Want to organize your data more easily through tables in Google Docs ? Below is how to create and edit tables in Google Docs .

Google Docs is a flexible platform that offers a range of useful features to users. Inserting a table is just one of them.
Thanks to its tabulating feature, Google Docs is a great choice for anyone who needs to analyze, create well-designed documents, or visualize data. The instructions below will help you learn how to create and edit tables in Google Docs to keep the data inside always neatly organized and easy to read.
How to edit and create tables in Google Docs
How to create tables in Google Docs
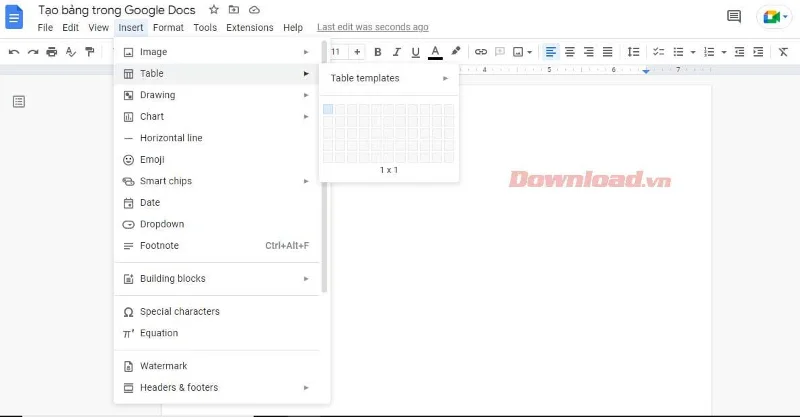
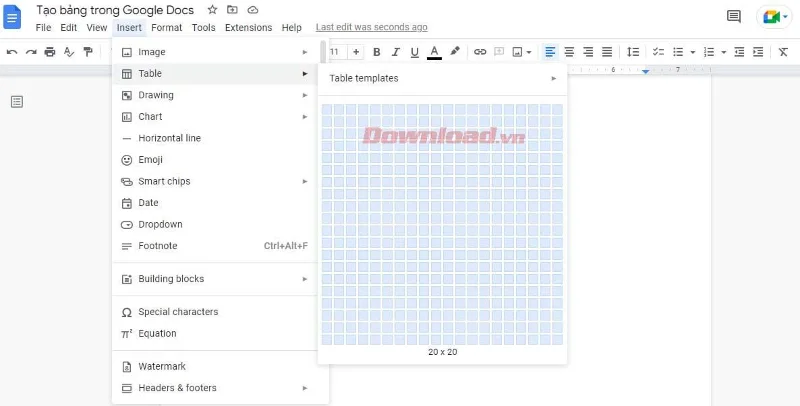
1. Open a Google Doc and locate the Insert tab on the menu bar.

2. Then, select Table and drag the cursor to select the desired number of rows and columns. Click on the table size you want (maximum 20x20 cells using this method).

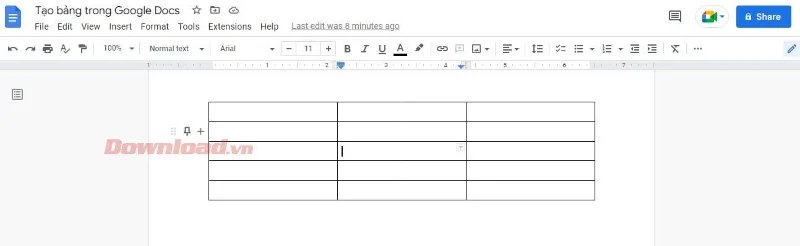
Insert the table and start entering information into the cells.
How to format and edit tables in Google Docs
This is an essential skill if you want to master the features of Google Docs. If you don't know how to edit a table in Google Docs, you cannot process reports with large volumes of data. Below is the most basic way to edit tables that every Google Docs user needs to know.
Insert rows and columns in a Google Docs table
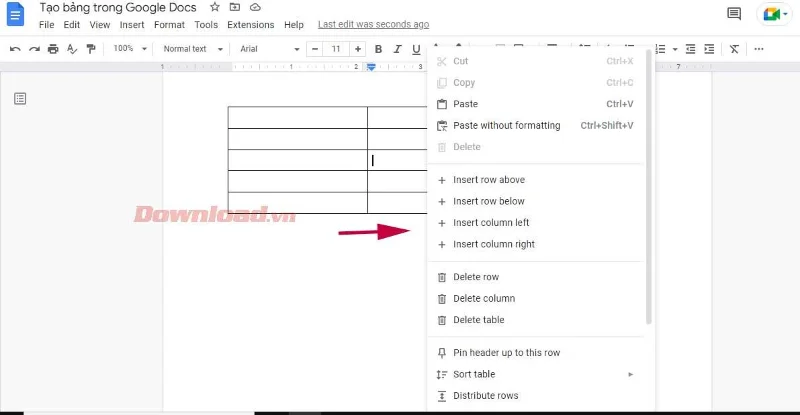
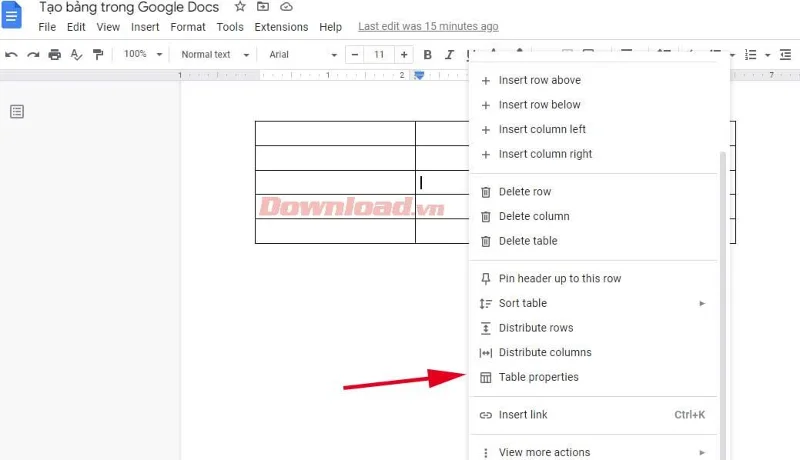
1. Right-click anywhere on the table and select Insert row above or Insert row below from the drop-down menu, depending on where you want the additional row.
2. The process is more like inserting multiple columns. Just tap Insert column left or Insert column right .

4. Alternatively, drag the cursor to the leftmost column of the table until the + sign appears. Clicking on it will add more than one row in the Google Docs table.
5. Similarly, to add another column, move the cursor to the top row until the + sign appears and select it. This action will insert one column to the right.

If your Google Docs table has an unused column or row, you should remove it. The process of deleting columns and rows is very simple. You can do this without affecting any data inserted into the table.
Just click on that extra column/row, select Delete row or Delete column . It's done!
Change table width and height in Google Docs
You have two ways of doing this: using the Table Properties menu or frame lines. First, to access the Table Properties menu :

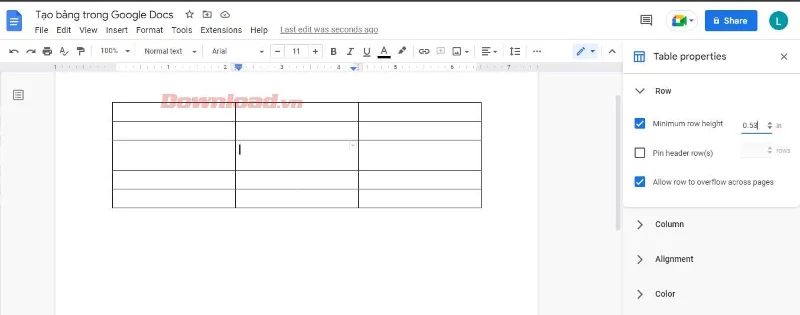
1. Right-click anywhere on the table and select Table properties . A new pop-up menu will provide different options for customizing the table.
2. Expand Row and enter the desired value in Minimum row height . After setting the minimum row height for all cells, you can increase the height with lines but not decrease it.
3. Similarly, expand the Column tab and enter a new value in Column width .

4. When you are satisfied with the size of the table, exit Table properties .
However, when you want to resize a certain row/column, move the cursor over its grid line. After it turns into a row of two-way arrows, click and drag until you reach the desired row height or column width.
Format borders in a Google Docs table
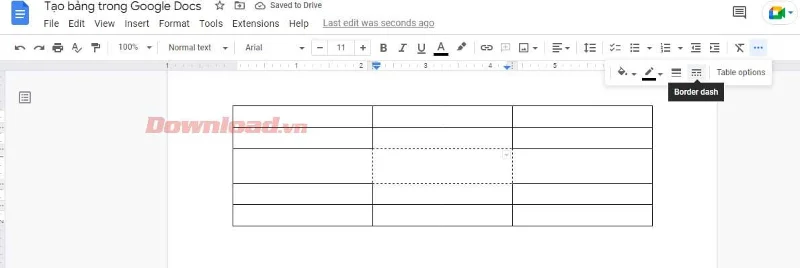
First, you must determine the desired border style for the table. Do you want to format the borders of columns, rows, or the entire table? Select all the cells you want to change and use a border.
After that, some new icons will appear on the toolbar. You can decide the color of the border via the pen icon. The two icons on the right allow you to edit the width and style of the border in dotted, dashed or solid form...

Merge cells in a Google Docs table
Merging cells can help you create more attractive tables. It helps you align data or create space to enter longer text.
Follow these steps to avoid losing text and create space when merging cells:
- Select the cells you want to merge.
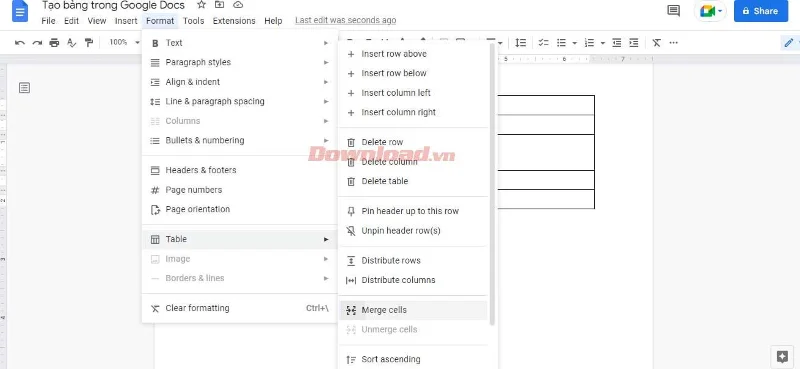
- Go to Format > Table > Merge cells .
- Alternatively, you can right-click on the selected cell, then click Merge cells from the drop-down menu.

Above is how to create and edit tables you need to know in Google Docs . Hope the article is useful to you.