There are many ways to format pictures in PowerPoint slides . You can use the visual tools in PowerPoint to personalize and edit photos easily. PowerPoint allows you to change the style and shape of an image, add contours, crop & compress images, add artistic effects, and much more.
- Microsoft PowerPoint Online
- Microsoft PowerPoint
- Microsoft PowerPoint for iOS
- Microsoft PowerPoint for Android
How to format pictures in PowerPoint
- Crop images in PowerPoint
- Crop a picture to a certain shape in PowerPoint
- Add a border to a picture in PowerPoint
- Adjust photo
- Compress pictures in PowerPoint
- Video tutorial to format images in PowerPoint
Crop images in PowerPoint
Part of the picture will be deleted when you use the image crop tool in PowerPoint. Cropping can be useful when an image has a lot of content and you only want to focus on one part of the focus.
1. Select the photo you want to crop. The Format tab will appear.
2. On the Format tab , click the Crop command .
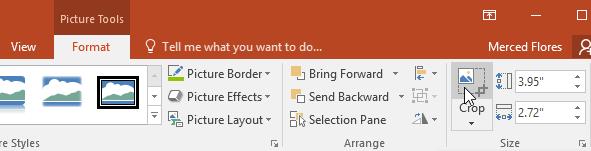
3. Crop tools will appear around the image. Click and drag one of the icons in the corners to the position you want to cut. Make sure your mouse pointer is right over the black crop handle so you don't accidentally select a resize handle.

4. Click Crop to crop the image.
Crop a picture to a certain shape in PowerPoint
1. Select the image you want to crop, then click the Format tab .
2. Click the Crop drop-down arrow . Point your mouse over Crop to Shape , then select the desired shape from the drop-down menu that appears.
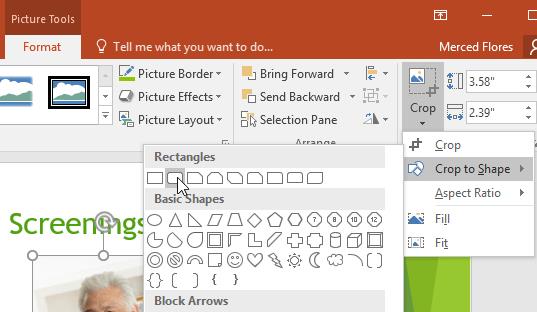
3. The photo will be cropped to the shape you choose.

You can crop the photo to the desired size before cropping it to a certain shape.
Add a border to a picture in PowerPoint
1. Select the image you want to add a border to, then click the Format tab .
2. Click the Picture Border command . A drop-down menu will appear.
3. Here you can choose the color, thickness, and border style.
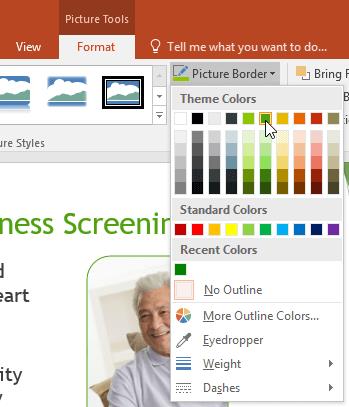
4. A border will appear around the image.

Adjust photo
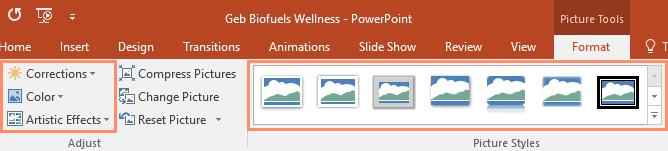
PowerPoint offers several options to change the way pictures appear in the slideshow. For example, you can add a frame, correct the photo, change the color or brightness of the photo, and even add some kind of artistic effect. These options are in the Adjust and Picture Styles groups on the Format tab .
When you're ready to edit and experiment with different image styles, select the shape and choose one of the options from the Format tab.
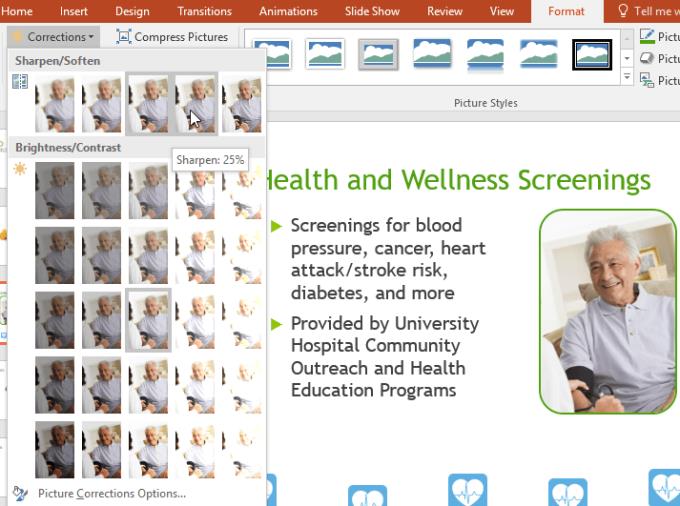
- Corrections : This command is in the Adjust group. Here, you can sharpen or smooth the image to adjust the opacity or clarity of the image. You can also adjust the brightness and contrast according to the lightness and darkness of the image.
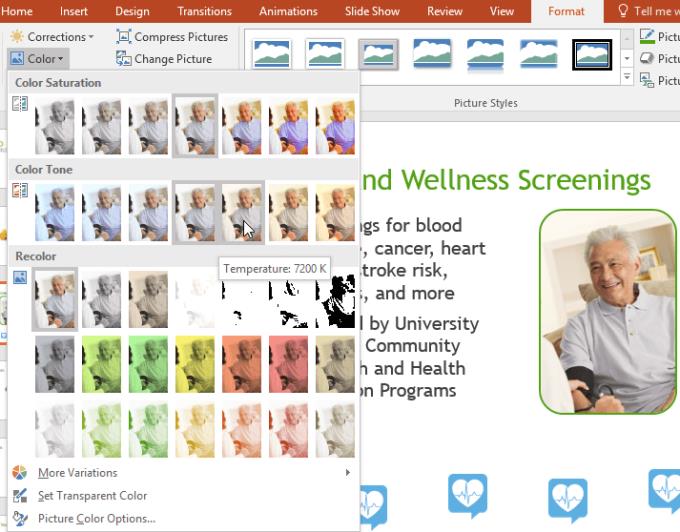
- Color : This command is in the Adjust tab. Here, you can adjust the saturation of the image (the brilliance of the colors), the tone (the temperature of the image, from cool to warm), and the coloring (which changes the overall color of the image).
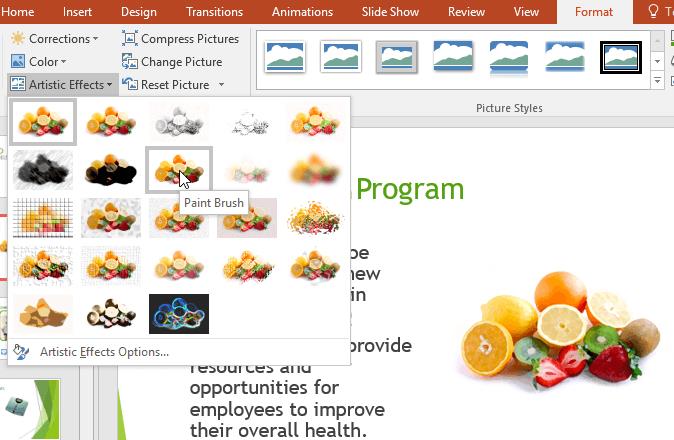
- Artistic Effects : This command is also in Adjust. Here you can add artistic effects like pastels, watercolors and gloss of the edges.
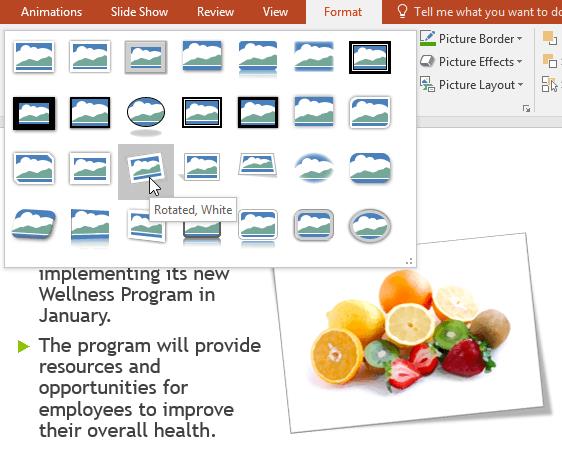
- Picture Styles Group : This group contains a range of styles that you can apply to a photo, including frames, borders, and edge softness.
Compress pictures in PowerPoint
If you want to email a presentation that contains photos, you need to control the file size. Large, high-resolution images can significantly increase the size of the presentation file, making it difficult to attach to an email. In addition, default cropping areas are saved with the presentation. This can also increase the file size. PowerPoint will help you reduce that file size by compressing the image, reducing the resolution, and removing the cropped areas.
To compress pictures in PowerPoint
1. Select the image you want to compress, then click the Format tab .
2. Click Compress Pictures .
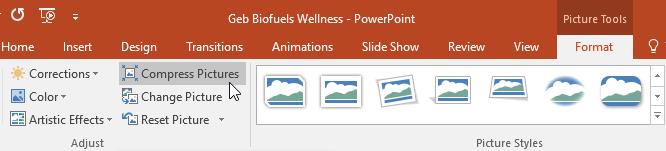
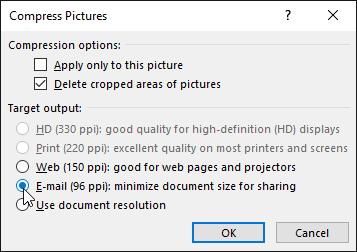
3. A dialog box will appear. Put a checkmark next to Delete cropped areas of pictures . You can also choose a setting that applies only to selected images or to all images in your PowerPoint presentation.
4. Select Target output . If you plan to send the presentation file by email, select Email (minimum file size). Then, click OK .
Compressing pictures in PowerPoint may not reduce the file size enough for your needs. For better results, you can use an image editing program to resize it before inserting it into your presentation.
Video tutorial to format images in PowerPoint
Above are instructions for formatting images in Microsoft PowerPoint . Hope this PowerPoint lesson is useful to you.


")


