Boot Camp 5.1.5769 - Utility for installing Windows on Mac
Boot Camp, Boot Camp is an application that allows to install Microsoft Windows on a Mac computer, released by Apple. With the new Boot Camp update, you can install the system
- Released: Apple
- Version: 5.1.5769
- Usage: Free
- Size: 376.2 KB
- View: 30,577
- Download: 18,913
- Day:
- Requirements: Mac OS X Intel

Boot Camp is an application that allows to install Microsoft Windows on a Mac computer released by Apple. With this latest update you can install Microsoft's latest Windows 10 operating system on your Mac. Once installed, reboot your Mac to switch between OS X and Windows.
- Some notes before deciding to use Boot Camp
- Instructions for choosing the appropriate Boot Camp
- Instructions to install Windows using Boot Camp
- How to install Windows 10 on a Mac
- Instructions for using Boot Camp to install Windows 7 on a Mac
- Tutorials and tips
Installing Windows on a Mac using the Boot Camp utility is the best way to take advantage of both operating systems. Boot Camp works on the mechanism of repartitioning the hard drive of the Mac to use both operating systems - in this case, OS X and Windows. With it, users can install Windows drivers on Mac.
So, when applying Windows with Boot Camp, you simply boot directly into Windows instead of OS X. And with the help of virtualization support software like VMware Fusion or Parallels, the hardware power of 1 Macs will be balanced and distributed appropriately between OS X and Windows.
This new Boot Camp version contains Windows Support Software (Windows Support Software or Windows Drivers) for 64-bit versions of Windows 7, Windows 8, Windows 8.1, Windows 10 operating systems on the Mac.
Some notes before deciding to use Boot Camp
- The Mac is based on the Intel platform.
- Apple keyboard, mouse or trackpad.
- Mac OS X installation disc.
- Available at least 16GB USB.
- Support utility Boot camp assistant (available in Mac operating system).
- A Windows installer (disc or ISO file) that contains 64bit versions of Windows 8 or later.
- At least 30GB of free disk space.
Instructions for choosing the appropriate Boot Camp
If you are using the following Mac models, you should choose Boot Camp 5.1.5621
- MacBook Air (11-inch & 13-inch, mid 2011)
- MacBook Air (11-inch & 13-inch, mid-2012)
- MacBook Pro (15-inch & 17-inch, mid 2010)
- MacBook Pro (13-inch, & 15-inch, early 2011)
- MacBook Pro (17-inch, early 2011)
- MacBook Pro (13-inch, 15-inch & 17-inch late 2011)
- MacBook Pro (13-inch & 15-inch, mid-2012)
- MacBook Pro (Retina, mid-2012)
- MacBook Pro (Retina, 13-inch, late 2012)
- MacBook Pro (Retina, 13-inch & 15-inch early 2013)
- Mac Pro (early 2009)
- Mac Pro (mid 2010)
- Mac Pro (mid 2012)
- Mac mini (mid 2011)
- Mac mini (late 2012)
- iMac (27-inch, mid-2010)
- iMac (21.5-inch & 27-inch, mid 2011)
- iMac (21.5-inch, late 2011)
- iMac (21.5-inch & 27-inch, late 2012)
If you are using the following Mac models, you should choose Boot Camp 5.1.5640
- MacBook Air (11-inch, mid-2013)
- MacBook Air (13-inch, mid-2013)
- MacBook Pro (Retina, 13-inch, late 2013)
- MacBook Pro (Retina, 15-inch, late 2013)
- Mac Pro (late 2013)
- iMac (21.5-inch, late 2013)
- iMac (27-inch, late 2013)
Instructions to install Windows using Boot Camp
Step 1: Check system requirements
Different versions of Windows require different processors, disk space, and RAM, so you should check the documentation that came with Windows to make sure your computer's status meets the requirements.
Step 2: Create a Windows disk image
If your copy of Windows is on a DVD or flash drive then you should create a disk image of it to work with Boot Camp.
Step 3: Open Boot Camp Assistant
Boot Camp Assistant will guide you through the steps of installing Windows. Open this application from the Utilities folder in the Applications folder and follow the on-screen instructions to automatically repartition the boot drive and download the relevant software driver for Windows. When prompted, connect your USB drive.
Step 4: Format the Windows partition
Upon completion of step 3, your Mac will reboot to install Windows. When asked where you want to install Windows, select the BOOTCAMP partition, then click Format .
Step 5: Install Windows
Follow the onscreen instructions to complete the Windows installation.
Step 6: Reboot the device
After Windows is installed, you can switch between Windows and Mac OS X. Use the Startup Disk control panel in OS X or the Boot Camp system tray icon in Windows to select the boot drive, and restart the computer.
How to install Windows 10 on a Mac
Currently you can install Windows 10 on the supported Macs on the list with Mac OS X Yosemite installed.
System requirements:
- You need to install the software (drivers) that support Boot Camp to install Windows 10. These software will be downloaded automatically when you use Boot Camp Assistant. Boot Camp supports Windows 10 64-bit version on Mac.
- To install, you need an ISO file of the Windows 10 installer, or Disk Utility to install Windows from DVD or USB. If this is your first time installing Windows on a Mac, make sure you are using a full installer, not an upgrade.
When installing Windows 10 on a Mac, there are some of the following cases:
- New settings
- Updated from 32 bit version
- Updated from 64 bit version
Perform a clean install of Windows 10
To install Windows 10 on a Mac, follow these steps:
Step 1: Check the list below to make sure your Mac supports Windows 10
- MacBook Pro (Retina, 15-inch, mid-2015)
- MacBook Pro (Retina, 13-inch, early 2015)
- MacBook Pro (Retina, 15-inch, mid-2014)
- MacBook Pro (Retina, 13-inch, mid-2014)
- MacBook Pro (Retina, 15-inch, late 2013)
- MacBook Pro (Retina, 13-inch, late 2013)
- MacBook Pro (Retina, 15-inch, early 2013)
- MacBook Pro (Retina, 13-inch, early 2013)
- MacBook Pro (Retina, 13-inch, late 2012)
- MacBook Pro (Retina, mid 2012)
- MacBook Pro (13-inch, mid-2012)
- MacBook Pro (15-inch, mid-2012)
- MacBook Air (13-inch, early 2015)
- MacBook Air (11-inch, early 2015)
- MacBook Air (13-inch, early 2014)
- MacBook Air (11-inch, early 2014)
- MacBook Air (13-inch, mid-2013)
- MacBook Air (11-inch, mid-2013)
- MacBook Air (13-inch, mid 2012)
- MacBook Air (11-inch, mid-2012)
- MacBook (Retina, 12-inch, early 2015)
- iMac (Retina 5k, 27-inch, mid 2015)
- iMac (Retina 5K, 27-inch, late 2014)
- iMac (21.5-inch, mid-2014)
- iMac (27-inch, late 2013)
- iMac (21.5-inch, late 2013)
- iMac (27-inch, late 2012)
- iMac (21.5-inch, late 2012)
- Mac mini (late 2014)
- Mac mini Server (late 2012)
- Mac mini (late 2012)
- Mac Pro (late 2013)
Step 2: Check for software updates to make sure OS X, firmware and Boot Camp have been updated to the latest version.
Step 3: Open Boot Camp Assistant from the Utilites folder (or use Spotlight to find it).
Step 4: Use Boot Camp to install a new copy of Windows.
Perform an installation upgrade of Windows 10 from 64 bit version
You can upgrade Windows 7, Windows 8.1 to Windows 10, with 10 GB of free disk space. If you are installing Windows 8, please update to Windows 8.1 before proceeding with the steps below.
Step 1: Start your Mac from OS X.
Step 2: When the Mac screen appears, select the App Store from the Apple menu. Click the Update tab in the App Store to check for software updates.
Step 3: Start the Mac from the Windows operating system you are installing on your computer.
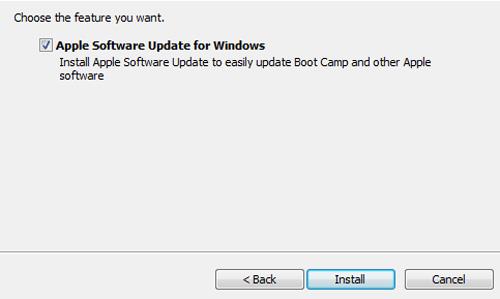
Step 4: Open Apple Software Update for Windows and install available updates, including the FaceTime Camera Update .
Step 5: Use the Windows installer to update.
Step 6: After the installation is complete, open Apple Software Update for Windows and install the available updates to ensure the Windows Support Software (drivers) for Boot Camp has been updated.
Step 7: Once the driver installation is complete, log into Windows to start using Windows 10 on your Mac computer.
Upgrading from 32-bit version of Windows:
Perform an installation upgrade of Windows 10 from 32-bit version
If Windows 7, 8.1 on Mac is 32 bit version then you need to back up important files to remove existing Windows partition and install 64 bit version of Windows.
Step 1: Use Boot Camp Assistant to remove the current Windows partition.
Step 2: Use Boot Camp Assistant to install 64bit Windows 10 version.
Step 3: After completing Windows installation, copy your important files to the Windows drive.
Instructions for using Boot Camp to install Windows 7 on a Mac
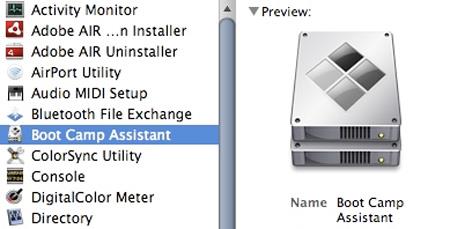
Select the path Finder > Applications > Utilities > Boot Camp Assistant to start the utility:
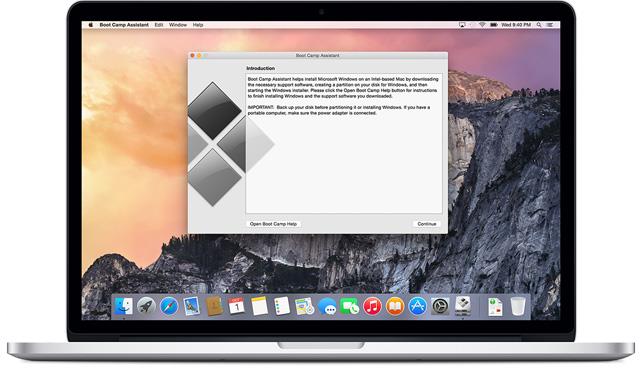
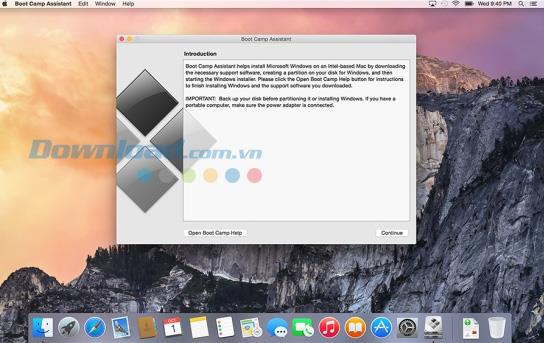
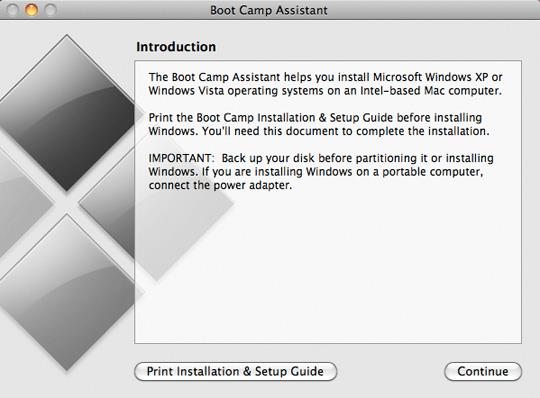
Click Continue at the instruction screen of Boot Camp Introduction to move to the next step:
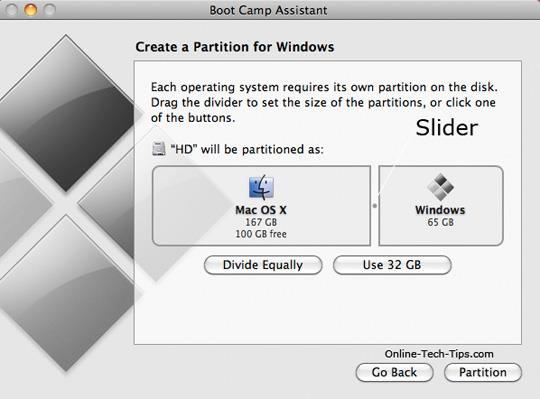
We will proceed to repartition the hard drive of the Mac system. With Windows 7, the Mac requires a minimum of 16GB. Press the Partition button , and wait for Boot Camp Assistant to repartition the entire hard drive. At the end of the process, you will see the BOOT CAMP icon on your desktop:
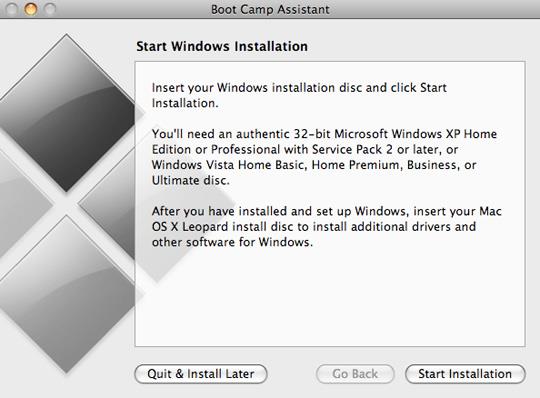
Next, insert the Windows 7 installation disc into the DVD drive and wait for the system to recognize the disc. Click the Start Installation button at the Boot Camp Assistant screen:
Then the Mac system will automatically reboot and start the Windows 7 installation process. At the next screen, you will select the partition to install Windows 7. Make sure you select the correct partition BOOT CAMP PARTITION. just created before. Click the Path Drive options (Advanced) and Format , the system will display a notification screen with content similar to "This partition might contain ...", select OK . This installation process will finish after a few reboots, and finally ask you to remove the installation disc from the DVD drive. At the last step, enter your username, language used ... We recommend that users update Windows to fix common errors, then restart the computer before moving to the step. next:
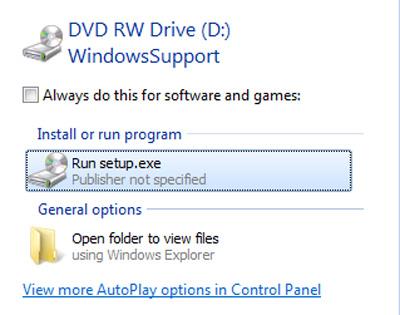
After Windows has finished booting, we need to install some additional driver support. Insert the Mac OS X installation disc into the DVD drive, select Run setup from the AutoRun bulletin board:
At the next screen, you select Apple Software Update for Windows to update the latest Apple patch for Windows:
Wait for this update to finish, remove the Mac OS X disc from the DVD drive and reboot the system:
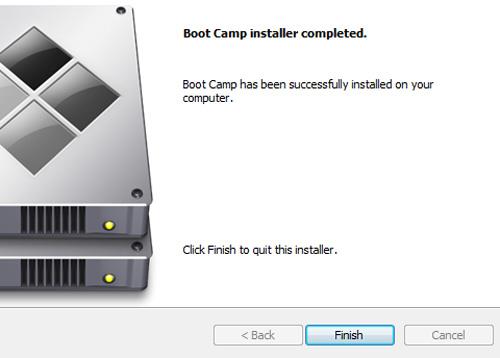
At the end of the above steps without any problems, you have successfully installed Windows 7 with Boot Camp to work with the Mac operating system. When the system boots, hold the Option button to go to the boot menu, where you can select OS X or Windows 7 to use.
The above are some basic steps to install and use Windows 7 with the Boot Camp utility for Mac OS X.
Tips and tutorials
- Create ISO image file for Boot Camp from Windows installation file
- 5 ways to run Windows software on a Mac
Maybe you are interested
 SSee Free for Mac Support viewing photos on Mac
  ComicRack This utility supports reading comic books on PC
  FastPaste Add-on supports text editing
  Google Cast A widget that plays web content on TV
  Bitcasa Online data storage utility
  RAMExpert Utility to increase RAM performance
  EverDoc 2019 Secure document storage utility
Maybe you are interested
- SSee Free for Mac Support viewing photos on Mac
- ComicRack This utility supports reading comic books on PC
- FastPaste Add-on supports text editing
- Google Cast A widget that plays web content on TV
- Bitcasa Online data storage utility
- RAMExpert Utility to increase RAM performance
- EverDoc 2019 Secure document storage utility