Home
» PC Tips
»
6 ways to change Administrator in Windows
6 ways to change Administrator in Windows
While Windows typically sets the first user on a PC as an administrator, there are many reasons and ways to change an administrator in Windows. Whether you're adding a new administrator-level user, promoting a standard user, or switching to a new administrator entirely, this guide provides six ways to change an administrator in Windows. Just pick your favorite method and get started.
Note : To prevent non-administrators from gaining unauthorized access, Windows requires that you make changes from an existing Administrator account.
1. Using Windows Settings
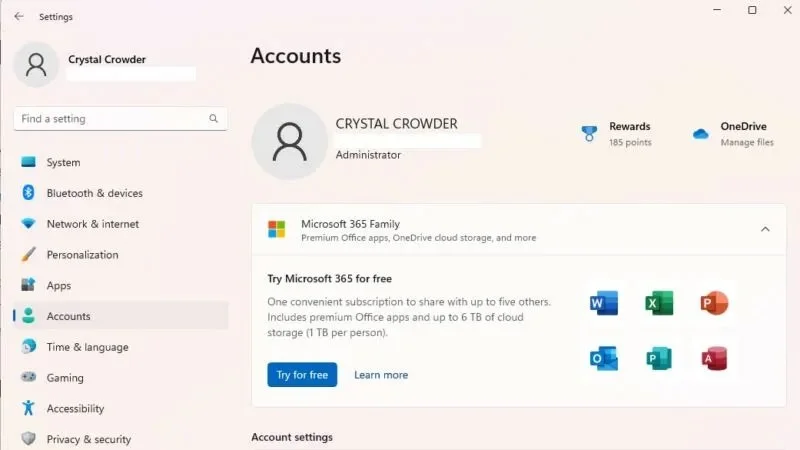
When you want to change administrators in Windows, the easiest way is to use Windows Settings.
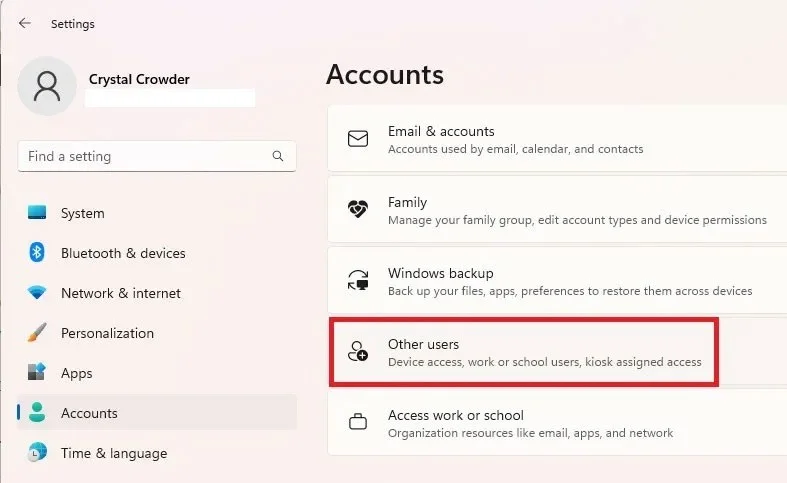
3. Select Other users on the right. This option is called Family & other users in Windows 10.
Select Other users
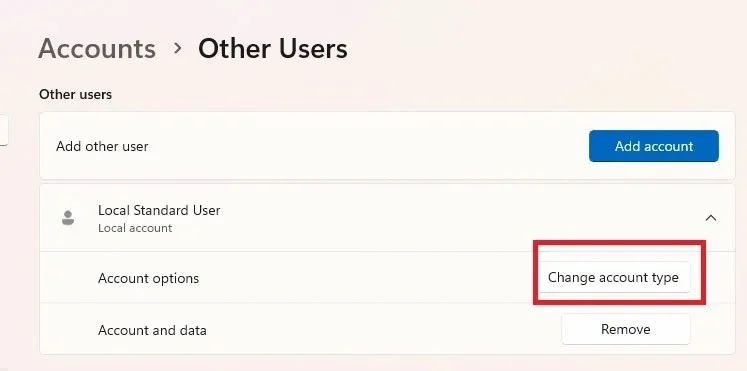
4. Select the desired user from the list.
5. Click Change account type .
Select Change account type.
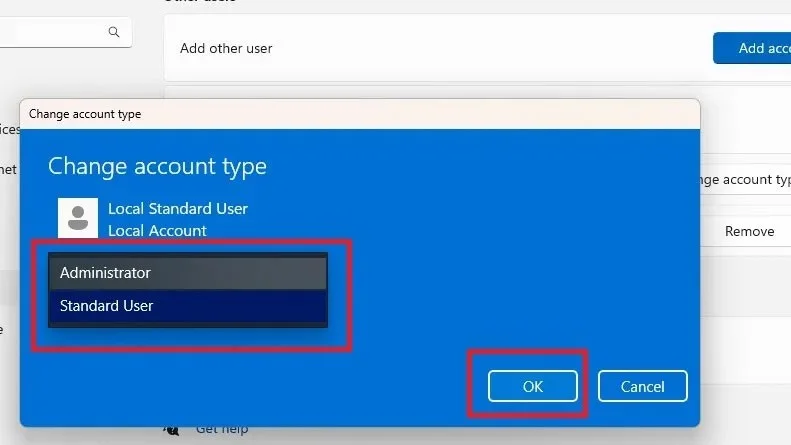
6. Select Administrator from the account type list and click OK to confirm.
Select Administrator from the list
You can easily downgrade the administrator account using the same method.
2. Change Administrator in Windows via Control Panel
If you prefer to change settings from Control Panel rather than Settings, follow these steps:
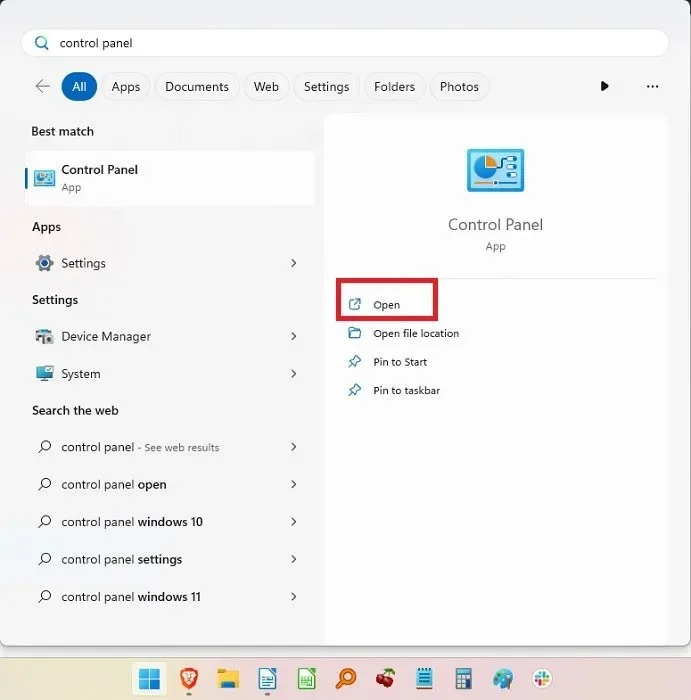
1. Go to Start and search for Control Panel , then click Open.
Open Windows Control Panel
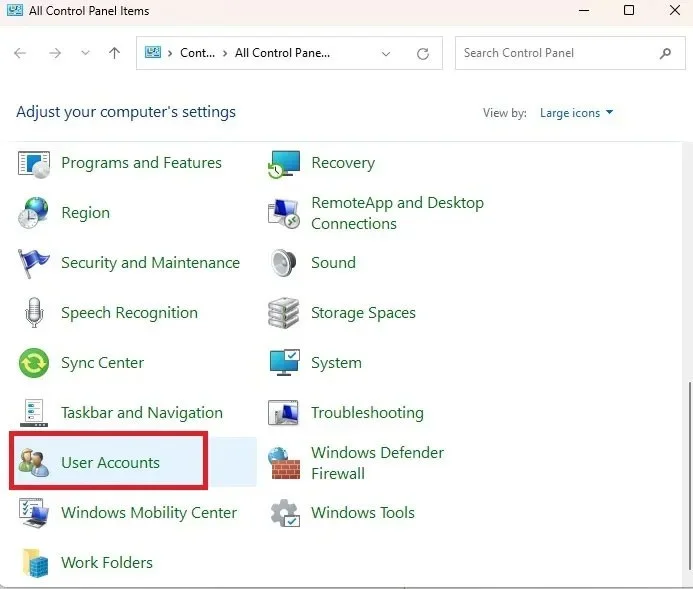
2. Select User Accounts.
Select User Accounts
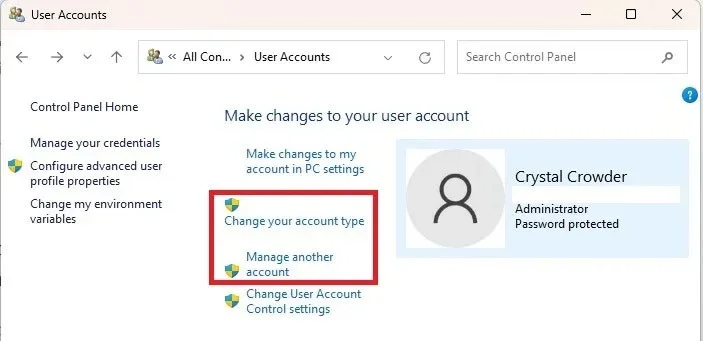
3. If you want to change your own account type, select Change your account type . For other accounts, select Manage another account .
Change account type
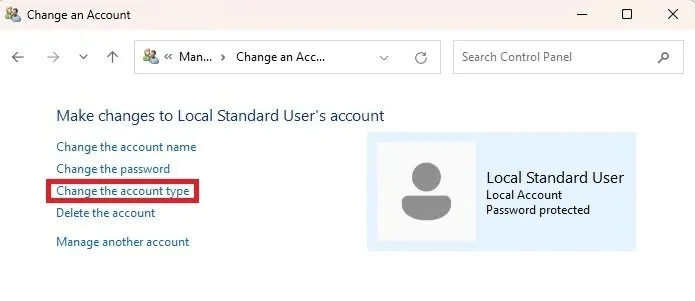
4. Select the account you want to change, then select Change the account type .
Select Change the account type
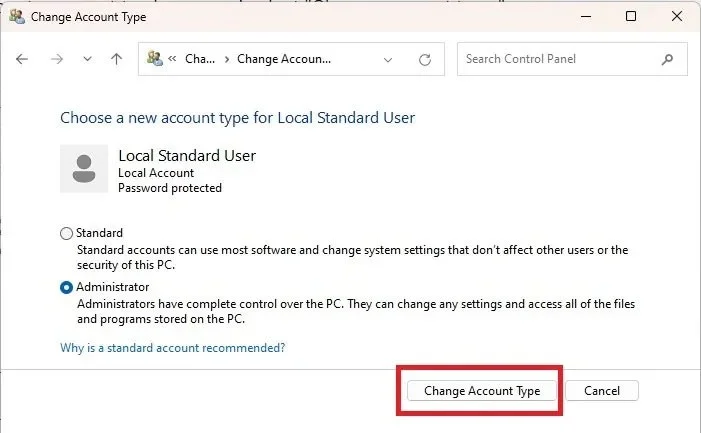
5. Select Administrator (or Standard if you are downgrading) and click Change Account Type .
Change account type
3. Change Administrator in Windows using Command Prompt
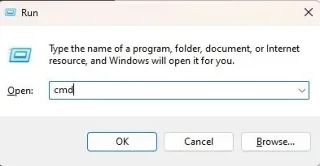
If you don't mind typing a few commands, it's easy to change a Windows user account between Standard and Administrator. Let's start by changing the Standard user to Administrator.
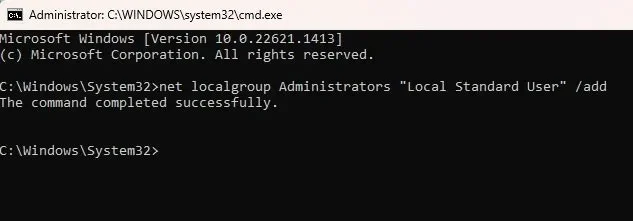
2. Enter the following to change the user account type to administrator:
net localgroup Administrators "User Account" /add
Replace User Account with your user account name. For a Microsoft account, use the first five letters of the account email address. For example, for windowsuser@microsoft.com, your user account name would be “windo”. Remember, you can use Windows 11 without a Microsoft account.
Select a user account name
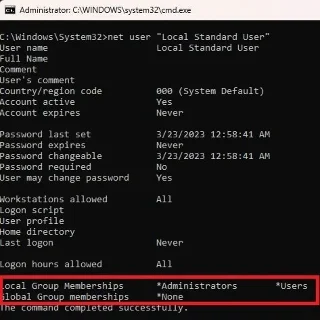
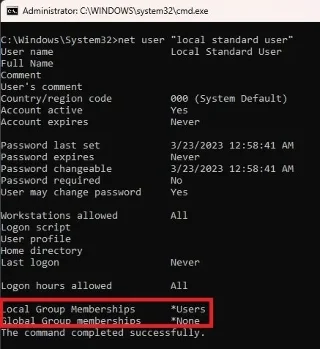
3. Verify the change by typing:
net user "user name"
Change Administrator Command on Windows
If you need to downgrade the administrator account, the process is similar:
1. Enter the following command, replacing User Account with the account name:
net localgroup Administrators "User Account" /delete
Command to downgrade administrator account
2. Verify the change with:
net user "user name"
Verify changes
4. Using PowerShell
If you prefer PowerShell , here's how to change administrator in Windows 10 and 11:
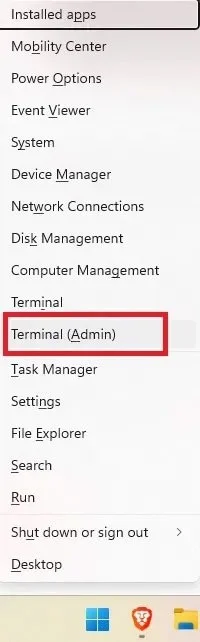
1. Press Win + X and select Terminal (Admin) . For Windows 10, select PowerShell.
Open Powershell
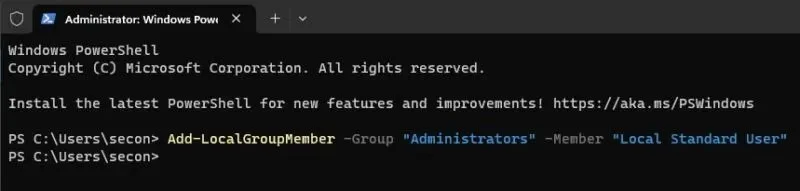
2. Enter the following command at the command prompt, replacing user account with the account name:
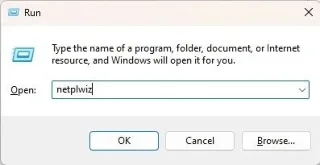
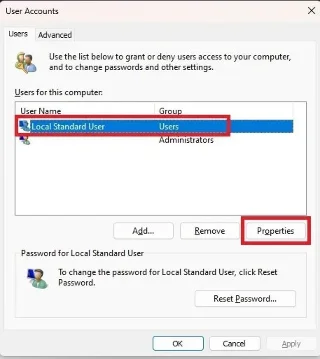
Another quick and easy way to change administrators in Windows is to use netplwiz. This method lists all users and you can switch back and forth between user types as needed.
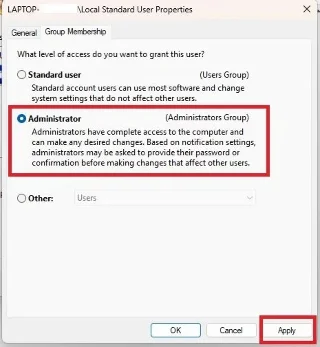
4. Select the Group Membership tab and change the account type. Click Apply.
Change account type
6. Change Administrator in Windows via Computer Management
This method only works on Pro versions of Windows 10 and 11. If you have a Home version, this option won't be available. Follow these steps to change accounts in Windows 10 and 11.
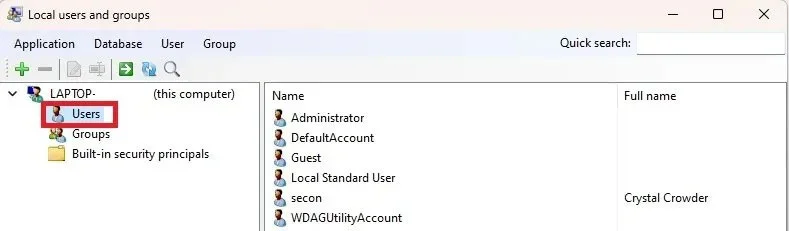
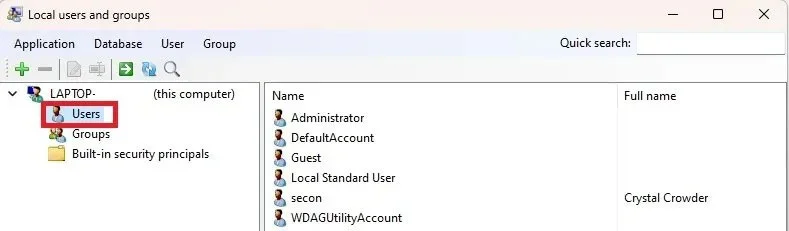
You can use the third party tool lusrmgmr to get similar results. This guide includes steps for both the Pro version of Windows and lusrmgmr. Screenshots are from lusrmgmr.
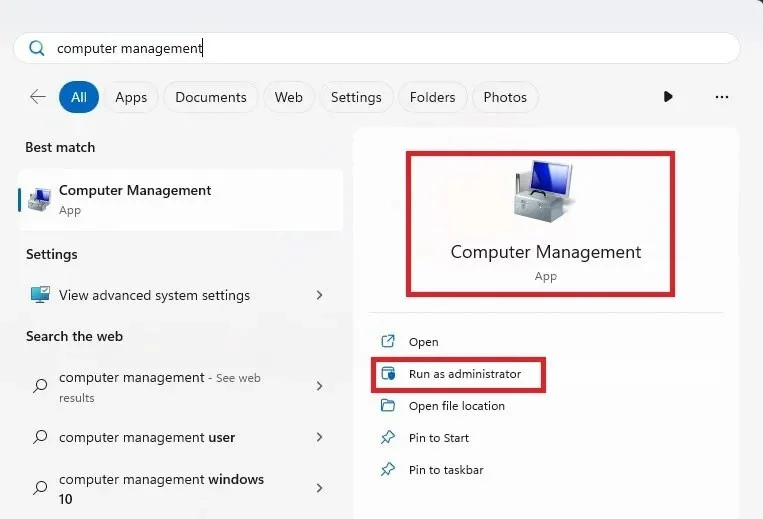
1. Open the Start menu and search for Computer Management . Select Run as administrator .
Open Computer Management with admin rights
2. Expand System Tools > Local Users and Groups .
Expand System Tools > Local Users and Groups
3. Select Users to open the list of users in the center pane.
4. Right click on the user and select Properties. Click Edit for lusrmgmr.
Click Edit for lusrmgmr
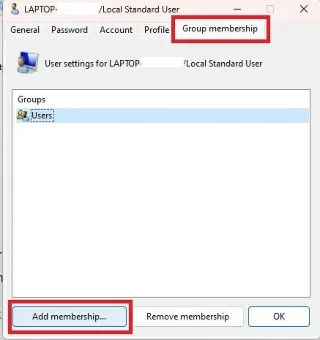
5. Select the Member Of tab and click Add. If using lusrmgmr, click the Group membership tab and select Add membership.
Click on the Group membership tab and select Add membership
6. Select Advanced.
7. Select Find Now .
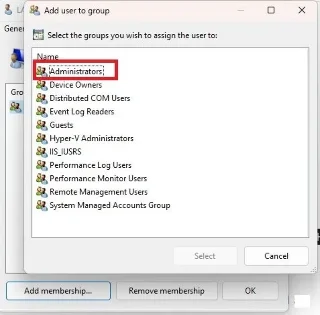
8. Select the Administrators group from the list. In lusrmgmr, the group list appears immediately. Select Administrators.
Select Administrators
9. Click OK to confirm your selection. In lusrmgmr, select Select.
10. Click OK again to exit the window. You should then see both standard and administrator users listed.
You can also demote a user using the same process. However, you will be revoking the permission instead of adding it.