How To Cut Out A Selection In Gimp

GIMP or GNU Image Manipulation Program offers several tools for selecting parts of illustrations or images, such as the Lasso, Ellipse, and Rectangle. All of these are incredibly useful when creating memes or working on your brand-new web design project. Cutting out the selected parts is another convenient feature; but how exactly do you use it?
How To Cut Out A Selection In Gimp

This article will show you how to cut out selections in GIMP. You’ll learn how to master this function and take your creations to the next level.

How to Cut Out Selection

Cutting out a selection in GIMP is straightforward. Here’s how to do so with rectangular objects.

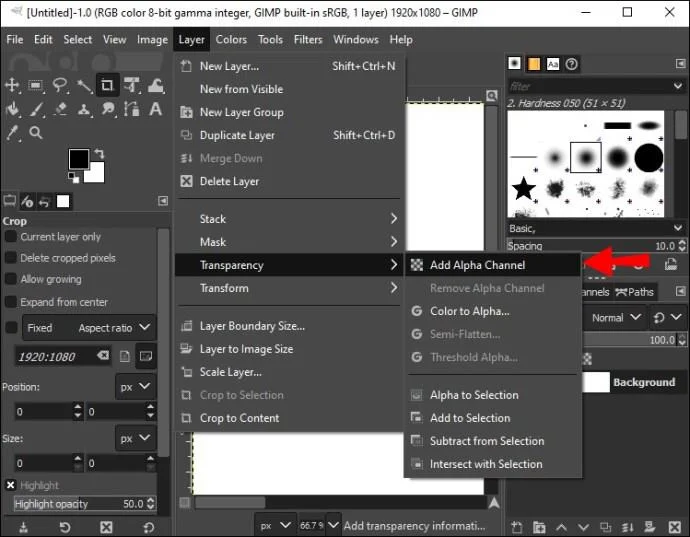
  1. Open your “Layer” menu, followed by “Transparency.”
    How To Cut Out A Selection In Gimp
  2. Press the prompt that lets you add an “Alpha” channel. This will incorporate a transparent background.
    How To Cut Out A Selection In Gimp
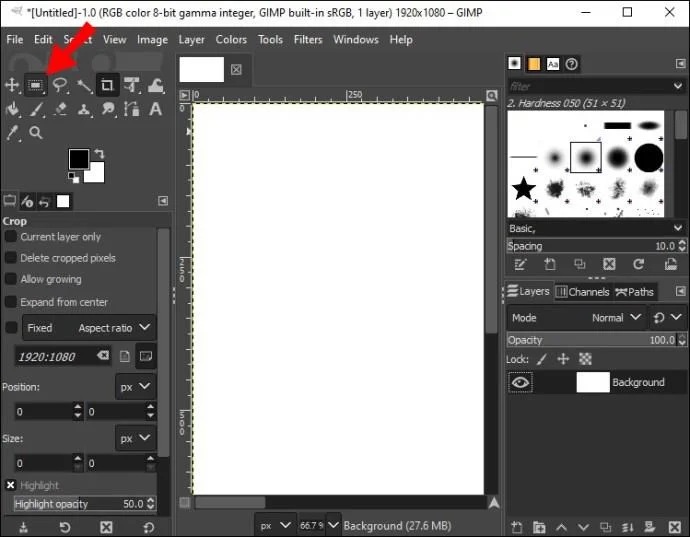
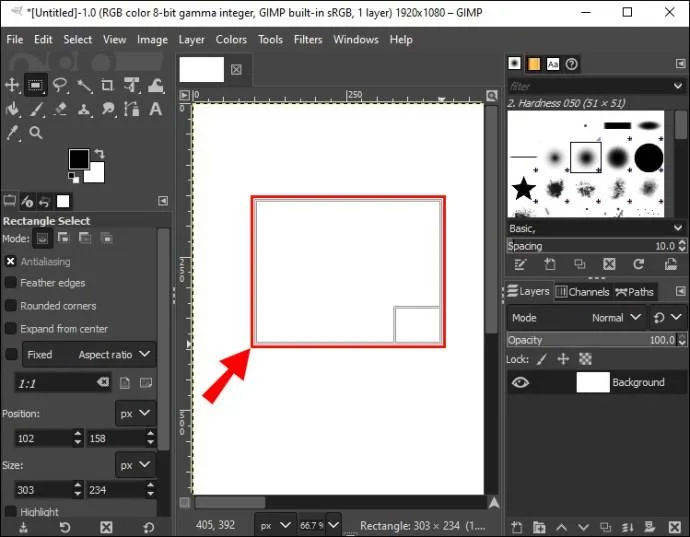
  3. Click your “Rectangle Select” option. Use the feature to create a rectangular zone around the selected object or image you wish to cut.
    How To Cut Out A Selection In Gimp
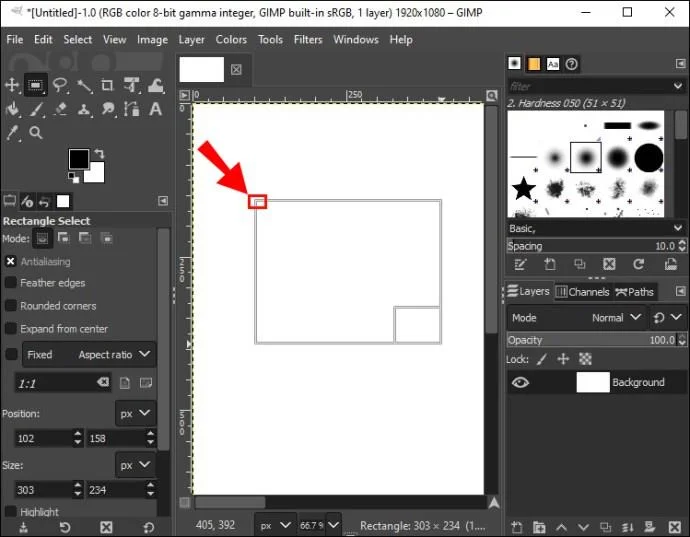
  4. Navigate to the top-left part of the image or object.
    How To Cut Out A Selection In Gimp
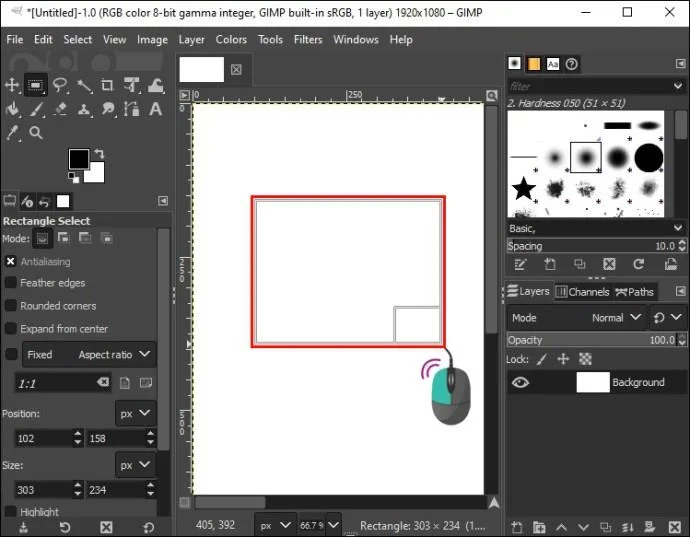
  5. Press and hold your left mouse button.
    How To Cut Out A Selection In Gimp
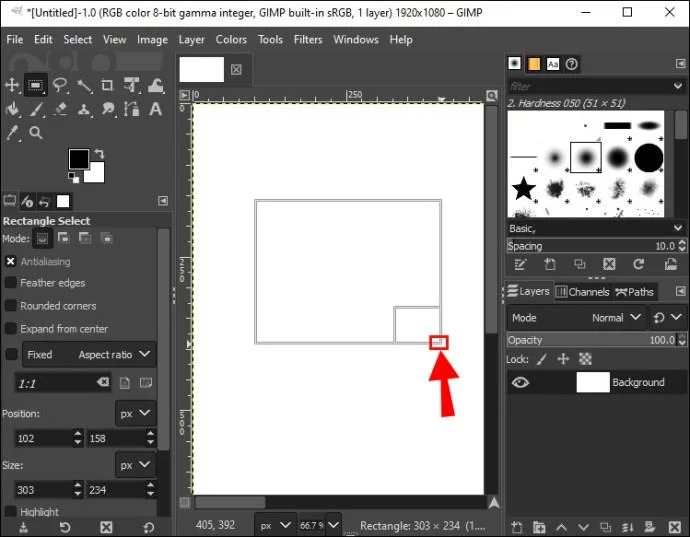
  6. Drag your cursor down to the right side of the area until your selection rectangle encloses it.
    How To Cut Out A Selection In Gimp
  7. Release your mouse button, and the program should show a box with moving lines around the part you wish to select and cut.
    How To Cut Out A Selection In Gimp
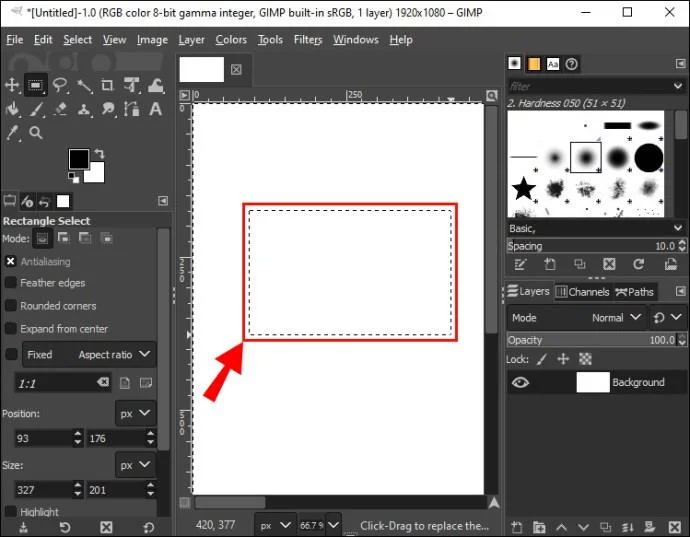
  8. Use the keyboard shortcut “Ctrl + I” to invert your selection.
    How To Cut Out A Selection In Gimp
    How To Cut Out A Selection In Gimp
  9. Press “Ctrl + X” to get rid of the section of the object or image you want to remove. The selected area should now appear on top of your transparent background.
    How To Cut Out A Selection In Gimp

This method works for cutting out elliptical, oval, and circular objects too.

  1. Enter your “Layer” menu and go to “Transparency.”
    How To Cut Out A Selection In Gimp
  2. Add an “Alpha” channel. This will set up a transparent background.
    How To Cut Out A Selection In Gimp
  3. Click your “Ellipse Select” option that allows you to draw a section around an image or object that will be cut out.
    How To Cut Out A Selection In Gimp
  4. Go to the upper-left part of the object.
    How To Cut Out A Selection In Gimp
  5. Press and hold your left mouse button. Drag the cursor to your right until the selection tool surrounds your entire image or object.
    How To Cut Out A Selection In Gimp
  6. Release the button, and you should see moving dashes around your object.
    How To Cut Out A Selection In Gimp
  7. Release the button and press “Ctrl + I”.
    How To Cut Out A Selection In Gimp
    How To Cut Out A Selection In Gimp
  8. Use “Ctrl + X” and the selected section will be cut out.
    How To Cut Out A Selection In Gimp

Finally, this is what you need to do to cut out selections in irregularly-shaped objects or images.

  1. Head to your “Layer” section and access “Transparency.”
    How To Cut Out A Selection In Gimp
  2. Include an “Alpha” channel to create a transparent field.
    How To Cut Out A Selection In Gimp
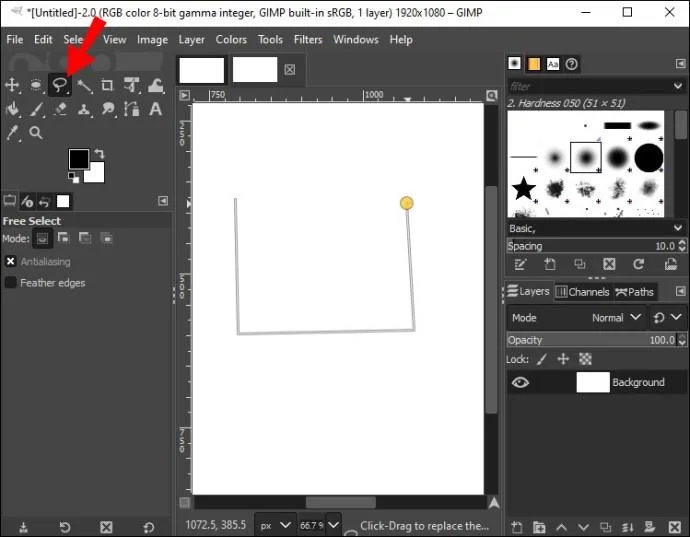
  3. Press your “Lasso” tool and draw a line around the image or object that will be cut out. Use your left click as you navigate the edges with your cursor. The shorter the distance between your mouse clicks, the more accurately you can select the desired sections.
    How To Cut Out A Selection In Gimp
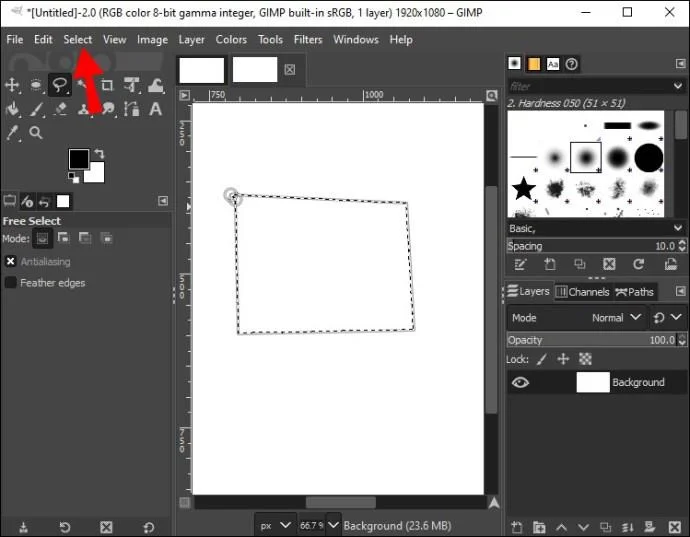
  4. Choose the first spot (anchor point) you made with your “Lasso” tool to encircle the object with a loop.
    How To Cut Out A Selection In Gimp
  5. Open your “Select” menu.
    How To Cut Out A Selection In Gimp
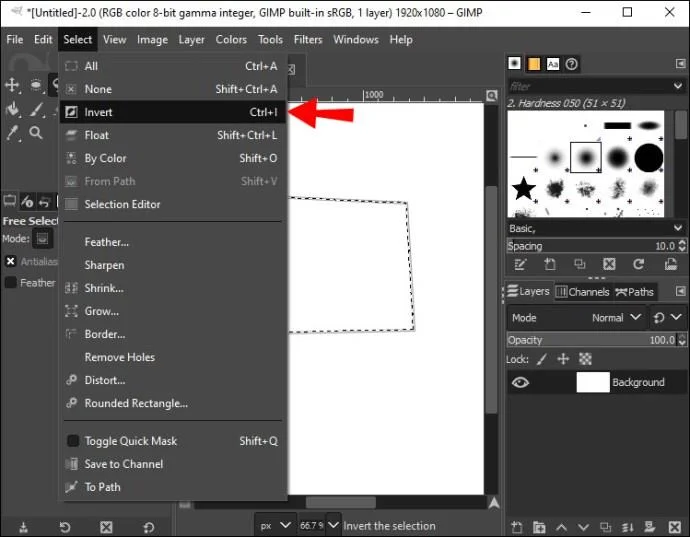
  6. Press “Invert.” This will select all sections of the object except for the area outlined with the “Lasso” tool.
    How To Cut Out A Selection In Gimp
  7. Use “Ctrl + X” to remove the parts.
    How To Cut Out A Selection In Gimp

Additional FAQ

How do you deselect a selection in GIMP?

After creating a selection, you may realize it’s not quite right for your project. If so, you want to deselect it.

1. Head to the “Select” menu.

2. Press “None,” and the selection should disappear. Alternatively, use “Shift + Ctrl + A” or click outside your selection while your selection tool is active.

Let Your Imagination Run Free

The selection cut-out feature opens up endless possibilities. You can experiment with various shapes and paste them into transparent backgrounds for a mesmerizing effect. You can also embellish your previous projects with stunning creations. The key is to let your imagination guide you.

How hard is it to cut out selections in GIMP? Is it a beginner-friendly feature, or did you start using it once you gained some experience? Let us know in the comments section below.

Leave a Comment

How to Use Windows 11 Quick Assist for Help

How to Use Windows 11 Quick Assist for Help

Discover how to use Windows 11 Quick Assist for seamless remote support. Learn step-by-step setup, troubleshooting, and tips to help friends or family with tech issues instantly.

Troubleshooting Windows 11 Dual Monitor Lag Fixes

Troubleshooting Windows 11 Dual Monitor Lag Fixes

Struggling with dual monitor lag on Windows 11? Discover proven troubleshooting fixes to eliminate stuttering, delays, and performance issues for seamless multi-monitor setups. Step-by-step guide inside.

How to Fix Windows 11 Startup Settings Blank Error

How to Fix Windows 11 Startup Settings Blank Error

Struggling with the frustrating Windows 11 "Startup Settings" blank error? Discover proven, step-by-step fixes to restore your boot options quickly and get your PC running smoothly again. No tech expertise needed!

How to Activate Windows 11 Enterprise with KMS

How to Activate Windows 11 Enterprise with KMS

Discover how to activate Windows 11 Enterprise using KMS effortlessly. This comprehensive guide covers everything from requirements to troubleshooting, ensuring seamless activation for your business needs.

How to Fix Windows 11 Kmode Exception Not Handled

How to Fix Windows 11 Kmode Exception Not Handled

Struggling with the dreaded KMODE EXCEPTION NOT HANDLED error on Windows 11? Discover proven, step-by-step fixes to resolve this blue screen nightmare quickly and get your PC running smoothly again. No tech expertise needed!

Troubleshooting Windows 11 Motherboard Driver Error Fix

Troubleshooting Windows 11 Motherboard Driver Error Fix

Struggling with Windows 11 "Motherboard" Driver Error? Discover proven troubleshooting steps to fix it fast and get your PC running smoothly again. Easy, step-by-step guide for beginners.

How to Fix Windows 11 Ping Spikes Over Wi-Fi Fixes

How to Fix Windows 11 Ping Spikes Over Wi-Fi Fixes

Struggling with ping spikes on Windows 11 over Wi-Fi? Discover proven fixes to stabilize your connection, reduce lag, and enjoy smooth gaming or streaming. Step-by-step solutions for instant results.

How to Recover Deleted Photos in Windows 11

How to Recover Deleted Photos in Windows 11

Accidentally deleted precious photos? Discover proven methods to recover deleted photos in Windows 11 effortlessly. Step-by-step guides, tools, and tips to restore your images safely.

How to Use Windows 11 Terminal Instead of CMD

How to Use Windows 11 Terminal Instead of CMD

Discover how to use Windows 11 Terminal instead of CMD for a modern, efficient command-line interface. Learn installation, setup, and tips to boost your productivity with tabs, themes, and more.

How to Activate Windows 11 Pro Without a Product Key

How to Activate Windows 11 Pro Without a Product Key

Discover safe, legitimate ways to activate Windows 11 Pro without a product key. Learn step-by-step methods using built-in tools and official Microsoft options to get your OS up and running smoothly. No risks, no hassle – just pure productivity.