Do you want to create an ebook using Microsoft Word ? So please refer to how to design and format an ebook in a few steps on Word below.

Instructions for creating ebooks using Microsoft Word
Step 1: Prepare
First, you should determine the main content of the ebook and how to layout it to make designing the rest easier. Some basic factors you need to prepare before creating an ebook:
- Topic of the ebook.
- Attractive title.
- The length is appropriate to the topic.
- Layout the ebook, e.g. sections, main/subheadings, if possible, add a few sentences to each section so the reader gets the gist of what the ebook is about. You can also write a draft first in a simple Word document before diving into the design.
Step 2: Create a cover page
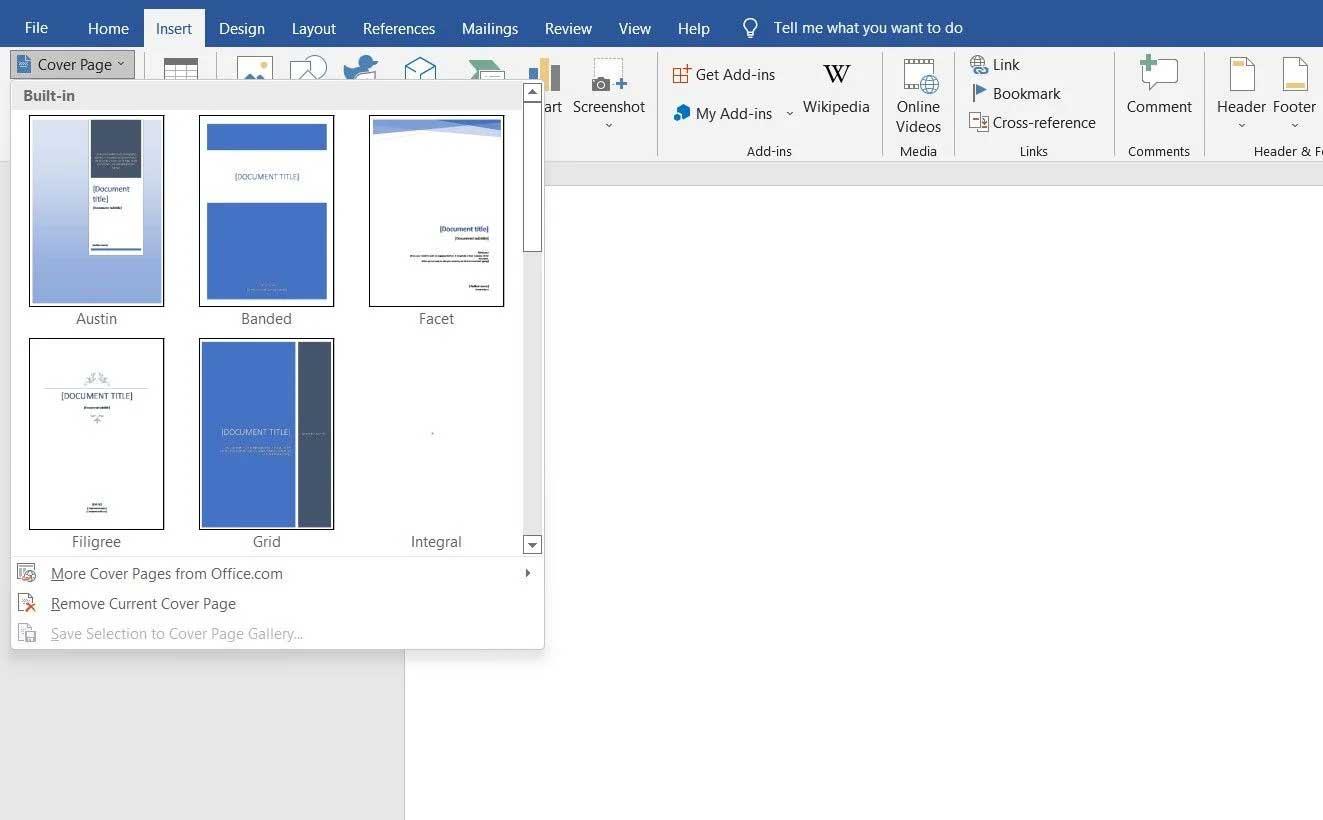
Once you have the perfect book title, all you need to do is create an impressive cover. Below are the steps to create an ebook cover page in Word:
- Go to the Insert menu .
- Click the Cover Page button below on the left.
- Choose a cover page that matches the ebook.
Step 3: Add copyright page
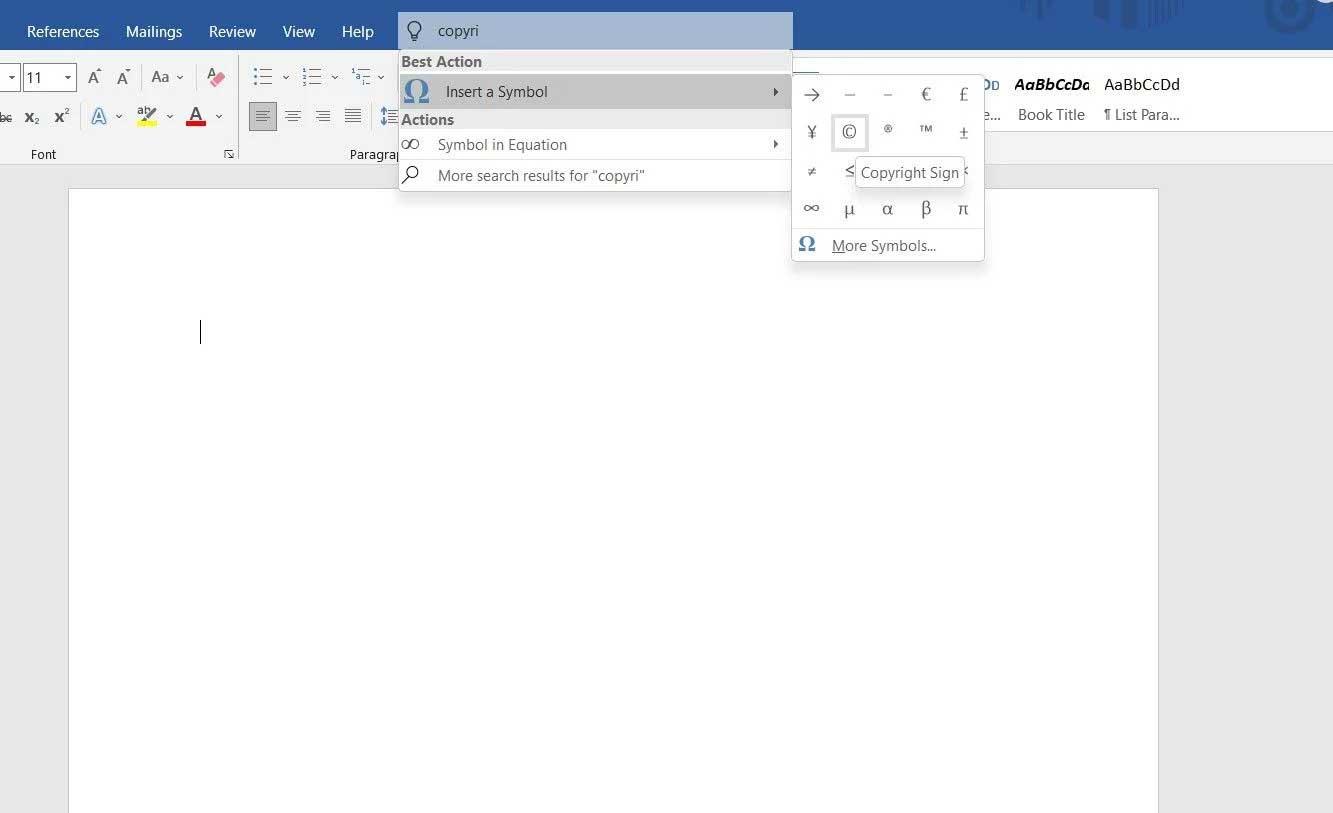
To copyright your ebook, you need to add this page to your layout as follows:
- Go to the Insert menu .
- Click Symbols on the right.
- Search for the copyright symbol and enter content into the page.
- Finally, write copyright, authorship, and copyright notices.
Step 4: Insert table of contents
The table of contents helps readers know how many sections are in the ebook. Microsoft Word provides you with 2 different table styles:
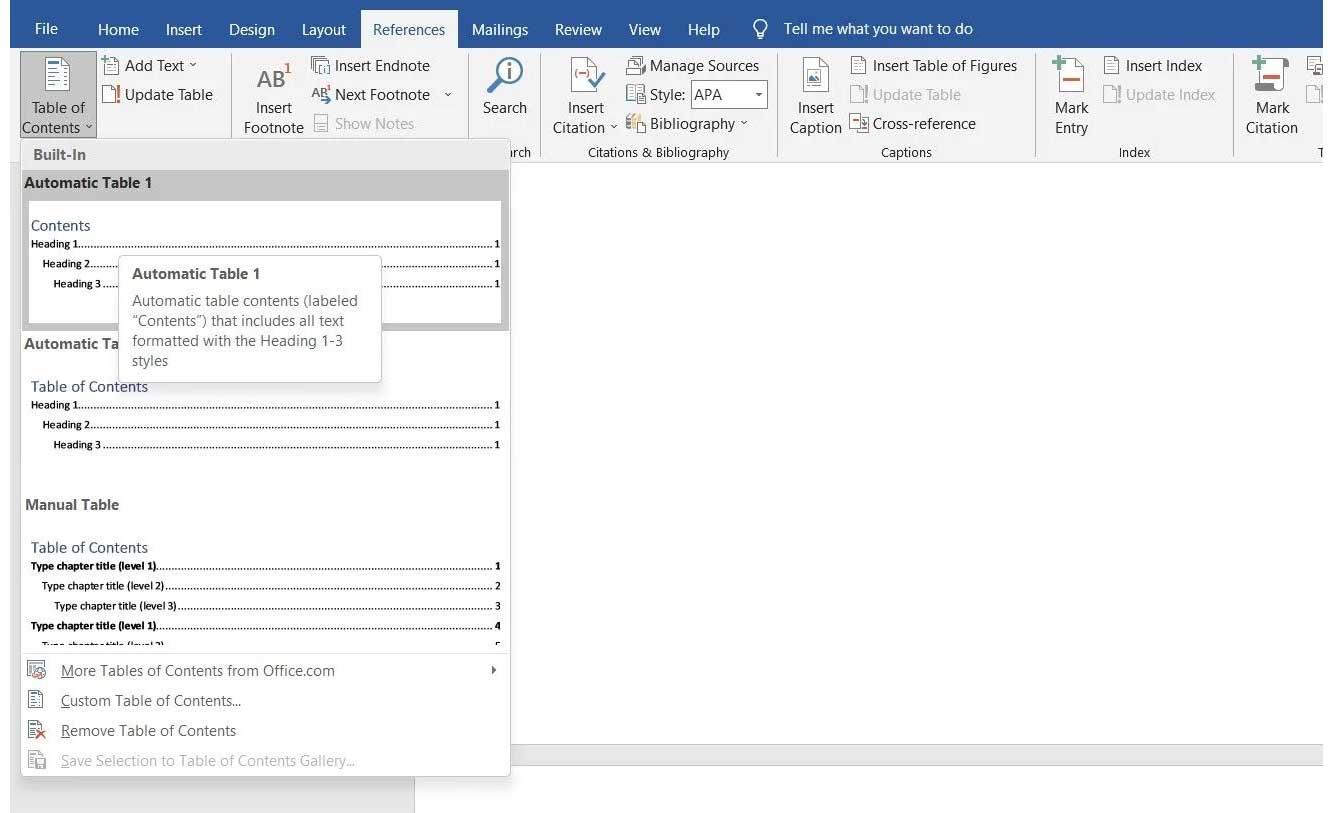
- Automatic table : Show all titles, from 1 to 3 in order. These versions have two separate titles: Contents and Table of Content. You can choose either one. They have the same function. Because it is automatically generated, you can enter as many headings (up to H3 level) as you want and just update the table. Word will automatically fill in the content.
- Manual Table : If there are more than 3 levels of subheadings in the ebook, for example, H4, H5, H6... you can choose this table style. As the name suggests, you can manually enter detailed information inside.
To insert a table of contents in an ebook, follow these steps:
- Go to the References menu .
- Click the Table of Content button located on the left side.
- Select the Automatic or Manual panel from the drop-down menu.
To update the table of contents, follow these simple steps:
- Go to References .
- Click the Update Table button next to Table of Content .
You can also update the content for this table:
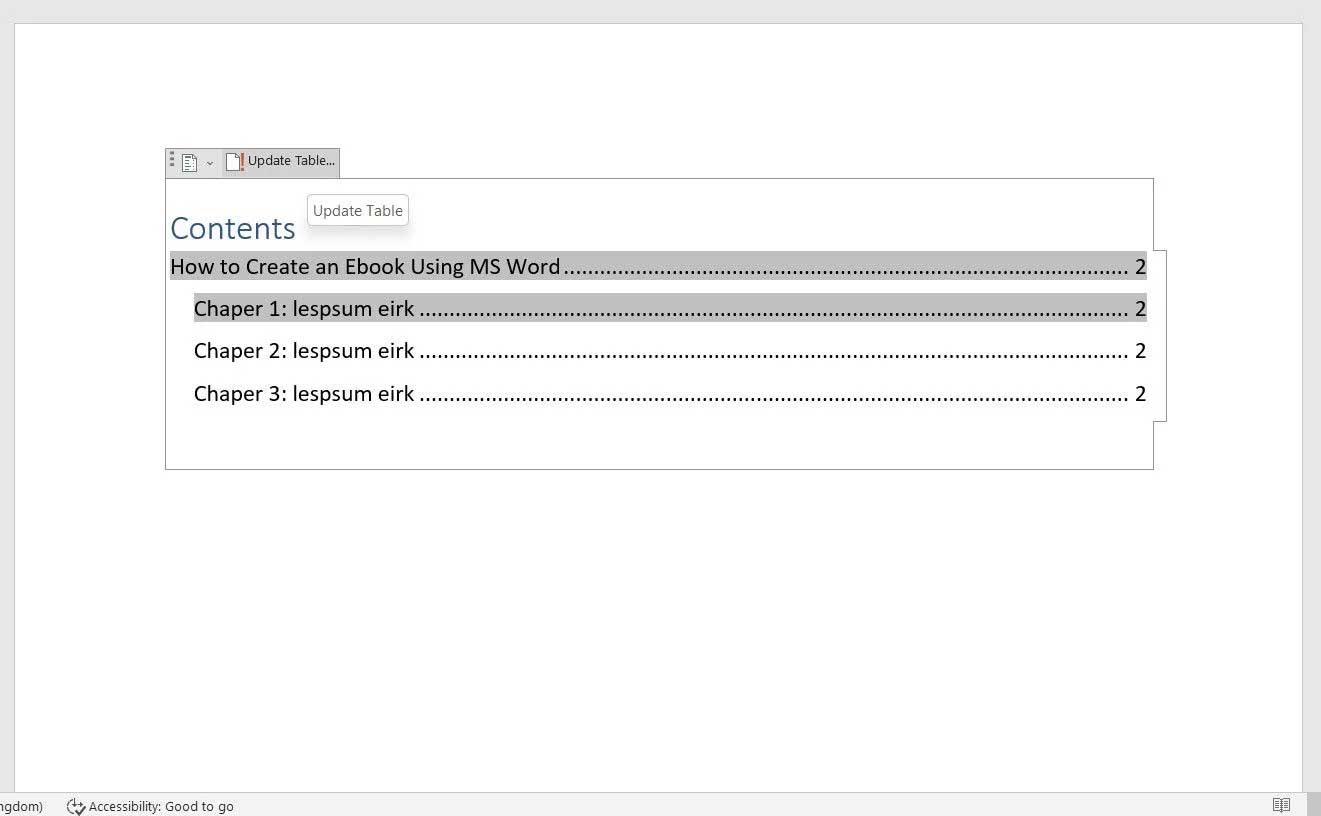
- Go to the Table of Content page in the ebook.
- Select this table.
- Click the Update Table button > select Update Entire Table .
Step 5: Add Header and Footer
Depending on the purpose of the ebook, you can add your company name or web URL, page number... to the header and footer. Most ebooks write the title in the Header. To insert it into an ebook:
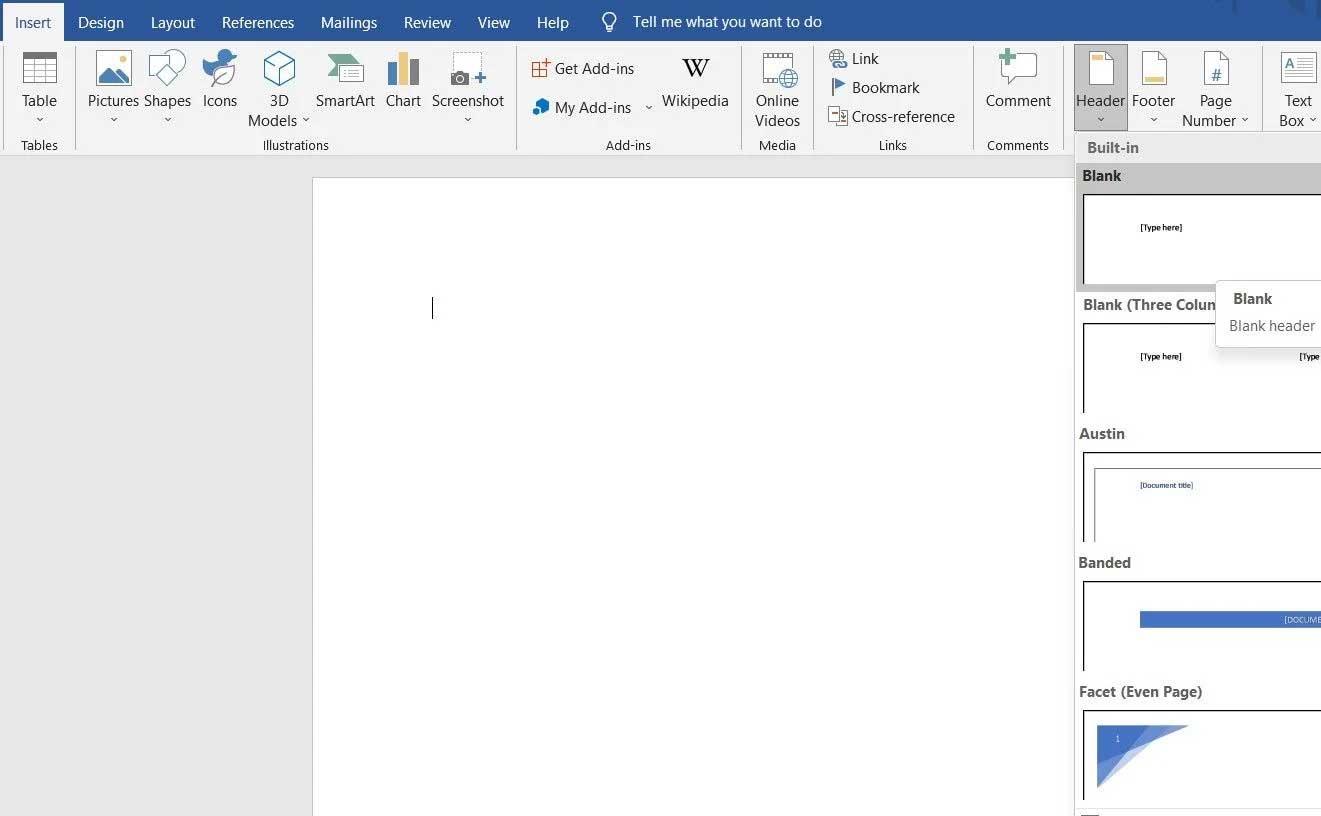
- Go to the Insert menu .
- Click Header .
- Choose the right title from the many available options.
Similarly, you can display any information in the footer, suitable for ebooks. To insert footer:
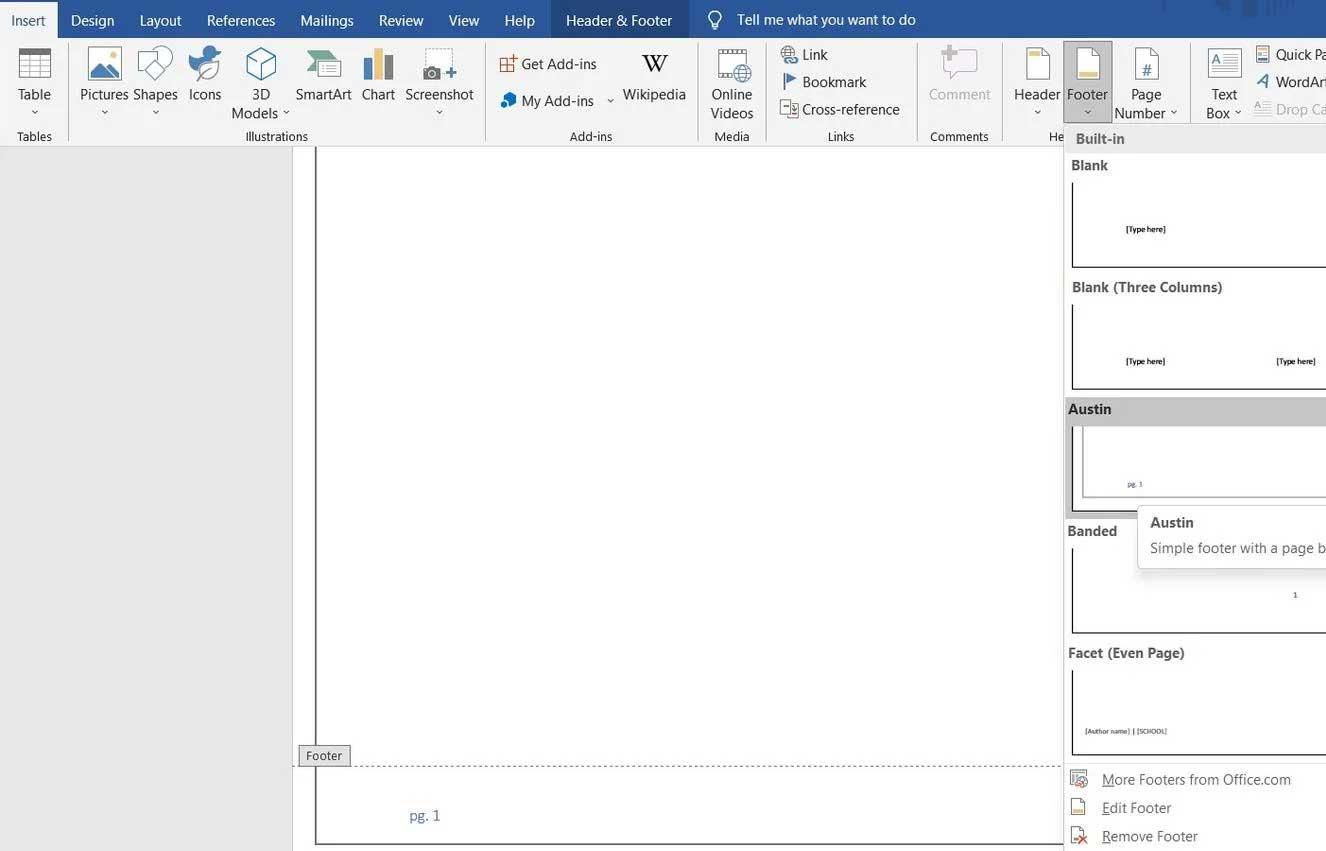
- Go to the Insert menu .
- Click Footer .
- Choose the footer style you want. To automatically add page numbers, select Austin or Branded.
Step 6: Create a draft
You have completed most of the necessary formatting for the ebook. Now you can start writing the manuscript. If you've created it in another document, just copy & paste the text.
To make sure the table of contents includes every main heading, select them from the Headings selection:
- Go to the Home menu.
- Select the necessary heading (Heading 1/2/3).
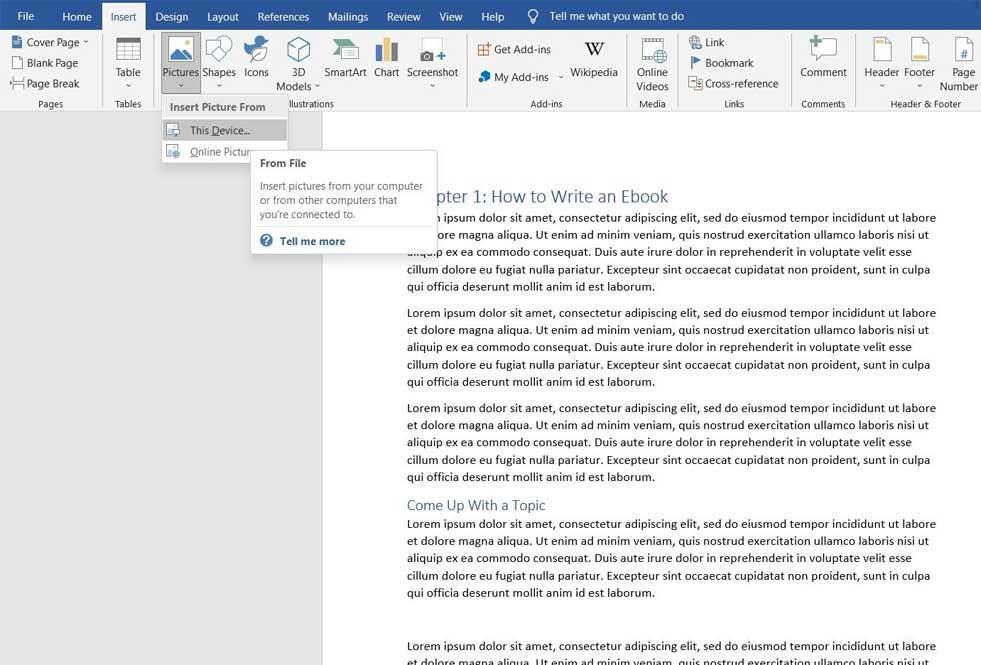
In addition, Microsoft Word also allows you to insert images or charts in the document. To add a photo, follow these steps:
- Go to the Insert menu .
- Click Pictures .
- Select This Device if the image is available offline, or select Online Pictures to directly insert the image from the web.
If you write an ebook about true stories that need to explain many different concepts, you can choose to insert:
- Multiple shapes - Word has a list of multiple shapes to choose from.
- Icons - Search for specific icons according to your needs, for example, arrows, body parts, graphic icons...
- 3D Model - Like photos, you can directly insert them from online options or upload them to your device.
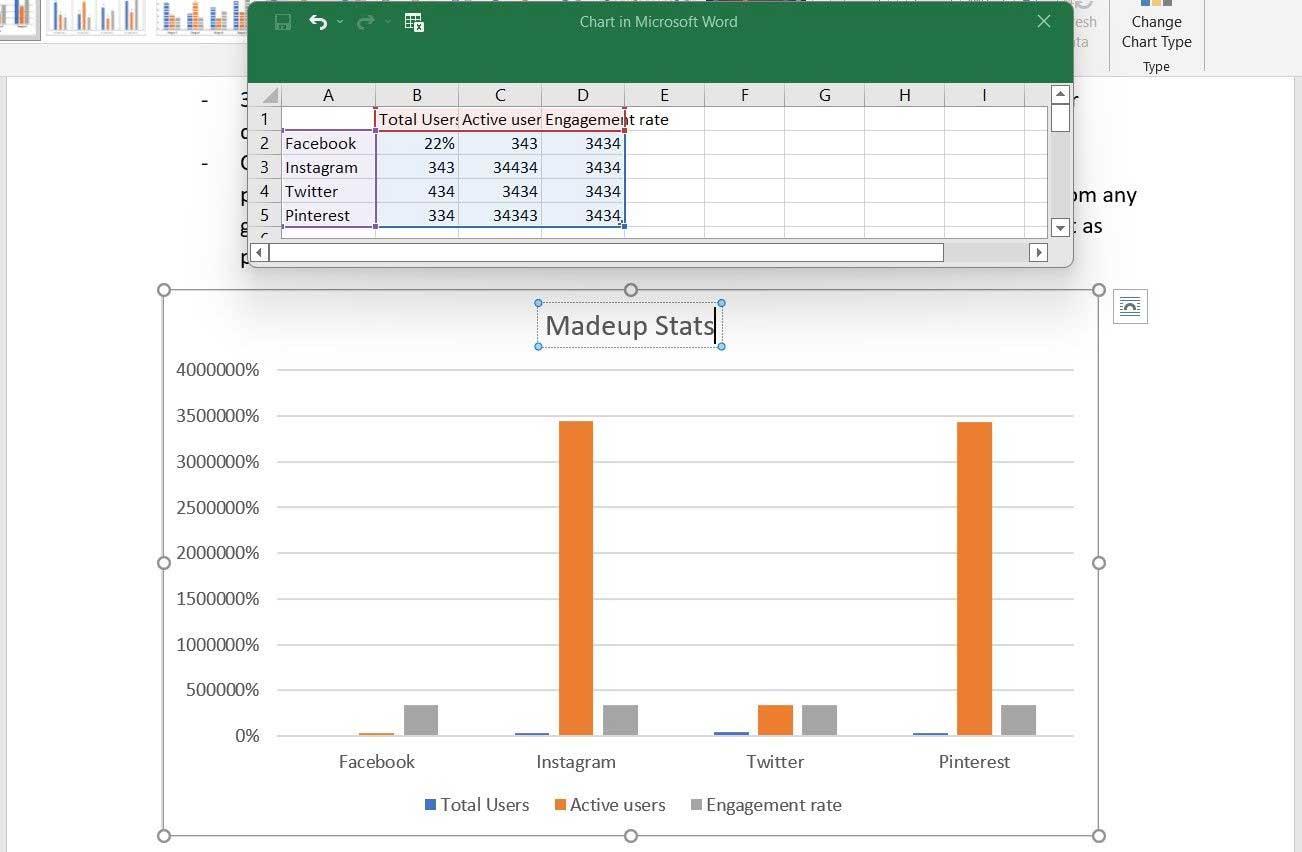
- Charts - If you need a chart to explain a concept or show changes in values, you can insert a column, line, pie, bar, histogram or any other graph/chart type from Chart and customize Turn it according to need.
Because this is an ebook, you can insert links into the text if you want to lead readers to any website or landing page. To insert links:
- Select the text you want to link to a web page.
- Right click and select Link .
- Paste the URL of the link and press Enter .
Step 7: Add author page
Ending your ebook with an author page is a great marketing tactic. You can add a biography, a short, concise summary of the author's highlights on this page and add social network/web links, email addresses, and even promote products here if available.
Step 8: Complete and export the ebook
This is the final step. Make the necessary editing and proofreading to get the ebook as accurate as you want, then export it to PDF to share with readers.
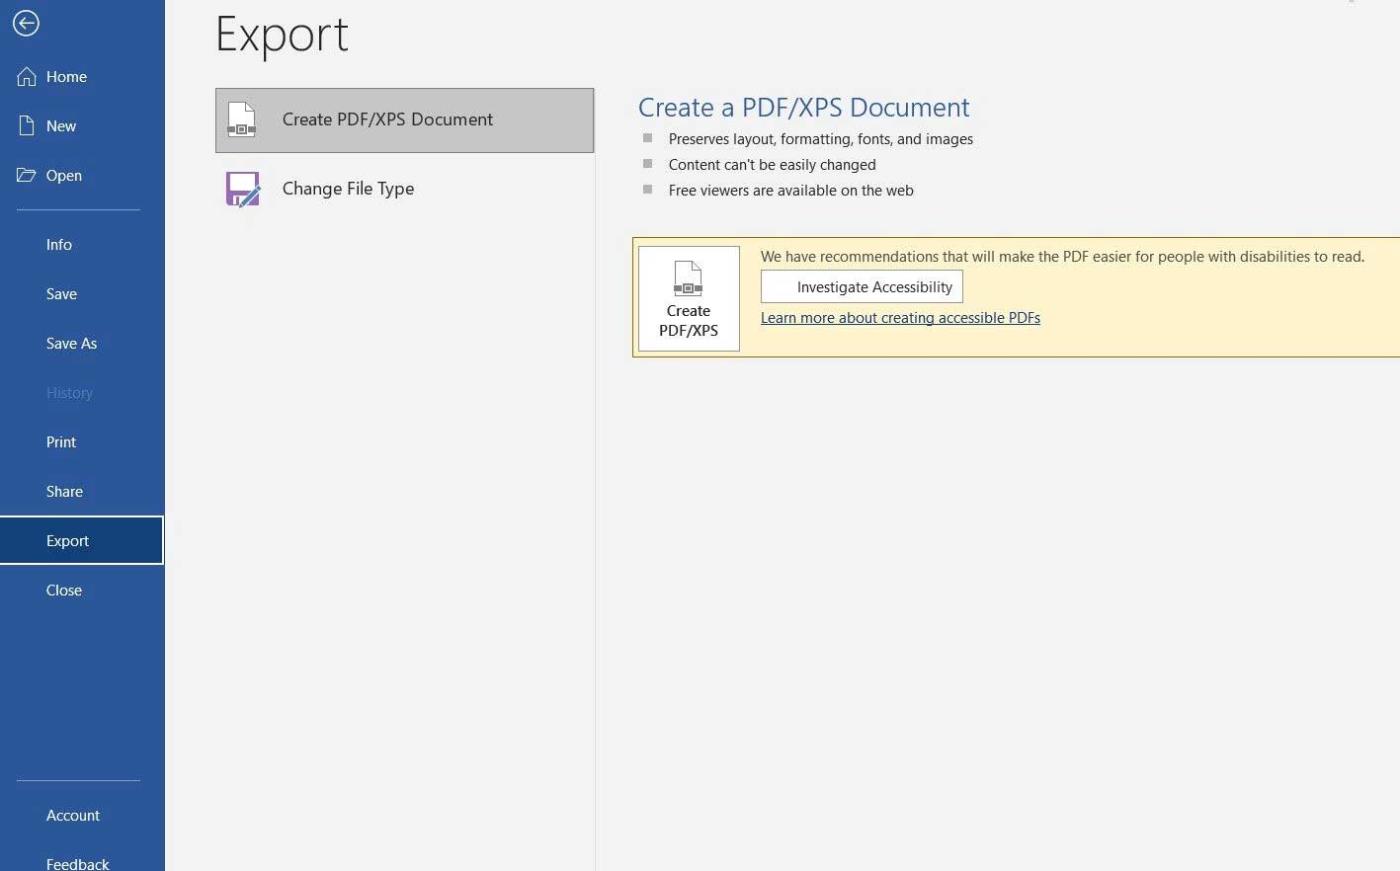
How to convert Microsoft Word ebook to PDF as follows:
- Go to Files from the main menu.
- Click Export .
- Click Create a PDF/XPS Document .
If you intend to write a story or short novel, Microsoft Word can be the perfect choice to start. As you can see, creating an ebook with Word is not too difficult, right? Hope the article is useful to you.


