
How to set up IP and network DNS for LG Smart TV NetCast operating system

Video How to set up IP and network DNS for LG Smart TV NetCast operating system

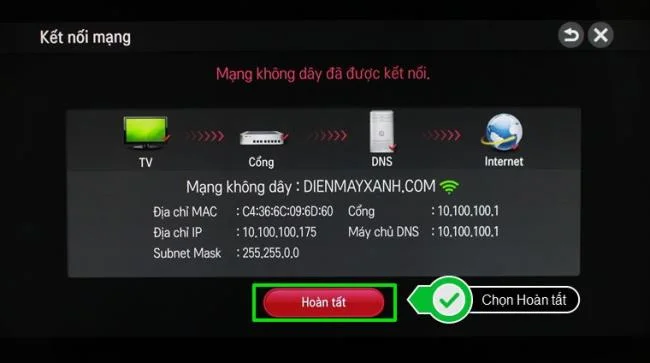
In the article below, WebTech360 will guide you through the steps to set up IP address and DNS for LG Smart TV NetCast  operating system   when the TV is connected to the network.

The reason you should set up IP and network DNS for TV

[success [You should set the IP address, network DNS for TV because:

- Each network needs an IP address, your TV will not be able to connect to the network without IP.

- Entering the correct IP, DNS is one of the ways to fix the error of television not accessing the network. [/ Success]

Steps to set up IP address and network DNS for LG Smart TV NetCast operating system

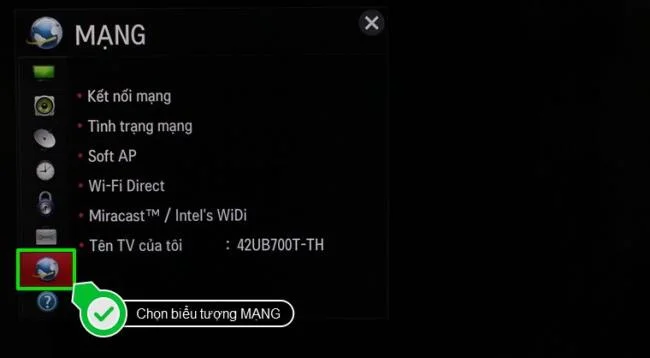
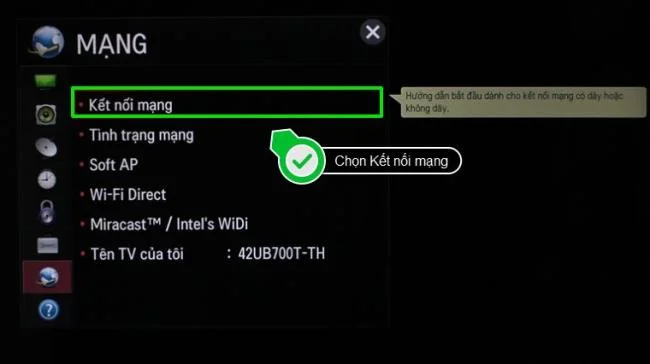
Step 1: Press the SETTINGS button on the remote, then select the NETWORK icon and then go to Network connection.

How to set up IP and network DNS for LG Smart TV NetCast operating system
Press the SETTINGS button on the remote
How to set up IP and network DNS for LG Smart TV NetCast operating system
Select the NETWORK icon
How to set up IP and network DNS for LG Smart TV NetCast operating system
Select Network Connection

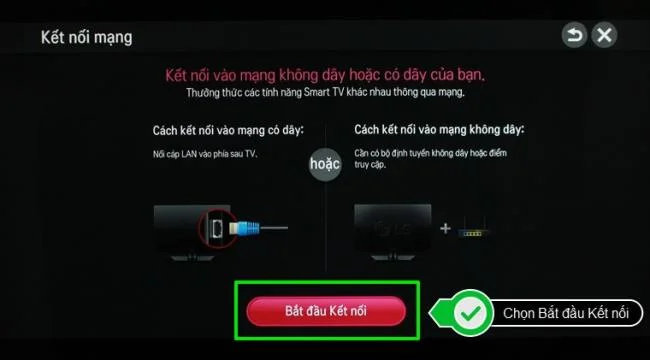
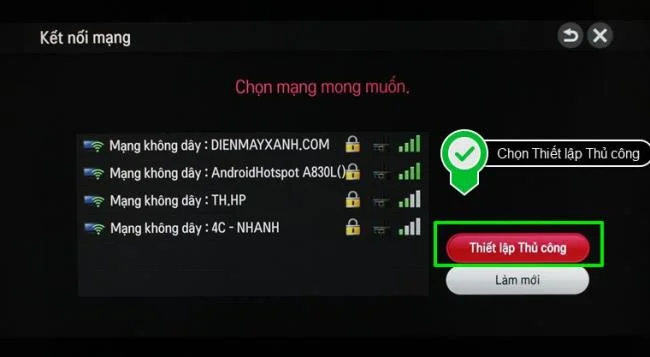
Step 2:  In this step, choose Start connection and then choose Manual Setup.

How to set up IP and network DNS for LG Smart TV NetCast operating system
Select Start Connection
How to set up IP and network DNS for LG Smart TV NetCast operating system
Select Manual Setup

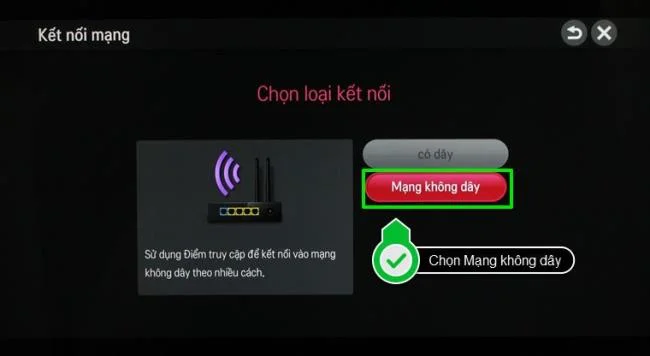
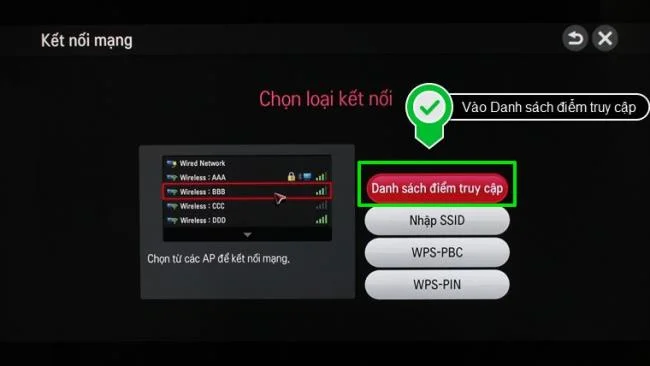
Step 3: Depending on the connection between the network and your TV, you will choose the type of wired connection or Wireless Network. Then go to the Access Point List, where the TV shows the available networks detected. Just select the network you want to connect to and enter the network's security code (if any) and select OK.

How to set up IP and network DNS for LG Smart TV NetCast operating system
Select Wireless Network
How to set up IP and network DNS for LG Smart TV NetCast operating system
Go to Access point list to select the network you want to connect to
How to set up IP and network DNS for LG Smart TV NetCast operating system
Select the wireless network you want to connect to and enter the security code  

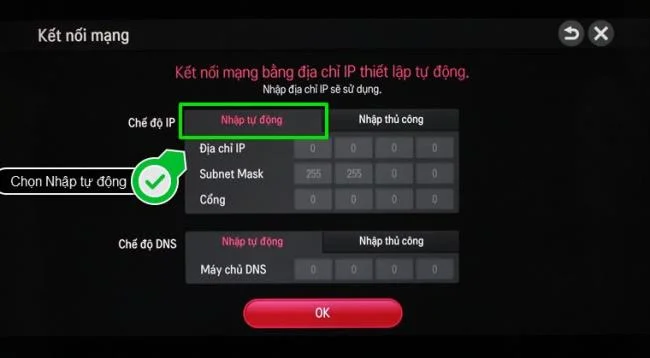
+ If you want the network IP to be in automatic mode:  Select Enter automatically.

How to set up IP and network DNS for LG Smart TV NetCast operating system
Select Auto Import

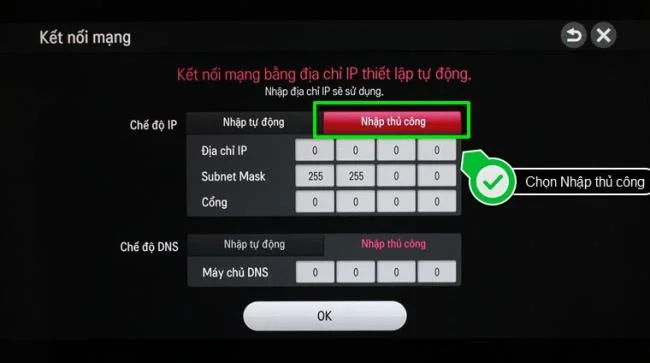
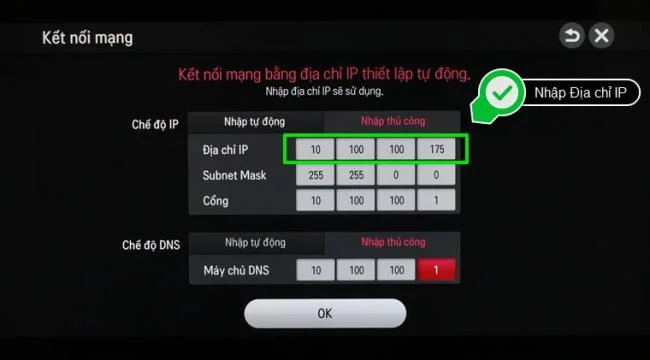
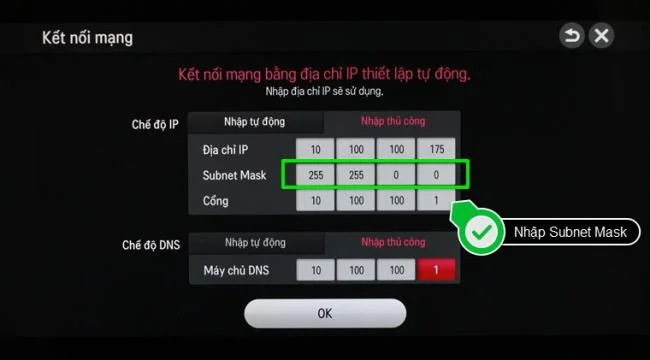
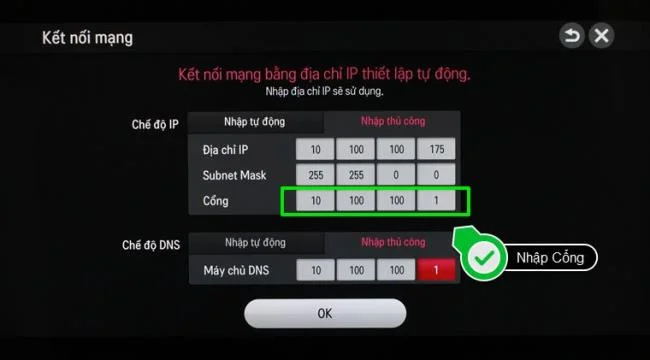
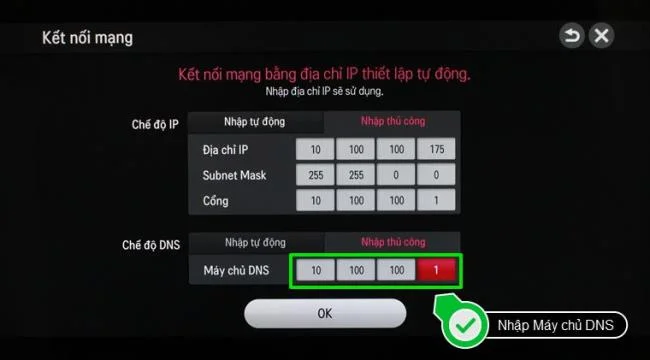
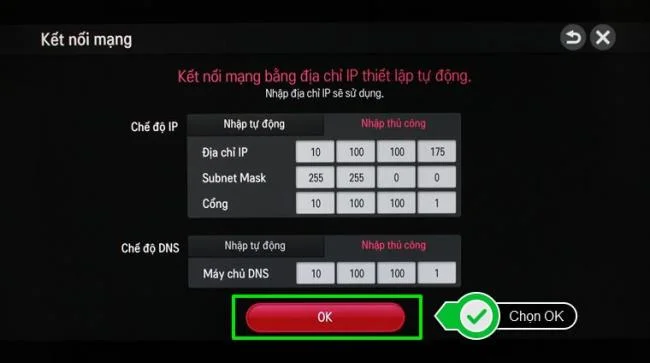
+ If you want to set IP manually: You just need to select Enter manually and proceed to enter the IP Address, Subnet Mask, Gateway and DNS for the TV. Finally, just select OK to complete the IP setup.

How to set up IP and network DNS for LG Smart TV NetCast operating system
Select Manual Import
How to set up IP and network DNS for LG Smart TV NetCast operating system
Enter the IP Address
How to set up IP and network DNS for LG Smart TV NetCast operating system
Enter the Subnet Mask
How to set up IP and network DNS for LG Smart TV NetCast operating system
Enter Port
How to set up IP and network DNS for LG Smart TV NetCast operating system
Enter DNS
How to set up IP and network DNS for LG Smart TV NetCast operating system
Click OK
How to set up IP and network DNS for LG Smart TV NetCast operating system
And Done

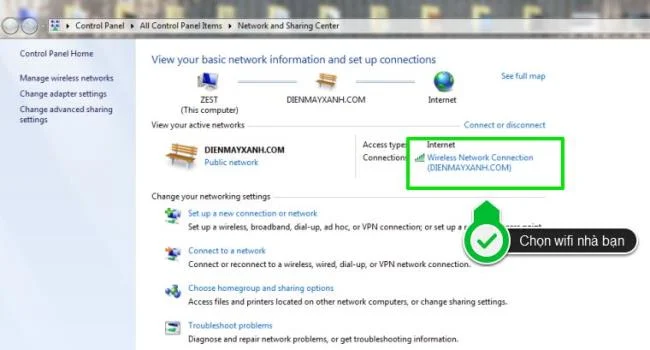
Note:  To know the exact IP address of your home network, you should use a computer connected to the network to check. How to check as follows:

How to set up IP and network DNS for LG Smart TV NetCast operating system
Open the Network and Sharing Center window, then select the connected network
How to set up IP and network DNS for LG Smart TV NetCast operating system
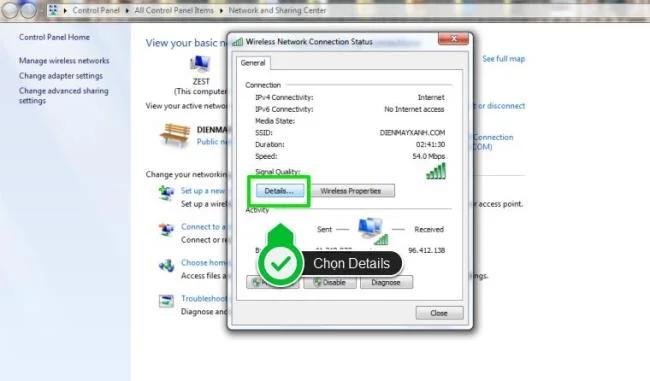
Select Details to display network information
How to set up IP and network DNS for LG Smart TV NetCast operating system
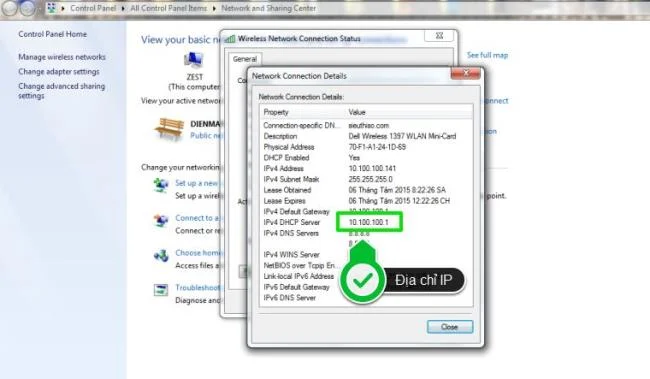
The correct IP of the network is in the IPv4 DHCP server entry

See more:

How to connect to a network for LG Smart TVs running Netcast operating system

Fix TV not connected to the network

Above are the steps to set up IP and DNS network on LG Smart TV NetCast operating system, wish you success!

WebTech360

Leave a Comment

Clear the ownCloud Apache .htaccess Warning Safely
Clear the ownCloud Apache .htaccess Warning Safely

Set AllowOverride All only for ownCloud’s web root, validate the active Apache vhost, and reload safely to restore .htaccess rules.

Set Up ownCloud Enterprise Auditing and Verify the Logs

Enable ownCloud’s Enterprise Auditing app, route admin_audit events to a protected log file, and confirm that real user actions are being recorded.

Connect ownCloud Infinite Scale to Keycloak with OIDC

Connect ownCloud Infinite Scale to Keycloak with OIDC

Align Keycloak’s realm issuer, web client, and user claims to let ownCloud Infinite Scale sign users in reliably across the web and mobile clients.

Move ownCloud Files to a New Owner Without Losing Shares

Transfer owned files and outgoing shares with ownCloud’s occ command, understand what stays behind, and verify access before deleting the old account.

Speed Up ownCloud 10 Queries by Managing Indexes Safely

Learn when ownCloud 10 database indexes need attention, how to apply supported schema updates safely, and when query tuning or a database change is the better fix.

Mount an SMB/CIFS Share in ownCloud Without a Linux Mount

Connect a Windows or Samba network share to ownCloud through External Storage, verify credentials, and troubleshoot inaccessible folders safely.

Purge ownCloud File Versions Safely with the occ Command

Purge ownCloud File Versions Safely with the occ Command

Remove every stored ownCloud Server Classic file version for one account or all users, and distinguish a full purge from retention-based expiry.

ownCloud Mobile Connection Refused? Check URL and Reachability

ownCloud Mobile Connection Refused? Check URL and Reachability

Trace an ownCloud mobile connection refusal by checking the server URL, phone network, HTTPS endpoint, and server logs in the right order.

Run ownCloud Background Jobs Reliably with a Systemd Timer

Replace on-demand job runs with a systemd timer that runs ownCloud’s supported occ system:cron command every 15 minutes.

Restore ownCloud WebDAV Sync by Finding the Broken Route

Trace the WebDAV request through Apache, Nginx, or a reverse proxy, then confirm ownCloud sync works with an authenticated PROPFIND test.