Home
» How to
»
How to use Skyworth E310, E510 and S810 TV remote
How to use Skyworth E310, E510 and S810 TV remote
WebTech360 will guide you on how to use the remote of Skyworth E310, E510 and S810 TVs.
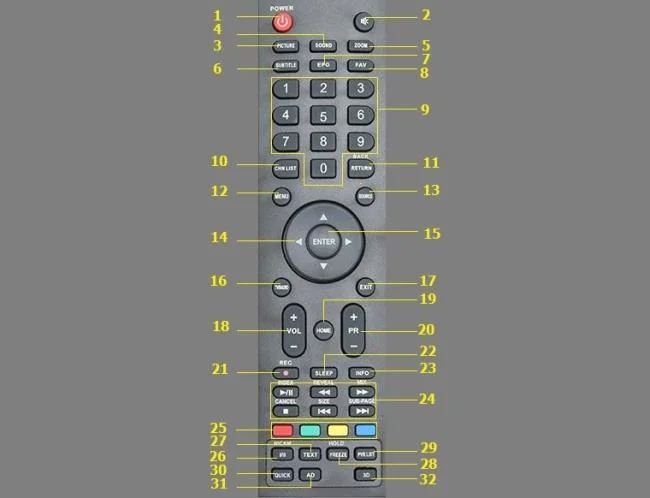
Skyworth E310, E510 and S810 TV remote
1. POWER: Press to turn on the TV or return to standby
2. MUTE: Press to mute or unmute the TV
3. PICTURE: Change the picture mode on TV
4. SOUND: Change the sound mode on TV
5. ZOOM: Change the aspect ratio of the picture on the TV
6. SUBTITLE: Turn subtitles on / off in DTV / USB mode
7. EPG: Press to display EPG information on TV
In which: EPG (Electronic Program Guide) is a graphical interface providing information on the screen to customers about the list of TV channels, detailed and brief information about programs on the system.
8. FAV (Favorite channel): Press to watch your favorite channels saved. Press the Up / Down buttons to tune favorite channels, press ENTER to confirm.
9. The numeric buttons are used to tune channels directly
10. CHN LIST: Press to enter the channel list
11. RETURN (BACK): Press to go back to the previewed channel
12. MENU: Opens the menu options of the TV set
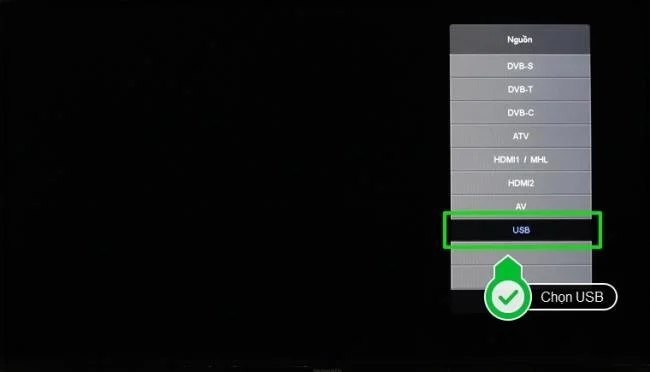
13. SOURCE: Select the input source mode of the TV
14. Up / down / left / right: Move the selection box
15. ENTER: Confirm the selection
16. TV / RADIO: Switch from TV to radio
17. EXIT: Exits the menu
18. VOL + / VOL-: Adjust TV volume up or down
19. HOME: Go to the home page of the TV. If your TV is not a Smart TV, this button will not work.
20. PR + / PR-: Change the TV channel you want to watch
21. REC: Press to record the current program (Only works in DTV mode)
22. SLEEP: Select sleep time, such as 10 minutes, 20 minutes, ...
23. INFO: Displays information about the current source.
24. Buttons to control teletext text transmission
Note: Teletext is a technology that uses television media to provide certain information necessary to an audience while watching television, and independent of the broadcasting program of the Television Station. The information that Teletext conveys is usually exchange rate, stock market, agricultural product prices, weather news, market prices, train hours, airplanes, lottery results ... Teletext service users can search for the above information by accessing Teletext news sites on the TV through a remote control device (usually integrated with the TV remote control).
INDEX: Click this button to display the appendix page
REVEAL: Press this button to display hidden information, such as the answer to a puzzle or game. Press again to remove the information from the screen.
MIX: Press this button to add Telext information to the TV program. Press again to return to the regular Teletext mode.
CANCEL: Press this button to temporarily return to TV program when searching the Teletext page. When the search is complete, the page number will be displayed in the upper left of the screen. Press again to return to the Teletext page.
SIZE: Enlarges the Teletext display, press this button again to enlarge the top half of the screen. Press this button again to enlarge the bottom half of the screen. Press this button again to return to normal screen size.
SUB-Page: Press this button to enter or exit the subpage mode (if a subpage is available). Press the Red / Green buttons to select the desired page.
25. Color buttons: Press to perform quick function in TV or DTV mode
26. NICAM: Press to select the desired audio output (Mono (Mono), Stereo (Stereo), or SAP) depending on the broadcast channel.
27. TEXT: Press to enter or exit the Teletext menu.
28. HOLD: Press to keep the Teletext page on the screen unchanged. Press again to exit hold state.
29. PVR LIST: Displays the list of recording files
30. QUICK: Click to list some common settings for quick change
31. AD (Audio Description): Press to turn on audio description, a voice describes what is happening on the screen for visually impaired viewers. Press it again to disable this function.
32. 3D: Press to access the 3D function.
Note: If the TV does not have the 3D function, the 3D button on the remote will not function and will not be used.
Frequently used buttons on the remote
1. MENU (Use on normal television)
Use of MENU button: Allows users to access the system of menu options such as picture settings, sound settings, channels, ...
How to use the MENU button:
Step 1: Press the MENU button on the remote.
Press the MENU button on the remote
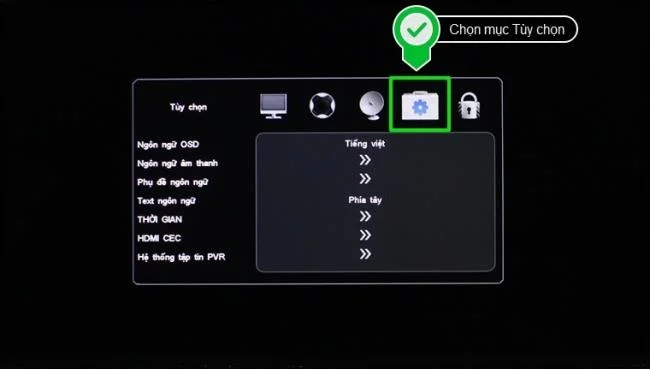
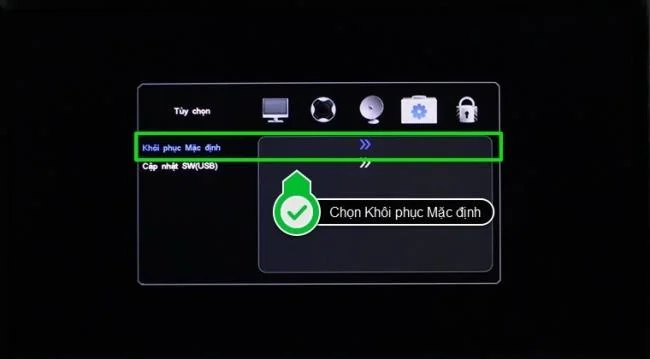
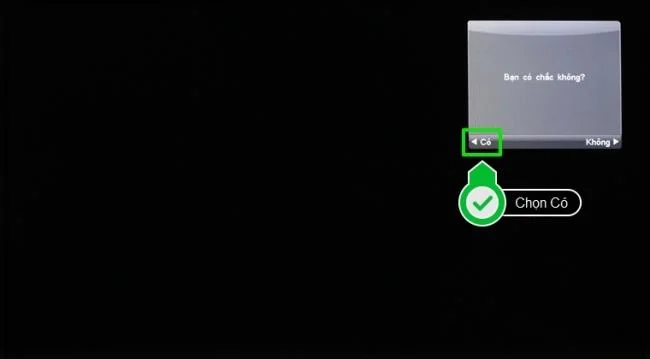
Step 2: Select and activate the feature you want to use. For example, in this article, WebTech360 chooses to factory reset on a regular Skyworth TV.
Select OptionsSelect Restore DefaultsSelect Yes to confirm by pressing the left arrow buttonThe TV reboots and is returned to the factory status
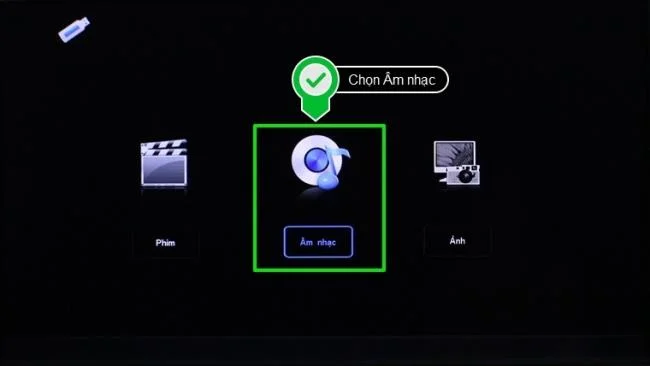
Use of HOME button: Display a full menu of TV features for users to choose from such as: Photo, Music, Video, Browser, ...
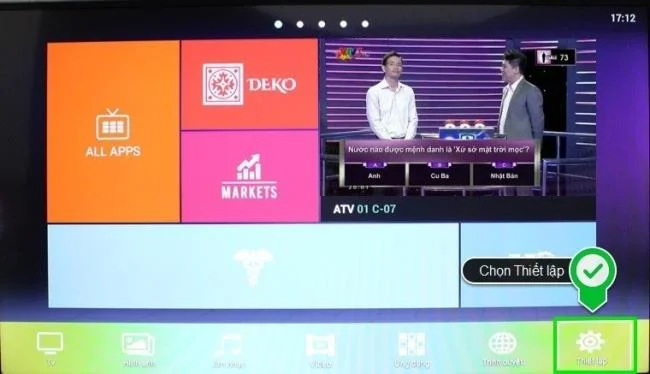
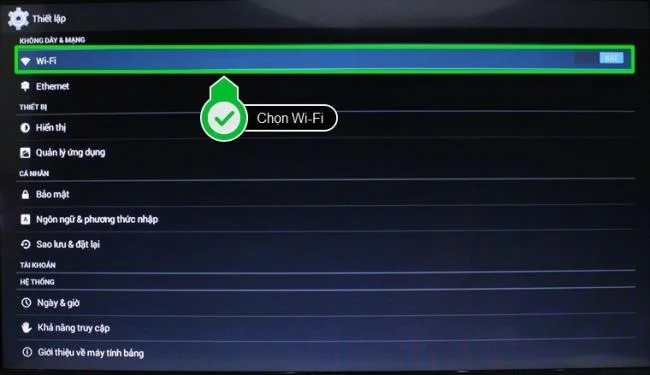
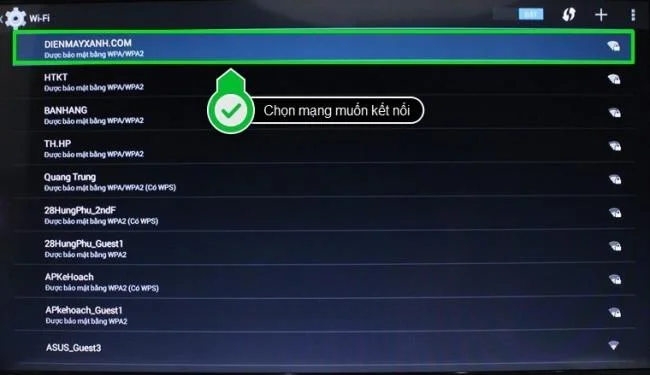
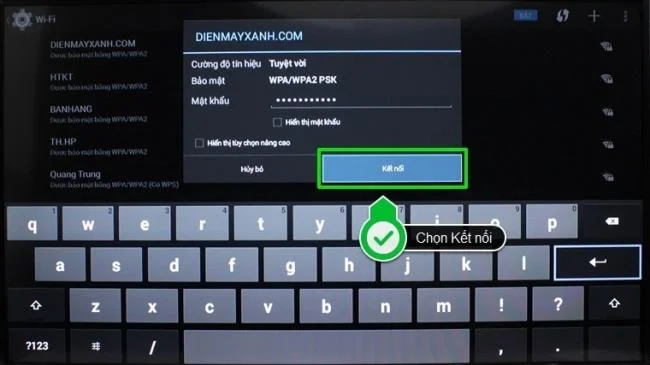
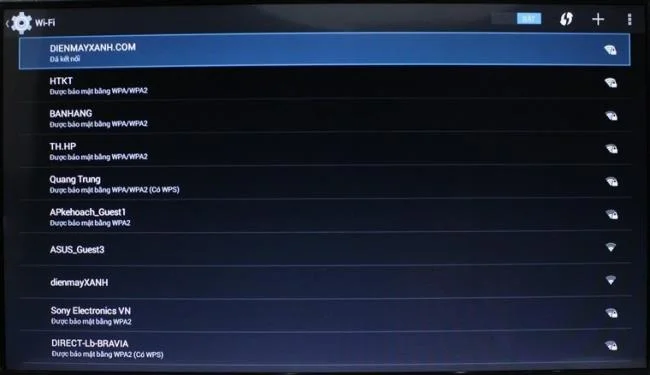
How to use the HOME button: Press the HOME button on the remote, the TV main menu will appear. From the menu interface, you select the feature you want to use. For example, in this article, WebTech360 will select Setup to set up the wifi connection for the TV.
Press the HOME button on the remoteSelect SetupSelect wifiSelect the network you want to connect toAfter entering the password, click ConnectThe TV is connected to the network