There are many different ways to install Windows operating system on a computer, we can install Windows from CD/DVD , install Windows directly from USB to avoid some errors during installation, or install Windows directly from the hard drive . With the method of installing Windows from USB, users can use the Windows To Go feature on Windows 8 and Windows 10 or in Rufus to install Windows on USB. We will create Windows portable on Windows 8/10 to use immediately when booting into it. From there, users can start Windows and access data on any computer with very quick operations.
1. How to use Windows To Go on Windows 8/10
Before installing, users need a USB with a minimum capacity of 32GB, and an ISO file to install Windows 10 or Windows 8.
Step 1:
First, we click on the Windows installation ISO file, then right-click and click Mount.

Step 2:
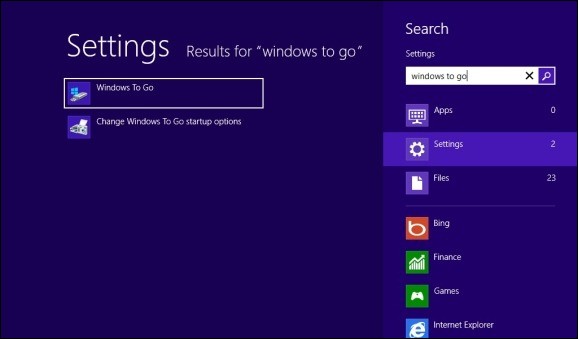
Press Windows + W to open the search bar and type Windows To Go in the box. The results will appear right next to it, then click to select.
Step 3:
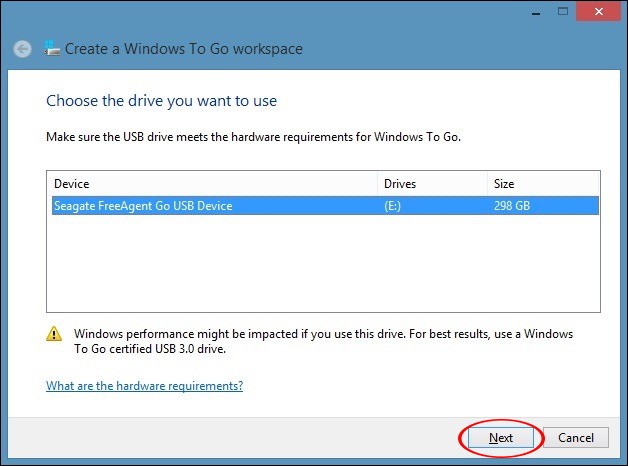
Connect the USB to the computer and then click on the USB you want to use in the next interface. Click Next below to continue.
Step 4:
The system will then automatically search for the mounted ISO file on your computer. If it is not found, click Add search location to find the file save path. Click Next below to continue.

Step 5:
Switch to the Set a BitLocker password (optional) interface, the user is asked to enter a password to secure the drive with BitLocker Drive Encryption. We can skip this step if we do not want to use it by clicking Skip.
If you want to use a password, select Use BitLocker with my Windows To Go workspace, enter the password below and click Next to continue.

Step 6:
Next, the interface to create Windows To Go appears, click Create to proceed. This process may take a while.
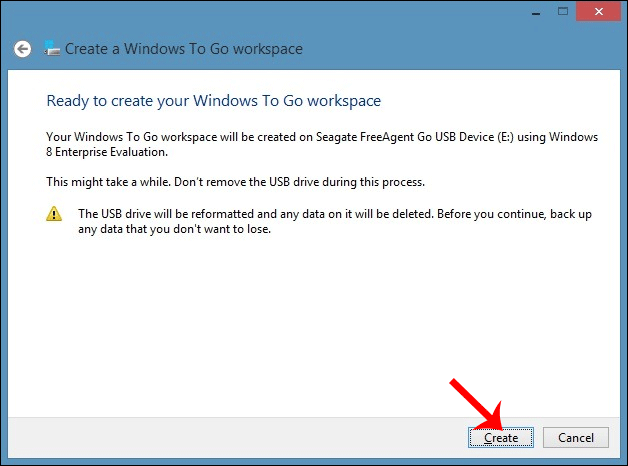
During the creation process, users are not allowed to disconnect the USB. Once created, we can connect the USB to the computer to check.

Step 7:
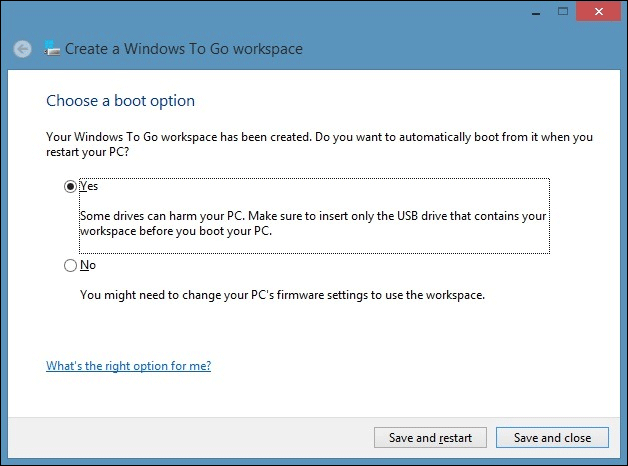
When the screen displays asking the user if they want to automatically boot when the computer restarts. If we choose Yes, it will automatically boot from Windows To Go. Finally, click Save and close to proceed.
2. How to use Rufus to create Windows To Go on USB
From Rufus version 2.0 and above, there is a feature to create Windows To Go on USB.
Step 1:
We download the latest version of Rufus from the link below.
Step 2:
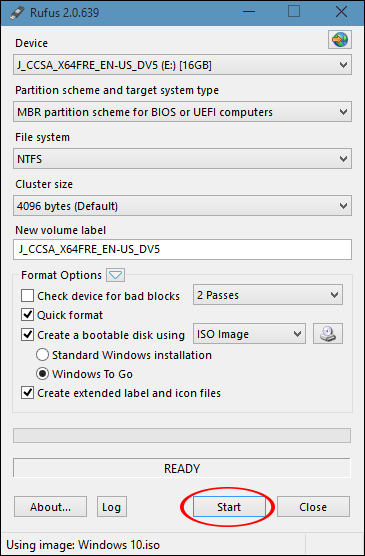
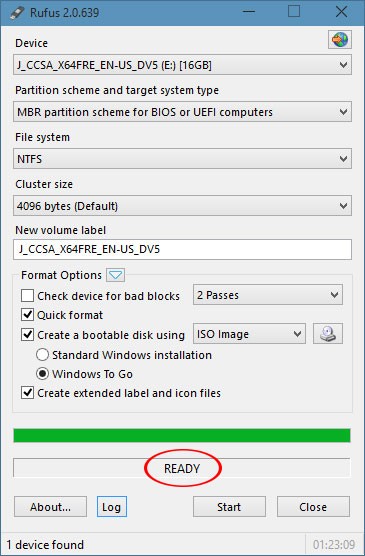
Next, we connect the USB we want to create Windows To Go to the computer, then start the Rufus software. In the software interface, we click on Device to select the USB connected to the computer. Select NTFS for file system , below select Windows To Go . Click on the drive icon at ISO image to add the ISO file you want to install. Click Start to begin.
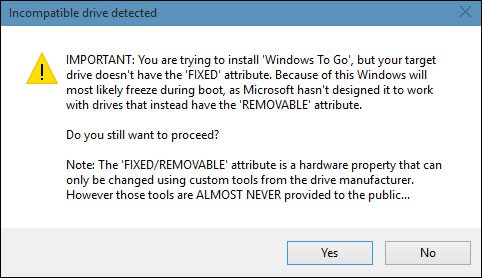
If the notification interface as shown below appears, click Yes to continue.
Step 3:
The process of installing Windows To Go onto USB will start immediately after that, it may take more than 1 hour to complete. When you see the READY message, it means the installation is complete. Click Close to close the interface.
So we have 2 ways to install Windows To Go on USB to boot Windows via USB. As a result, users can install Windows on any device.
Good luck!
