Lenovo has a whole series of computers, such as ThinkPad and Yoga. How to take a screenshot on your Lenovo ThinkPad? Can you follow the same process to screenshot on Lenovo Yoga as well? Is there a different keyboard orientation to take screenshots? In order to take a snapshot with some important information, you can learn more details about 4 efficient methods to take screenshots on your Lenovo devices with ease. How screenshot ThinkPad ☑ Print Screen ThinkPad
Part 1: How to Screenshot on A Lenovo ThinkPad
1. How to Take A Screenshot of the Whole Screen on Lenovo
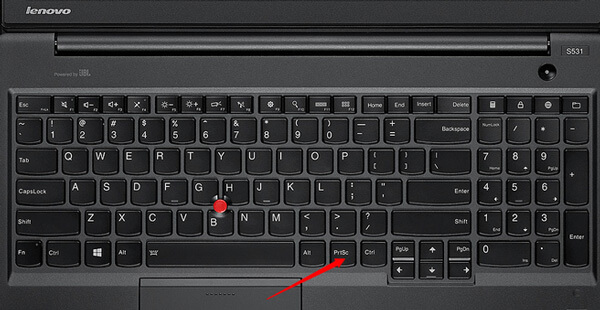
Press the PrtSc key on your keyboard to take screenshot of the whole screenshot on your Lenovo. It will be saved to the clipboard automatically. After that, you can simply press Ctrl + V to paste the screenshot to an image editor, or Ctrl + S to save the screenshot directly.
2. How to Screenshot of An Active Window on Lenovo
Navigate to the window you want to screenshot on Lenovo ThinkPad, press the Alt + PrtSc keys on the keyboard to capture the active window. You can open the Paint program on your Lenovo and paste the image with Ctrl + V, or even save the screenshot to hard drive with Ctrl + S.
3. How to Take A Custom Screenshot on A Lenovo
When you need to take a custom screenshot on a Lenovo, you need to use Windows 10 version 1809 or above. Press Windows Logo + Shift + S at the same time to invoke the built-in Snip & Sketch app in Windows 10. Just click and drag your mouse and select a desired area of your screen. Then you can view the screenshots under C:\Users\[Your Name]\Pictures\Screenshots.
Part 2: How to Take A Screenshot on Lenovo Yoga
Can you use the same keys to take a screenshot on Lenovo Yoga? You can press and hold the ON/OFF button and the Volume Down button at the same time to screenshot on the Lenovo tablet. In a few seconds, the edge of the screen will flash, confirming the creation of the screenshot. After that, you can find the screenshot in Gallery or My Files. Different from the desktop version, it only enables you to capture full screen of your tablet without a built-in image editor.
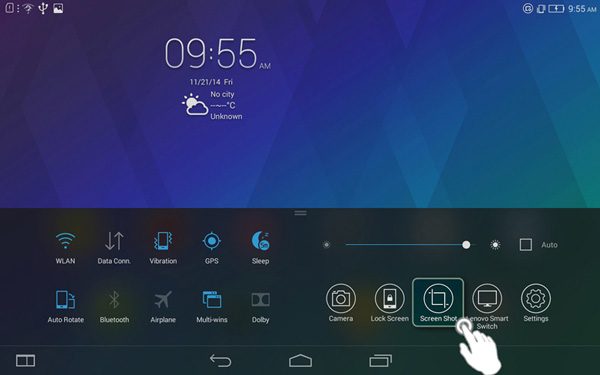
With screenshot shortcut, you can also take screenshot on iPhone
Part 3: How to Screenshot on Lenovo with Snipping Tool
Once you have invoked the built-in Snip & Sketch app in Windows 10, how to take a screenshot on Lenovo with the snipping tool? Just learn more about the different snapshots with the excellent program as below.
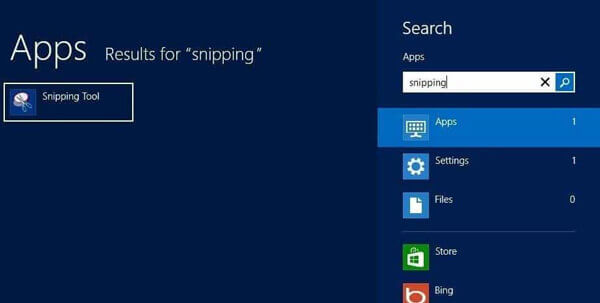
Step 1Press the Start button on your Lenovo computer. You can enter the Snipping command line and click on the search bar, which will show you to Snipping Tool application.
Step 2Once you have launched the Snipping Tool, you can click on the New button to choose a desired screenshot mode, such as the Free-form Snip, Rectangular Snip, Windows Snip and Full-screen Snip.
Step 3After that, you can click and drag your mouse to select a certain area of your screen. Then release the mouse button. In the pop-up window, you can click the Save Snip icon to save the custom screenshot.
Part 4: The Best Method to Take A Screenshot on Lenovo
What is the ultimate method to capture onscreen activities easily, including the screenshots, videos and audio files? Is there a method to take and edit a snapshot for free on Lenovo? Blu-ray Master Screen Recorder provides a free solution to take screenshot on Lenovo ThinkPad, add annotation and edit the photos with ease. Moreover, you can also use the program to record screen video and audio files.
- 1. Capture screenshots, screen videos and audio files with the desired area.
- 2. Advanced built-in annotation tool, drawing on screenshot and more others.
- 3. Customize the photo formats, capture with hot keys and tweak the area.
- 4. Create an animated GIF image with a whole series of images with ease.
Step 1Make sure you open the desired window where you want to take the screenshot. Download and install the free snipping tool, launch the program on your computer. Go to the home interface, you can just choose the Screen Capture button to screenshot on Lenovo ThinkPad for free.

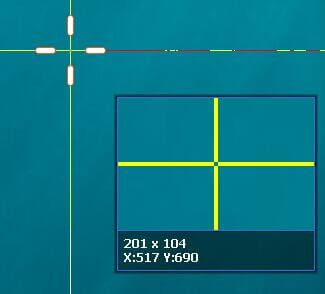
Step 2Hover your mouse over the window to take the screenshot. Of course, you can drag your mouse to select the screenshot area to take the screenshot on Lenovo. Moreover, there are detailed pixels about the capture screenshot within the cursor when you capture the image.
Step 3During the process, you can draw on the screenshot with arrow, texts, circle and more other elements to the screenshot. There are more parameters that enable you to adjust the fonts, colors, styles and more according to your requirements with ease.

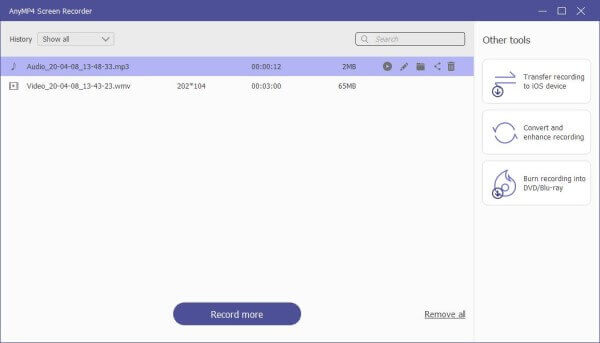
Step 4If you are satisfied with the screenshot, you can click the Save button to save the screenshot on Lenovo. After that, you can open the screenshot within the media library to manage the screenshots and further edit or transfer the screenshot within clicks.
Part 5: FAQs about How to Screenshot on Lenovo
1. How to Take A Screenshot on Lenovo Smartphone?
Just similar to Lenovo Yoga tablet, when you open the desired screen, you can press both Power and Volume Down buttons at the same time to take a screenshot on Lenovo smartphones. After that, you can also open the saved screenshot folder under the Gallery of the Android phone.
2. Where is the Captured Screenshots on A Windows 7 Lenovo?
How to locate the screenshots you have captured with Windows 7? Go to the Start menu, and then choose the All Programs option, then you can find the Snipping tool within the Accessories folder. It enables you to locate the captured screenshot on Lenovo directly. Moreover, the screenshots will be saved in the path C:/Users/[Your Name]/Pictures/Screenshots.
3. How to Screenshot on A Lenovo Chromebook?
Of course, you can also take a screenshot on your Lenovo Chromebook with Power and Volume Down key combination. You can use Ctrl + []]] to take a screenshot of the entire screen and Ctrl + Shift + []]] to take a screenshot of a specific portion of your screen. After that, you'll use your mouse or cursor to select the area of your screen you want to capture.
Conclusion
Once you have mastered the methods to screenshot on Lenovo devices, you can always capture a desired screenshot with ease. Of course, the default method to screenshot on Lenovo with key combination is the easiest method, but there are limited editing features and annotation tools. You can always use the Blu-ray Master Screen Recorder to capture the desired image, audio file and screen video with ease.
