Stop Unwanted Printing and Downloads in ONLYOFFICE
Set print and download limits for ONLYOFFICE links, room members, or Docs API sessions, then verify the restrictions from a recipient account.
A little-known addition on the Windows 10 Anniversary update is the network reset feature. This feature cleans out the drivers and network settings so you can start over. This is especially helpful if you encounter network problems and the solutions you take to fix the problem are not working.
If you're using the Windows 10 Anniversary edition and are trying to connect to the Internet, resetting the network may be just what you need to do to continue surfing the web.
Before proceeding to learn how to reset the network, let's take a look at what to do. Network reset does not simply stop and restart your network drivers or scan all network details. In some ways, network reset can be considered a "hard reset" solution - restore factory settings to resolve network problems.
When network setting is enabled, it will clean all network drivers on your computer. When all drivers are cleaned and the computer has been restarted, all settings will be reset to default. Then Windows will try to download and reinstall the drivers for your network hardware.
This means that your current method of accessing the Internet will lose its ability to connect. Therefore, you should have the driver for the WiFi adapter before doing this method, just in case Windows doesn't download the drivers for you. Also, if you use a VPN, resetting the network will cause problems with it. As such, it's best to prepare to reinstall all the VPNs you use, so you can recover after a network reset has taken place.
Network reset will clean all drivers and network settings. This means it is not the first method to think about when you encounter network problems. In fact, this should be the last resort.
Before you wipe out all network settings on your computer, you should try using other network troubleshooting tools and methods. After seeing no positive results, use the network reset method.
>>> See also: 7 best network troubleshooting tools
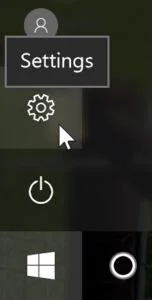
If you use the Windows 10 Anniversary edition, you can find the network reset feature by clicking the Start button , then the wheel icon on the left.
Here, click on Network & Internet .
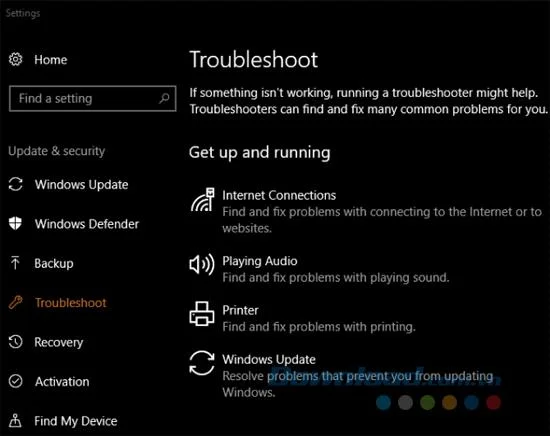
Then click on Status on the left.
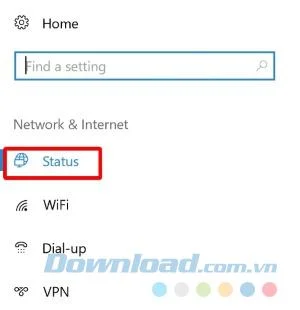
You will find an option on the right side labeled Network reset . Click on it.
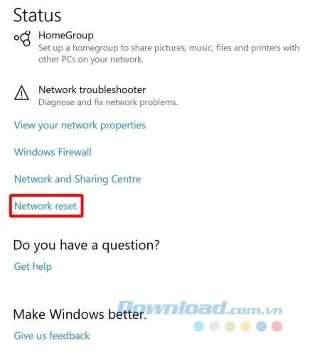
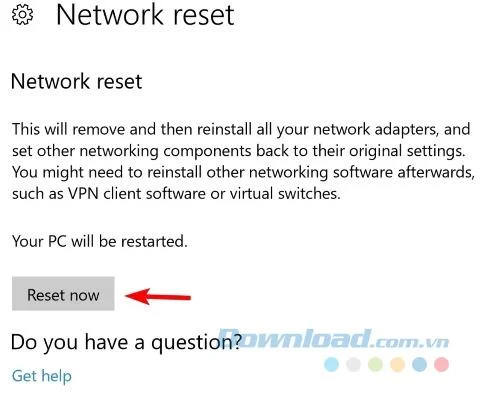
The Network reset screen tells you: “ This will remove and then reinstall all your network adapters and put other network components into their original settings. You may need to reinstall other network software later, such as a VPN or virtual switch . "
Note: Your computer will automatically restart, so make sure you have everything saved and ready to shut down. Click on Reset now to begin the process.
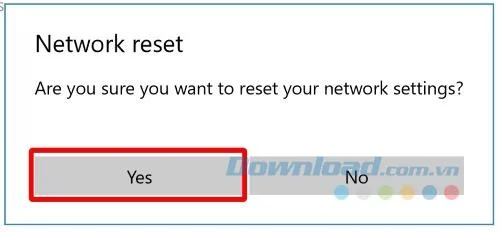
Click Yes in the pop-up window.
After rebooting, your computer will have to reset its network drivers and settings. Allow Windows to reinstall drivers or install them manually if desired. After the installation is complete, try connecting to the network again and see if this method helps.
If you have a network problem with Windows 10 and nothing can fix it, then resetting the network may help. However, you should only use it as a last resort.
Set print and download limits for ONLYOFFICE links, room members, or Docs API sessions, then verify the restrictions from a recipient account.
Set a backup destination, schedule, Mail coverage, and retention limit in ONLYOFFICE Workspace, then verify the archive is ready to restore.
Start the Enterprise Docker Compose stack, persist its license and data, configure JWT safely, and confirm the editors are ready to integrate.
Use an ONLYOFFICE JavaScript macro to remove nonprinting characters and trim extra spaces from a defined spreadsheet range, with a safe review workflow.
Connect ONLYOFFICE DocSpace to Active Directory or OpenLDAP, import users and groups safely, map account fields, and schedule reliable synchronization.
Move portal data from Disk Default to a supported cloud storage provider, or relocate Docker data safely by changing its host volume mapping.
Identify whether Document Server uses a Linux package or Docker, remove only its components, and check remaining data without deleting shared services by mistake.
Trace slow collaborative editing to Docker resource pressure, proxy connections, or document load, then choose the fix that matches your measurements.
Install custom fonts in ONLYOFFICE Document Server, compare persistent Docker mounts with direct copies, rebuild the font list, and verify the result.
Choose where TLS should terminate, mount a trusted certificate and private key safely, and verify HTTPS access to a Dockerized ONLYOFFICE Docs server.