Home
» PC Tips
»
How to verify MD5, SHA-1 and SHA-256 checksums in Windows
How to verify MD5, SHA-1 and SHA-256 checksums in Windows
If you've just downloaded a file from the Internet, you might want to verify that the file you downloaded hasn't been tampered with. After all, who knows what other nefarious tricks a hacker might have gotten up to? By checking the file's MD5, SHA-1, or SHA-256 checksum, you can verify the integrity of the file and ensure that it hasn't been corrupted or altered.
What is checksum?
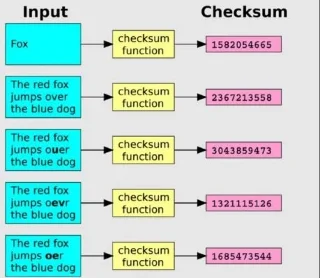
A checksum is a short, unique string that results from running a cryptographic algorithm on a given file. The algorithm looks at all the bits that make up a file and, based on those unique bits, generates a checksum.
Cheksum calculation diagram
This checksum will change if even one bit in the file changes. By comparing the two checksums, you can ensure that your file has not been corrupted or modified. It is a useful way to protect against file corruption or malicious tampering with your downloads.
The most commonly used algorithms for checksums in MD5, SHA-1 and SHA-256 are also available and are based on cryptographically secure algorithms. If you have a choice, use SHA-256.
How to use a checksum?
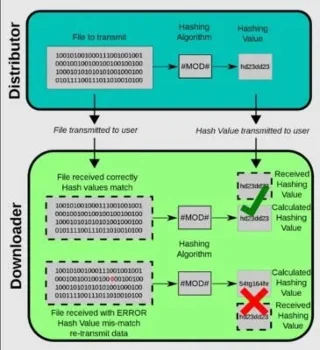
To use checksums, you first need to know what the checksum of a given file is. This should be provided to you by the same source that downloaded the file.
File transfer hash
Run your downloaded file through the same checksum algorithm using one of the tools below. Once you've done that, compare the two strings. If the strings match, the file is unchanged. If the strings don't match, it means your file is different from the original.
Verify checksum with third party tool
The best way to run a checksum in Windows is to use a tool called MD5 & SHA Checksum Utility. It will calculate MD5, SHA-1, and SHA-256 checksums for a given file at the same time and let you compare your results with the data provided.
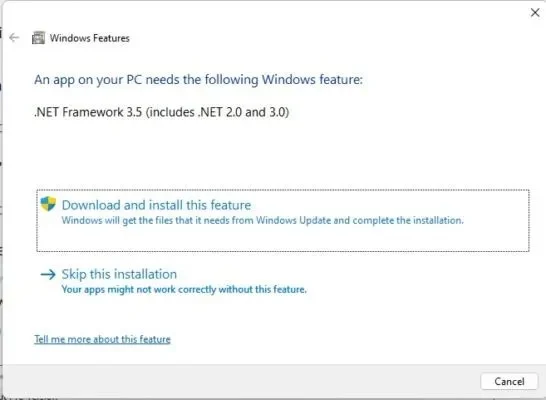
2. Double-click the downloaded file to launch the program. You may be prompted to download .NET Framework 3.5, which the application needs to run correctly. Click Download and install this feature to continue.
Install MD5 & SHA Checksum Utility on Windows PC
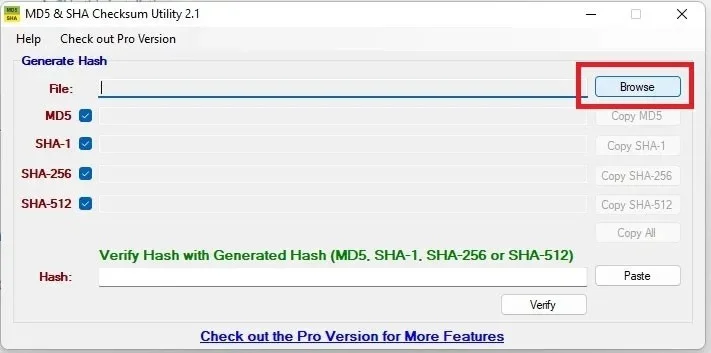
3. Click the Browse button to select the file you want to check.
Browse files in MD5 & SHA Checksum Utility
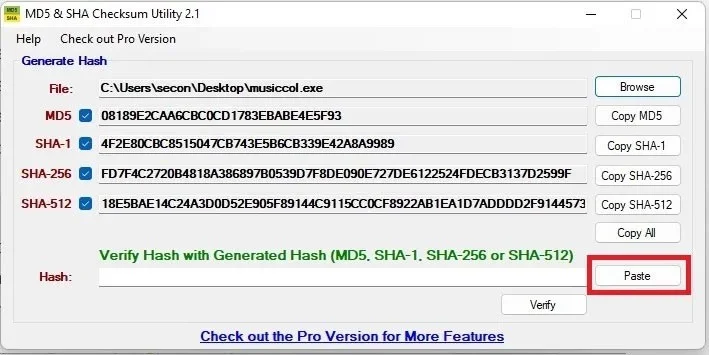
4. Determine the checksum provided for the downloaded file. Not all downloaded files have a checksum available, but open source or security-conscious developers will often provide a checksum. Copy that checksum to the clipboard, then click the Paste button in the MD5 & SHA Checksum Utility.
Paste the checksum in MD5 & SHA Checksum Utility
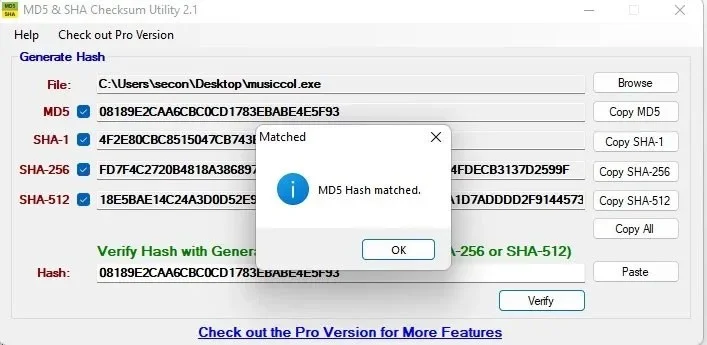
5. Click Verify to verify your checksum. If the checksum matches the one the application calculated, you will receive a success message. This means that the file you have is the same as the file that was previously checked.
Notice MDS Hash matched in MD5 & SHA Checksum Utility
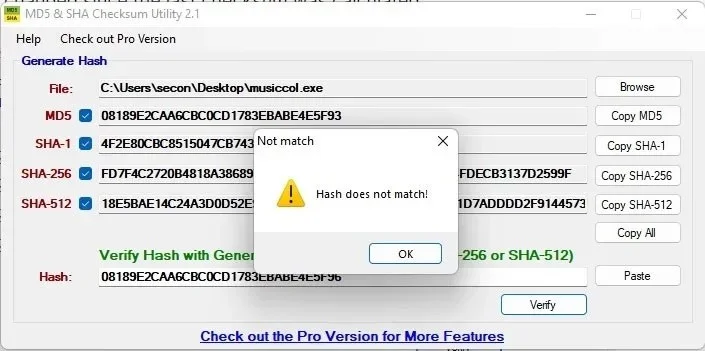
6. If the checksum is different, you will get an error message. This means that the file has changed in some way since the last checksum was calculated.
Hash did not match message in MD5 & SHA Checksum Utility
Verify checksums in File Explorer
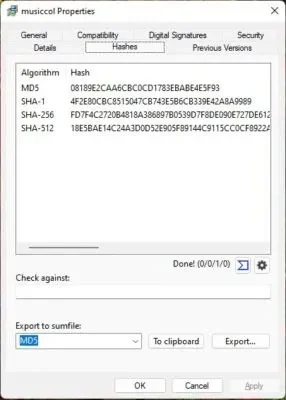
If you frequently verify checksums, you might be interested in OpenHashTab. The application installs an additional tab in the Properties window of File Explorer. Being embedded in Explorer, OpenHashTab can calculate checksums on the spot without requiring a separate application. By default, it calculates MD5, SHA-1, SHA-256, and SHA-512 hashes. Additional hash algorithms can be enabled in OpenHashTab's settings.
Note : If you don't like OpenHashTag, try HashCheck , which does the same thing.
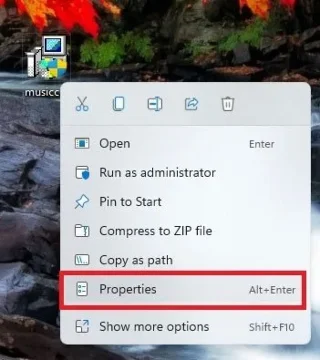
2. Right-click on the file you want to run a checksum on and select Properties from the context menu.
Context menu for Windows application/program
3. Click the tab labeled Hashes at the top of the window to see the MD5, SHA-1, SHA-256, and SHA-512 hashes for the file you selected.
New Hashes tab in File Explorer
4. Copy and paste the checksum you want to compare into the Check Against dialog box.
Compare checksum with OpenHashTab
5. If you check the hash, you should see the matching algorithm (in this case MD5) and file name below the Check against box. If not, you will see a No match found message .
Verify checksums in Windows with Certutil
If you don't want to download anything, use the Windows Command Prompt or Terminal to verify the checksum using the certutil command.
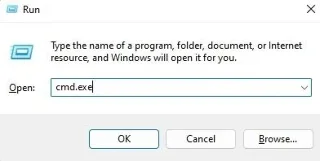
1. Open Command Prompt . Press Win + R , type cmd.exe and click OK or open Start and search for “command prompt” .
Certutil
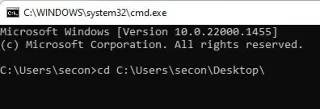
2. Use the cd command to navigate to the folder containing your downloaded file. By default, this is usually the Downloads folder , but some people download files to their computers. A quick way to get the path is to right-click the file and select Copy Path. Copy this into the Command Prompt.
cd filepath
Certutil Directory
3. Enter the following command with your file name:
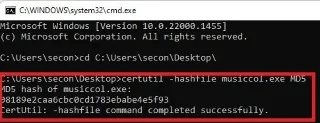
certutil -hashfile filename MD5
Certutil Hash
4. The MD5 value will appear below the command. Compare this number to the hash checksum value you received for your downloaded file. When using this certutil command, you will usually just copy the value into Notepad and verify it manually after running the utility.
Verification results
5. Although MD5 is used as an example, the utility also supports MD2, MD4, MD5, SHA1, SHA256, SHA384 and SHA512.