Schedule Reliable Backups for ONLYOFFICE Workspace

Set a backup destination, schedule, Mail coverage, and retention limit in ONLYOFFICE Workspace, then verify the archive is ready to restore.
Creating subtitles for videos on CapCut will help users describe video content in a way that is easy to understand and detailed for viewers. Using CapCut to create captions for videos is quite simple but very effective.
If you regularly edit videos with CapCut , creating subtitles for videos with this tool is a must. We already know too much about CapCut's features, know clearly the effectiveness and influence of CapCut with Youtube or Tiktok. Videos with subtitles will often have a stronger appeal than regular videos. Please follow this article to let WebTech360 guide you how to create video subtitles with CapCut very clearly and quickly.
CapCut is the most popular free video editing app on mobile today. It provides all the necessary tools from cutting, dividing, inserting text, adding filters & effects, color correction... In addition to basic features, CapCut also has advanced features such as Layer, Mask, Keyframe, visual effects, 3D, Chroma key... In particular, you can also insert subtitles.
Video tutorial on creating subtitles for videos using CapCut
Instructions for automatically inserting subtitles into videos on CapCut
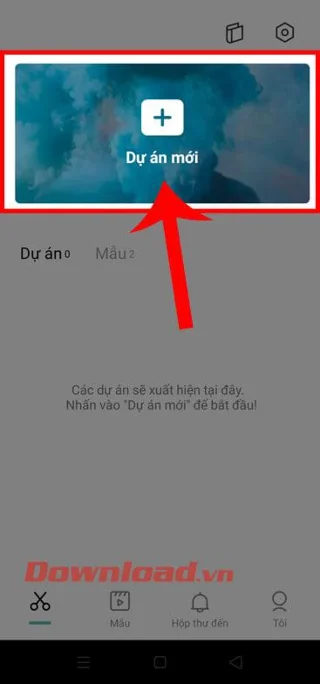
Step 1: First, open the CapCut application on your phone, then click on New Project .
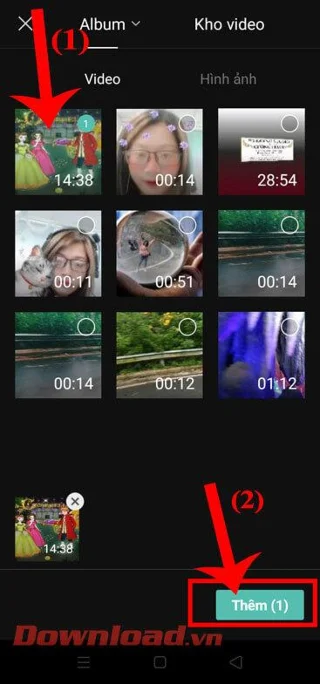
Step 2: Select a video for which you want to create subtitles, then click the Add button in the lower right corner of the screen.
Step 3: At the video editing interface, touch the T icon .

Step 4: To create subtitles for the video, we will click on Automatic Subtitles at the bottom of the screen.
Step 5: At this time, the Create automatic subtitles window will appear on the screen , set the sound and language for the subtitles. Then, tap the Continue button .
Step 6: Next, wait a moment for the application system to analyze and create subtitles for your video.
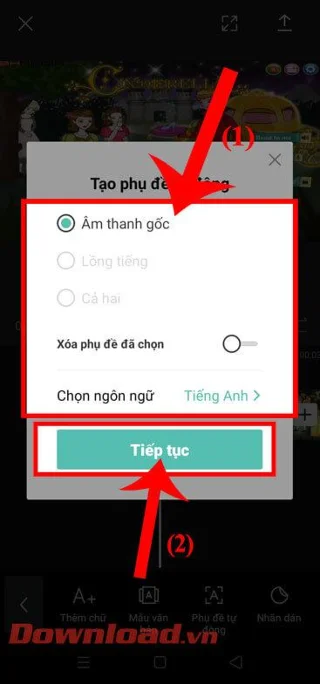

Step 7: After successfully inserting the subtitles, click the Play button icon to watch the video.
Step 8: Click the arrow icon in the upper right corner of the screen to save the video with subtitles.
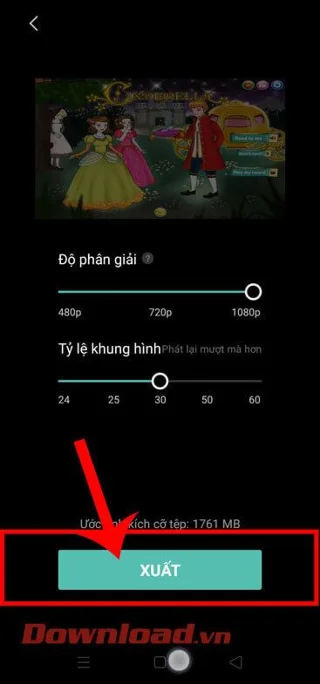
Step 9: Set Resolution, Aspect Ratio , then tap the Export button .
Hopefully, WebTech360's guide to creating subtitles for videos on Capcut will help you get a truly engaging and interesting video.
Wishing you success!
Set a backup destination, schedule, Mail coverage, and retention limit in ONLYOFFICE Workspace, then verify the archive is ready to restore.
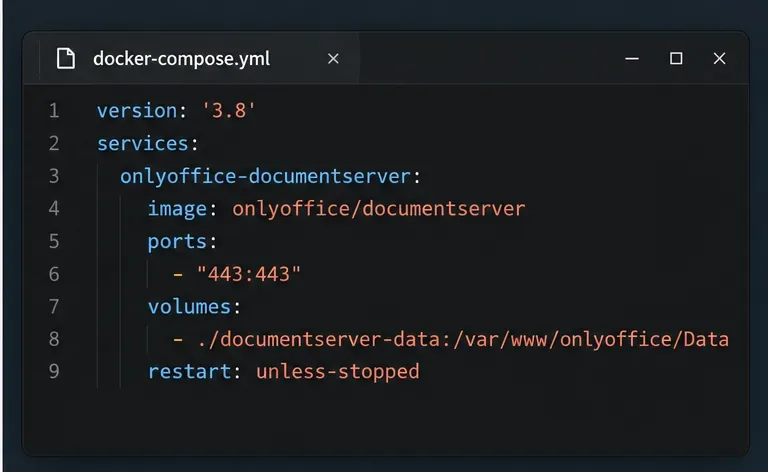
Start the Enterprise Docker Compose stack, persist its license and data, configure JWT safely, and confirm the editors are ready to integrate.
Use an ONLYOFFICE JavaScript macro to remove nonprinting characters and trim extra spaces from a defined spreadsheet range, with a safe review workflow.
Connect ONLYOFFICE DocSpace to Active Directory or OpenLDAP, import users and groups safely, map account fields, and schedule reliable synchronization.
Move portal data from Disk Default to a supported cloud storage provider, or relocate Docker data safely by changing its host volume mapping.
Identify whether Document Server uses a Linux package or Docker, remove only its components, and check remaining data without deleting shared services by mistake.
Trace slow collaborative editing to Docker resource pressure, proxy connections, or document load, then choose the fix that matches your measurements.
Install custom fonts in ONLYOFFICE Document Server, compare persistent Docker mounts with direct copies, rebuild the font list, and verify the result.
Choose where TLS should terminate, mount a trusted certificate and private key safely, and verify HTTPS access to a Dockerized ONLYOFFICE Docs server.
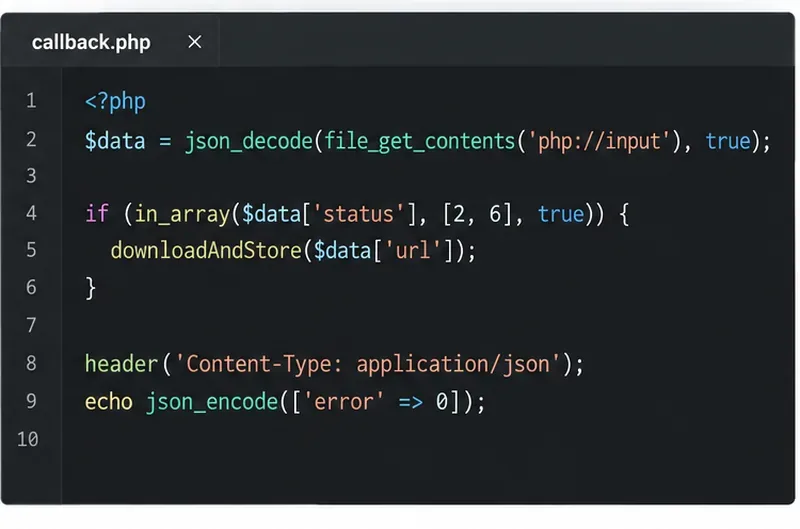
Embed the ONLYOFFICE editor in your PHP app, sign its configuration with JWT, and save edited files through a secure callback.