After a while using your computer starts running "lumbering", affecting work and makes you feel uncomfortable. So the reason is? And how to overcome this situation?
Usually when installing, removing software or changing settings, junk files will be generated. Long term, will make the system work slowly. So Wise Registry Cleaner will be a great solution for you now!
Unlike CCleaner , Wise Registry Cleaner not only cleans computer junk but it quickly locates and fixes problems that occur in the Windows Registry. Help you clean Registry, optimize the system, speed up the operation of your system.
Please refer to the installation and instructions for using Wise Registry Cleaner in the following article:
Instructions for installing Wise Registry Cleaner
Wise Registry Cleaner
Step 1: Double-click the file that you have downloaded in the download button above. The Wise Registry Cleaner installation window appears, click Next to continue the installation process.
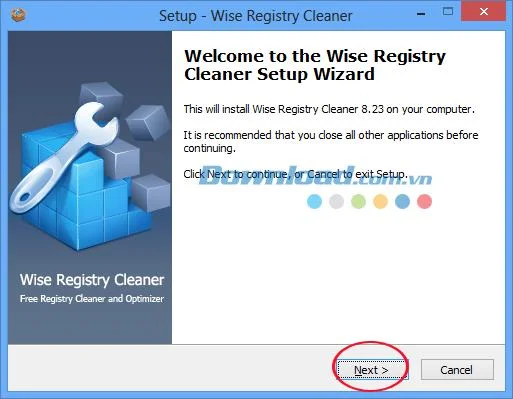
Wise Registry Cleaner installation window
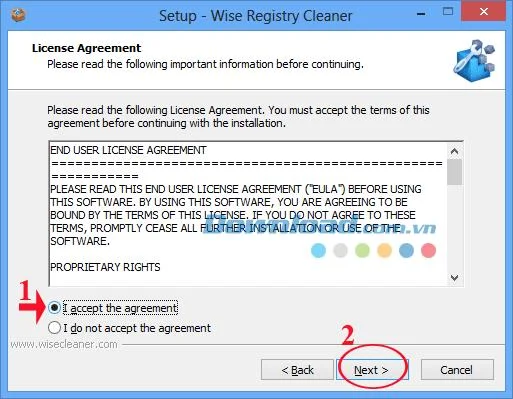
Step 2: The terms of use software window appears. Please carefully understand the terms that the manufacturer offers, then click I accept the agreement to install.

Agree to the terms when installing Wise Registry Cleaner
Step 3: The installation of Wise Registry Cleaner software is relatively simple, you just need to Next ... Next and then click Finish to finish the installation process.
Manual Wise Registry Cleaner
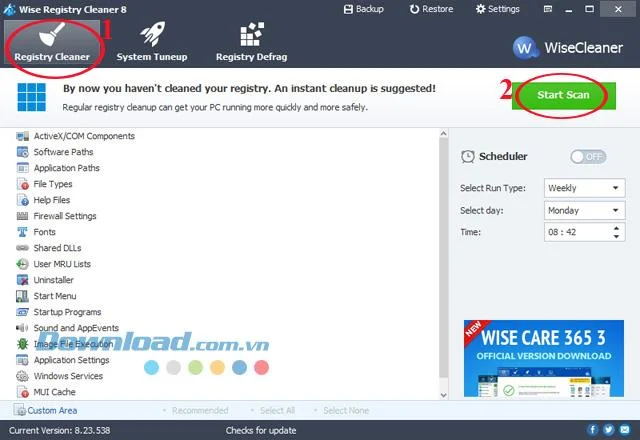
On the main interface of the program will have 3 tabs corresponding to the following 3 main functions:
- Registry Cleaner: Clean the Registry.
- System Tuneup: System optimization.
- Registry Defrag: Defrag the Registry.
Clean up the Registry
Step 1: At the Registry Cleaner tab , click the Start Scan button to start scanning all the system components listed in the list.

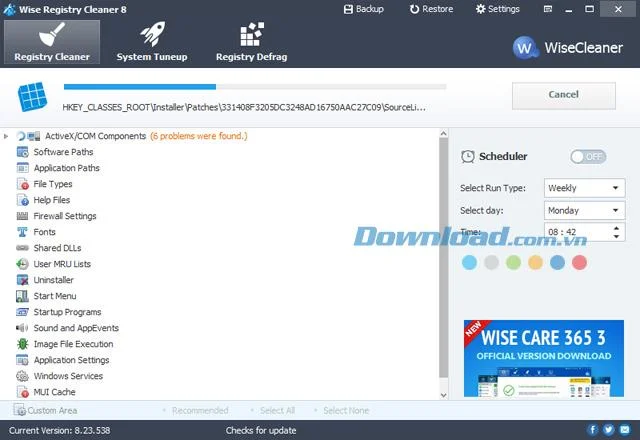
Step 2: Wait a moment for the program to scan:

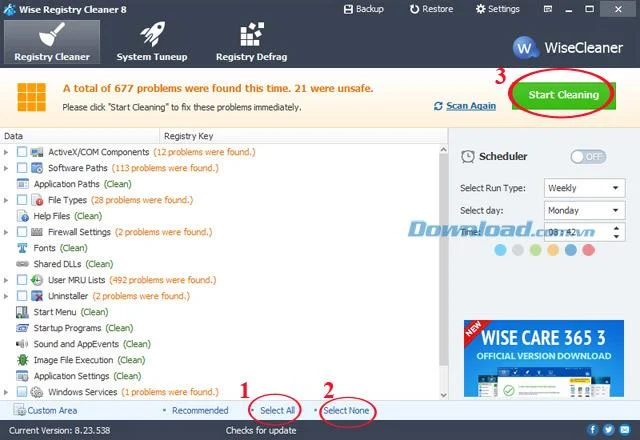
Step 3: After the scan is complete, you can click Select All to select all repairs or Select None to select some components to repair only.
Finally, click the Start Cleaning button to start the system cleaning.

System optimization:
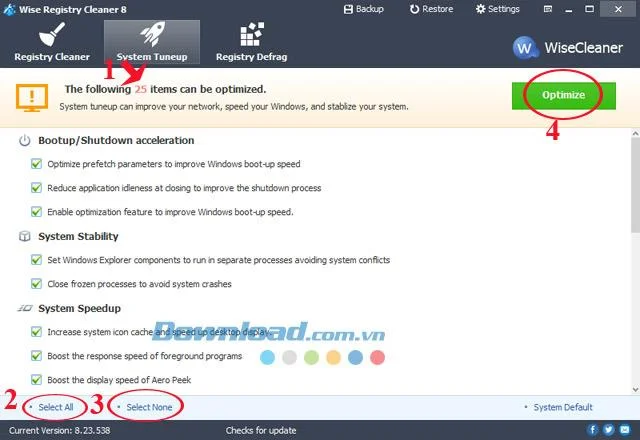
Click the System Tuneup tab, which gives you several options to optimize your system to achieve optimal performance when using the program.
There are 25 items that can be optimized, click Select All to select all or Select None to select a number of options to increase boot speed, turn off the computer faster than normal, speed up the process. manage the system, increase the speed of network access ...
Then click on Optimize to begin the optimization process.

Defrag the Registry:
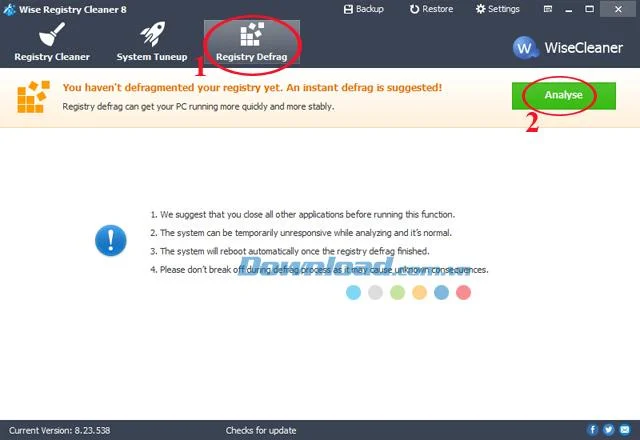
Step 1: Click the Registry Defrag tab , then click the Analyze button to analyze the entire Registry on your computer.

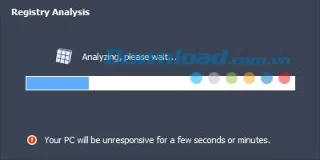
Step 2: Please wait for a while for the analysis process to finish.

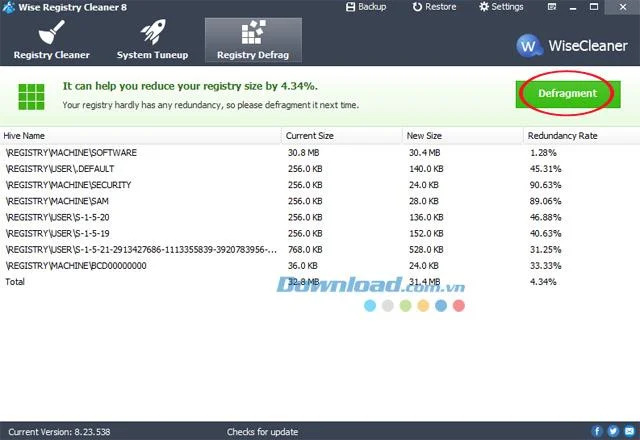
Step 3: After the analysis is complete, the program presents a fragmented list. Click on the Defragment button to defragment.

Step 4: A new window appears, informing you to save all your unfinished work because at the end of defragmentation, it will restart the computer. Click Yes to begin.

Note: During the defrag process, you must not turn off the program because it may cause unintended errors.
Optimize system schedule:
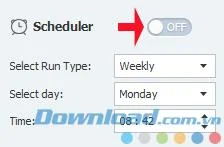
You just need to turn on the Scheduler function , then set some parameters below:
- Select Run Type: Set the scan mode weekly, daily, monthly, when the computer is idle or just logged in.
- Select day: Select days of the week.
- Time: Set the time.

Change language:
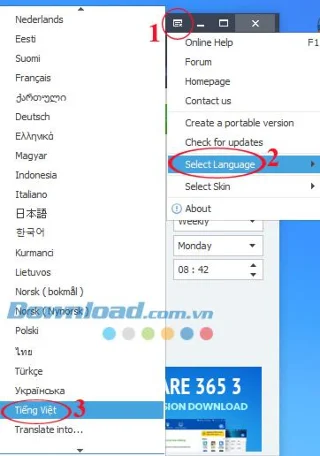
If you want to change the Vietnamese language, click the icon (as shown in the picture), hover over the Select Language line , select Vietnamese .

Similarly, if you want to choose another language, just tick the language.
So, you know how to use Wise Registry Cleaner to clean and optimize your computer system effectively already! In addition, you can use Wise Care 365 Free , Registry Easy , RegistryBooster 2012 . .. to clean the Registry, improve computer performance.
I wish you successful implementation!