Home
» Wiki
»
How to Create a Signature in Outlook to Make Your Emails Look More Professional
How to Create a Signature in Outlook to Make Your Emails Look More Professional
Need to add a signature in Outlook? Don't know how to create an Outlook signature? In fact, it's easy to add a custom email signature with linked images and company logos in Outlook for Windows. You can choose your own font, color, and style it with the detailed instructions below.
Create and add email signatures in Outlook 2007
Using Outlook's Signature feature will add a personal signature to all your emails so you don't have to re-enter the same information in all your emails. The following steps will help you do this.
Create signature
1. From the Tools menu , select Options... The Options dialog box appears.
2. Select the Mail Format tab .
3. In the Signatures section , click SIGNATURES... The Signatures and Stationery dialog box appears.
steamed into SIGNATURES...
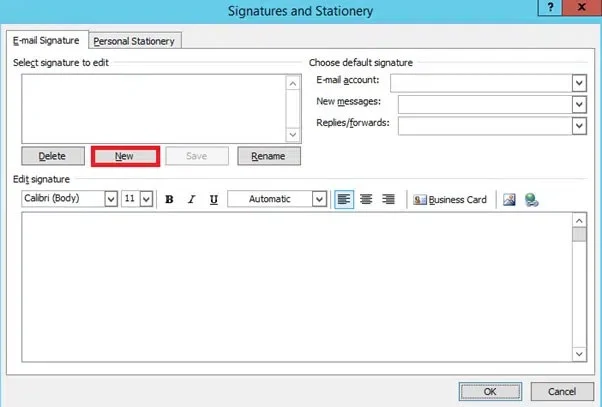
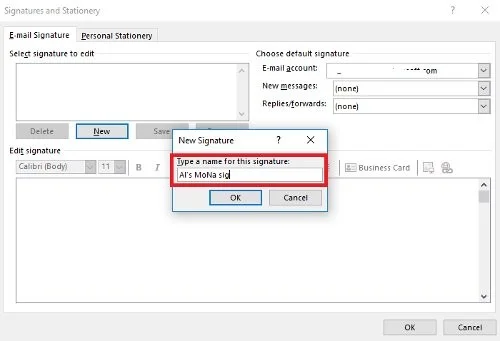
4. To create a new signature, click NEW. The New Signature dialog box appears.
Create new signature
5. In the Type a name for this signature text box , type a short descriptive name for the signature.
6. Click OK.
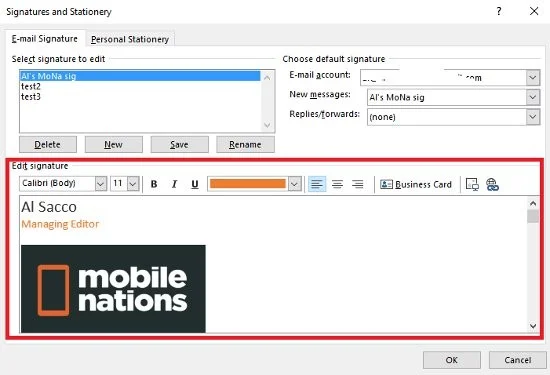
7. In the Edit signature section, enter your signature.
8. (Optional) To format the text in Signature , from the pull-down menu, make any desired changes
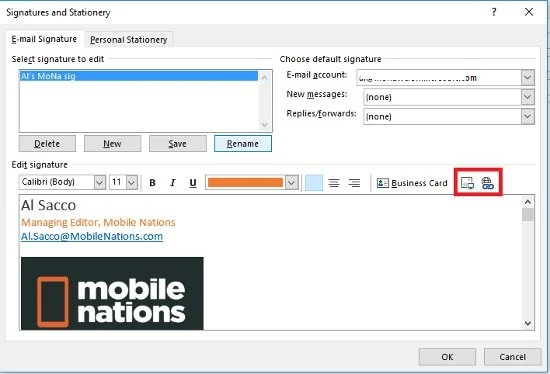
NOTE : You can add photos and links to your signature by clicking the ADD PICTURE or ADD HYPERLINK button located at the far right of the Edit signatures section .
9. Click Save to save. Your signature will be saved.
NOTE : If there is only one signature, nso will become the default signature for new emails.
10. Click OK. You are returned to the Options dialog box.
11. Click OK. The Options dialog box will close.
Assign a default signature
If you've used the Signature feature to create multiple signatures, use the following instructions to set a default signature. The default signature is added to all your new outgoing messages. The signature set in the Replies/forwards drop-down list will be added to your outgoing and forwarded messages instead of the default signature. You can also apply any signature you've created to just one message.
1. From the Tools menu , select Options... The Options dialog box appears.
2. Select the Mail Format tab.
3. In the Signatures section , click Signatures... The Signatures and Stationery dialog box appears.
4. In the Choose default signature section, from the New messages drop-down list , select the signature you want to place on your new outgoing emails.
5. From the Replies/forwards drop-down list , select the signature you want to place on your outgoing replies and forwards.
NOTE : If you do not select a signature from the Replies/forwards drop-down list , it will not automatically add any signature to your outgoing replies or forwards.
6. Click OK. The Signatures and Stationery dialog box closes.
7. Click OK. The Options dialog box will close.
Add a signature to a specific email
While the default signature can be used, it is also quite simple to add a specific signature to a specific email without changing the default signature. You may want to do this if the signature is only required in rare cases.
1. Create email.
2. If you need to delete an existing signature:
Select the Signature text .
Press [Delete]
3. Place the insertion point where you want the new signature to appear
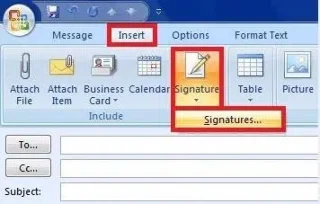
4. On the Insert tab , select Signature , and then select the desired signature.
OR
On the Message tab , in the Include group , click Signature and select the desired signature
The signature will be inserted.
5. When you are ready to send your email, click SEND. Your email will be sent.
Create and add email signatures in Outlook 2010 - 2019
The following method of creating a signature in Outlook can be applied to Outlook versions 2010, 2013, 2016, 2019.
To add a signature to an email in Outlook, follow these steps:
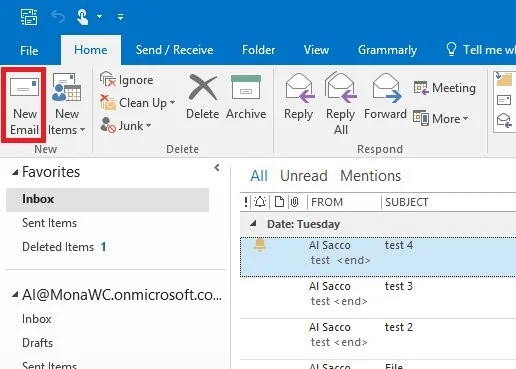
Step 1: Click Home on the toolbar.
Step 2: Click New Email in the top left corner of the screen.
Step 3: A new mailbox appears, click Message and select Signature in the Include section .
Step 4: In Email signature , click New .
Step 5: In the Type a name for this signature section , enter the name of the signature.
Step 6: Press OK
Step 7: On the next screen, check the signature name under Select Signature to Edit .
Step 8: In the large blank box below Edit Signature, enter your name, title, company name, email address, social media information, or other personal information you want to appear in your new signature.
Under Edit signature, there are different font options and formatting options. You can create rich styles and borders to make it unique.
Step 9: Add a custom image such as a company logo, locate where you want to insert the image and click the Insert picture icon .
Step 10: Select the image in your computer's file browser and select Insert .
Step 11: To insert a website link into an image or logo, or any text in your signature. First, highlight the image or text you want to insert.
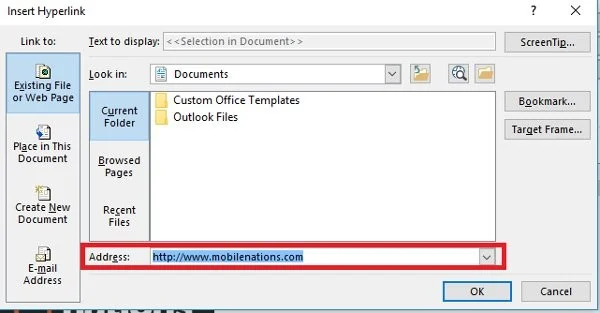
Step 12: With the image selected, click the Insert Hyperlink icon .
Step 13: A new window appears, enter the full URL of the website in the last box. Then press OK .
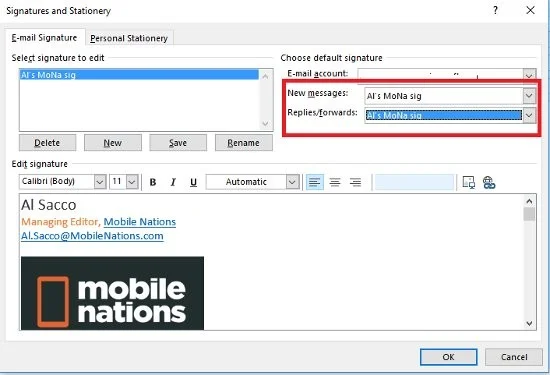
Step 14: Set preferences for New messages and Replies/Forward .
If you want to apply the signature to all new messages, select the signature name from the New messages drop-down menu .
If you want to use it for replies or forwards, in the drop-down menu select the signature name of Replies/Forward .
Furthermore, if you do not want to apply the signature to new messages, replies or forwards, select (none) for the appropriate menu.
Step 15: After setting up, press the Save button below.
Step 16: Finally, select OK in the Signatures and Stationary box to save the changes.
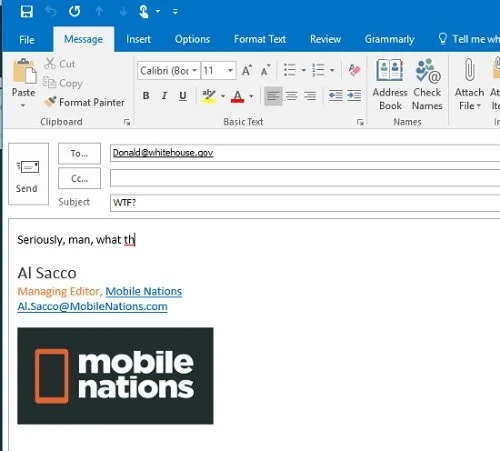
When you open a new mailbox, reply, or forward another message, the signature automatically appears at the bottom of the page.
How to add a signature in the Outlook 365 web app
1. Click the gear icon in the upper right corner of Outlook 365.
2. Type “signature” into the search box at the top of the Settings panel.
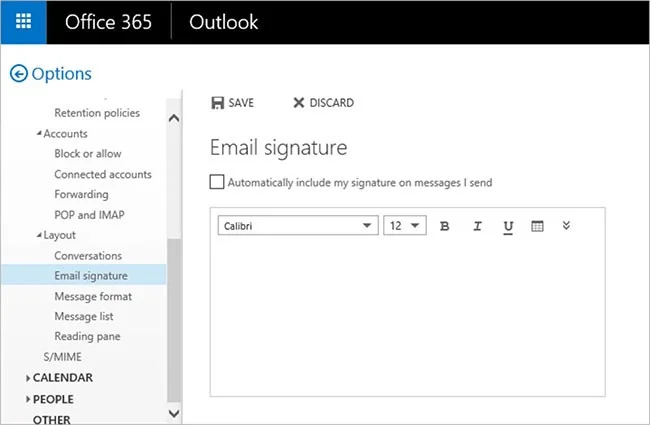
3. Select the "Email signature" result .
4. Create a new signature using the in-app signature editor.
Add a signature in the Outlook 365 web app
5. Click “Save” when you are done.
How to add a signature on Outlook mobile app
1. Launch the Outlook mobile app on your Android or iOS device.
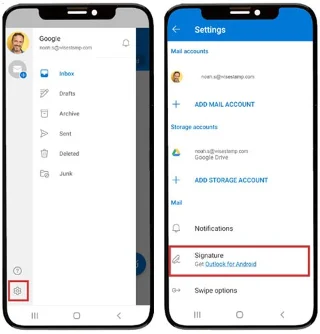
2. Tap your account picture in the top left corner.
3. Click the gear icon in the bottom left to open Outlook settings.
4. Tap Signature to open the signature settings.
Add signature on Outlook mobile app
5. Enter your information in an organized manner.
6. Tap the check mark in the top right to complete the setup.
So you have completed creating a signature in Outlook. You can add multiple signatures to use for different partners with the same operations as above.
How to edit signature in Outlook
Whether you're using the desktop version of Outlook or Outlook.com, it's easy to update your signature. Here's how to change your signature in Outlook:
Change email signature in Outlook for Windows
If you're using Outlook for Windows:
Open Outlook and click the File tab.
Click Options and select Mail.
Scroll down to the Signatures section and click the Edit button.
Make your changes in the Signature Editor and click OK.
Your changes will be saved automatically.
Update signature in Outlook for Mac
If you're using Outlook for Mac:
1. Open Outlook and go to the Preferences menu.
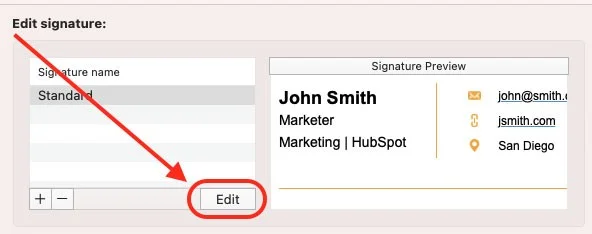
2. Click the Signatures tab and then select the signature you want to edit under signature name.
3. Click Edit and make your changes
Click Edit
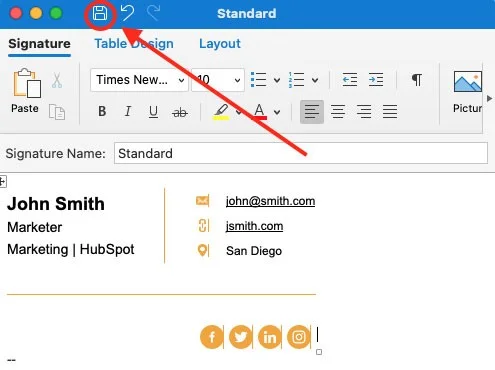
4. Click the Save icon to save your changes and then close the window.
Save changes
Change your signature in Outlook 365
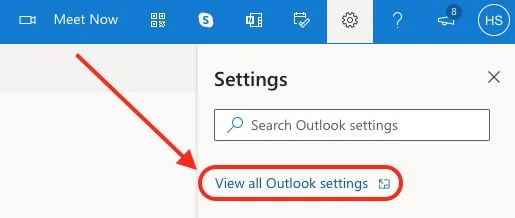
1. Sign in to your Outlook account and click the gear icon in the upper right corner.
Go to Outlook settings
2. Select View all Outlook settings from the drop-down menu.
Select View all Outlook settings
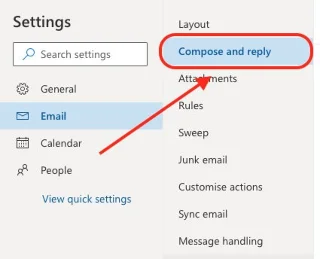
3. Click Email in the left sidebar, then click Compose and Reply .
Click Compose and Reply
4. Under Signature , enter your signature changes in the text box provided.
5. Scroll down to the bottom of the page and click Save to save your changes.
Updating your signature in Outlook is a quick and easy process that only takes a few minutes to complete. Whether you're using the desktop version, Outlook.com, or Outlook on the web, you can easily update your signature to reflect any changes.