Fixing images in Excel cells helps you easily manage images when inserting images into Excel , the image does not change position or size when processing other content. Images when fixed in cells cannot be moved to another position, so you can easily merge them with different content, similar to the operation of fixing shapes in Excel . Depending on your need to fix images in Excel cells when working in data, you can choose to fix images but still move or fix images but still change size. Below are instructions for fixing images in Excel cells.
Instructions for fixing images in Excel cells
Step 1:
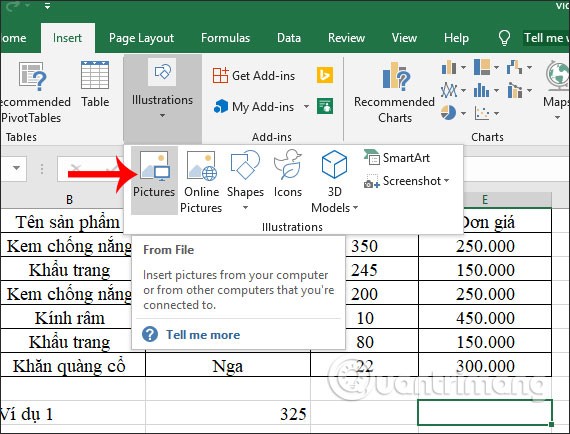
In the cell where you want to insert the image, click Insert and then select Picture to select the image you want to insert. Then we adjust the image in the cell accordingly.

Step 2:
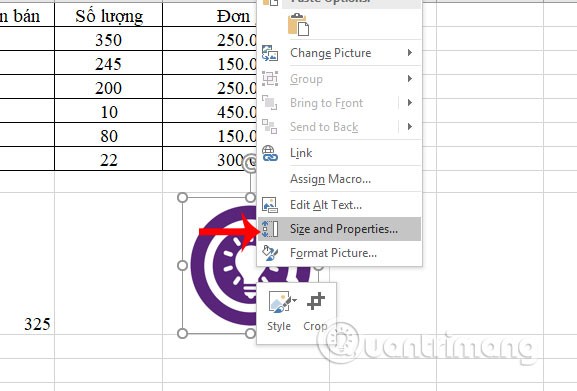
Right-click on the image and select Size and Properties… from the displayed list.

Step 3:
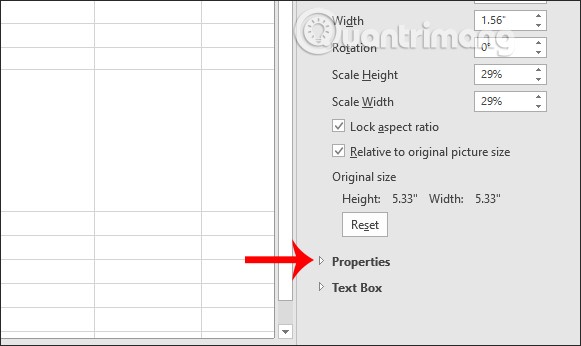
Then on the right side of the interface displays the image editing frame. We continue to click on Properties to adjust the image inserted in the Excel cell.

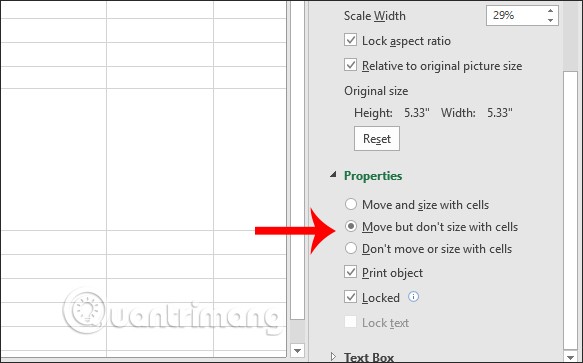
Then there are 3 options to fix the inserted image in Excel including:
- Move and size with Cells: images or frames can move, resize when users resize rows and columns.
- Move but don't size with Cells: the image can be moved but cannot be resized when resizing rows and columns.
- Don't move or size with Cells: the image cannot be moved or resized when you resize rows and columns.
We choose the type of image fixation in the Excel cell we want to use, depending on the requirements to fix it.

With just a very simple setting, the image inserted in an Excel cell will not change in size, or move if you change rows or columns. The image will be fixed in the exact position you insert it in the data table.
Good luck!


