With any conversation we have on Zalo , all the images, videos, links, files that we have sent will be saved in the Archives by this application's system . However, when we review the images, files, and links we sent, we often have to pull up the conversation to find them, which makes it take users a lot of time to find them again.
To help people quickly find sent data , Download.vn would like to introduce the steps to review all photos, videos, files and links shared via Zalo extremely simply and easily. done, invite you to follow the article.
Video tutorial to review all photos, videos, files and links shared via Zalo
How to review all photos and videos sent via Zalo on PC
Step 1: First, open the Zalo PC application on your computer or access Zalo Web on your browser.
Step 2: Click on the individual/group chat where we want to review the sent images and videos.
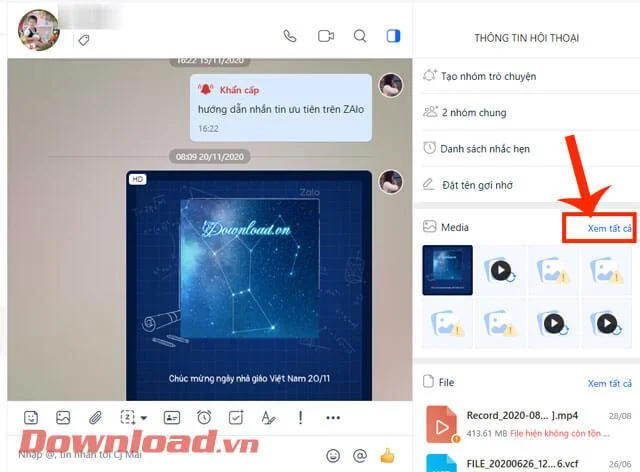
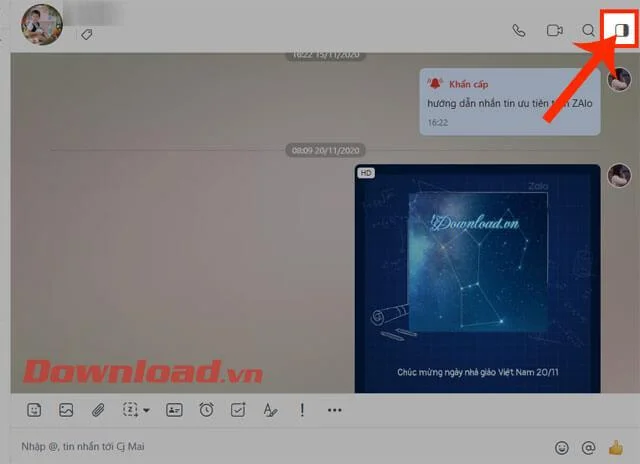
Step 3: Click on the square icon in the upper right corner of the conversation.
Step 4: Now all the information of the conversation will be displayed, click See all , in the Media and File sections, to see details of the images, videos, and files that you and your partner shared. that friend shared with each other.

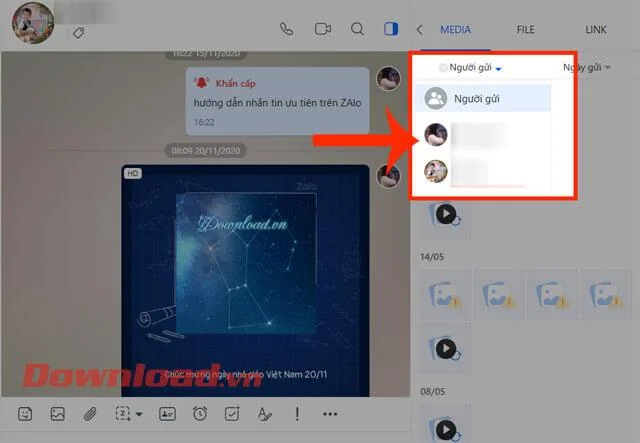
Step 5: To view the images and videos I sent, click on the Sender section , then select your Zalo account .

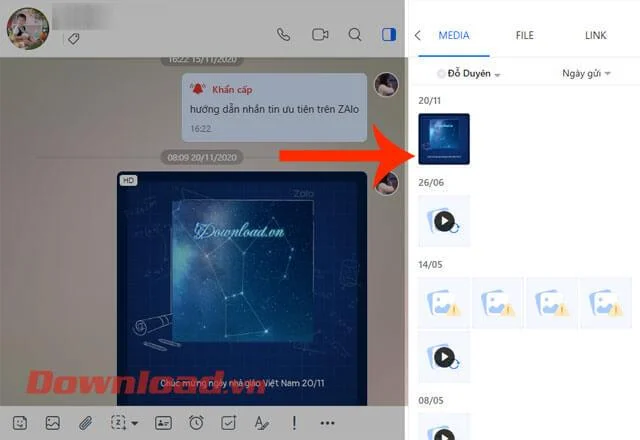
Step 6 : At this point, all the data you have sent will be displayed in the Conversation information section .

How to find data shared via Zalo on your phone
Step 1: Open the Zalo application on your phone, then go to any conversation between you and a friend or group.
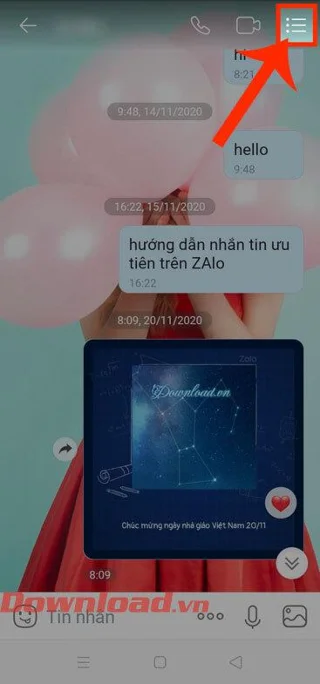
Step 2: At the conversation interface, click on the three dashes icon in the upper right corner of the screen.
Step 3: In the Options screen , click on Repository .
Step 4: Now all the data that you and your friend have sent will appear, and divided into categories such as: Photos, Links, Files.


Wishing you success!