Changing text direction or rotating tables in Microsoft Word is quite easy. Here's how to rotate a table in Word .
- Download Microsoft Word
- Download Microsoft Word Online
- Download Microsoft Word for iOS
- Download Microsoft Word for Android
How to rotate a table in Microsoft Word
How to create tables in Microsoft Word
If you already know how to create tables, you can skip this step. If you don't know, follow the detailed step-by-step instructions below:
- Open Microsoft Word on PC, select Blank document to create a document.
- Select the Insert menu from the toolbar > Insert Table .
- Enter the number of rows and columns you want to create the table for, then tap OK .
- Additionally, move the cursor over the table structure provided to select rows & columns in the table, left click to insert the table.
How to rotate a table in Microsoft Word
After you have created a table, you have 3 ways to rotate the table in Word.
1. Change text direction
The easiest way to rotate a table in Word is to use the available Text Direction feature. This isn't a way to actually change the direction of the board, but it will help you flip the board easily.
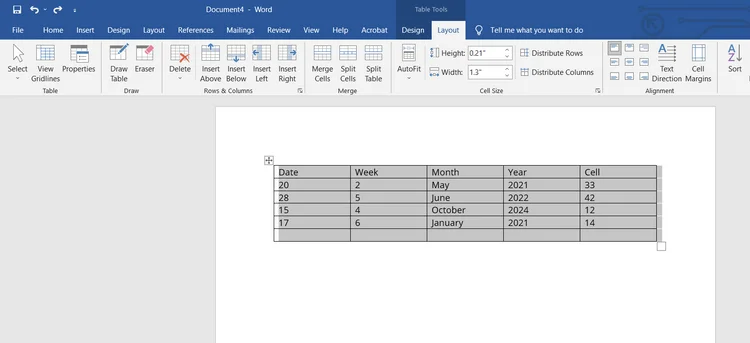
1. Select the entire table by moving the cursor over it and pressing the 4-way arrow present at the top.

2. Select the Layout tab from the top menu bar.

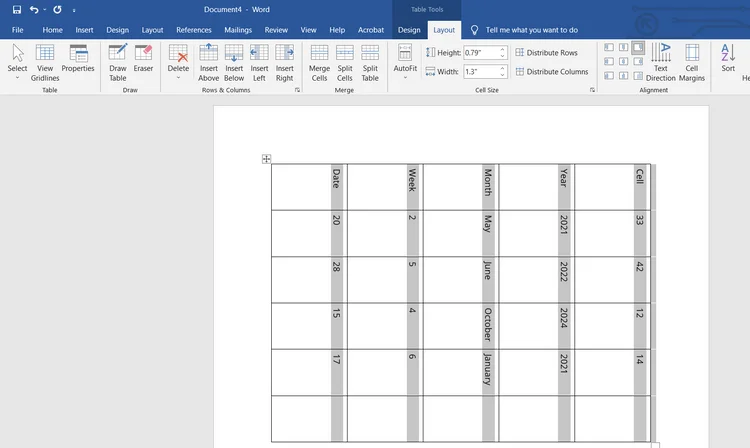
3. Tap Text Direction from the toolbar. Word will rotate all text in the table clockwise 90 degrees. Touching Text Direction again will flip the text from 90 degrees to 180 degrees.

It's easy to see that Text Direction does not give you full authority to rotate the table angle as you like. In fact, it doesn't rotate the table, only the text inside.
To have complete control over table rotation in Word, you need solution number 2.
2. Convert table to image
This method gives you the freedom to rotate the table in Word. However, you cannot edit the table.
1. Open the Word document with the table you want to rotate.
2. Select the entire table by moving the cursor above and touching the 4-way arrow button.
3. Right-click anywhere in the table and select Copy . Alternatively, you can use Ctrl+C on Windows or Cmd+C on Mac to copy the table.
4. Delete the original table.
5. Click the same point on the document that contains the original table.
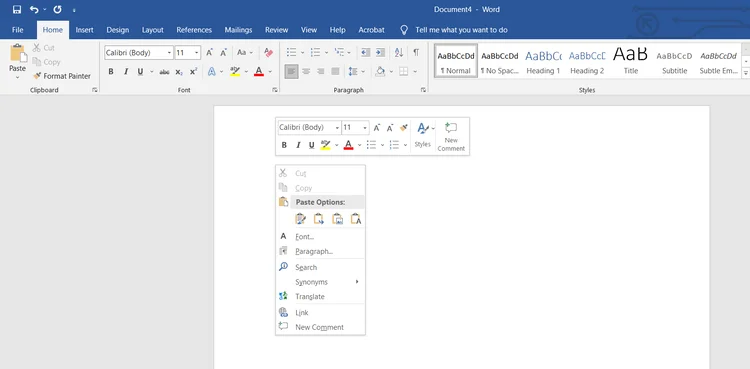
6. Right-click and select Picture (shown as clipboard) in Paste Options .

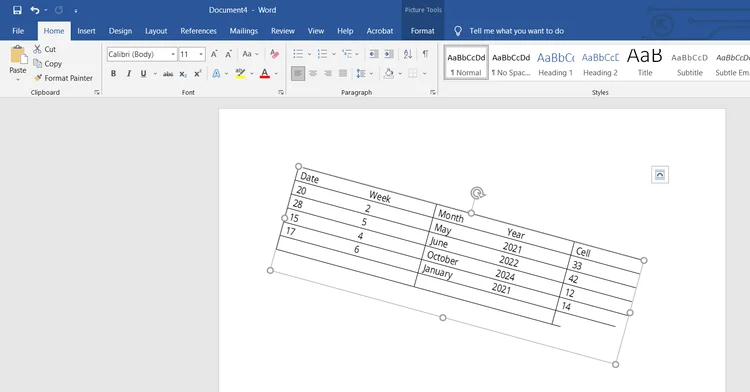
The time table will be pasted as an image. With table images, you can freely rotate them as you like.
7. Click on the image to select it, then place the cursor on the rotate icon at the top of the table.

Hold down the left button on the mouse, then rotate the table in Word in the direction you want.
3. Use Microsoft Excel
If you use Word, you can also use Excel. In the third and final method, using Excel will help you rotate the table in Word.
1. Copy table in Microsoft Word.
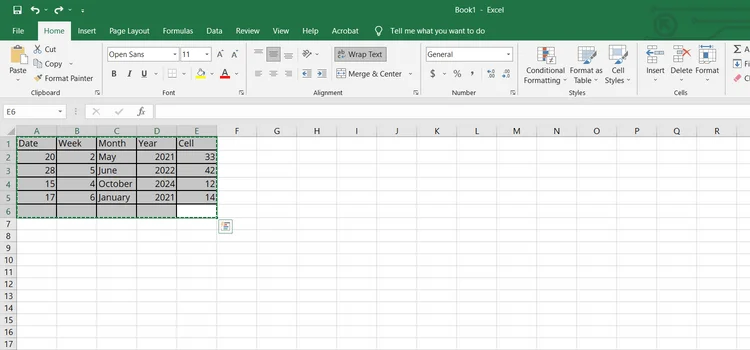
2. Open Microsoft Excel, create a new document by selecting Blank Workbook .
3. Paste the table using Ctrl+V or Cmd+V .

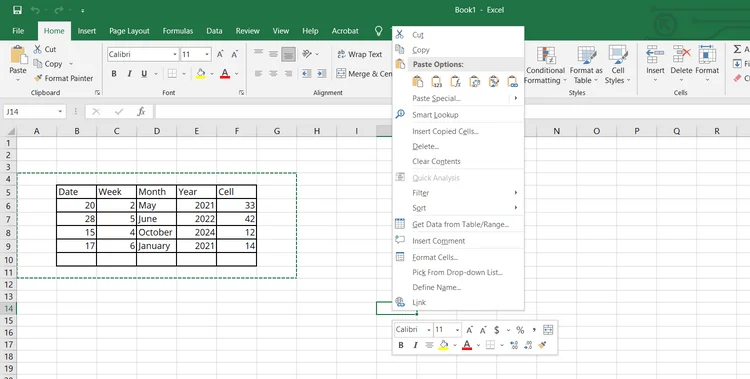
4. Copy the pasted table in Excel.
5. Click on an empty cell and right click. A pop-up menu appears.
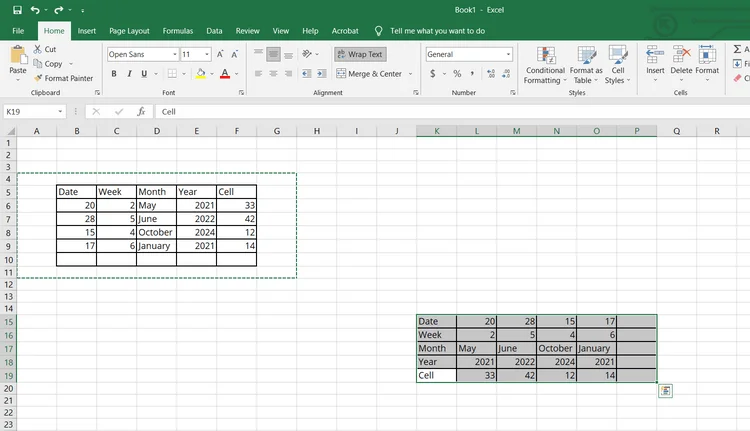
6. Select Transpose in Paste Options . If you can't find this option, go to Paste Special > Transpose .

The above option will rotate the table in Word from portrait to landscape mode.

7. Next, copy the rotated table and paste it inside the Word document.
Above is how to rotate a table in Word . Hope the article is useful to you.