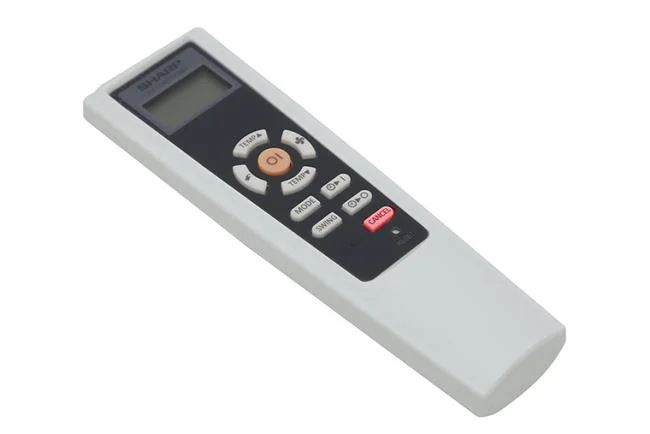
With the following article, WebTech360 will join you to learn about how to use Sharp AH-A9PEWS, AH-X9NEWS, AH-A12PEW air conditioner in the most effective way.
Quick view
1. Table of buttons of Sharp air conditioner remote
2. The display screen of air conditioner remote
3. Timer shutdown
4. Extreme cooling mode
5. How to adjust the wind direction
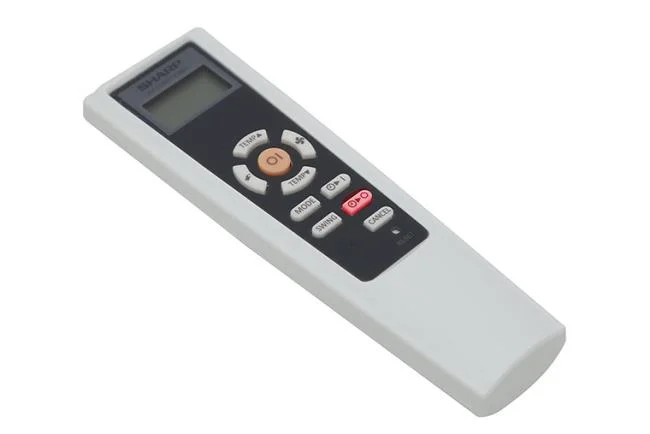
1 Panel of buttons of Sharp air conditioner remote
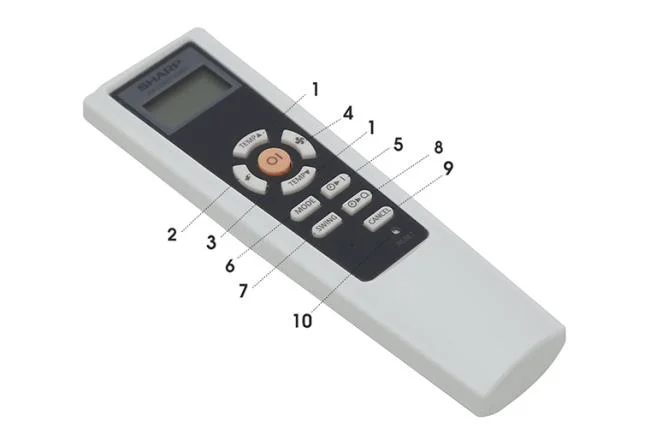
Control of Sharp air-conditioning
1. Temp: Set the temperature according to your preference
+ Auto / Dry mode: Adjusted temperature increases and decreases within ± 2oC compared to room temperature
+ Cold mode: The temperature can be set in the range of 16-30oC
2. Powerfull Jet (Extreme cooling mode): The machine will operate with maximum capacity and will adjust the optimal flap so that the room is cooled the fastest.
3. Power button (ON / OFF): Start the machine.
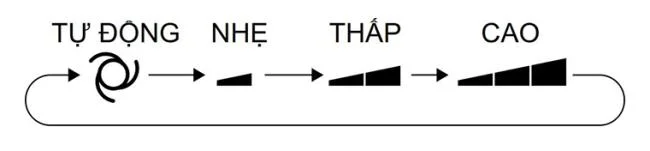
4. Fan (fan speed setting): You can adjust the fan speed as desired. There are 4 different fan speeds available: Automatic -> Light -> Low -> High

4 fan speeds of the machine
5. Timer On: Timer opening machine
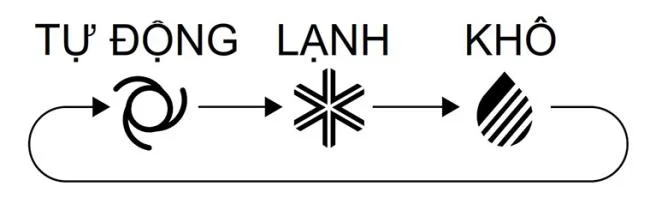
6. Mode: The machine has 3 operating modes for you to choose from: Automatic, cold, dry.

Sharp air conditioner mode
+ Automatic: The machine automatically sets the temperature, fan speed according to the temperature in the room with the pre-installed sensor temperature.
+ Cold: The mode will give you a chilly, cool atmosphere. Very suitable for crowded rooms or sunny noon, hot air.
+ Dry: The mode not only cools but also dehumidifies your room, returning the air to dry and fresh.
7. Swing: Helps you to adjust the wind direction as desired
8. Timer off: Timer shutdown
9. Cancer timer button: Deletes timer settings.
10. Reset button: Erases all current settings and return to the original default of the machine
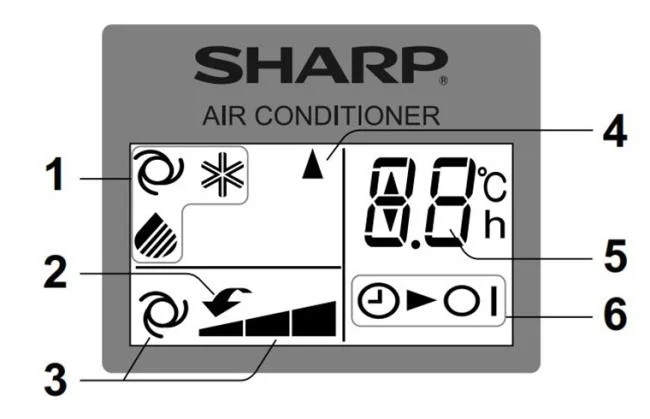
2The display screen of air conditioner remote

Sharp air conditioner remote display screen
1. Symbols of the cooling mode
2. Strong cooling function designation
3. Fan speed designation
4. Signal is transmitting
5. Temperature indicator and countdown time setting
6. Turn on timer indicator light
3 Timer shutdown

First we press the Time Off button

Then set the time as desired
After successful setting, the indicator light "Clock" will light up on the remote screen.

To cancel the off timer setting we press the Cancel button
Note: To set the timer to turn on the phone, do the same with the shutdown setting.
+ Minimum installation time is 30 minutes and maximum is 12 hours.
+ You cannot set 2 shutdown and open modes at the same time
+ If power is lost, all settings will be canceled after power is restored
Shutdown timer: When setting off timer, the machine automatically adjusts the set temperature to avoid over cooling while you are sleeping. After 60 minutes of installation, the temperature will increase 1oC compared to the original temperature
Timer to turn on the machine: The machine will be turned on before the set time so that the room can reach the desired temperature on time.
4Extremely cooled mode
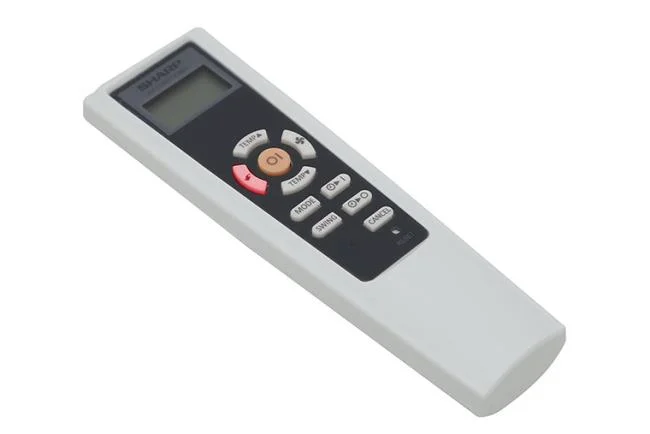
The machine will operate with maximum capacity and adjust the optimal flap so that the room is cooled the fastest.

While doing this you press the Powerful Jet button (highlighted in red on the image).
To cancel the mode, press the Powerful Jet button again. When the room has reached the desired mode, please turn off the mode to avoid wasting electricity
Note:
+ The fan of the machine will operate at extremely high level for about 30 minutes, then switch to high level
+ In this mode, you do not need to set temperature or fan rotation speed
5 How to adjust the wind direction

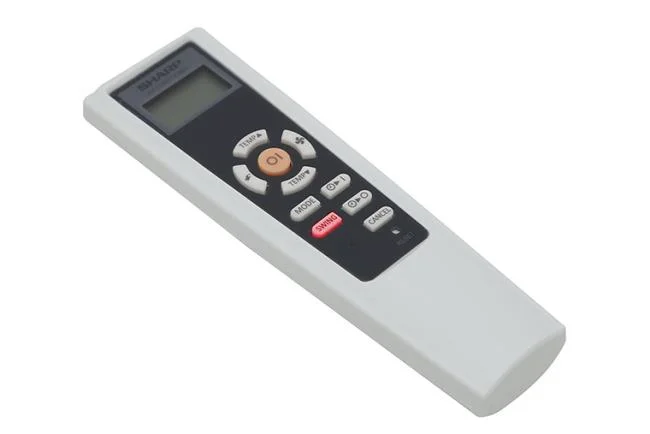
Press the Swing button to adjust the wind direction
Step 1: Press the Swing button. The vertical flap will oscillate
Step 2: Press the Swing button again to stop at the desired position.
Attention:
+ Do not adjust the vertical island by hand
+ Adjust the vertical flap at a low position in the cold or dry mode for a long time, condensation will appear.
See more:
Use the air conditioner so that it is durable and efficient
10 ways to save energy when using an air conditioner
WebTech360 believes that, with the above sharing, you can use your air-conditioner more efficiently and economically. You will have a space to relax and work comfortably with the usefulness that Sharp air conditioning brings.