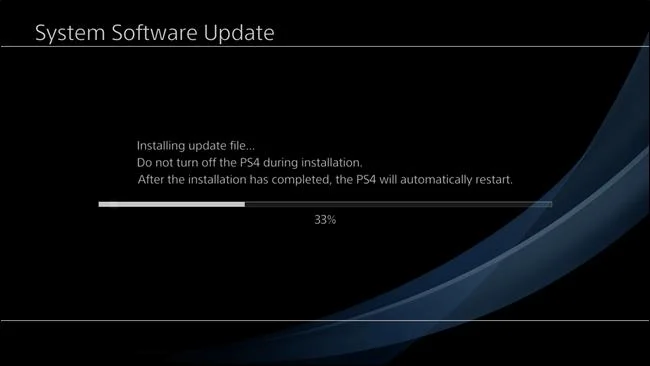
Sony is very good at the task of regularly updating the PlayStation "family". Therefore, you can easily install them without any problems. If you have problems downloading or installing automatic updates, you can always upgrade your PS4 manually.
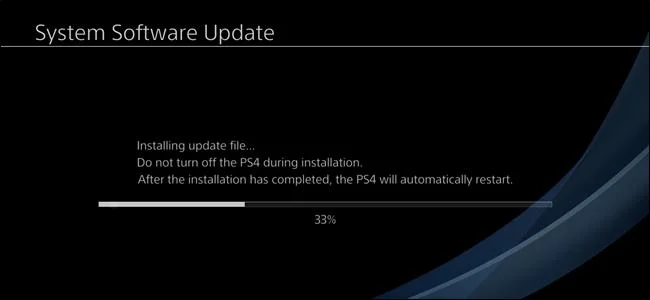
Most of the time, you can rest assured the PlayStation will automatically download system updates. However, if the update fails, you will need to download and install it yourself. This usually happens when the PS4 doesn't have wifi access. The good news is that manual PS4 installation is easy. You have two ways to do that: via the system menu and in safe mode. You should start with the system menu, and if that doesn't work, switch to Safe Mode.
Before you begin, you need:
- Network connection for a number of devices: phones, computers ...
- USB flash drives have enough storage space to download updates (from 8 GB or more).
- Latest update file
- Micro USB cable (if you need to install the update in Safe Mode)
Note: If you download the update file using your phone, you will need a flash device compatible with the handset.
After everything is ready, you can start a manual update of the PS4.
How to install the PS4 update from the system menu

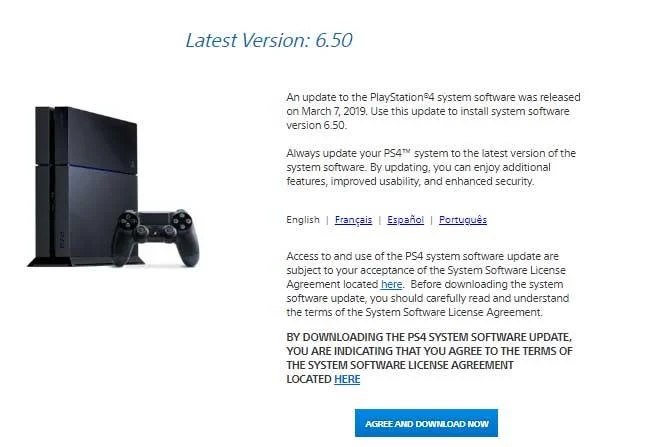
First, download the latest PlayStation System Update . Next, you need to transfer the update to the flash drive. You will need to create several directories on the flash drive before copying the update file.
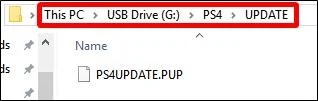
First, create a folder named PS4, then create an UPDATE folder inside. Use all uppercase letters for both folder names. Finally, copy the update file you downloaded into the UPDATE folder .

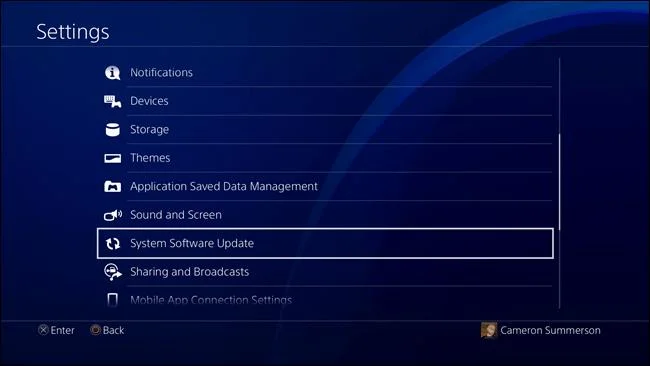
Once the update file is in the right directory structure, plug the filash drive into a PS4 USB port, then open the Settings menu . Scroll down a bit, then select the " System Software Update " item . When you do this, the PS4 will automatically find the update file on the flash drive and install it.

If all went well, you've successfully updated the PS4. If not, you will need to try installing it from Safe Mode.
How to install the PS4 update using Safe Mode
If automatic and manual updates via the system menu fail, updating via Safe Mode is essentially a process of "forcing" a system to update PS4.
You need to set up the flash drive as described in the previous section. Download the update file, create a PS4 / UPDATE directory structure on the flash drive, and then move the update file into the UPDATE folder.
Next, you need to unmount the external storage that has been attached to the PS4. If more than one drive is attached, the PS4 will not know where to check for updates. Just make sure to unmount the external storage using System > Storage menu - don't just uninstall it. When the update process is completed, you can remove the mount drive.
For all other non-connected external drives, continue the process and turn off your PS4 completely.
When the lights off indicate that the system has completely stopped working, insert your flash drive, then press the PS4 power button and hold it for a while. You will hear a beep when the system is on, but keep holding the button until it beeps again. This process takes about 7 seconds. The second beep signals the system to enter safe mode.
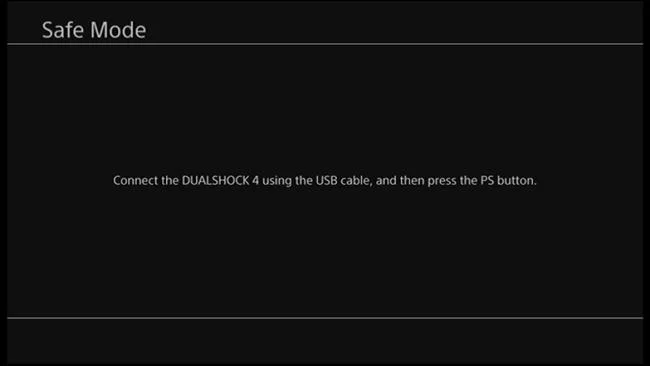
When the system is on, connect the DualShock controller via USB, then press the PS button.

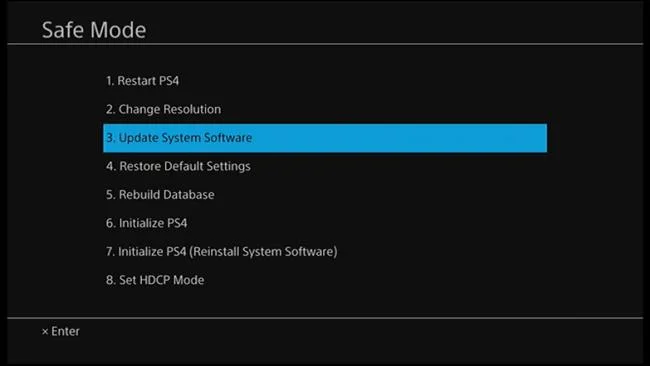
When the Safe Mode menu loads, select " Update System Software " to open the update menu.

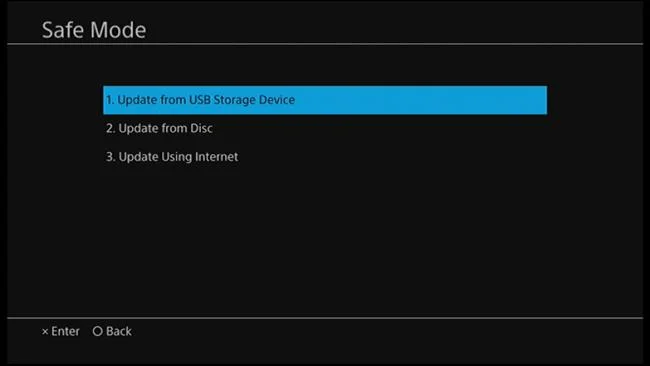
On the next screen, select " Update from USB Storage Device ". If the flash drive is not connected, plug it into the system. Just select " OK " to continue when connecting the drive.

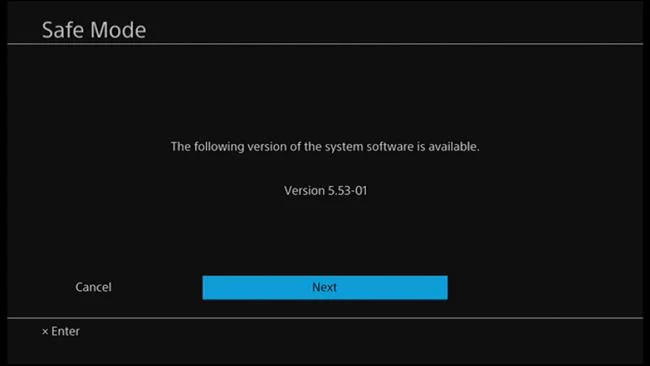
The PS4 will search for the update file for a few minutes, and then notify you of the available system updates. Click " Next " to install it.

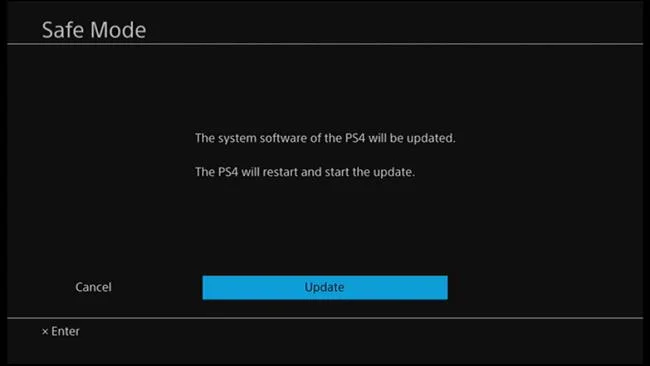
It takes a few seconds to copy the PS4 update file from the flash drive. When the process is complete, click the " Update " button to reboot the system and install the update.

After restarting the PS4, it starts to update. You can relax while waiting for the process to complete. Finally, the PS4 will reboot, you will have the latest version on the system.

Simple and easy right? Hope the article is helpful to you.