Press and hold the Fn (Function) key to see F1 through F12 in your Touch Bar.
Show the function keys
Press and hold the Fn (Function) key on your keyboard to see F1 through F12 in the Touch Bar.
You can also make the function keys appear automatically when you use specific apps:
- Choose Apple menu > System Preferences, then click Keyboard.
- Click Shortcuts at the top of the window, then select Function Keys from the list on the left.
- Click the add button (+), then select an app and click Add. For each app that you add, the function keys will automatically appear in the Touch Bar whenever you're using that app.
Or use the onscreen keyboard
As an alternative to showing the function keys in the Touch Bar, you can use the function keys in the onscreen keyboard.
- Choose Apple menu > System Preferences, then click Keyboard and complete one of these steps:
- If you're using macOS Big Sur, select "Show Input menu in menu bar" in the Input Sources pane.
- If you're using macOS Catalina or earlier, select ”Show Keyboard and emoji viewers in menu bar” in the Keyboard pane.
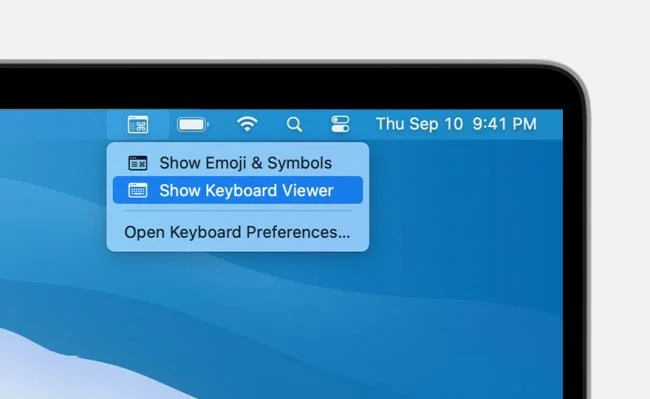
- Click the viewer icon
 in the menu bar, then choose Show Keyboard Viewer.
![]()
- Click the Fn key in the onscreen keyboard to make it show all function keys.
Show the function keys when using Microsoft Windows
Press and hold the Fn (Function) key on your keyboard to see F1 through F12 in the Touch Bar.
You can also make the function keys appear continuously in the Touch Bar:
- From the notification area on the right side of the Windows taskbar, click the up arrow
![]() to show hidden icons.
to show hidden icons.
- Click the Boot Camp icon
![]() , then choose Boot Camp Control Panel from the menu.
, then choose Boot Camp Control Panel from the menu.
![]()
- If you're asked whether to allow this app to make changes, click Yes.
- Click the Keyboard tab.
- Select ”Use all F1, F2, etc. keys as standard function keys”.
Or use the onscreen keyboard
As an alternative to showing the function keys in the Touch Bar, you can use the onscreen keyboard:
- From the Windows menu, select Windows Ease of Access.
- Click On-Screen Keyboard.
- Click the Fn key in the onscreen keyboard to make it show all function keys.
How to use the function keys on your Mac
You can use the top row of keys on your Apple keyboard as controls for built-in Mac features or as standard function keys.
Control features on your Mac
By default, the top row of keys on your Apple keyboard control many different features on your Mac. For example, pressing the keys with speaker icons adjusts the volume.
![]()
If your Mac has a Touch Bar, learn about using function keys on MacBook Pro with Touch Bar.
Use standard function keys
Standard function keys work differently depending on the app and the keyboard shortcuts that you've set up. Some apps have their own keyboard shortcut preferences that you can customize.
To use the standard function keys, hold the Function (Fn)/Globe key ![]() when pressing a function key. For example, pressing both Fn and F12 (speaker icon) performs the action assigned to the F12 key instead of raising the volume of your speakers.
when pressing a function key. For example, pressing both Fn and F12 (speaker icon) performs the action assigned to the F12 key instead of raising the volume of your speakers.
If your keyboard doesn’t have an Fn key, try pressing and holding the Control key when pressing a function key.
Change the default function key behavior
If you want to change the top row of keys to work as standard function keys without holding the Fn key, follow these steps:
- Choose Apple menu > System Preferences.
- Click Keyboard.
- Select "Use F1, F2, etc. keys as standard function keys".
If you don't see 'Use F1, F2, etc. keys as standard function keys'
If you don't see 'Use F1, F2, etc. keys as standard function keys', you might be using a keyboard not made by Apple. These keyboards might need a utility to change the keyboard functions. Check with your keyboard manufacturer for more information.
Learn more
Learn about How to Enable, Disable function keys FN + F1, F2, F3, ... F12 on Laptop
 to show hidden icons.
 , then choose Boot Camp Control Panel from the menu.
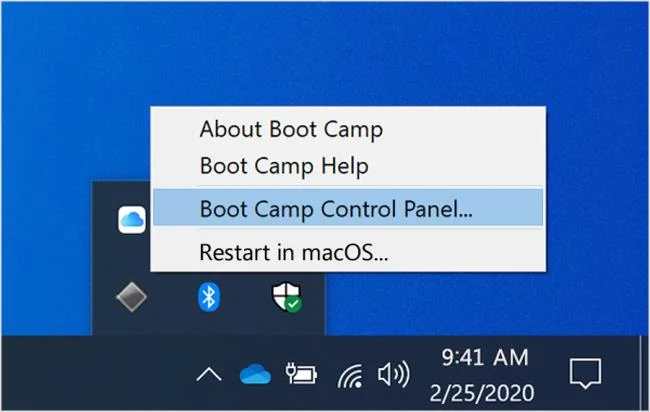

 when pressing a function key. For example, pressing both Fn and F12 (speaker icon) performs the action assigned to the F12 key instead of raising the volume of your speakers.


