Deploy Collabora CODE on Kubernetes with Helm

Install the official Collabora Helm chart, configure WOPI access and ingress affinity, and verify the deployment without common setup mistakes.
You do not like the default file icon on the system, want to change for fancy, more attractive look. However, Windows does not support changing file icons directly, but must rely on the help of FileTypesMan.
FileTypesMan is a small, completely free file management software that requires no installation. Just launch it will automatically identify and display the file extension types for users to see. So how to change the file icon on your computer, invite you to follow the article below of Download.com.vn:
Step 1: First, you must download the type of icon you want to change to your device, for example, in the framework of this article we want to replace the text file, then visit Icon Archive , click Download ICO button to download File text icon about. Similarly, if you want to download a file type, just type it into the search box, then download it.
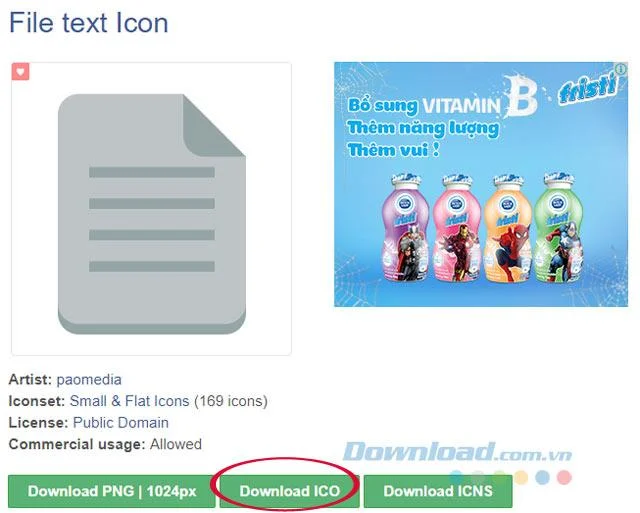
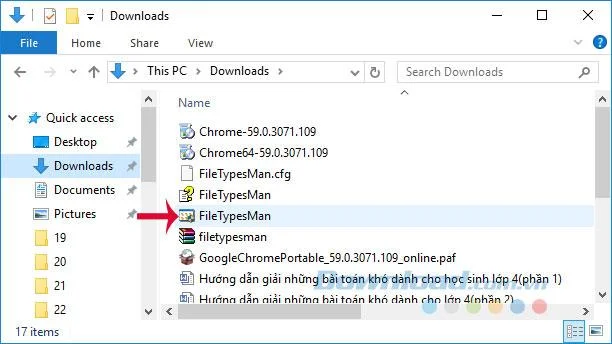
Step 2: By default, Windows does not come with the option to change the file icon, so you need the help of FileTypesMan . After downloading, you just need to extract the file using WinRAR or 7-Zip , and then use it without installation.
Step 3: After opening, FileTypesMan will list all file types in the system, arranged in order from A - Z. Click the magnifying glass icon on the toolbar to search for file types I need to change.
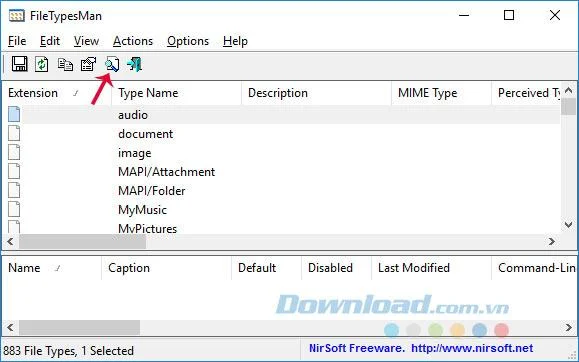
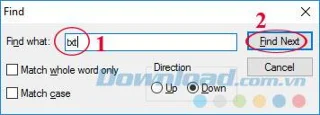
Step 4: Type the file extension into the Find What box , and then click the Find Next button . Here, we will find the file type "txt".
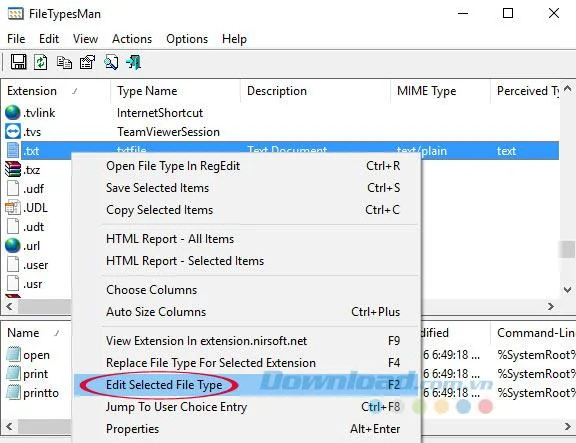
Step 5: When you find the file type you need, right-click it, select Edit Selected File Type.
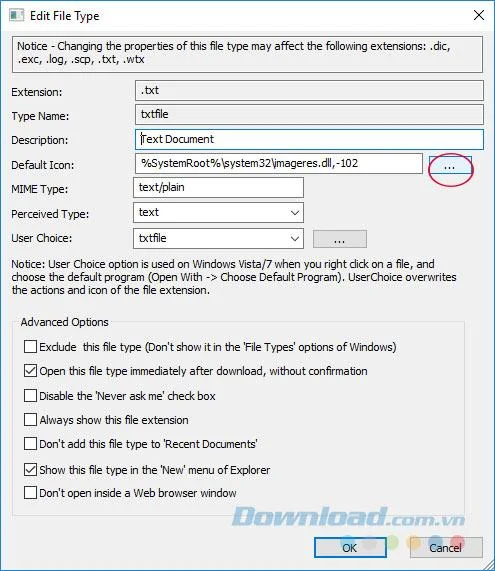
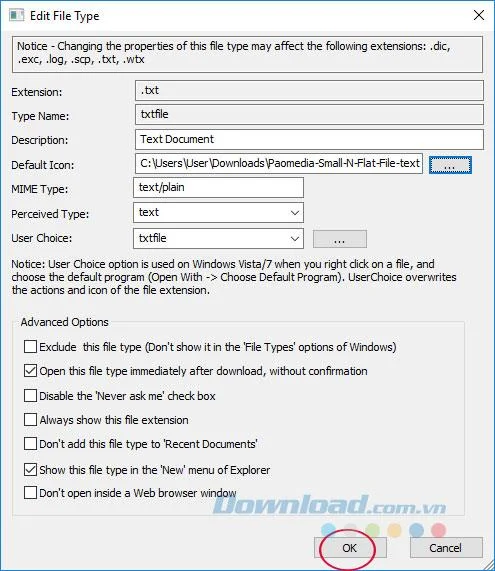
Step 6: Edit File Type interface appears, click the 3-dot icon in the Default Icon section.
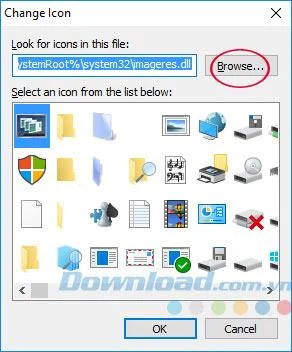
Step 7: Immediately you will see all the available icons in the system, if you like these icons, you can use them, without clicking Browse to select the icons according to your preferences.
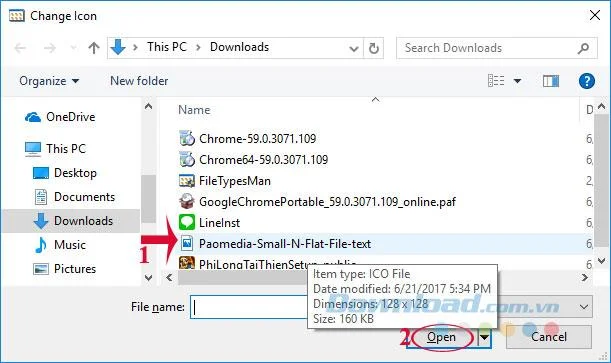
Step 8: Navigate to the location where the downloaded icon was stored above, select it and click Open.
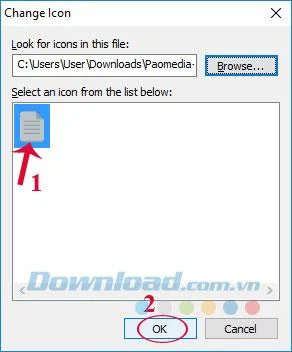
Step 9: The selected icon is listed in the Change Icon window . Just select it, then press the OK button .
Step 10: In the Edit File Type window , click the OK button to save all changes.
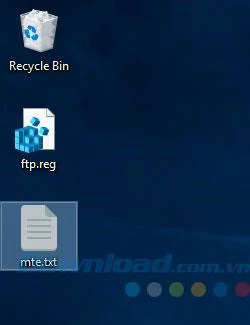
So, the file type icon has been changed immediately.
Now you can change any file you want. Pretty simple, isn't it?
I wish you successful implementation!
Install the official Collabora Helm chart, configure WOPI access and ingress affinity, and verify the deployment without common setup mistakes.
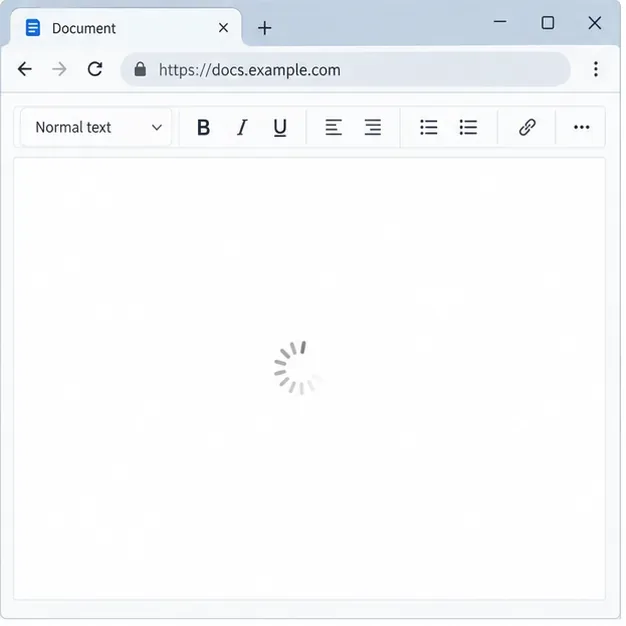
Use browser requests, WOPI logs, and targeted proxy checks to find why Collabora opens a blank document—and choose a fix that fits the evidence.
Configure CODE Docker dictionaries and tag document passages correctly so English, French, and other supported languages receive the right spell-checking.
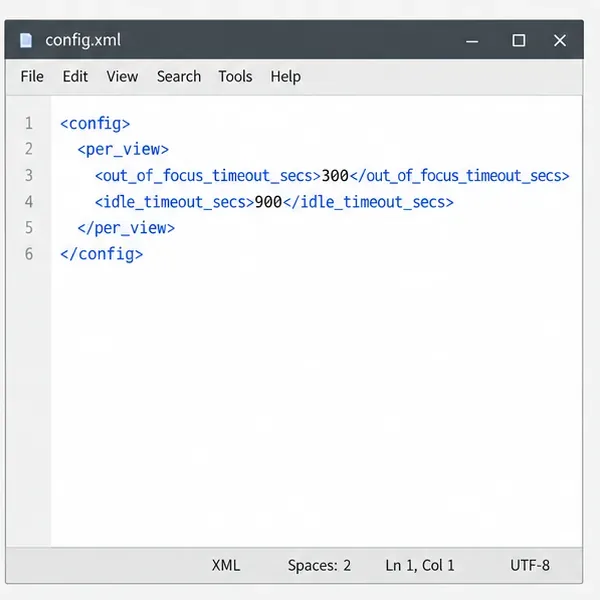
Adjust the per-view inactivity threshold in coolwsd and distinguish it from background-tab dimming, document unloading, autosave, and login expiration.
Stop scheduled CODE update checks, review optional remote services, and use outbound network controls without breaking document editing.
Enable secure document editing in Seafile by configuring Collabora’s discovery URL, HTTPS, and WOPI access for your deployment.
Test the system clipboard, adjust browser permissions, and identify when an embedded Collabora integration needs an iframe policy change.
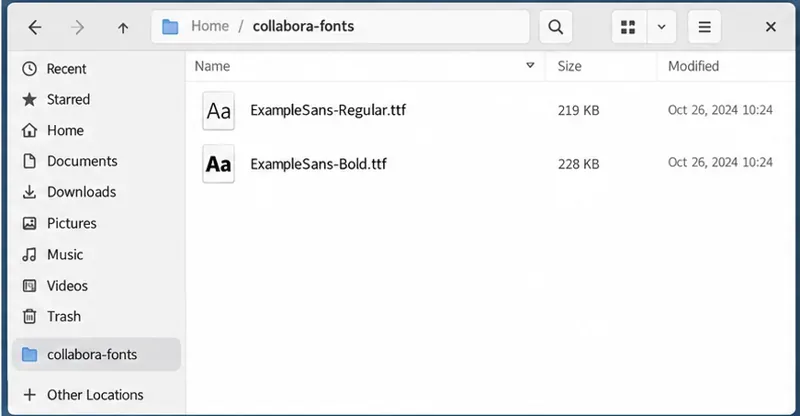
Mount font files into Docker and Collabora’s systemplate so custom typefaces appear in the editor and render correctly in documents.
Back up coolwsd.xml and its deployment sources, restore them safely, and verify CODE before users return to editing.
Allow the exact Nextcloud or other WOPI origin in CODE, then verify the active host allow-list and distinguish it from Nextcloud’s source-IP restriction.