In this article, you will learn ways to chance Viber number on different platforms, how to prepare, as well as a smart tool to recover Viber messages if the unexpected happens.
Sometimes we need to find ways of how to change Viber number for a number of reasons. Maybe you lost your SIM or you simply want to change your number inorder to avoid someone who has been pestering you with a plethora of distressful messages. Luckily, changing your Viber number is as easy as ABC .This article will offer you a step by step guide on how to change Viber number on PC, Android or iPhone.
Part 1: How to change Viber number on PC
Things to do before changing Viber number
Before you are going to change your Viber number, here is a tip for you - backup your Viber data in advance! Here you can use a tool, Dr.Fone - WhatsApp Transfer, to backup and restore your Viber meesages, photos and call history to your computer or mobile phone.
How to change your Viber number on PC computer
It is important to note that there is no way to change your Viber number without first deactivating your Viber account. There have been lots of complaints of people seeking to know why Viber cannot make it possible for one to change their number without first deactivating their account, but that is not possible at the moment. So, it is worth repeating that it is not possible to change your Viber number using your existing Viber account?
If you change your phone's number or SIM card, but still continue to use the same phone, your old Viber number would still show up when you send messages or call people. Here is how to change Viber number on your PC.
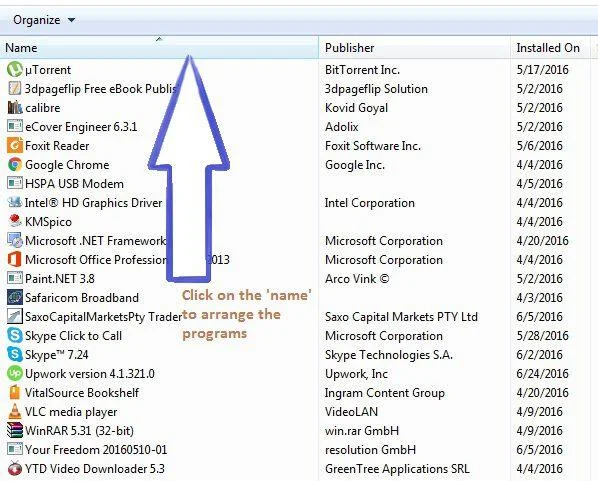
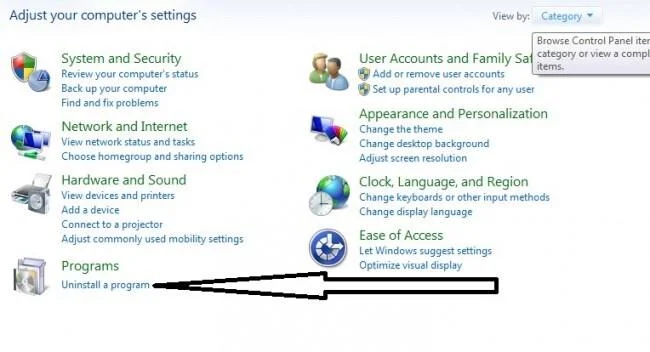
Step 1. Find Viber on your PC
Go to "Start" then click "Control" panel. Select "Programs" and click "Uninstall a program". A list of all installed programs in your PC will show up and you have to select Viber.
Step 2. Uninstall Viber from your PC
Look for Viber from your list of installed programs. If you have installed many programs, you can arrange them in alphabetical order
![]()
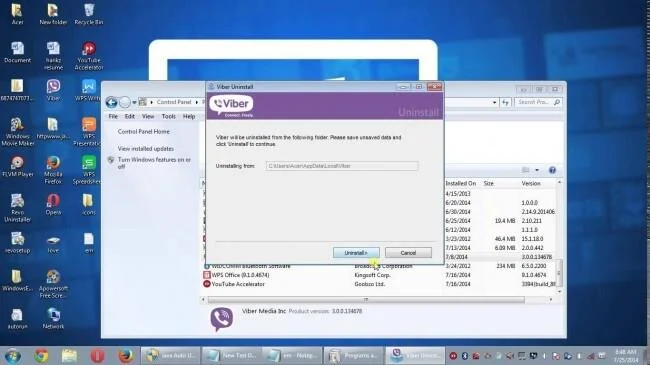
Select Viber from the list of programs and click "Uninstall".
![]()
Click "Continue" and let it uninstall from your PC.
![]()
Click finish when uninstall is complete
That should be it and this should automatically deactivate your Viber account after 45 days. Your contact list will be automatically deleted after 45 days.
It is important to note that you can also deactivate your account directly without having to uninstall. In fact this is the best method.All you have to do is to go to Viber on your PC. This is how to change number in Viber on your PC.
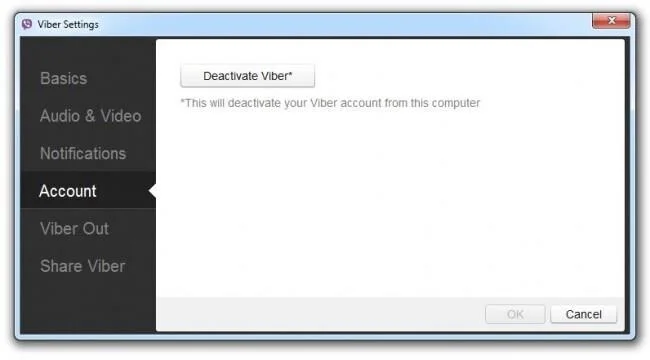
Step 3. Go to Account
![]()
Step 4. Click the settings icon and select "deactivate Viber"
![]()
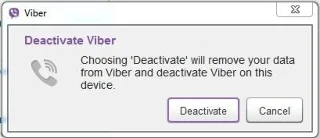
It will ask you whether you want to continue to deactivatethe account at which point you should select "Deactivate". Wait for a few seconds for your Viber account to be deactivated.
Step 5. Start Viber and create new account with your new number.
Please note that deactivating your old Viber account willerase all the messages and call history. Fortunately, your pictures will remainintact because they are normally stored on your phone or memory device.
![]()
Part 2: How to change Viber number on Android
Many people use Viber on Android because it is the most used OS on smartphones. The process of deactivating Viber on Android is more or lessthe same as with on PC. Basically, you have to deactivate your Viber accountbefore creating a new account if you want to change Viber number. basically, that is all you need to do if you are looking for how to change Viber number on Android.
Steps to change Viber number on Android
1. Open Viber Android app
2. Next, Click onthe More options tab
![]()
![]()
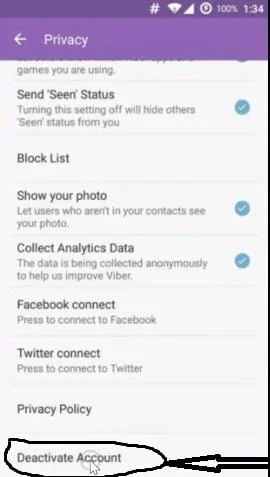
3. Select privacy,scroll down until you see Deactivate Account. Clickand confirm.
![]()
4. Follow the prompts to deactivate your account, and remember that you will lose allyour messages history. As we have already mentioned, there is really nothing you can do about this. However, you may keep your pictures because pictures are normally stored on the phone's memory.
5. Close your Viber. In order to reactivateyour account, you have to restart Viber and follow the prompts so as to create a new account with your new phone number.
![]()
Part 3: How to change Viber number on iPhone?
Like PC and Android, you need to deactivate your Viber account before changing your number. So here are the steps to deactivating Viber on iPhone or iPad. Please note that how to change Viber number are the same with Android ones.
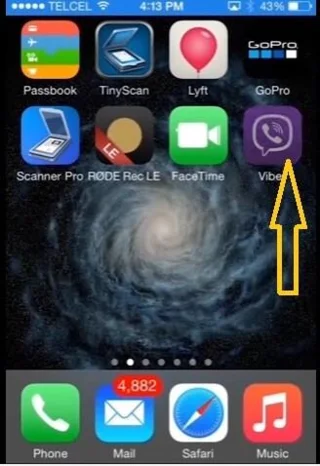
1. Open Viber app on your iPhone
![]()
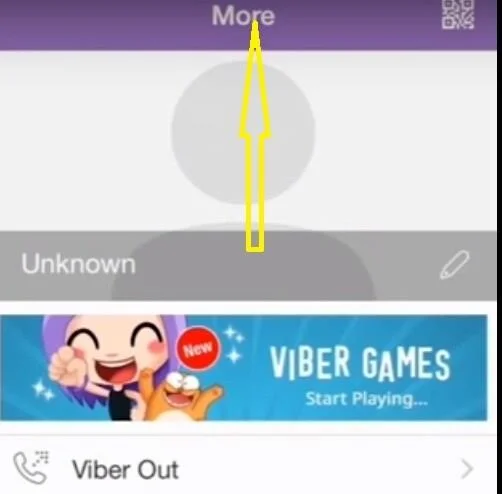
2. Next, Click on the More options tab
![]()
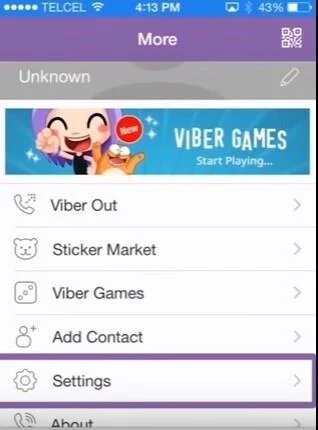
3. Go to settings
4. Then select privacy. After that, select deactivate your account
![]()
![]()
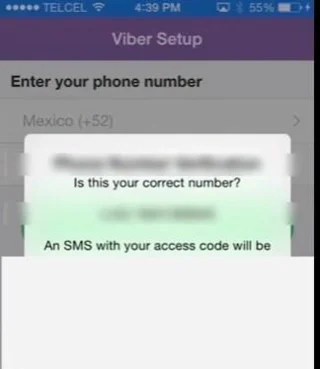
5. Open the application on your iphone
6. Enter your new phone number
![]()
![]()
7. Follow the prompts to complete the setup for your new phone number.
Part 4: How to retrieve Viber messages
After learning how to change number in Viber, it is important to learn how to retrieve your Viber messages becuse you will lose all your messages during the process of changing your Viber number.
Why you need to retrieve Viber messages
There are many reasons why one would need to retrieve their Viber messages. Viber messages could get deleted if your app got deactivated or deleted by mistake. If Viber crashes and you are no longer able to retrieve the messages, you may also need a way to retrieve your messages. You could also have deleted the messages by mistake.
Steps to recover Viber messages by Dr.Fone
Here are steps to recover your lost or wrongly deleted Viber messages using Dr.Fone software.
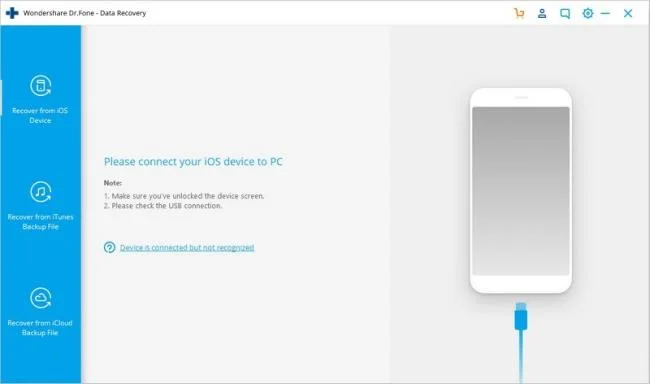
1. Connect your iPhone to the Computer
It is assumed that you have already installed Dr.Fone on your PC. Once you have connected your iOS device using a USB cable, you need to launch Dr.Fone on your computer. Dr.Fone will detect your mobile device by default and show "Recover from iOS Device".
![]()
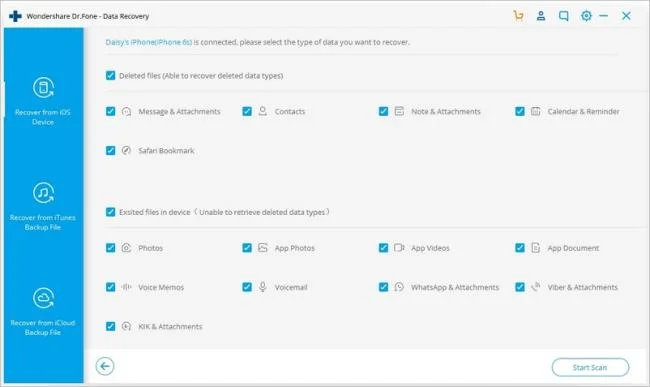
Step 2. Scan your device for lost or wrongly deleted Viber messages
By simply clicking "start scan", the tool will start retrieving any recently deleted data. The process of scanning may last a few minutes. Once you see any message in the process of scanning, you need to pause the process.
![]()
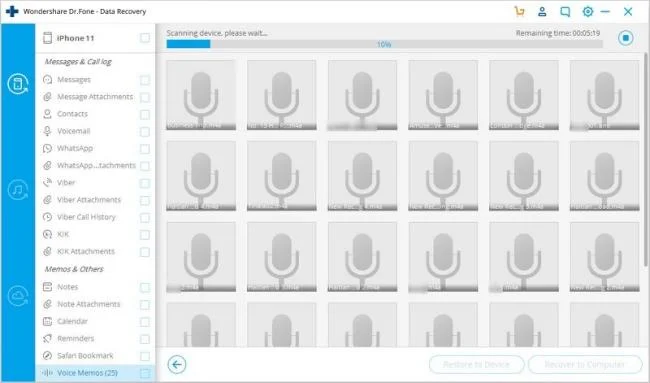
Step 3. Preview the Scanned Viber Data
The next things is to preview the Viber messages. Once the process is complete, you can see all the messagesin the device include the one in the device. You can also seach for a specific file on the search field.
![]()
Step 4. Recover Viber messages from your iPhone
Once you have selected all the messages you need, click the "Recover" button. The recovered files will be restored to your computer.
Start Download Start Download
Your Viber account is basically your phone number and if you have to change your Viber number, it basically means you have to deactivate your current Viber account. In other words, everything in your Viber is linked to your Viber ID. So even if you have a new phone number and you have not yet deactivated your old account, people with your old phone number will still access your account.