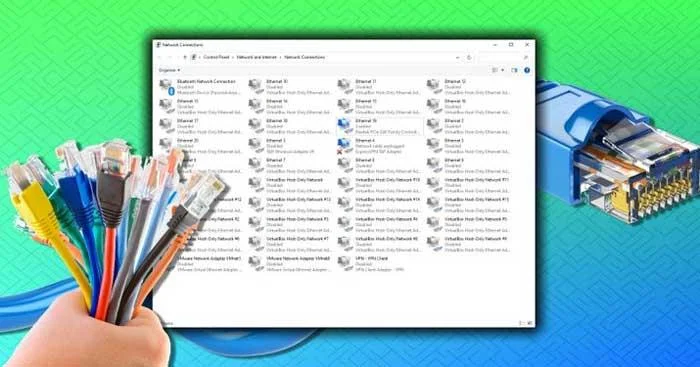
If you want to remove an old Network Adapter from the Network Connections list, please refer to the instructions below with Download.vn .
What is Network Adapter?
Network Adapter - A network adapter is a piece of hardware that allows a computer to communicate with other devices. For example, on your laptop, you may have a wireless network adapter, allowing a Wi-Fi connection or an Ethernet port. You also get a Bluetooth network adapter for Bluetooth connectivity and more.

Network adapters make it easy for devices to communicate with each other, automate configuration and management of active network connections between them, and make troubleshooting simpler.
Remove Network Adapter from the list of network connections
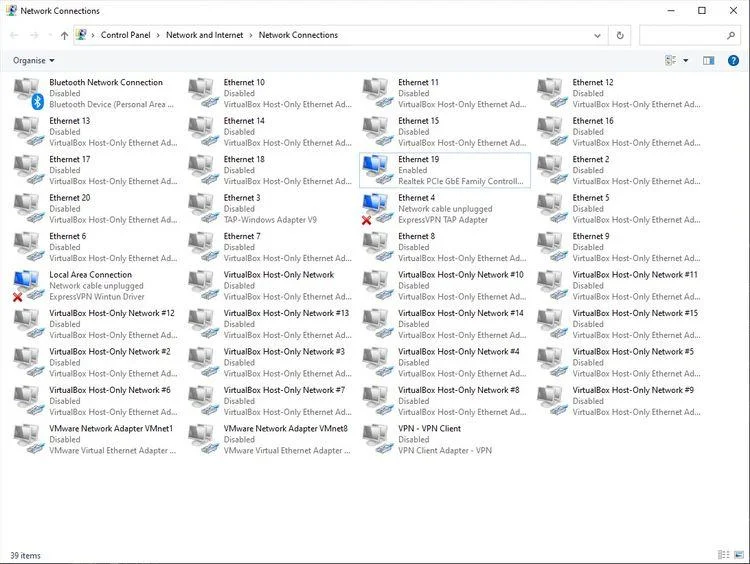
The first way to remove a network adapter on Windows is through Network Connections. In this window you will find all network connections. This is a simple way to manage network adapters.
- Open File Explorer.
- Copy and paste Control Panel\Network and Internet\Network Connections into the File Explorer address bar, then press Enter .
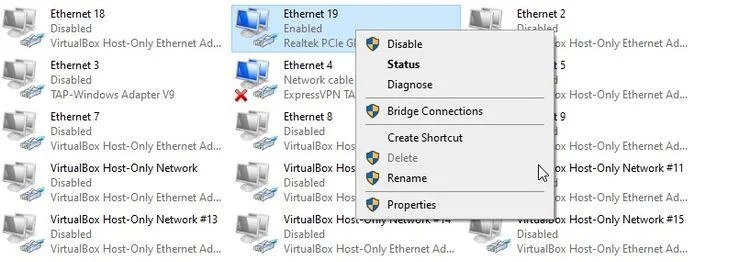
- Right-click the network adapter you want to remove and select Delete .

That Network Adapter will be uninstalled and disappear from the system. However, as you can see on the screen, the Delete button is not always clickable. If this is the case, move on to the next section.
Uninstall the Network Adapter using Device Manager
This is a Windows utility that allows you to see all the devices connected to your computer, be it a mouse, keyboard, graphics card or network adapter.

- Type Device Manager in the Start menu search bar and select Best match .
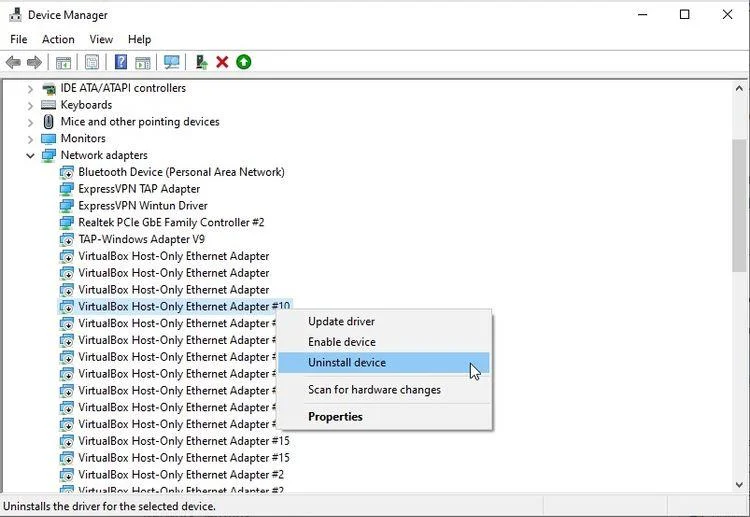
- Scroll down and open Network adapters with the arrow icon.
- Right-click the network adapter you want to remove and select Uninstall device .
- When this warning appears select, Uninstall .
- Repeat steps if necessary.
Delete network configuration using Command Prompt
If the network adapter still refuses to work, you can go one step further and remove the network adapter configuration from the system using Command Prompt.

- Enter cmd in the search bar on the Start menu , then select Run as Administrator .
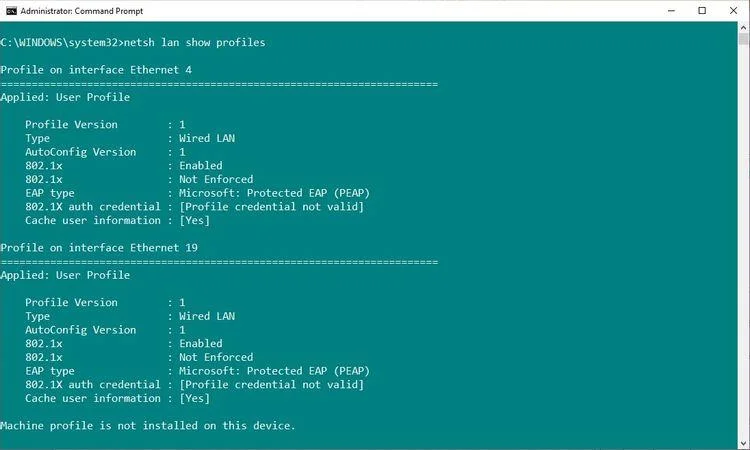
- Now if you are trying to remove a wired Ethernet connection, enter netsh lan show profiles .
- However, if you are trying to remove a wireless Wi-Fi connection, enter: netsh wlan show profiles .
- If you receive a warning that the wired or wireless auto-configuration service is not working, in the Start menu , type services and select Best match , then scroll down, then find Wired AutoConfig or WLAN Autoconfig , right-click and select Start .
- If you receive a warning, you should enter the previous commands in step 2 or 3.
- Find the network adapter you want to remove from the list and note its interface name found at the top of each profile.
- Next, enter the following command to remove a wired network adapter interface: netsh lan delete profile interface="InterfaceName" . Or enter the following command to remove a wireless network adapter interface: netsh wlan delete profile interface="InterfaceName" .
Above are some ways to delete network adapter on Win 10 & Win 11 . Hope the article is useful to you.