Are you tired of your C drive filling up with desktop clutter? 😩 In Windows 11, your desktop is a gateway to productivity, but it can quickly become a space hog. The good news? You can easily setup Windows 11 desktop folders on D drive to reclaim storage and keep things organized. This guide walks you through the process with clear steps, empowering you to take control of your PC setup. Let's dive in and transform your workflow—it's simpler than you think!
Why Move Your Windows 11 Desktop Folders to the D Drive?
Before we get hands-on, let's highlight the perks. Your default desktop folder lives in the C drive under Users\[YourUsername]\Desktop, which can bloat quickly with files, downloads, and shortcuts. By relocating it to the D drive (often your secondary storage), you:
- ✨ Free up C drive space: Keep your system drive lean for updates and apps.
- 📁 Improve organization: Use the D drive for larger files without impacting boot performance.
- 🚀 Boost efficiency: Windows 11 handles this seamlessly, ensuring your desktop works just like before.
- 💡 Future-proof your setup: Ideal if you're adding more storage or managing multiple drives.
Pro tip: This method is official and safe—no third-party tools needed. It's especially handy for users with SSDs on C and HDDs on D, balancing speed and capacity. Ready to start? Follow these steps to setup desktop on D drive in Windows 11.

Step-by-Step: How to Setup Windows 11 Desktop Folders on D Drive
We'll use the built-in "Location" tab in folder properties—a reliable feature in the latest Windows 11 updates. Ensure you have admin rights and back up important files first. Let's go!
-
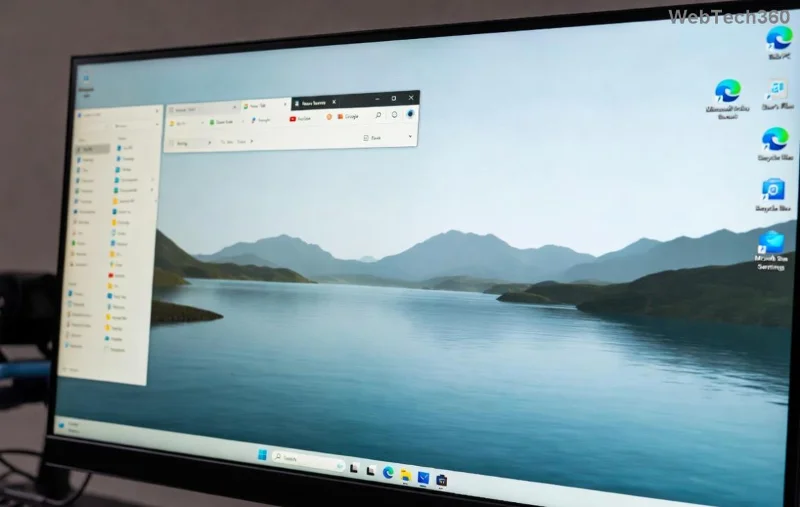
1️⃣ Open File Explorer and Locate Your Desktop Folder
Press Windows + E to launch File Explorer. Navigate to C:\Users\[YourUsername] (replace [YourUsername] with your actual name). Right-click the Desktop folder and select Properties. This opens the folder settings window.
-
2️⃣ Access the Location Tab
In the Properties dialog, click the Location tab. Here, you'll see the current path pointing to C drive. This is your starting point for relocation.
-
3️⃣ Move to the D Drive
Click Move. A new window appears showing available folders. If your D drive has a dedicated folder (e.g., D:\MyDesktop), select it. Otherwise, create one: Navigate to D:\, click New Folder, name it "Desktop," and select it. Confirm with OK. Windows will prompt to move all files—choose Yes to transfer everything automatically.
-
4️⃣ Apply and Restart Explorer
Click Apply, then OK. You might see a progress bar as files copy. To ensure changes take effect, restart File Explorer: Open Task Manager (Ctrl + Shift + Esc), find "Windows Explorer" under Processes, right-click, and select Restart. Your desktop should now pull from the D drive!
That's it! 🎉 Your Windows 11 desktop folders are now on the D drive. Test by saving a file to your desktop—it should appear in D:\Desktop. If something feels off, you can always revert by following the same steps and moving back to C.
![Step-by-step screenshot of moving desktop location in Windows 11 Properties]()
Advanced Tips for Relocating User Folders in Windows 11
Want to go further? Move desktop to another drive is just the beginning. You can apply the same process to Documents, Pictures, and Downloads for full Windows 11 storage optimization. Here's a quick comparison:
| Folder |
Default Location |
Why Move to D? |
Estimated Space Savings |
| Desktop |
C:\Users\[Username]\Desktop |
Handles shortcuts and temp files |
Up to 5-10 GB |
| Documents |
C:\Users\[Username]\Documents |
Store large Word/PDF files |
10-50 GB+ |
| Downloads |
C:\Users\[Username]\Downloads |
Auto-saves big installers |
5-20 GB |
For each, repeat the Location tab method. If you're dealing with a multi-drive setup, label your drives clearly in Disk Management (search for it in the Start menu) to avoid confusion.
Troubleshooting Common Issues When Setting Up Desktop on D Drive
Even with straightforward steps, hiccups happen. Here's how to fix them quickly:
- ❌ Permission Denied Error: Run File Explorer as admin (right-click the icon > Run as administrator). If persistent, check ownership: Right-click the D drive folder > Properties > Security > Advanced > Change owner to your user.
- ❌ Files Not Moving: Ensure no apps are using desktop files. Close programs and try again. For stubborn cases, use the
robocopy command in Command Prompt: robocopy C:\Users\[Username]\Desktop D:\Desktop /E /COPYALL, then update the location.
- ❌ Desktop Icons Missing After Restart: Rebuild the icon cache—run
ie4uinit.exe -show in Command Prompt as admin.
- 💡 OneDrive Sync Issues: If using OneDrive, pause sync before moving, then resume. For details, check Microsoft's guide: Microsoft Support.
These fixes keep your setup smooth, ensuring you enjoy a clutter-free experience. If you're on a networked drive, note that symbolic links (via mklink) might be better for shared access—explore that for pro setups.
![Troubleshooting Windows 11 folder relocation with error resolution]()
Enhance Your Windows 11 Setup: Next-Level Organization
Now that your desktop folders on D drive are set, level up! Use Windows 11's Storage Sense (Settings > System > Storage) to auto-clean old files. Create subfolders like "Work," "Personal," and "Projects" on D for laser-focused organization. For visual flair, customize folder icons via Properties > Customize tab.
Feeling empowered? This tweak not only saves space but sparks joy in a tidy digital space. 👏 Share your before-and-after in the comments—did it speed up your PC? If you're eyeing more optimizations, like relocating the entire Users folder, that's a deeper dive for power users. Stick around for our next guide on Windows 11 performance boosts!
By following this guide, you've unlocked a smarter way to manage your Windows 11 desktop folders. Happy organizing—your D drive thanks you! 🚀