BlueLife KeyFreeze 1.5 - Update for 2024: Quickly Disable Keyboard and Mouse
BlueLife KeyFreeze, a free application for Windows, allows you to disable the keyboard and mouse quickly without locking the screen.
Sometimes you don't want your laptop keyboard to accept input. This is usually because you have an external keyboard plugged in, the built-in keyboard is broken, or you just want a better typing space with a full-size keyboard.
However, since the keyboard is an integral part of your laptop, disabling its primary input method can be a bit tricky. Here, we will show you how to temporarily and permanently disable the laptop keyboard on Windows 10 and 11.
How to find laptop keyboard in Device Manager
Whether you want to disable your laptop keyboard temporarily or permanently, you'll need to uninstall the input device from Device Manager.
To do this, you will need to identify the built-in keyboard in Device Manager. Since Device Manager will list all recognized keyboards, including external keyboards, here is how you can identify your laptop keyboard from the list.
To identify the built-in keyboard in Device Manager:
1. Press Win + R to open Run .
2. Type devmgmt.msc and click OK to open Device Manager .
3. In Device Manager , expand the Keyboards section .
4. Right-click the first keyboard entry (HID/Standard) and select Properties.
5. In the General tab , select the General section . If the message says Location 1 or Plugged into keyboard port , it's probably your laptop's internal keyboard.
6. The Bluetooth and USB keyboards will display On Bluetooth Low Energy and On US Input Device respectively in their respective positions.
If you don't see your keyboard listed, make sure you have Device Manager set to show hidden devices.
How to temporarily disable laptop keyboard
To temporarily disable your laptop keyboard:
1. Right-click all HID and PS/2 Keyboard entries with Properties Location set to Location 1 or Plugged into keyboard .
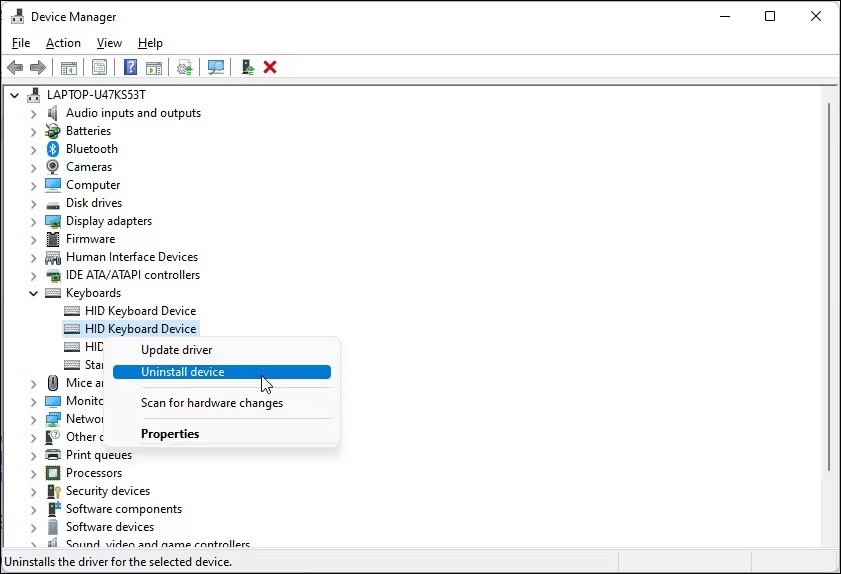
2. Next, select Uninstall Device from the context menu.
3. Click Yes to confirm the action.
That's it! You have successfully disabled the keyboard inside your laptop.
However, this is a temporary solution. As soon as you restart your system, Windows will search for devices that are connected but not recognized and install the necessary drivers to make them work.
How to disable laptop keyboard permanently
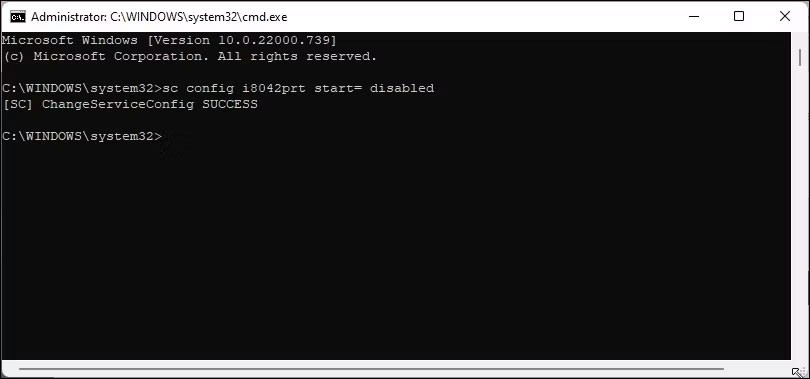
If you want to permanently disable your laptop keyboard, you can disable the PS/2 i8042prt keyboard driver service built into your laptop using Command Prompt. We will use the sc command line utility to configure the service and set its start parameter to disabled.
To disable laptop keyboard permanently:
sc config i8042prt start= disabledNote that, for this feature to work, you need to uninstall the keyboard from Device Manager as shown above and restart your PC.
If you change your mind and want to re-enable the keyboard, you can use the following command in Command Prompt with admin rights.
sc config i8042prt start= autoOnce you see the success message, restart your PC to apply the changes.
Disable built-in keyboard with incompatible driver
Another odd solution to disabling the built-in keyboard is to install an incompatible driver for the input device. Here's how to do it.
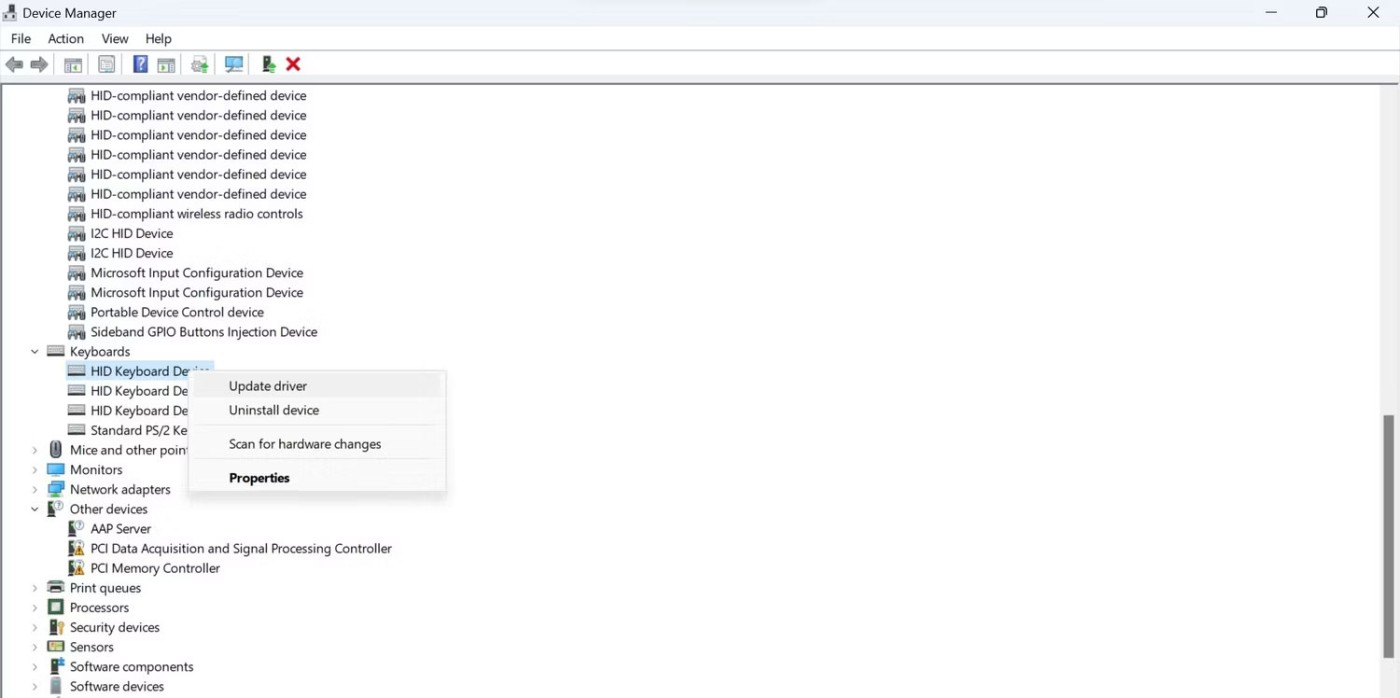
1. Open Device Manager and expand the Keyboard section .
2. Right-click on your laptop keyboard device and select Update driver .
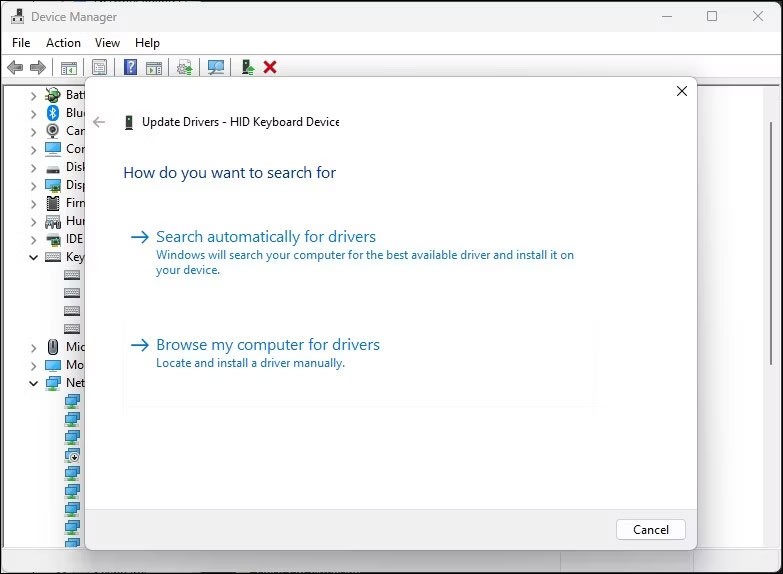
3. Select Browse my computer for drivers .
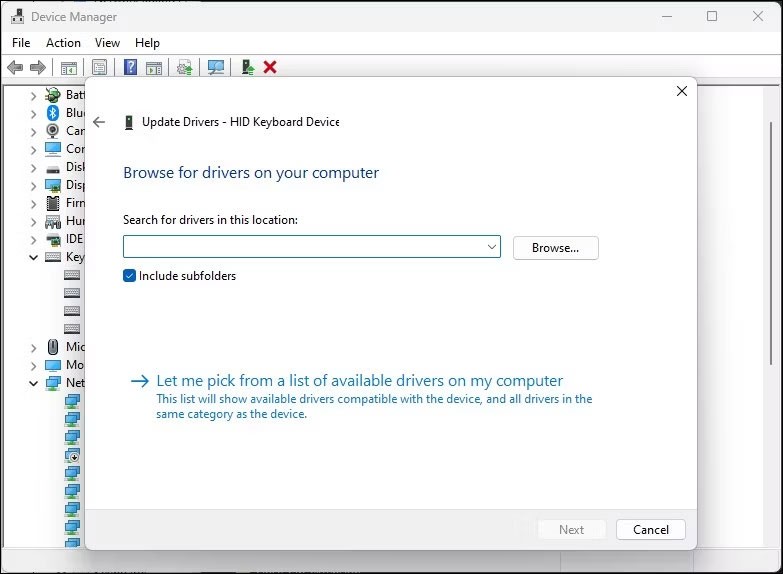
4. Next, select Let me pick from a list of available drivers on my computer .
5. Uncheck the Show compatible hardware option .
6. Select a random manufacturer in the Manufacturer column .
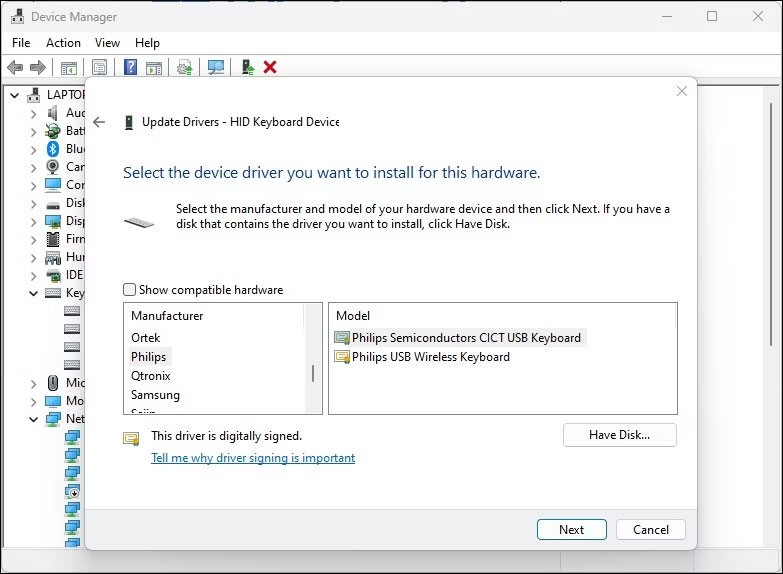
7. Click Next . Click Yes if the Update Driver Warning dialog box appears.
8. After installation, close Device Manager and restart your computer.
After restarting, your laptop keyboard will stop working. If you need to reinstall the correct driver to enable the keyboard, right-click on the keyboard device and select Update driver . Next, select Search automatically for drivers . Windows will find a compatible driver and install it.
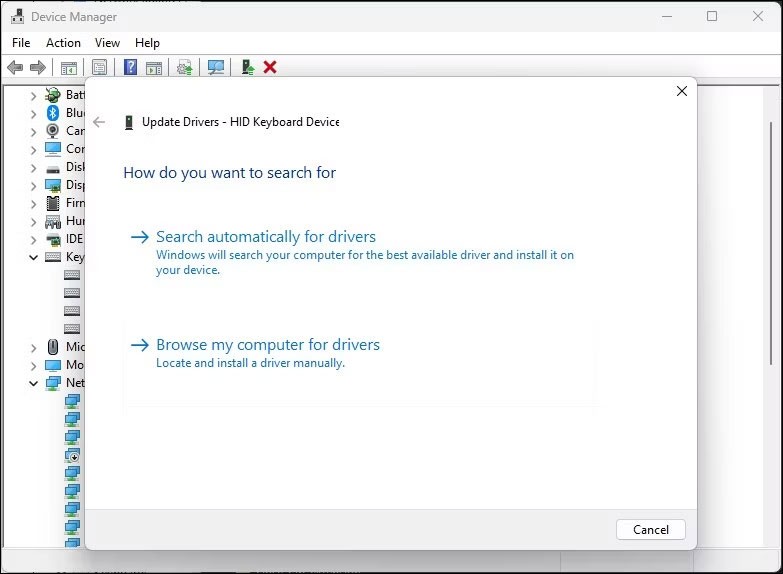
Alternatively, select Browse my computer for drivers in the Update Drivers dialog box . Next, select Let me pick from a list of available drivers on my computer . Make sure the Show compatible hardware option is enabled. Select the HID Keyboard Device driver from the list and click Next .
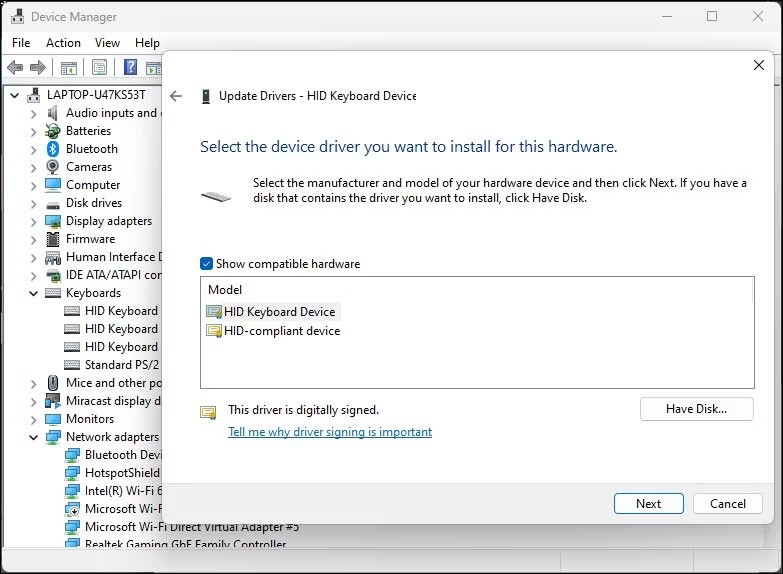
Wait for the driver to install. Once complete, restart your computer and the keyboard should start working again.
Good luck!
See more articles below:
Discover how to safely convert MBR to GPT without data loss in Windows 11. Follow our step-by-step guide using built-in tools and third-party software for a seamless upgrade to modern partitioning.
Struggling with the 0x80072ee7 Store connectivity error? Discover proven, step-by-step fixes to restore your Microsoft Store access quickly and easily. Say goodbye to frustrations!
Struggling with background change errors on Windows 11 Pro? This step-by-step guide helps gamers fix the issue fast, restoring your custom setups without hassle. Discover proven methods to personalize your desktop effortlessly.
Discover how to set up Windows 11 Dynamic Refresh Rate for buttery-smooth performance on compatible displays. Follow our step-by-step guide to optimize your PC
Struggling with slow browsers on Windows 11? Discover proven fixes for memory leaks in Chrome, Edge, Firefox, and more. Boost performance and end frustration today.
Struggling with the Windows 11 Photos App File System Error? Discover proven, step-by-step fixes to restore your photo viewing experience without hassle. Updated with the latest troubleshooting tips for seamless performance.
Struggling with OBS Studio black screen on Windows 11? Discover proven fixes for smooth streaming and recording. Step-by-step guide to resolve black screen issues quickly and easily.
Struggling with "GPT Partition Style Not Supported" error on your old PC? Discover proven solutions to convert partitions safely, upgrade your system, and get back to smooth computing without data loss. Perfect for legacy hardware users.
Struggling with stylus pen pressure sensitivity on Windows 11? Discover proven fixes to restore smooth, responsive drawing and note-taking. Step-by-step guide with tips for optimal performance.
Discover step-by-step how to use Windows 11 PowerShell as administrator. Learn to launch, run commands, and troubleshoot with elevated privileges for ultimate control. Perfect for beginners and pros alike.
Discover all essential methods to take a screenshot on Windows 11, from basic keyboard shortcuts to advanced tools. Get step-by-step guides, tips, and tricks to capture your screen perfectly every time.
Discover the ultimate guide to optimizing Java settings for Windows 11. Boost performance, reduce lag, and enhance your Java apps with these expert-recommended tweaks for maximum efficiency.
Discover a step-by-step guide on how to setup Windows 11 BitLocker on external USB drives. Protect your data with easy encryption tips, troubleshooting, and best practices for ultimate security.
Struggling with the Windows 11 "Clock Out of Sync" error? Discover proven, step-by-step fixes to resolve time synchronization issues, restore accuracy, and keep your PC running smoothly. No tech expertise needed!
Struggling with gaming lag on Windows 11 due to VBS and HVCI? This comprehensive guide explains what they are, why they cause stuttering, and step-by-step troubleshooting to boost your FPS without compromising security. Get back to seamless gaming today!
