Home
» How to
»
How to Mount a Remote SSHFS Directory Automatically at Boot in Debian
How to Mount a Remote SSHFS Directory Automatically at Boot in Debian
To mount a remote SSHFS directory automatically in Debian, configure noninteractive SSH authentication and add an SSHFS entry to /etc/fstab. With systemd, you can either connect during boot or activate an automount at boot and connect when the directory is first accessed. The second approach is useful when the remote server or network may be unavailable during startup.
This reference uses Debian 13 “trixie” documentation reviewed on October 9, 2026, including SSHFS 3.7.3 and systemd 257 documentation. The commands are configuration examples, not results from a tested deployment. Check your installed manuals if you use another release.
Choose when the SSHFS connection should start
Requirement
Configuration choice
Expected behavior
Make the directory available on demand after boot
Use x-systemd.automount
The first access triggers the remote mount.
Attempt the remote connection during boot
Omit x-systemd.automount
systemd starts the mount as part of startup.
Allow startup to continue if storage is unavailable
Use nofail
The mount is not a required boot dependency.
An application must wait for this storage
Add a dependency to that application’s service
The application starts only after the mount succeeds.
The main example uses an on-demand mount. The distinction matters: an active automount does not mean an SSHFS connection already exists. See Debian’s systemd automount manual for the relationship between the automount and its matching mount unit.
Before you start
The Debian client uses systemd and you have sudo access.
The remote account supports SFTP and can access the intended directory.
The client can reach the remote host, including any required VPN or jump host.
You have a way to verify the remote server’s SSH host-key fingerprint.
The local mount point is empty and is not a critical system directory.
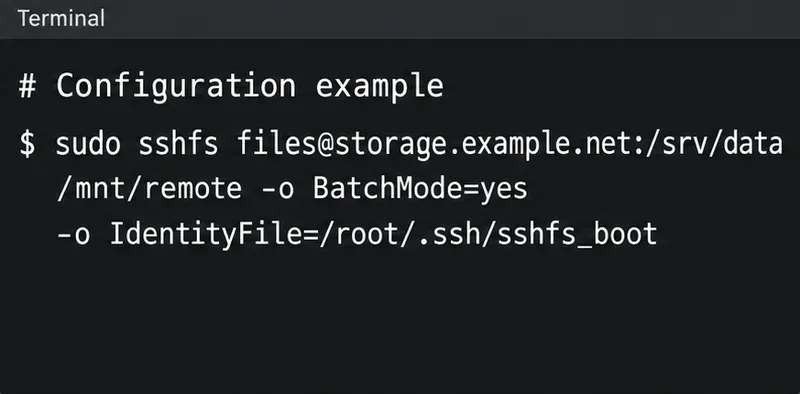
Replace files@storage.example.net:/srv/data with your remote username, hostname, and directory. The hostname is a placeholder. The local mount point is /mnt/remote; the dedicated key is /root/.ssh/sshfs_boot.
This is an administrator-managed system mount. It runs locally as root but logs into the remote server as files, not remote root. The SSHFS project documentation generally recommends running ordinary interactive mounts as a regular user. A system boot mount requires deliberate credential and access management.
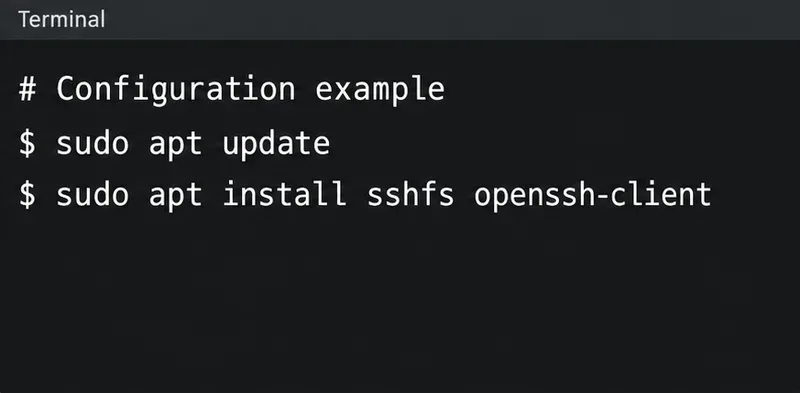
Install SSHFS on the Debian client. The remote system needs working SFTP service; it does not need an SSHFS installation just to serve files. If package installation fails, resolve the repository or connectivity issue before editing boot configuration.
Install the SSHFS client and OpenSSH tools on Debian.
Do not overwrite an existing key at that path. Choose another name if necessary and use it consistently below. The empty passphrase is intentional for this unattended example: there is no person available to unlock the key during boot. Protect the client and give the remote account only the directory permissions it needs. If your policy requires encrypted keys, arrange a managed unattended unlocking mechanism instead.
The key-generation options are documented in Debian’s ssh-keygen manual. A key unlocked in your desktop SSH agent is not automatically available to the system mount.
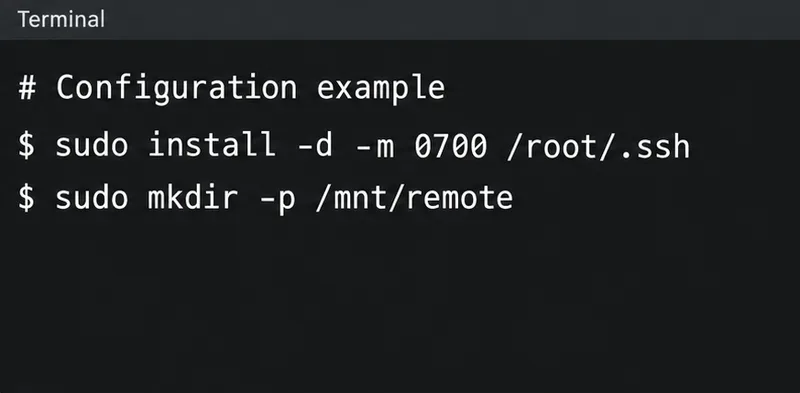
Prepare the local directories before creating the dedicated boot key.
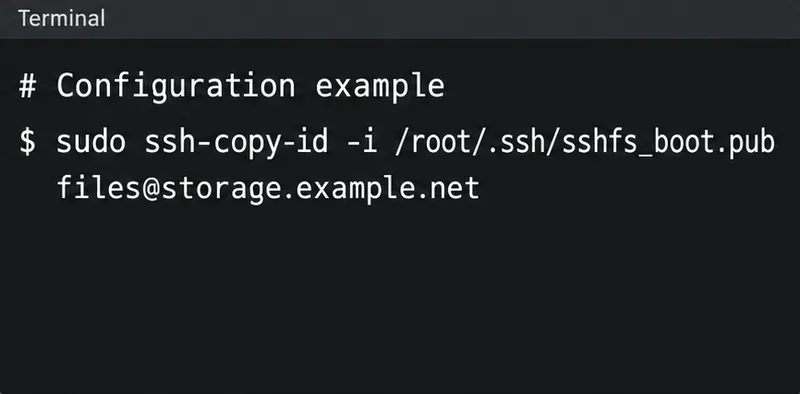
During this setup connection, compare the displayed host-key fingerprint with a value obtained from the server administrator through a trusted channel before accepting it. The command runs as local root, so the usual host-key record is stored in root’s SSH files. If password-based setup is disabled on the server, have the administrator install the public key instead.
Next, test SFTP with the same identity and host-key file the boot mount will use:
At the SFTP prompt, use ls /srv/data, then bye. This must work without a password or confirmation prompt. BatchMode=yes prevents interactive authentication; the explicit host-key setting preserves verification. These options are defined in the OpenSSH client configuration manual.
For a nondefault port, use -p 2222 with ssh-copy-id, -P 2222 with sftp, and port=2222 in SSHFS options. If a jump host is necessary, configure and test that route under root’s SSH context too.
Authorize the dedicated public key for the example remote account; verify the host fingerprint during setup.
Check that the listing belongs to the intended remote directory. This example initially permits access only to the local mount owner, root, so use sudo for the check. Finish by unmounting before starting the systemd-managed configuration. Close shells and applications using the directory if it is busy.
SSHFS uses the remote account’s permissions. Being root on the client does not grant additional permissions on the server. Fix authentication, SFTP, or remote path errors here before making the configuration persistent.
The terminal shows a manual mount example; use the complete command and verification options in the text.
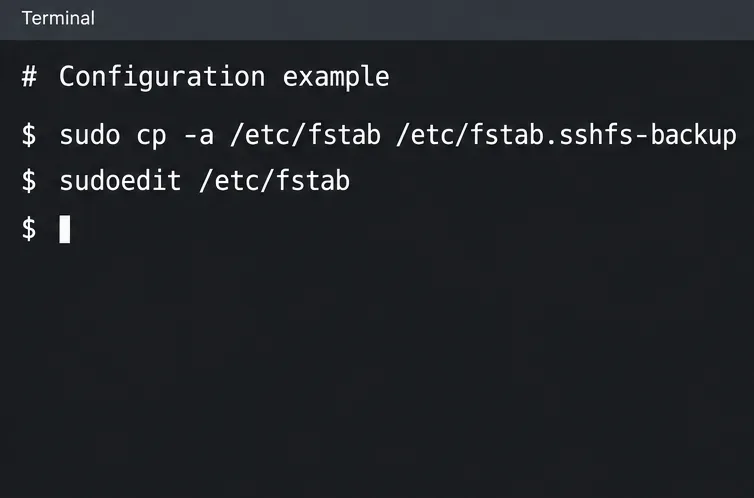
5. Add the persistent fstab entry
sudo cp -a /etc/fstab /etc/fstab.sshfs-backup
sudoedit /etc/fstab
Choose a different backup filename if that backup already exists. Append the following as one physical line, replacing the example server and path:
Debian’s SSHFS manual specifies sshfs as the fstab filesystem type and accepts fuse.sshfs for compatibility. The final fields disable dump and filesystem-check scheduling for this entry. Consult the fstab format reference if paths contain whitespace.
Option
Purpose
_netdev
Classifies the mount as network-dependent.
nofail
Lets boot continue without requiring this mount.
x-systemd.automount
Creates an access-triggered automount.
x-systemd.mount-timeout=30s
Bounds the initial mount command’s wait.
ConnectTimeout=10
Bounds SSH connection establishment.
reconnect and server-alive settings
Help detect a broken connection and reconnect.
The systemd-specific options are documented in the Debian systemd mount manual. The mount timeout does not impose a deadline on every later file operation.
Back up fstab before adding the persistent SSHFS entry.
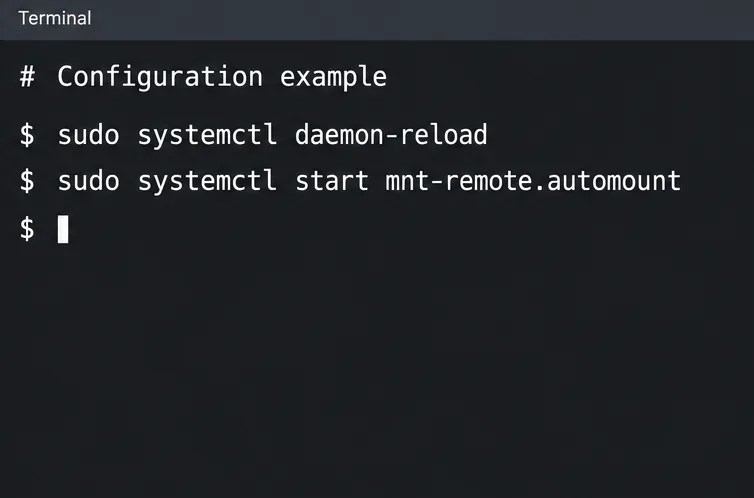
6. Reload systemd and activate the automount
sudo findmnt --verify --verbose
sudo systemctl daemon-reload
sudo systemctl start mnt-remote.automount
systemctl status mnt-remote.automount
sudo ls /mnt/remote
findmnt -t fuse.sshfs
Review verification messages before continuing. The findmnt manual describes fstab verification; this checks configuration, not whether remote credentials work. Accessing the directory performs the separate connection test.
The unit names above correspond to /mnt/remote. For another path, derive the mount name with systemd-escape --path --suffix=mount /your/path. Units generated from fstab do not need a separate systemctl enable command.
If you want a connection attempt during boot, remove x-systemd.automount from the entry. After releasing users of the directory, stop its automount and mount units, reload systemd, and start the matching mount unit. Keep nofail if storage should remain optional.
Reload systemd and start the generated automount unit.
7. Verify behavior after a reboot
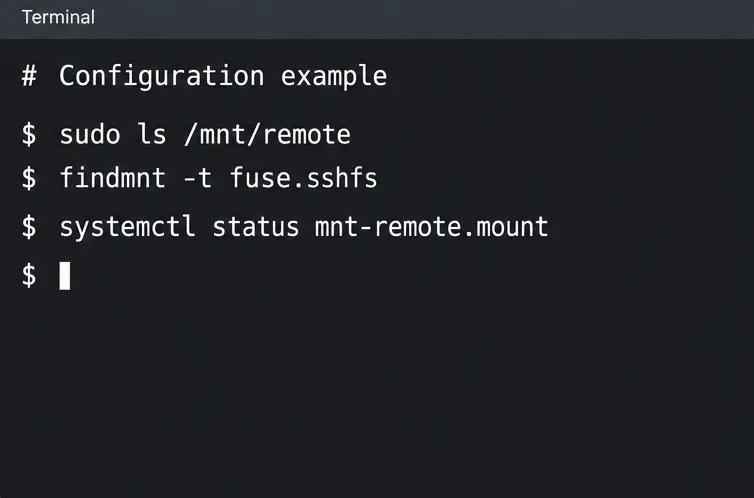
Reboot at a suitable maintenance time. With the on-demand configuration, check the automount first, then access the directory:
systemctl status mnt-remote.automount
sudo ls /mnt/remote
systemctl status mnt-remote.mount
findmnt -t fuse.sshfs
Expected signs are an active automount after startup and a real SSHFS mount after access. An autofs entry alone does not prove that remote files are connected. Verify a known remote file or directory, not merely that the local mount-point folder exists.
If an application must have this storage before starting, add a drop-in to its service containing:
[Unit]
RequiresMountsFor=/mnt/remote
This dependency, documented in systemd.unit, pulls in and orders the necessary mounts. Reload systemd and test that application’s startup separately. The application also needs appropriate local access permissions.
Access the directory, then inspect the real SSHFS mount and its unit status.
Repeat the root-context SFTP test; check the selected key and remote authorization.
Host-key verification fails
Verify the server fingerprint and root’s known_hosts entry. Investigate a changed key before updating it.
Name resolution or connection fails
Check DNS, routing, port access, VPN startup, and jump-host availability.
sudo can read files but a local user cannot
Review FUSE access policy and ownership mapping.
Mount is busy
Close processes whose working directory or open files are under the mount point.
network-online.target is a startup synchronization point, not a guarantee that a particular server or VPN is reachable. The systemd network-online explanation describes that limitation.
For intentional access by a local user, consider adding allow_other,default_permissions,uid=1000,gid=1000, substituting the actual local IDs. This exposes access beyond the mount owner, while kernel permission checks still apply. The UID/GID options change presented ownership, not server-side ownership. Root mounts do not require user_allow_other in fuse.conf; that policy enables non-root mounts to request broader access. See the FUSE permissions manual. Re-test as the intended application user after changing these options.
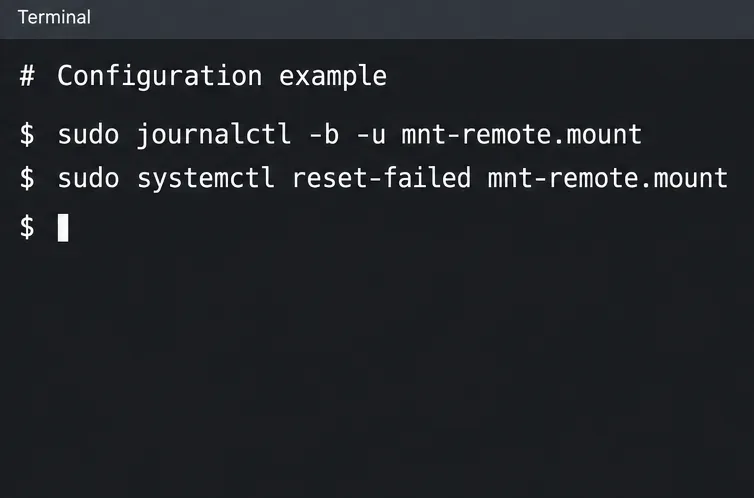
After fixing the underlying problem, clear a failed mount state and retry access:
sudo systemctl reset-failed mnt-remote.mount
sudo ls /mnt/remote
Reconnect is not transparent recovery for every application: previously opened files can fail and may need reopening. Interrupted writes can lose data. Choose another storage design if your workload requires stronger failure guarantees.
Read the mount journal first; clear a failed state after correcting its cause.
Operational checklist and rollback
Unattended SFTP works using the exact boot identity.
The host key is verified and stored in the expected file.
The fstab entry parses and contains no passwords or private-key contents.
Access after reboot produces the intended remote listing.
The actual local user or service can read the required files.
You understand how the application handles unavailable storage.
To disable the configuration, stop applications using the directory, stop mnt-remote.automount and mnt-remote.mount, remove only this entry from fstab, and run sudo systemctl daemon-reload. Preserve other fstab entries. Removing the mount configuration does not delete remote files or revoke the remote authorized key.