The most commonly deficient nutrients in the diet

Diet is important to our health. Yet most of our meals are lacking in these six important nutrients.
Copilot in the new Microsoft Edge has added a screenshot feature to send directly into the conversation with the tool, without having to take an additional step of taking a screenshot of the computer screen and then editing it. This feature is extremely useful, helping users save steps when sending images with Copilot. The article below will guide you to take screenshots via Copilot in Microsoft Edge.
How to take screenshots on Copilot Microsoft Edge
Step 1:
You access the Microsoft Edge browser then click on the Copilot icon . Then the conversation interface appears, you click on the screenshot icon as below.

Step 2:
Now the plus icon appears on the interface for you to select the area of the screenshot you want to use in Copilot. We will use the mouse to select that area of content.
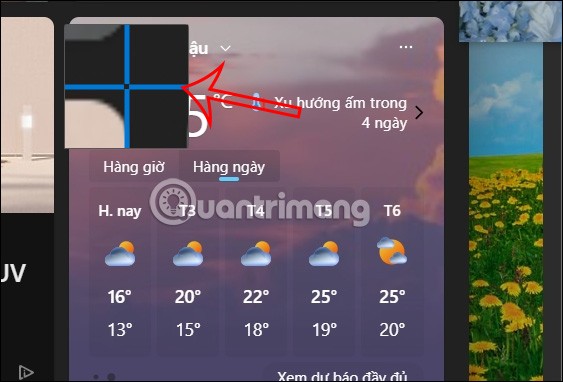
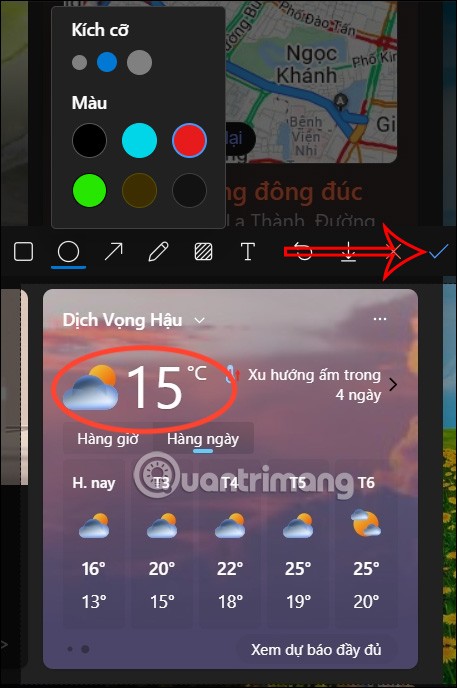
Next, when we release the mouse, we will see the tools displayed inside to help you edit the screenshot immediately without needing other software. You can circle the area you need to pay attention to, adjust the size or color. After editing, click on the v icon to save the screenshot and send it to Copilot.
Step 3:
You enter your question into the Copilot box as usual and then submit.
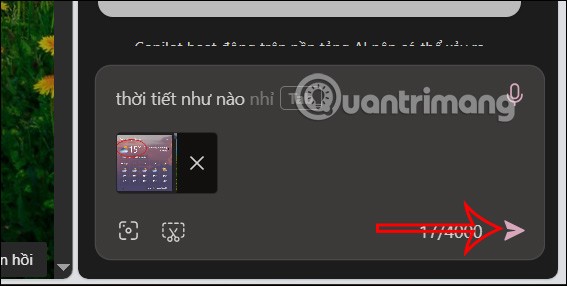
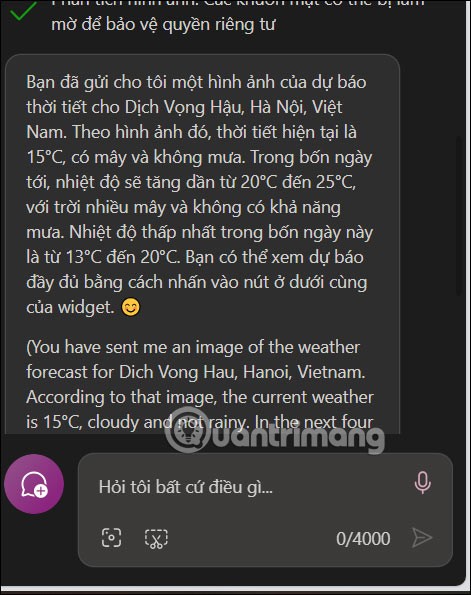
As a result you get Copilot's response as shown below through the screenshot you submitted.
Diet is important to our health. Yet most of our meals are lacking in these six important nutrients.
At first glance, AirPods look just like any other true wireless earbuds. But that all changed when a few little-known features were discovered.
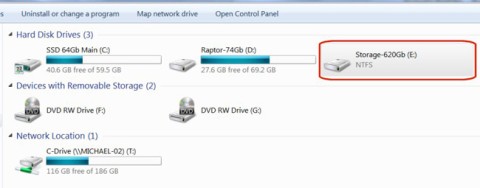
In this article, we will guide you how to regain access to your hard drive when it fails. Let's follow along!
Dental floss is a common tool for cleaning teeth, however, not everyone knows how to use it properly. Below are instructions on how to use dental floss to clean teeth effectively.
Building muscle takes time and the right training, but its something anyone can do. Heres how to build muscle, according to experts.
In addition to regular exercise and not smoking, diet is one of the best ways to protect your heart. Here are the best diets for heart health.
The third trimester is often the most difficult time to sleep during pregnancy. Here are some ways to treat insomnia in the third trimester.
There are many ways to lose weight without changing anything in your diet. Here are some scientifically proven automatic weight loss or calorie-burning methods that anyone can use.
Apple has introduced iOS 26 – a major update with a brand new frosted glass design, smarter experiences, and improvements to familiar apps.
Yoga can provide many health benefits, including better sleep. Because yoga can be relaxing and restorative, its a great way to beat insomnia after a busy day.
The flower of the other shore is a unique flower, carrying many unique meanings. So what is the flower of the other shore, is the flower of the other shore real, what is the meaning and legend of the flower of the other shore?
Craving for snacks but afraid of gaining weight? Dont worry, lets explore together many types of weight loss snacks that are high in fiber, low in calories without making you try to starve yourself.
Prioritizing a consistent sleep schedule and evening routine can help improve the quality of your sleep. Heres what you need to know to stop tossing and turning at night.
Adding a printer to Windows 10 is simple, although the process for wired devices will be different than for wireless devices.
You want to have a beautiful, shiny, healthy nail quickly. The simple tips for beautiful nails below will be useful for you.
