Before sharing with your friends to see the photos of the last vacation you want to edit a bit, but you are not proficient in Photoshop and want to find a simpler photo editing tool to easily edit. repair.
So Fotor would be the ideal choice for you. This tool is completely free, supporting brightness adjustment, contrast, white balance and color saturation of the image. At the same time, it allows highlighting or blurring photos, adding details to photos, cutting, dragging and rotating photos.
Please refer to the following article to know how to install and use Fotor to edit photos as you like:
Instructions to install Fotor for Windows
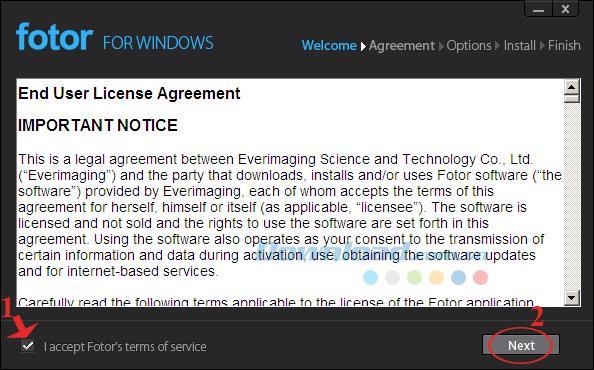
Step 1: Double-click the installation file, the installation window appears in the I accept Fotor's terms of service box to agree to accept the terms of use that the manufacturer requires.
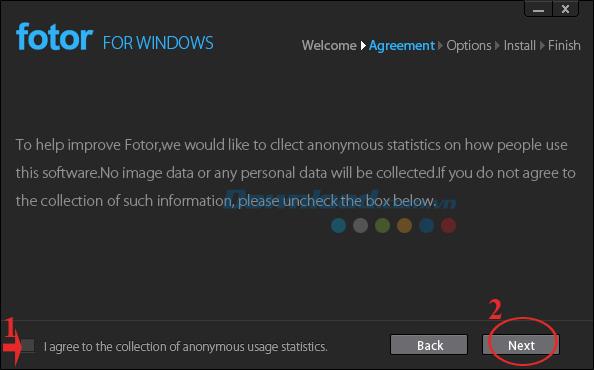
Step 2: In this window the manufacturer wants to collect data to statistics who are using Fotor. You can be assured that information about dates, as well as photos used or personal data will not be collected.
If you disagree with the manufacturer collecting data then uncheck I agree to the collection of anonymous usage statistics. Then click Next to continue.
Step 3: Fotor installation process is not complicated, just click Next ... Next to complete the installation process.
Video tutorial on downloading and installing Fotor
Extremely simple photo editing with Fotor
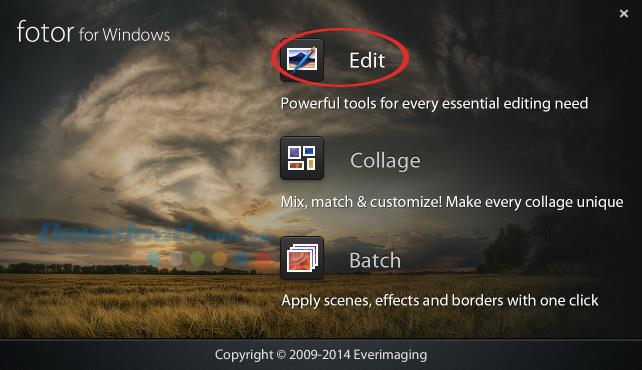
Step 1: Open Fotor, on the main interface of the program, there are 3 main functions for you to choose:
- Edit: Edit photos.
- Collage: Create collages.
- Batch: Apply context, effects and borders to a series of photos with one mouse click.
To edit the image, you click Edit .
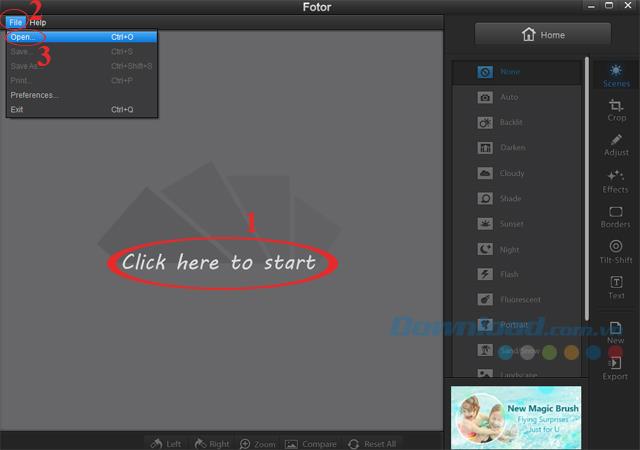
Step 2: Click the text Click here to start or on the toolbar click the File tab , select Open (or use the keyboard shortcut Ctrl + O ) to select the image file to edit.
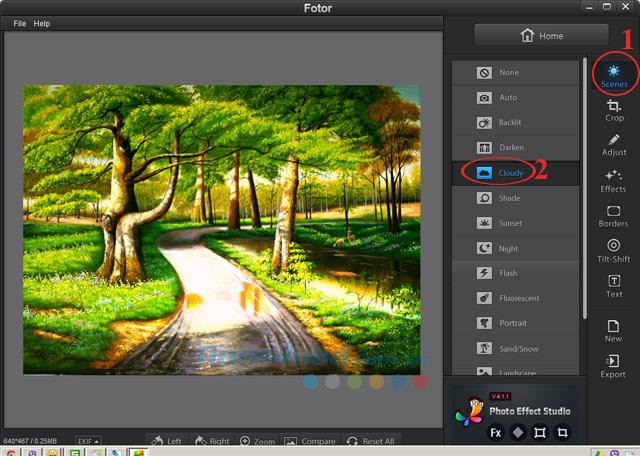
Step 3: To change the color of the image, click Scenes in the right column of the screen. A variety of scene modes will appear, here Fotor offers 15 modes that have been configured for specific shooting conditions. You just need to click on the appropriate scene mode to apply to your image file.
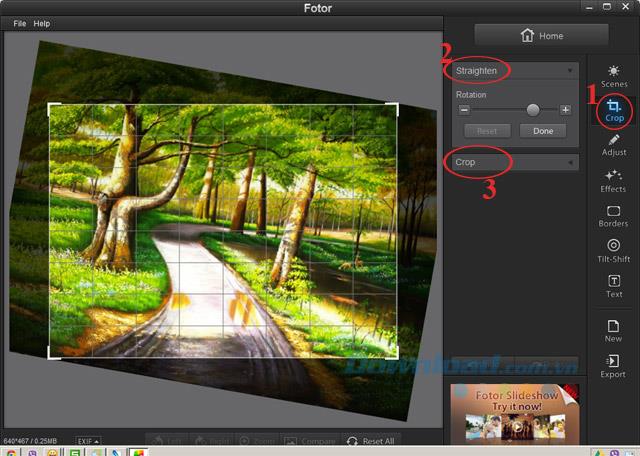
Step 4: To crop the image, click Crop , there will be two cropping modes for you to choose: Straighten and Crop .
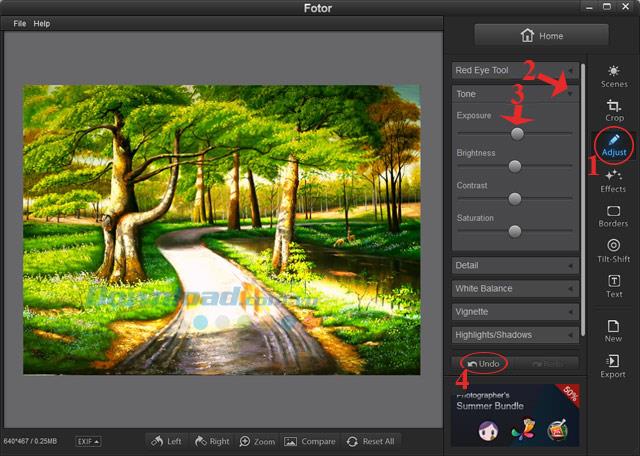
Step 5: Next, click Adjust to change the brightness, contrast, saturation for the image. There are 6 modes for you to choose, click the drop-down button next to each mode, then you just need to hold the mouse and adjust the slider to suit your photo.
If there is a slight adjustment, click Undo to return to the operations you have just performed.
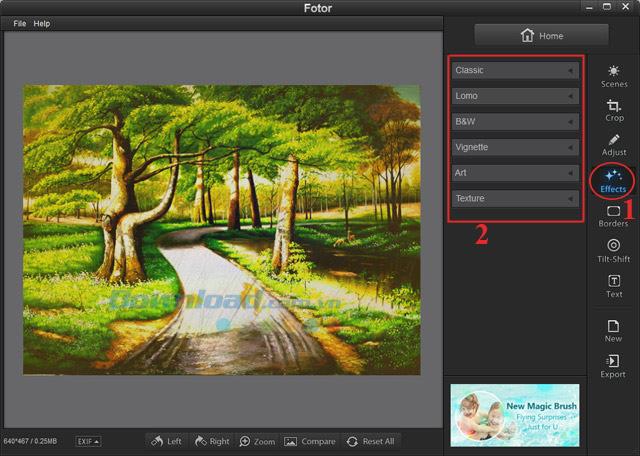
Step 6: To add effects to photos click Effects in the right corner of the screen. Here, provide 6 groups with 77 different effects for you to freely choose to apply to your photos.
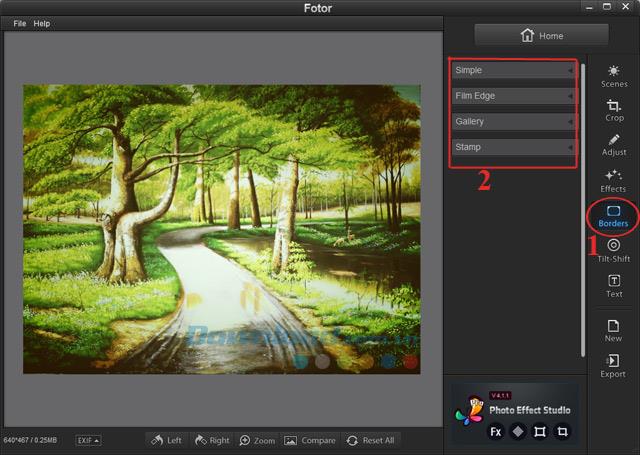
Step 7: To add borders to your photos, click Borders . Here, provide 4 groups with 37 contour patterns available to apply to image files.
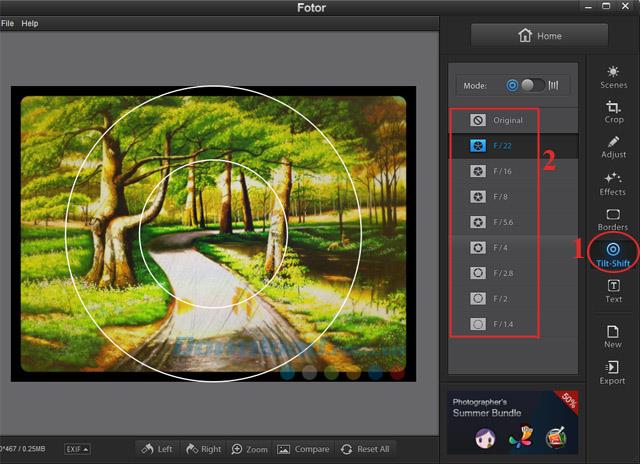
Step 8: If you want to focus on a detail on the image and blur the other areas, then press Tilt-Shift. Here will give you 8 effects available, you just need to choose the appropriate effect to apply to your photos only.
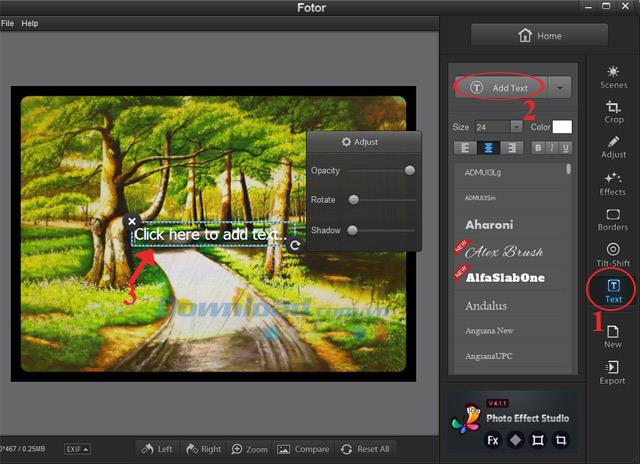
Step 9: If you want to add text to the image, click Text, then click the Add Text button , type the text you want to insert and choose the font, size, font color, move the position of the text.
Step 10: After processing the image, click Export to save to your computer or share on social networking sites such as Facebook , Twitter or Flickr .
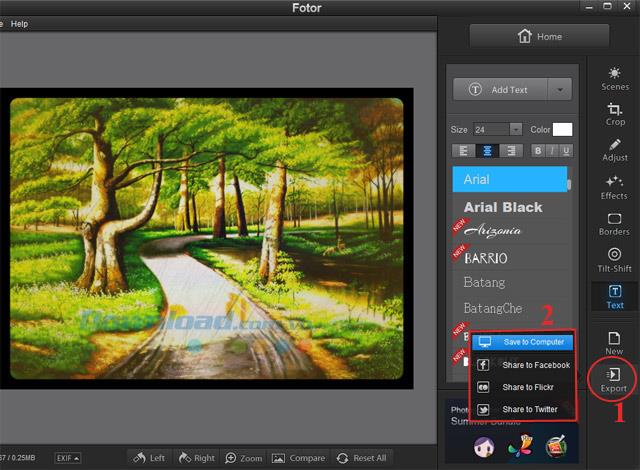
Here, we will choose Save to Computer.
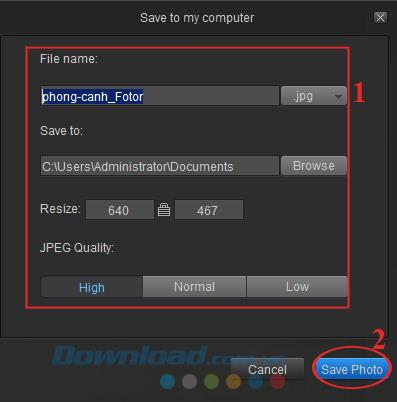
The Save to my computer window appears. Here you can name the image, choose where to store, choose the size and quality of photos. Then click Save Photo to save.
You can now edit any photo as you like. Isn't it great, guys? If you are in need of creating Wedding Photo Album , you can use Wedding Album Maker Gold.
In addition, you can refer to some free photo editing software: PhotoScape , Paint.NET , GIMP ...
Please refer to the instructions in the following Video:
I wish you successful implementation!


