Setting the Android phone screen brightness too high will cause many harmful effects on our health, including memory loss, increased risk of cancer, ... and especially affect the eyes. Besides, the Android screen light is too high will also quickly reduce your battery capacity. Therefore, changing the phone screen brightness is a simple way to help you choose the screen brightness suitable for the surrounding environment, avoiding the phone screen being too bright or too dark.
Most Android phones use a light sensor to automatically adjust the brightness of your phone's screen. However, if you don't know how to do it, follow the instructions below.
Note: The instructions in this article are performed on Oppo phones. For other Android phones, you just need to do the same.
1. Adjust Android phone screen brightness using quick settings bar
This is the simplest way to help you easily increase or decrease the brightness of your Android phone screen. The specific steps are as follows:
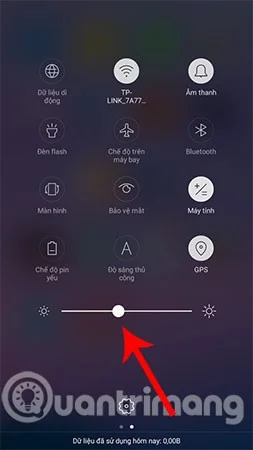
From the Android phone screen, swipe down from the top to bring up the quick settings panel. You will then see the screen brightness adjustment bar icon as shown below and now you can choose the appropriate Android screen brightness for yourself by moving the function bar to the right to increase screen brightness and sliding to the left to decrease brightness.
2. Adjust the screen brightness of your Android phone by accessing Settings
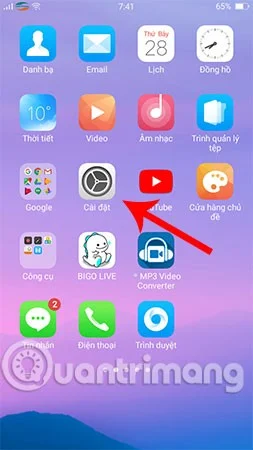
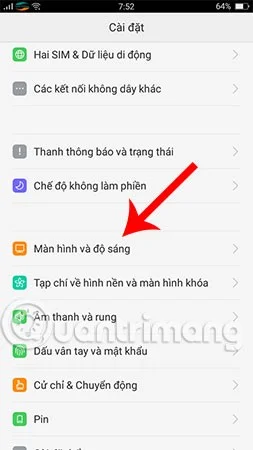
Another way to adjust the screen brightness on an Android phone is to set it up in the Settings section. First, go to the Settings app , then scroll down and look for the Display and Brightness section .


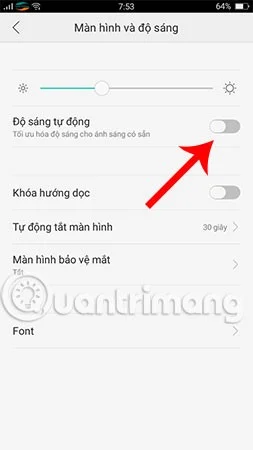
Here, you will have more customizations than the first method introduced above. Specifically, you are not only allowed to increase or decrease the brightness of the Android screen, but you can also activate the Auto-Brightness feature . As soon as you activate this feature, the system will automatically change the brightness of your phone screen to suit the environment you are using.

3. Adjust Android phone screen brightness using the application
In addition to the 2 ways to adjust the brightness of the Android phone screen just instructed above, you can also use additional applications to control screen brightness . Adding an application to help adjust the screen brightness is very necessary, they will help you customize the brightness to a level lower than the manufacturer's standard level. Thereby, limiting the condition of fatigue and blurred eyes when using the phone at night, bringing a more comfortable and pleasant feeling.
Above are 3 ways to help you increase or decrease the brightness of your Android phone screen manually or with the help of useful software. Please refer to and set it up immediately to protect your eyes. Not only Android, iPhone users can also adjust the settings themselves to reduce the brightness of the iPhone screen below the iOS limit , helping to reduce eye strain.
Good luck!
See also: