WebTech360 – Table of contents is an indispensable component in long documents and manuals with many pages and many sections. With such long documents, creating a table of contents will help readers shorten the time to look up headings, convenient for reading and editing. However, if you do not know the automatic table of contents generation but create the table of contents manually, you will not only lose a lot of time, but you will also not be able to access the required indexes in the document. In this article, WebTech360 will show you how to create an automatic table of contents in Microsoft Word easily and quickly.
Step 1. Determine the level of automatic table of contents to create
To create an automatic table of contents in Microsoft Word, you first need to identify the large to small headings in your document. There are two ways we can set the level of the table of contents.
Method 1. Mark the level of indexes in the text
Select (highlight) the piece of content you want to index. On the Ribbon, select the References tab , in the Table of Contents group, click Add Text , then select the Level you want to apply to the highlighted paragraph (Level 1 is the highest level, then Level 2 and Level 3... ).
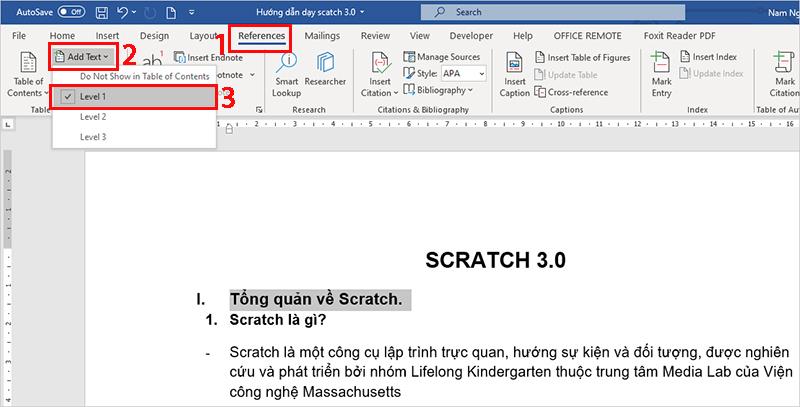
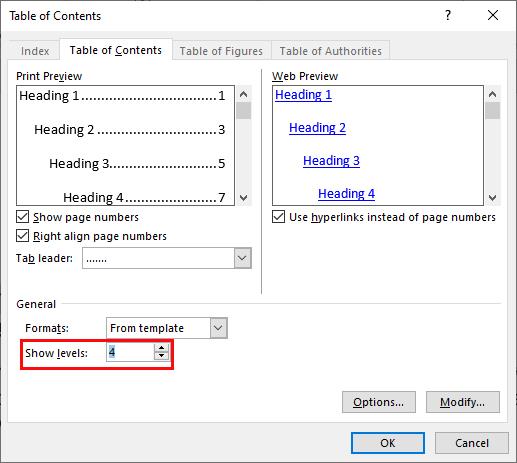
Note: Normally by default Microsoft Word has 3 Levels for you to choose from, but if in the document there is a hierarchy of more than 3 levels, you can increase the number of Levels by clicking Table of Contents and then selecting Custom Table . of Contents …and change the value in the Show levels box . After clicking OK, the table of contents will immediately be created at the position of the mouse pointer, but if it is incomplete, you can delete or update it later.
Method 2: Use heading tags (I use this way more often)
Highlight the content you want to make a heading, in the Home tab select Heading with the corresponding level ( Heading 1 is the largest heading level, then Heading 2 and Heading 3 ...). Do this with all the indexes down to the smallest level you want to create in the table of contents.
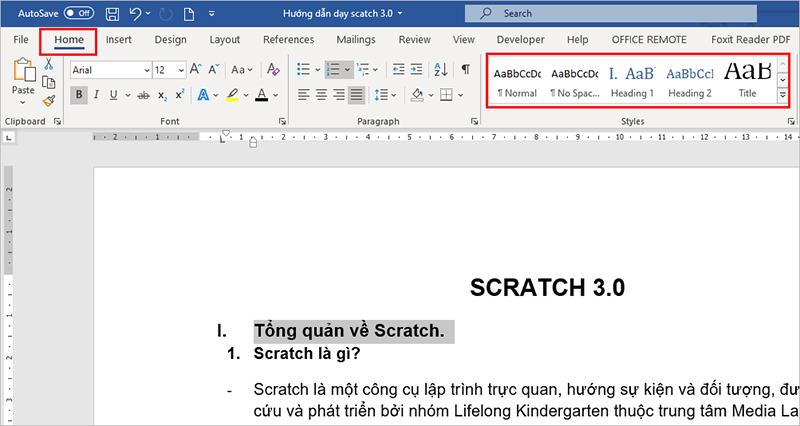
Note: You can reset the text format (font, size, bold, ...) of each Heading style by right-clicking on that Heading style and then selecting Modify... Usually I will format these Headings first. for each text from the beginning.
Step 2: Create an automatic table of contents
– Place the cursor where you want the table of contents to be displayed (usually the first or last page of the document).
– Open the References tab, click on Table of Contents and then select the form of table of contents display (a template is available for you to choose) . After doing this, the table of contents will appear.
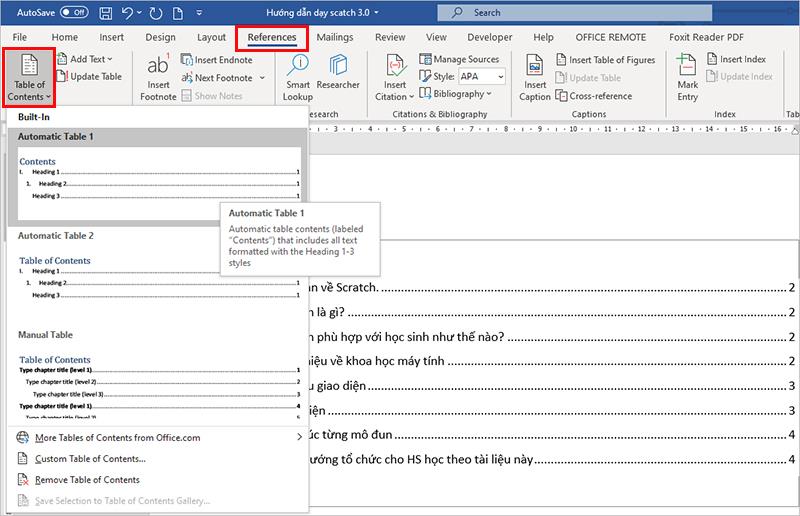
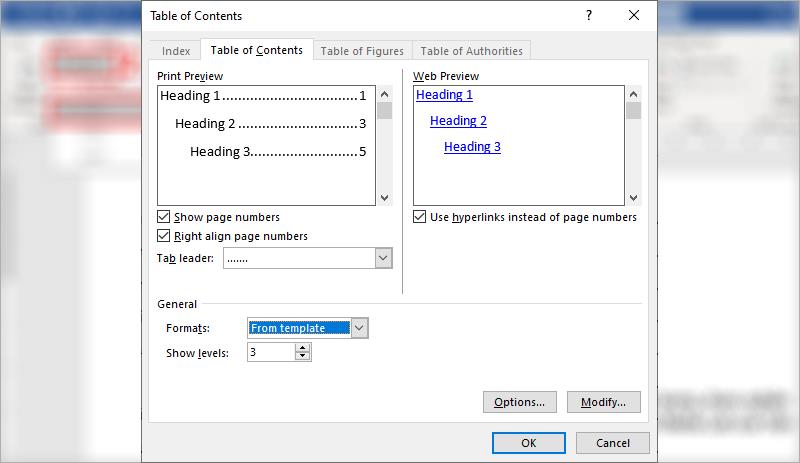
– You can also change a few customizations to display the table of contents. Click Table of Contents à Custom Table of Contents… In the Table of Contents tab customize the following settings:
- Show page numbers: Displays the page number corresponding to the title name.
- Right align page numbers: Displays the page numbers in the right margin (if unchecked, the page numbers will be right after the index name).
- Tab leader: The form of alignment, the comparison between the title name and the page number (use a series of dots, dashes, or blanks) .
So you've created an automatic table of contents quickly, now admire your results.
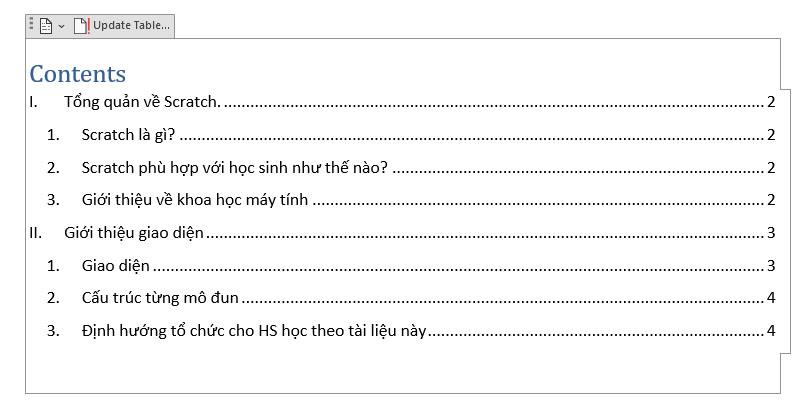
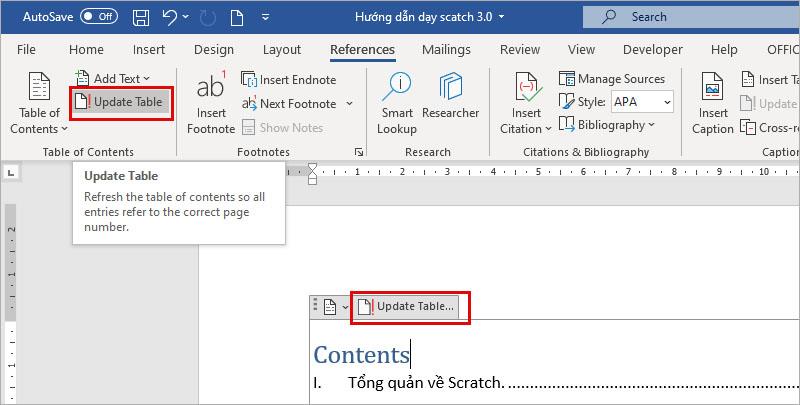
It's simple right? After you have created the table of contents, all the adjustments in the document can be updated automatically. You can click the Update Table button.. which appears at the top of the table of contents or Update Table on the Ribbon References
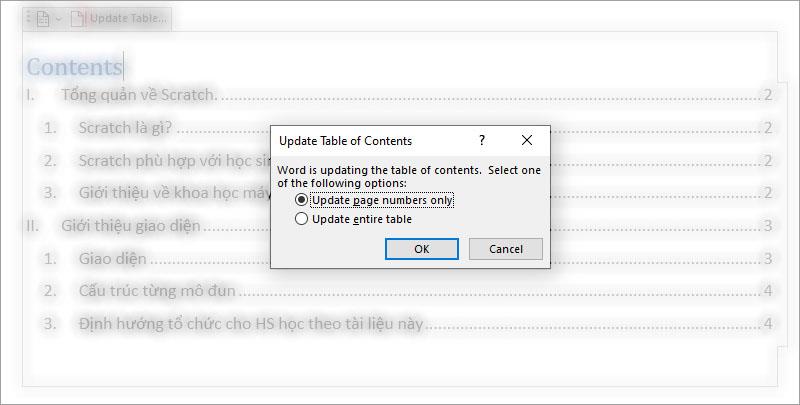
Either way, you'll get a notification with two options:
- Update page numbers only (update page numbers only)
- Update entire table (update the entire table of contents)
The above are quick instructions to help you create an automatic table of contents in Microsoft Word easily and quickly. Hope to help you improve the efficiency in your work.
Reference: Instructions for duplex printing in Microsoft Word


