ibisPaint is a great painting app on mobile devices. The instructions below will help you start sketching on ibisPaint easily.
Drawing on the small screen of a smartphone can be very difficult for beginners. Therefore, the article suggests that you should practice drawing freely first (like when you do on paper). This is the ideal starting point for a "journey" to explore the world of digital painting.
How to draw sketches on ibisPaint
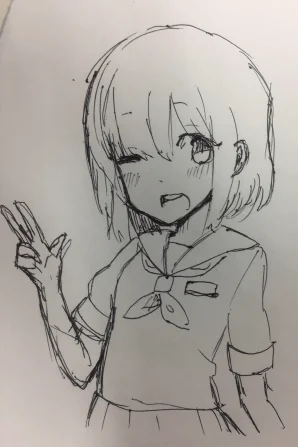
Draw something inside your sketchbook if you have one. You can also use A4 paper or a notebook. Draw as usual, then take a picture of it with your phone.

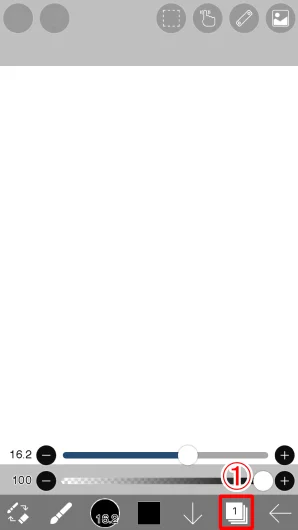
Touch the Layer icon (1) in the main toolbar to open the layer creation window.

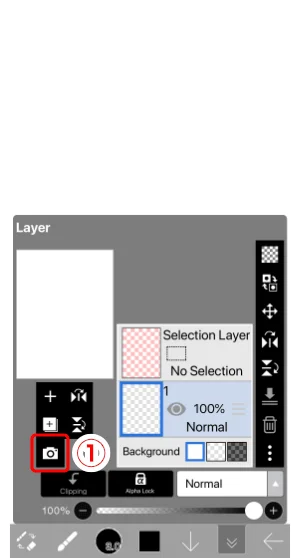
Next, tap (1) Import from Photo Library and import your drawing photo.

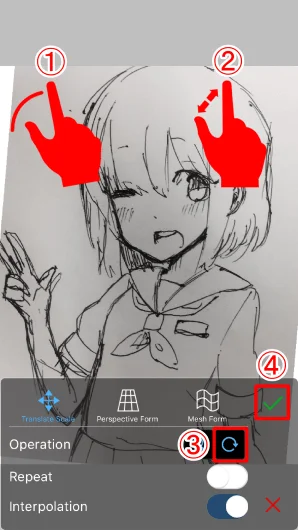
Selecting a photo will activate geolocation mode. Use one finger to drag and two fingers to zoom in and out. Tap the icon  to turn on the rotate tool. Rotate the photo by dragging 2 fingers. When the photo is in the desired position, tap the Done button .
- Drag with 1 finger to move.
- Use 2 fingers to zoom in and out of the image (resize).
- Turn on rotate and drag with two fingers to rotate the image.
- Touch the Done button to complete the process.

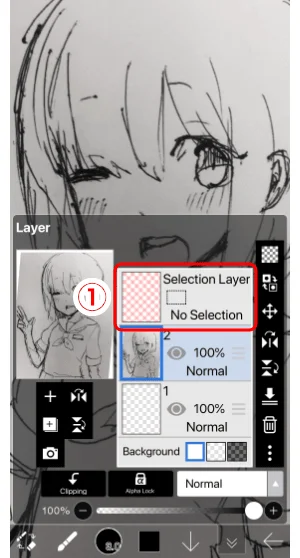
Now we have 3 layers. The layer with the pink background image is the selected layer. It is a special layer where you can use a brush or eraser to create selections. If you are just starting out, you should not use this layer.
Layers in ibisPaint and ibisPaint X

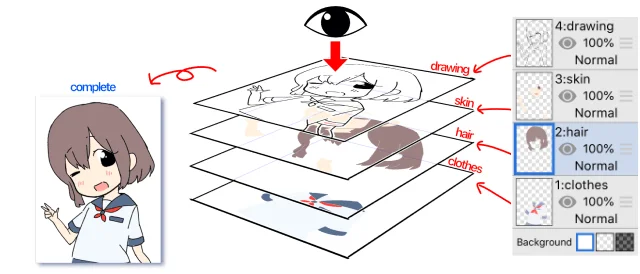
Layers are an important aspect of digital painting, so you should learn a little about them. As the name suggests, the layer resembles many scenes in an anime or cartoon movie. If you draw lines, fill colors, and create backgrounds on all different layers, the colors won't mix. This is quite useful for editing later. You should also draw hair, skin, and clothes on separate layers.
The background in ibisPaint is white, but the layers you paint will be on a transparent background when creating them. Erasing line drawings or filling them with an eraser will return the current layer to transparency.

The layer order is fixed, but you can drag the Reoder control (1) up or down to rearrange them.
Now drag the image you just imported to the bottom and place the current layer in the 2nd position.
- Drag the layer handle up or down.
- Tap Layer 2 to change it to Current Layer .
- Close the Layers window with the button .
↓

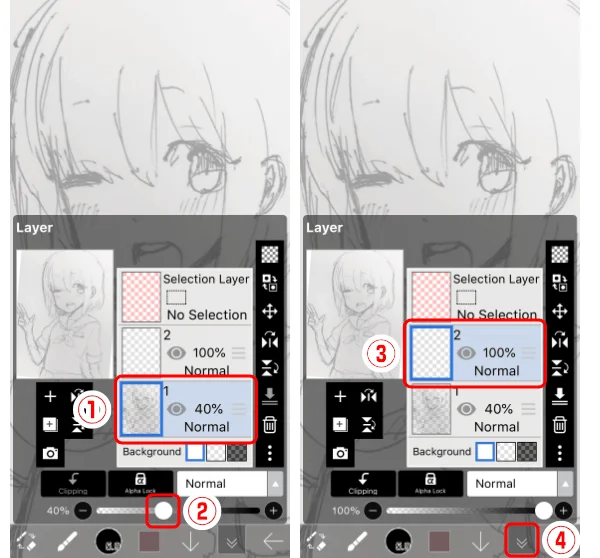
If you import a sketch with heavy lines created with a pen or similar tool, the lines will be hard to see. In this case, you should reduce the opacity of the sketch layer.
- Tap Sketch Layer to change the current layer.
- Adjust the Opacity slider from 100% to 40%.
- Tap Layer 2 to switch to the current layer.
- Tap the button
↓to close the Layer window.
Above is how to draw sketches on ibisPaint . Hope the article is useful to you.
 to turn on the rotate tool. Rotate the photo by dragging 2 fingers. When the photo is in the desired position, tap the Done button .