Put ownCloud on HTTPS with Let’s Encrypt and Nginx
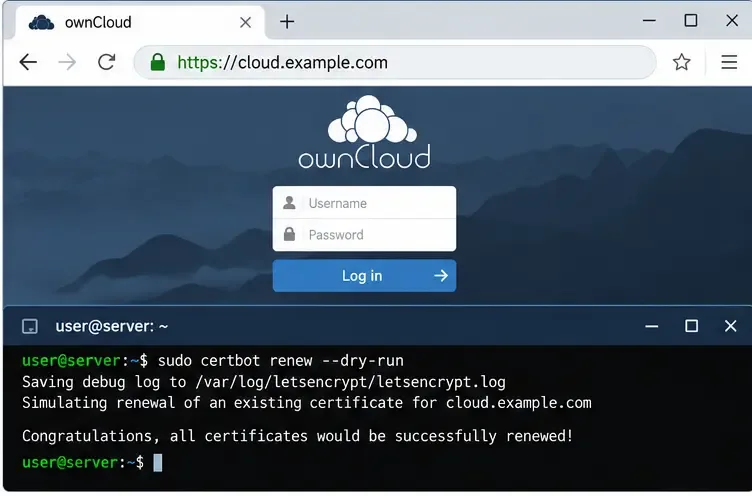
Choose HTTP-01 or DNS-01, configure an ownCloud reverse proxy, and verify Certbot renews HTTPS certificates automatically.
Terminate TLS at a reverse proxy in front of ownCloud Server, then use Certbot to obtain and renew a Let’s Encrypt certificate. For one public hostname, Nginx with the HTTP-01 challenge is usually the simplest route when the proxy can accept inbound connections on port 80. If port 80 cannot be exposed, or you need a wildcard certificate, use DNS-01 with an automated DNS integration instead.
This article targets ownCloud Classic Server 11 in Docker with Nginx on the same Linux host. Current ownCloud documentation directs TLS to a proxy. These interface-style examples use a placeholder hostname; substitute yours.
If you already run a TLS-terminating proxy, keep certificate management there instead of adding another proxy. Certbot’s Nginx plugin obtains the certificate and edits the virtual host, but changes your Nginx configuration. If you prefer to manage that configuration yourself, use Certbot’s certificate-only mode and wire the certificate paths into your proxy manually.
| Choice | Best fit | Main tradeoff |
|---|---|---|
| HTTP-01 with Nginx and Certbot | A public single hostname with inbound TCP 80 available | Simple, no DNS API secret; depends on correct public DNS and port 80 reachability. It cannot issue wildcard certificates. |
| DNS-01 with a DNS provider plugin | Port 80 is closed, the service is private, or you need a wildcard | Works without a public web challenge, but automated renewal needs DNS API access. Use a narrowly scoped credential and protect it. |
| Existing proxy’s ACME integration | A proxy already manages certificates for other sites | Fewer moving parts; renewal behavior and configuration are specific to that proxy. |
Let’s Encrypt’s optional tlsserver profile began issuing 45-day certificates on May 13, 2026; its default classic certificates remain 90 days until switching to 64 days on February 10, 2027. Certbot often schedules renewal; verify yours.
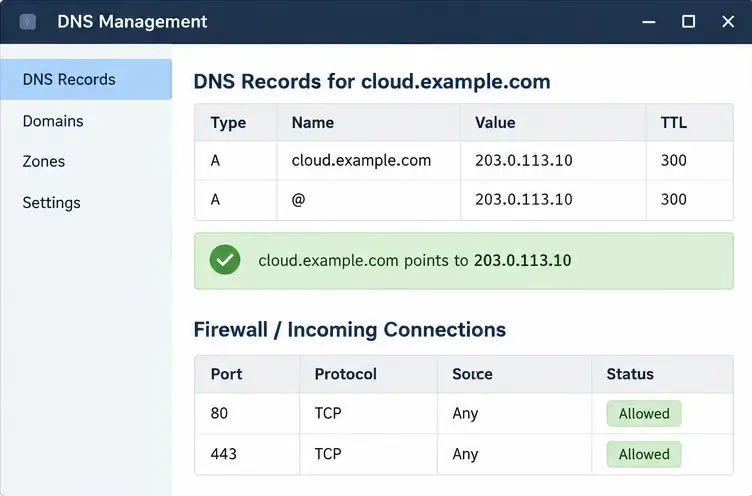
cloud.example.com that points to the server’s public IPv4 address. Add an AAAA record only if IPv6 reaches the same proxy correctly. Allow inbound TCP 80 for HTTP-01 validation and TCP 443 for users’ HTTPS connections in both the host firewall and any cloud firewall or router. Check DNS from outside your network..env file, replace the example hostname and set the relevant values:OWNCLOUD_DOMAIN=cloud.example.com
OWNCLOUD_TRUSTED_DOMAINS=cloud.example.com
OWNCLOUD_OVERWRITE_CLI_URL=https://cloud.example.com
OWNCLOUD_OVERWRITE_HOST=cloud.example.com
OWNCLOUD_OVERWRITE_PROTOCOL=https
OWNCLOUD_TRUSTED_PROXIES=PROXY_SOURCE_IP
HTTP_PORT=127.0.0.1:8080PROXY_SOURCE_IP is a placeholder: use the address ownCloud actually sees for the proxy, not an assumed loopback address. Docker networking changes the source address ownCloud sees. Trust only the proxy address or smallest required set; broad trust lets clients spoof forwarded information. The official Compose example publishes ownCloud on port 8080; binding the host side to loopback keeps the app’s HTTP listener off the public interface when the provided port mapping uses ${HTTP_PORT}:8080. If your Nginx is in a container, use a private shared Docker network and its service address instead of this host-loopback example.
Keep your existing database, Redis, and volume settings. After editing the file, recreate the ownCloud service so it reads the updated environment: docker compose up -d owncloud.
server {
    listen 80;
    server_name cloud.example.com;

    location / {
        proxy_pass http://127.0.0.1:8080;
        proxy_set_header Host $host;
        proxy_set_header X-Real-IP $remote_addr;
        proxy_set_header X-Forwarded-For $proxy_add_x_forwarded_for;
        proxy_set_header X-Forwarded-Proto $scheme;
    }
}
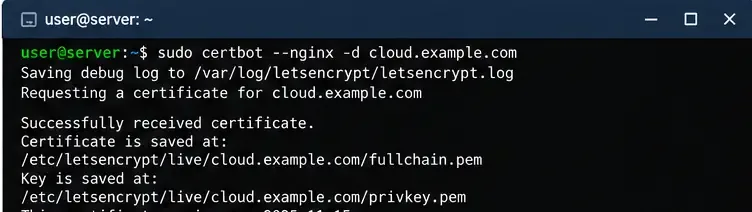
Enable the site using your distribution’s Nginx layout, then check and reload Nginx with sudo nginx -t and sudo systemctl reload nginx. Site-enablement paths vary by distribution. Keep the ACME HTTP challenge reachable; do not put an authentication gate or a blanket redirect rule in front of the challenge path while issuing the certificate.
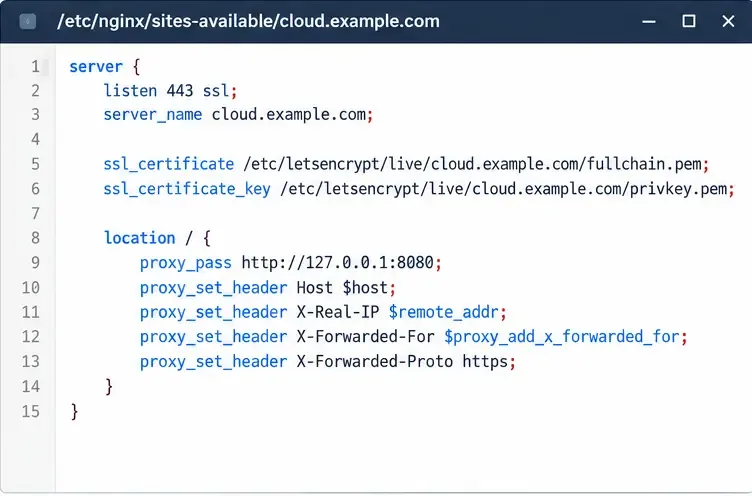
sudo certbot --nginx -d cloud.example.com --redirectCertbot’s Nginx installer obtains the certificate and configures HTTPS and an HTTP-to-HTTPS redirect. Review the Nginx changes before accepting them. If you want Certbot to issue the certificate without editing Nginx, use sudo certbot certonly --nginx -d cloud.example.com, then manually configure the TLS virtual host with the resulting fullchain.pem and privkey.pem paths and reload Nginx. Never publish or paste the private-key file.
Open https://cloud.example.com from an external network. Confirm the browser reports a valid certificate, ownCloud loads without a redirect loop, and generated links use HTTPS. If ownCloud reports an untrusted domain or builds HTTP links, check OWNCLOUD_TRUSTED_DOMAINS, OWNCLOUD_OVERWRITE_HOST, OWNCLOUD_OVERWRITE_PROTOCOL, and the trusted proxy address.
sudo certbot renew --dry-run
sudo systemctl list-timers --all | grep -i certbot
A successful dry run checks the renewal path without replacing the live certificate. The Nginx installer should deploy renewed certificates through its renewal integration; if you use certificate-only or webroot mode instead, make sure your renewal setup reloads Nginx after a successful renewal. Certbot documents deployment hooks for renewal for that purpose. Check the scheduler again after installation or migration, and alert on renewal failures rather than relying on a person to renew by hand.
For DNS-01, use the plugin documented for your DNS provider, create an API token limited to the records it must change, and test automatic renewal with the same Certbot dry run. Let’s Encrypt notes that DNS-01 supports wildcard names and services that are not public, but warns that broad DNS credentials on the web server increase the impact of a compromise.
For the version-specific details, see the ownCloud Server 11 Docker installation guide, its reverse proxy configuration and environment variable reference. For validation and renewal choices, consult Let’s Encrypt’s challenge documentation, its certificate lifetime schedule, and the Certbot instructions for your operating system.
Choose HTTP-01 or DNS-01, configure an ownCloud reverse proxy, and verify Certbot renews HTTPS certificates automatically.
Configure oCIS LDAP sign-in, align user and group lookups, and verify TLS and schema settings before rollout.
Add an Amazon S3 bucket to ownCloud 10, prepare compatible credentials and endpoints, and check access without confusing a mount with primary storage.
Schedule protected MariaDB dumps for ownCloud Server, handle maintenance mode safely, and verify each backup before relying on it.
Plan an ownCloud 10 to oCIS migration with the supported app, ordered commands, identity checks, and a clear list of data that needs separate handling.
Replace ownCloud Classic 10 logos and tune web UI colors with a theme app, while avoiding upgrade and integrity-check pitfalls.
Assign byte-based storage limits to new ownCloud Infinite Scale users by role, with a proxy.yaml example and a safe verification checklist.
Restore ownCloud desktop syncing by checking the server hostname, certificate chain, private CA trust, and captive portal issues without disabling TLS verification.
Use the invalid-file report to identify mismatched core files or app signatures, restore the correct release files, and verify the integrity check safely.
Deploy ownCloud Infinite Scale from its official Compose example, configure domains and persistent storage, then verify TLS, containers, and first login.