Fix ownCloud Sync Certificate Errors at the TLS Source
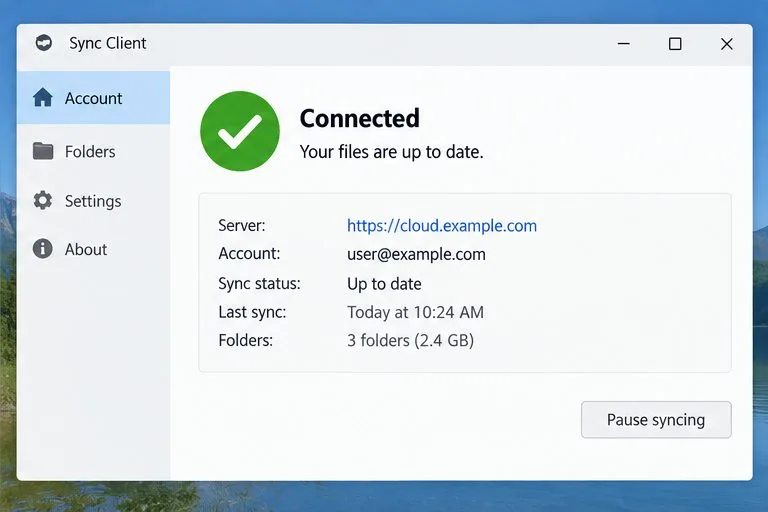
Restore ownCloud desktop syncing by checking the server hostname, certificate chain, private CA trust, and captive portal issues without disabling TLS verification.
Fix an ownCloud Desktop sync certificate error by correcting the TLS certificate that the server presents or by installing the trusted private CA that issued it. First confirm that the certificate is valid for the exact server hostname and includes its intermediate chain; do not disable certificate checks or click through an unexplained warning.
Check the client version before changing anything. As of October 2026, ownCloud’s release notes list Desktop App 7.1.0 and 6.0.3: the 7.x series supports Infinite Scale only, while ownCloud Server Classic 10 or 11 requires the 6.x series. The same notes also explain that a captive portal can trigger a certificate mismatch and pause synchronization. See the ownCloud Desktop App release notes.
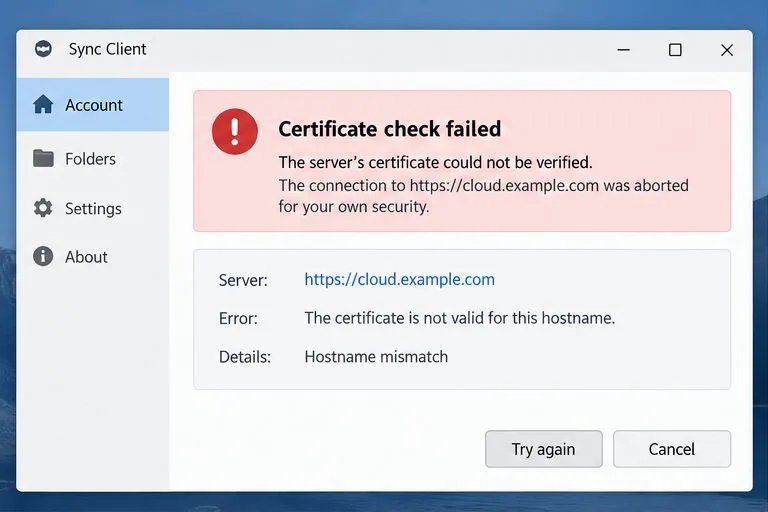
Compare the server URL shown in the ownCloud Desktop App with the address that works in your browser. Use the same hostname and path. A browser can sometimes retrieve a missing intermediate certificate automatically while a desktop client cannot.
Inspect the certificate details and confirm its Subject Alternative Name (SAN)—the hostnames it covers—includes the hostname you entered. A certificate for files.internal.local does not cover cloud.example.com just because both names reach one server. Check the validity dates and issuer, and verify the computer clock; a wrong local date can make a valid certificate appear expired or not yet valid.
If the browser also reports an error or several devices fail, the likely repair is on the server or reverse proxy. If only one computer fails, check its trust store, clock, proxy, and client version. ownCloud’s Desktop App troubleshooting guidance recommends confirming browser access and checking the server URL or proxy when desktop clients cannot connect.
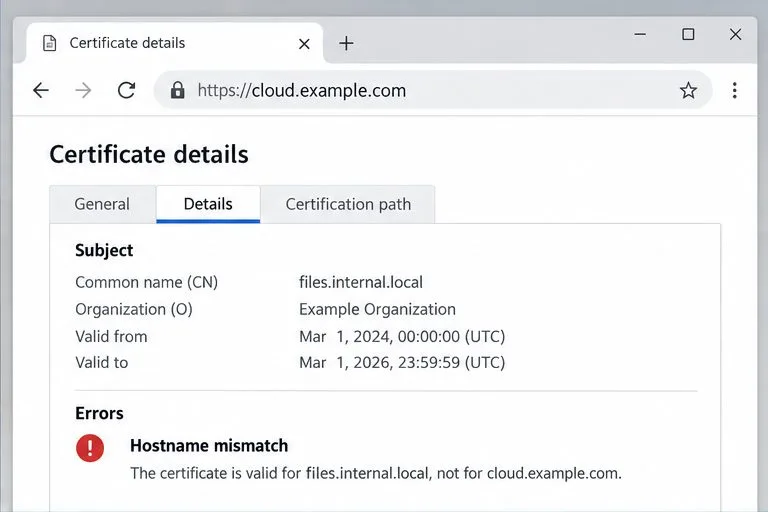
Ask the server administrator to install a certificate whose SAN includes the public hostname users enter, whose dates are current, and whose private key matches the certificate. A certificate can encrypt a connection and still fail identity verification when its hostname is wrong or its issuer cannot be verified.
The HTTPS endpoint must present the server certificate and required intermediate CA certificates in order. It normally should not send the root CA certificate; clients need to trust that root already. Check the reverse proxy or load balancer that terminates HTTPS, not just the ownCloud host. The proxy may still serve an old or incomplete chain after backend files were updated.
For a quick diagnostic from a machine with OpenSSL, run this command after replacing the example hostname:
openssl s_client -connect cloud.example.com:443 -servername cloud.example.com -showcerts -verify_return_error </dev/null-servername sends the hostname for Server Name Indication when one server hosts multiple TLS sites. Review the chain and verification result: an issuer failure suggests a missing intermediate or untrusted CA; a hostname or date error requires correcting the certificate or URL. This checks only the endpoint reached from that machine and network path. See the OpenSSL s_client reference.
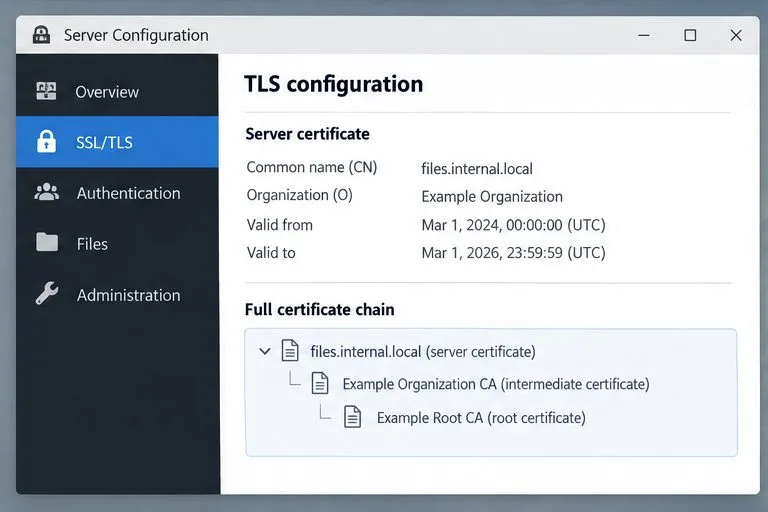
If your organization uses a private certificate authority (CA), obtain its root certificate through an authenticated channel and verify its fingerprint with the administrator. Install that CA certificate—not the server’s private key—in the operating system trust store, then restart the ownCloud client. On Debian or Ubuntu, an administrator can place a PEM-encoded CA certificate ending in .crt under /usr/local/share/ca-certificates/ and run sudo update-ca-certificates. Other platforms use different trust-store tools.
TLS behavior can vary by client build and platform. Qt documents that its default TLS configuration uses the system CA list, but not every package is necessarily configured identically. If adding the CA does not help, ask the administrator to check the client package and logs; never import a certificate from an unverified browser warning. See Qt’s CA certificate configuration documentation. ownCloud’s Server FAQ on self-signed SSL certificates directs administrators to its security guidance; it does not recommend weakening normal client verification.
A self-signed server certificate is not the same as a certificate issued by a trusted private CA. If a private CA is used, distribute and trust the CA root through a controlled channel, then serve a hostname-matching server certificate signed by that CA. Avoid accepting a changing certificate prompt as a routine workaround: it can train users to approve an impostor during a man-in-the-middle attack.
If the failure occurs only on public Wi-Fi, hotel networks, or a newly changed corporate network, open a browser and complete the network sign-in page first. A captive portal intercepts requests before login and may present a certificate that does not belong to the ownCloud hostname. ownCloud’s release notes explicitly say synchronization can pause when a captive portal causes a certificate mismatch and should restart after the portal is cleared.
On a managed work device, an HTTPS inspection proxy may replace the server certificate with one signed by the organization’s inspection CA. Ask IT whether that is expected and whether the approved CA is installed for the desktop client. Do not bypass verification to make syncing work; the proxy or trust configuration needs to be corrected by the administrator.
Quit and reopen the client, confirm the account connects to the exact HTTPS URL, and wait for the sync status to report completion. Create a small test file in the sync folder and confirm it appears in the web interface, then check the client log for any recurring TLS verification message. If the certificate failure remains, send the administrator the exact hostname, client version, operating system, time of failure, and the specific certificate error—never send passwords or private keys. If ownCloud’s web interface works but all compatible Desktop Apps still fail, provide the server URL and TLS diagnostic output so the administrator can investigate the proxy or certificate chain.
Restore ownCloud desktop syncing by checking the server hostname, certificate chain, private CA trust, and captive portal issues without disabling TLS verification.
Use the invalid-file report to identify mismatched core files or app signatures, restore the correct release files, and verify the integrity check safely.
Deploy ownCloud Infinite Scale from its official Compose example, configure domains and persistent storage, then verify TLS, containers, and first login.
Set up the S3NG driver, bucket permissions, persistent metadata storage, and upload sizing so ownCloud Infinite Scale can store file contents reliably.
Find why an ownCloud Server upload stops near completion by checking file status, quota, temporary disk space, PHP limits, and proxy timeouts.
Set AllowOverride All only for ownCloud’s web root, validate the active Apache vhost, and reload safely to restore .htaccess rules.
Enable ownCloud’s Enterprise Auditing app, route admin_audit events to a protected log file, and confirm that real user actions are being recorded.
Align Keycloak’s realm issuer, web client, and user claims to let ownCloud Infinite Scale sign users in reliably across the web and mobile clients.
Transfer owned files and outgoing shares with ownCloud’s occ command, understand what stays behind, and verify access before deleting the old account.
Learn when ownCloud 10 database indexes need attention, how to apply supported schema updates safely, and when query tuning or a database change is the better fix.