Set Up ownCloud Enterprise Auditing and Verify the Logs
Enable ownCloud’s Enterprise Auditing app, route admin_audit events to a protected log file, and confirm that real user actions are being recorded.
People often reach a Keycloak sign-in page, authenticate, and then land back at the ownCloud Infinite Scale login screen—or see an “unknown user” error. The usual causes are a realm issuer that does not match, a web client copied from a different example version, or an identity claim that does not match an oCIS account. Configure Keycloak as oCIS’s external OpenID Connect provider (OIDC), align those three values, and verify the browser and clients can reach the provider over HTTPS.
This walkthrough uses fictional hosts: cloud.example.com for oCIS and sso.example.com for Keycloak. The configuration references ownCloud Infinite Scale 8.2 documentation; compare names with the documentation for your installed release before applying them. This is for Infinite Scale (oCIS), not ownCloud Server 10.
An identity provider (IdP) authenticates users for another service. OpenID Connect is the sign-in protocol that lets oCIS trust Keycloak’s login and identity information. A realm is Keycloak’s separate set of users, clients, and settings. Choose the realm that will serve oCIS, then identify its issuer URL: for the example realm ocis, it is https://sso.example.com/realms/ocis.
Before editing oCIS, open https://sso.example.com/realms/ocis/.well-known/openid-configuration in a browser. This OpenID Connect discovery document describes the provider’s endpoints. Confirm that its issuer value exactly matches the realm URL, including scheme, host, capitalization, and path. The issuer must not be the administration page or the longer discovery URL. The provider’s TLS certificate must be trusted by users’ browsers and by the oCIS server/container.
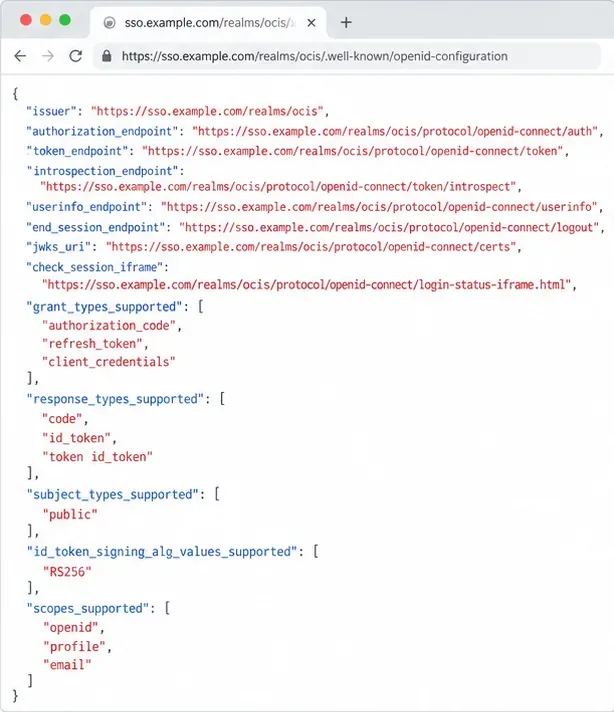
If the discovery URL does not load, resolve DNS, reverse-proxy routing, firewall, or certificate problems first. A successful browser response alone does not prove the oCIS container can reach Keycloak; check network access from the server’s deployment network as well. The OpenID Connect discovery rules require the returned issuer to identify the same provider. See the OpenID Connect Discovery specification.
Use the maintained ownCloud Keycloak deployment example as your starting point and match its realm file to your oCIS release. Do not mix versions: the current compose example uses the web client ID web, while older setup notes say ocis-web. Keycloak and oCIS must use the same client ID.
In Keycloak, open the selected realm and web client. Match the sign-in flow and client ID to the ownCloud example. Set valid redirect URIs to the exact callback addresses required by that realm, using the public HTTPS host. Set web origins only as the template requires. The wildcard below is illustrative, not a production recommendation: broad redirect patterns can allow unintended destinations. Labels vary by Keycloak release.
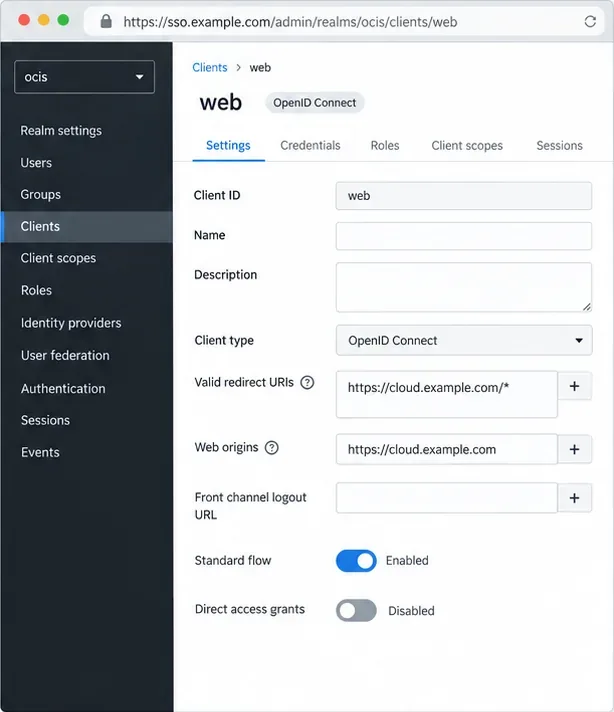
Keep Keycloak’s public hostname stable. If TLS ends at a reverse proxy, configure its public hostname and trusted proxy headers, or redirects may use the wrong scheme or host; follow the Keycloak reverse proxy guidance. Replace demo administrator credentials before exposing Keycloak.
Add these variables to the oCIS service in your deployment configuration, preserving its other settings and secrets. The sample uses fictional URLs and the current example client ID:
OCIS_URL=https://cloud.example.com
OCIS_OIDC_ISSUER=https://sso.example.com/realms/ocis
WEB_OIDC_CLIENT_ID=web
PROXY_OIDC_REWRITE_WELLKNOWN=true
OCIS_EXCLUDE_RUN_SERVICES=idp
OCIS_URL is the public oCIS address; the issuer and client ID must exactly match Keycloak. The rewrite enables the discovery path used by desktop, Android, and iOS clients. Excluding idp stops the built-in provider in external-IdP deployments; omit it if your setup intentionally uses that service.
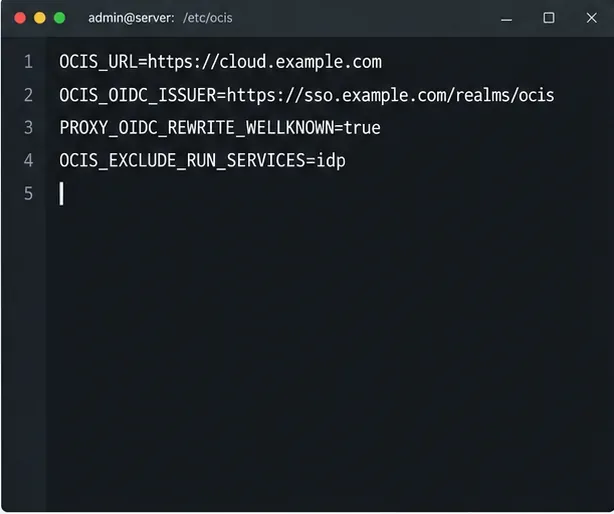
Apply the changes with your deployment’s normal restart process. With Docker Compose, run docker compose up -d from the compose directory to recreate changed services, then review the oCIS logs. Use trusted TLS certificates in production. The ownCloud example marks INSECURE=true as a local self-signed-certificate option; remove it or set it to false on an internet-facing server. ownCloud also says not to use PROXY_OIDC_INSECURE in production.
A claim is an OIDC identity field, such as sub, preferred_username, or email. oCIS uses it to find an account. For existing users, map it to the attribute they already use—username, mail, or user ID. A mismatch can produce “user not found” after Keycloak accepts the login.
To create accounts on first login, set PROXY_AUTOPROVISION_ACCOUNTS=true only when intended and after enabling writes in the oCIS Graph user backend. The identifier must be unique, stable, and never reassigned. ownCloud identifies sub as suitable; use email or preferred username only if it cannot change. Keep the creation and lookup claims aligned:
PROXY_AUTOPROVISION_ACCOUNTS=true
PROXY_AUTOPROVISION_CLAIM_USERNAME=sub
PROXY_USER_OIDC_CLAIM=sub
PROXY_USER_CS3_CLAIM=username
Confirm Keycloak returns the chosen claim in the token or userinfo response. With auto-provisioning off, a new user is not created at sign-in; with a read-only Graph backend, provisioning can fail. Add group or role mapping only after sign-in works. Consult ownCloud’s 8.2 proxy and automatic-provisioning documentation before enabling write access or changing identity mappings.
Open oCIS in a private browser window and sign in. You should reach the Keycloak realm, authenticate, and return to the same oCIS host as the expected account. Test an existing account first. If provisioning is enabled, test one approved new user and confirm it is created once with the intended username. Sign out and repeat the login.
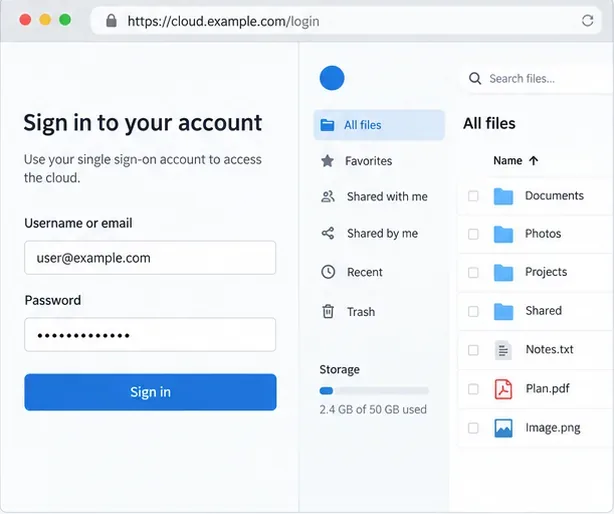
For desktop or mobile discovery, open https://cloud.example.com/.well-known/openid-configuration; the rewrite should expose Keycloak’s provider information. A login loop points to a redirect host or scheme mismatch. A rejected user after successful login points to a missing claim or a mismatch between PROXY_USER_OIDC_CLAIM and PROXY_USER_CS3_CLAIM.
Enable ownCloud’s Enterprise Auditing app, route admin_audit events to a protected log file, and confirm that real user actions are being recorded.
Align Keycloak’s realm issuer, web client, and user claims to let ownCloud Infinite Scale sign users in reliably across the web and mobile clients.
Transfer owned files and outgoing shares with ownCloud’s occ command, understand what stays behind, and verify access before deleting the old account.
Learn when ownCloud 10 database indexes need attention, how to apply supported schema updates safely, and when query tuning or a database change is the better fix.
Connect a Windows or Samba network share to ownCloud through External Storage, verify credentials, and troubleshoot inaccessible folders safely.
Remove every stored ownCloud Server Classic file version for one account or all users, and distinguish a full purge from retention-based expiry.
Trace an ownCloud mobile connection refusal by checking the server URL, phone network, HTTPS endpoint, and server logs in the right order.
Replace on-demand job runs with a systemd timer that runs ownCloud’s supported occ system:cron command every 15 minutes.
Trace the WebDAV request through Apache, Nginx, or a reverse proxy, then confirm ownCloud sync works with an authenticated PROPFIND test.
Fix Nextcloud’s missing outgoing address warning by setting its canonical URL and checking DNS, HTTPS, and reverse-proxy routing from the server itself.