This PowerShell script can bypass Windows 11 system requirements, Microsoft Account
A new utility is being developed that will help remove the strict system requirements of Windows 11.
The security of accounts and personal information is always very important for computer users. However, many people are often subjective or do not know how to do this properly. If you follow the instructions in the article below, your Outlook Email account and Microsoft account may be much better security.
This is a prerequisite and also the most important for each type of account we use. Some factors that you should sum up in your password are:
Do not set a password according to the habit, easy-to-guess passwords like your name, date of birth ... though long but it will not be strong enough to protect you.
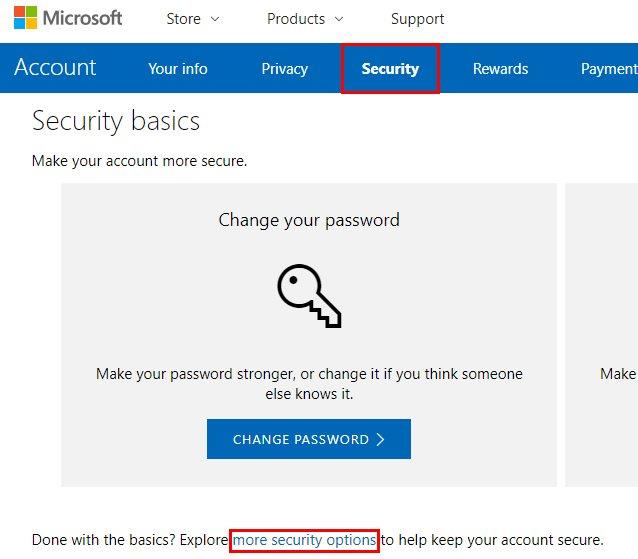
You can change the password of your Outlook Email and Microsoft account by:
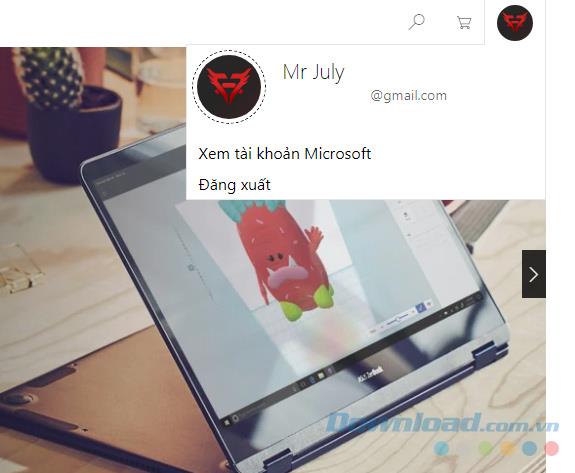
Log in to the account you are using, then left-click on the avatar of the account, select View account - View account.
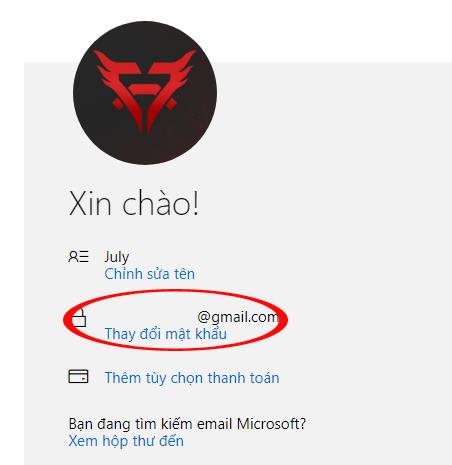
Select Change Password - Change password and make a new password according to the suggestions above.
This is an extremely effective protection feature. In addition to entering your password, the user will need to have an additional verification code sent to your phone or email. This means that when activated, even if the password is revealed, others cannot log into your account.
Doing:
Microsoft will naturally want you to use their authentication application, however, we can also use other alternatives. But after installing it on your phone, select your operating system from the list below, scan the QR code and save the recovery code before clicking Finish to complete.
There are times when you will need to allow others to access your account or accidentally save a password on your computer without forgetting to log out. This of course will give bad guys the opportunity to be curious, to steal your information.
It is best not to let anyone have access to your account, or if so, then immediately change a different password.
It is a fact that the shorter the password, the easier it is to use and log in, the longer and more complex the opposite. The Windows operating system allows users to log in to a Microsoft account, so if a bad guy can log in to your computer, they can also know your email.
A perfect solution to this problem has been provided by Windows, which is to use a PIN , even a fingerprint (if supported by your device).
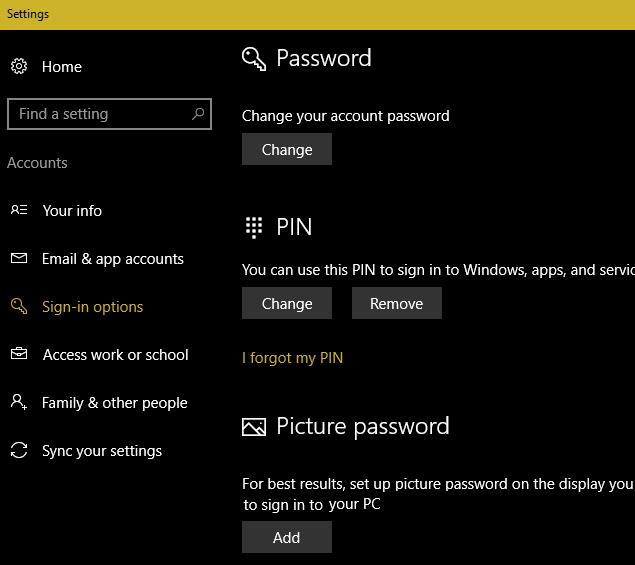
Doing:
In Settings / Accounts / Sign-in options and click Add to add the method that you want here.
We can easily review the access history on our Outlook account at any time to check when we are away or not in use, has anyone logged in and used it or not?
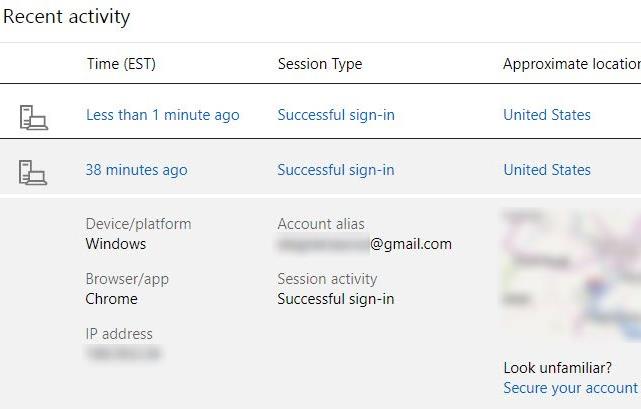
The test is very simple, you just need to visit the security page of Microsoft and select Review Activity to review the activities on your account. You can click on each item to see details about each activity (time, location, operating system ...).
Microsoft accounts can log in on all devices as well as different operating systems. It is necessary to check the list of devices that you have used to log into your account. Because sometimes, even a little bit forgetful can bring serious consequences.
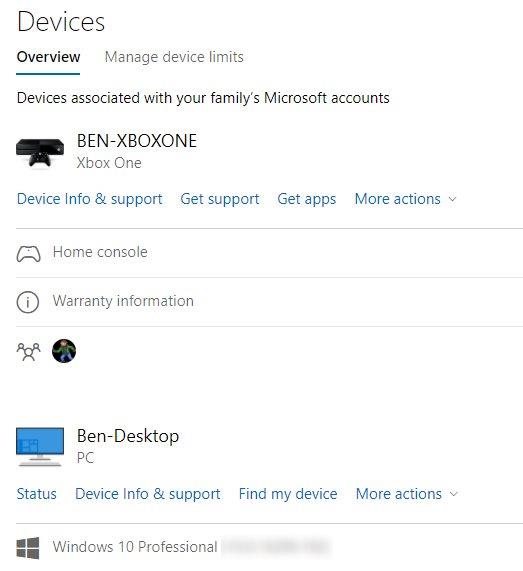
Visit the Devices page and check the list of devices once associated with your account. If you've enabled two-factor security for your accounts before, it's a good idea to delete the list of used app passwords by:
This not only ensures security, but also logout accounts directly from devices that do not support double-layer security. Finally, click Remove all the trusted devices associated with my account to force the application of two-step security for future devices.
Just a phishing email or a file downloaded from an unofficial source can cause you to get your account stolen or sensitive information in your account. Especially emails, letters or messages asking you to confirm your account password.
Microsoft never asks its users to do this, so all such emails are fraudulent or contain malicious code.
If lost, unable to log in to your Outlook account, the phone number, email in the recovery information is always the most effective and fastest way to fix this. Have you added this information to your account? Not yet or do not know the way? See the following instructions.
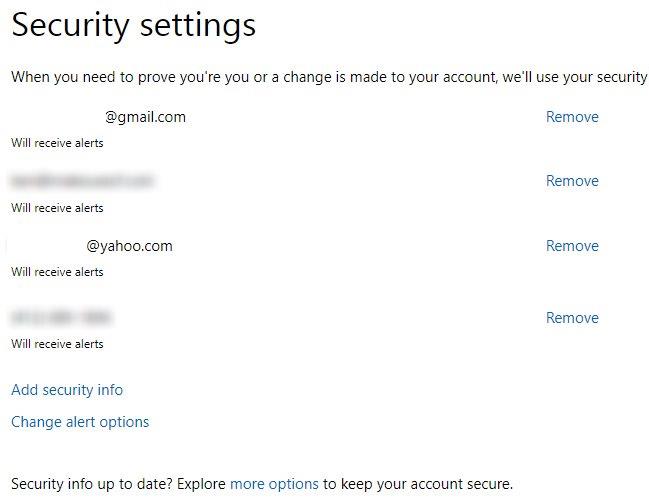
Visit the Microsoft Security page again and select Update Info. You will see the necessary information related to your account. Click Remove to remove the old information, no longer used and replace new information into it.
If you haven't added this information, go to Add security info to add account recovery information, then Microsoft will send you an initial confirmation code to the device (or email). Finally click on Change alert options to make changes.
The computer's Outlook version stores your emails in PST files , so adding a password to protect the information in these files is absolutely necessary. Remember, however, that these passwords will not work if you have synchronized other accounts ( Microsoft Exchange accounts ).
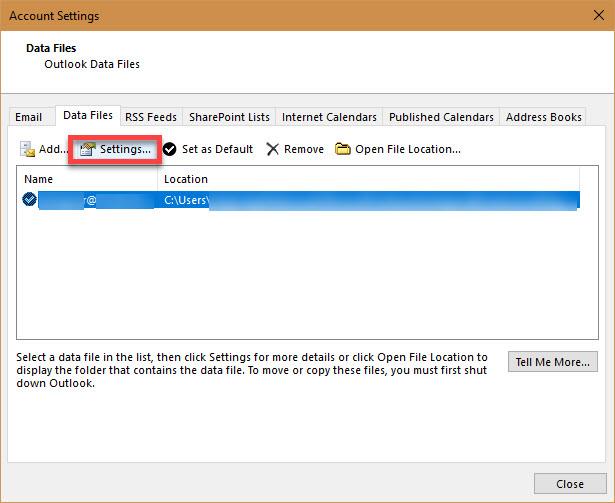
Doing:
This is an Outlook trick that I personally like and use. That is, instead of using the original account directly, we can create a fake email, to deceive spam and spam sent.
Other emails are still sent directly to your real mailbox, although it will be difficult to manage if you abuse this but if done well, checking your mail daily will be a lot easier.
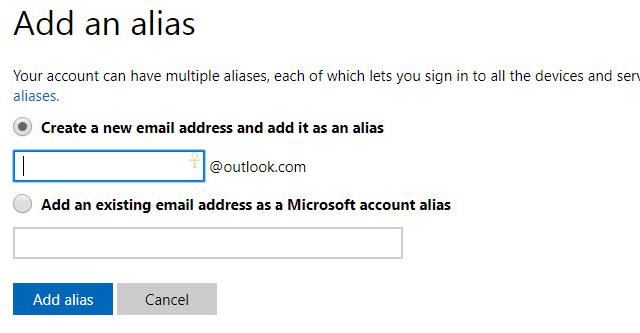
Making:
However, it should be noted, we can only create and use up to 10 accounts of this type on a main account.
Finally, Microsoft accounts are very important for Windows users (especially Windows 10 ), so in addition to being careful, you should also protect yourself with the above suggestions to avoid unfortunate things. can happen.
A new utility is being developed that will help remove the strict system requirements of Windows 11.
The following article will show you how to turn off data synchronization and delete data that is synchronized on devices that are signed in to a Microsoft account.
On the new Windows 10 operating system, managing users is now simple and it also gives you more options so you can control the user's Microsoft account. You can use more than one Microsoft account on
Xbox Live is an indispensable account if you want to manage your data (music, games ...) on your computer, especially online games, trial versions distributed by Microsoft.
Tired of Microsoft Edge Precision Driver compatibility glitches? Get step-by-step solutions to restore smooth performance, fix lag, and optimize your setup. Proven fixes for the latest Edge versions.
Discover step-by-step ways to customize the Microsoft Edge new tab page. Personalize shortcuts, backgrounds, content, and more for a tailored browsing experience. Boost productivity today!
Struggling with Microsoft Edge YouTube error like black screen and lag? Discover step-by-step fixes for smooth playback. Clear cache, toggle hardware acceleration, and more – ultimate guide to resolve black screen and lag issues fast.
Master how to completely uninstall Microsoft Edge from Windows 11 in 2026. Step-by-step, no-trace removal for gamers seeking max performance. Say goodbye to bloatware!
Discover how to reset Microsoft Edge to default settings in 2026 effortlessly. Fix crashes, slowdowns, and pop-ups with proven step-by-step methods for a fresh, blazing-fast browser.
Tired of Microsoft Edge "Certificate Not Trusted" warnings blocking your browsing? Discover proven troubleshooting Microsoft Edge "Certificate Not Trusted" warnings steps to resolve SSL errors securely and regain smooth access. Works on latest Edge versions.
Discover how to safely remove your Microsoft Edge profile and personal data without risks. Our expert guide ensures a clean slate while protecting your important info – perfect for privacy pros!
Discover simple, step-by-step instructions on how to change Microsoft Edge home page and startup settings. Customize your browser for a faster, personalized experience today!
Tired of Microsoft Edge update errors crashing your Windows 11 browsing? This ultimate guide delivers proven, step-by-step fixes for common issues like 0x80070005, stuck updates, and more. Update Edge effortlessly today!
Struggling with "This Site is Not Secure" error in Edge? Discover step-by-step fixes to restore secure browsing instantly. Clear cache, update certs, and more—no tech skills needed!
Tired of the frustrating Microsoft Edge "404 Not Found" error? Discover quick, proven fixes to resolve 404 errors in Edge browser. Step-by-step guide with latest tips for smooth browsing.
Tired of Microsoft Edge "Out of Memory" error crashing your streaming sessions? Get step-by-step fixes to resolve it fast, boost performance, and stream smoothly without interruptions. Updated with the latest tips.
Struggling with Troubleshooting Microsoft Edge "Cortana and Copilot" AI? Get proven fixes for crashes, unresponsiveness, and errors in the latest Edge versions. Restore your AI assistant effortlessly!
Struggling with the Edge Browser "Clock Behind" error on Windows 11? Discover proven, step-by-step fixes to sync your clock, clear caches, and restore smooth browsing. Quick solutions that work!
Tired of Microsoft Edge video stuttering and frame drops ruining your streaming? Discover proven troubleshooting steps to restore smooth playback in this comprehensive guide. Fix it fast!


