Do you want to unleash your imagination with simple but cute nail art with cute animals? Here are my cat nail art and owl nail art proposals step by step with the new Pupa gel-effect enamels!
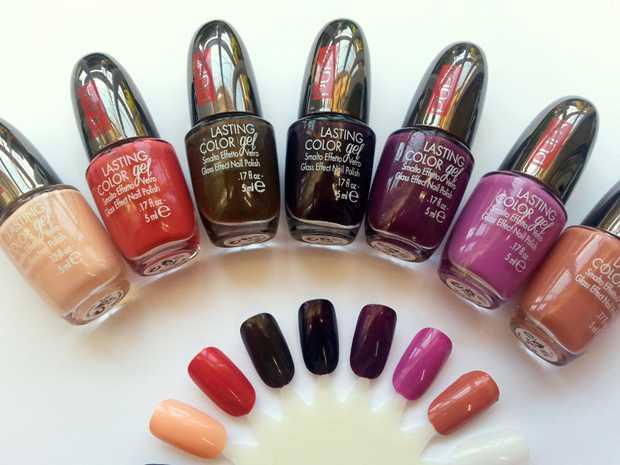
Pupa Lasting Color Gel nail polishes are among the most beautiful for autumn winter 2014: the colors are warm and the application, as well as the yield, is really excellent! Surely you already know that the gel effect nail polishes differ from the classic nail polishes for an extraordinary brilliance and a more full-bodied texture, which gives three-dimensionality and character to the manicure.
For this reason I have decided to show you some of the new 16 color variations of this seasonal line of Pupa Lasting Color Gel nail polishes, which expand the already vast range of variations of this line.
So if you want to discover this line of nail polishes and how to create beautiful cat and owl nail art suitable for the season, follow my step by step tutorials !
 PROCEDURE NAIL ART CAT
FIRST STEP: After applying a reinforcing base , I apply the new shade of Pupa dark purple n. 103 . I want to underline my opinion on these products: the applicator brush and Pupa nail polishes is one of the best I've ever tried because its rounded bristles follow the nail line very well. doing pretty much everything by yourself!
SECOND STEP: With the cream color n. 97 I draw a semicircle at the base, and above these at the two ends, two triangles that will be the ears of our cat and in the center of the semicircle I draw the tail.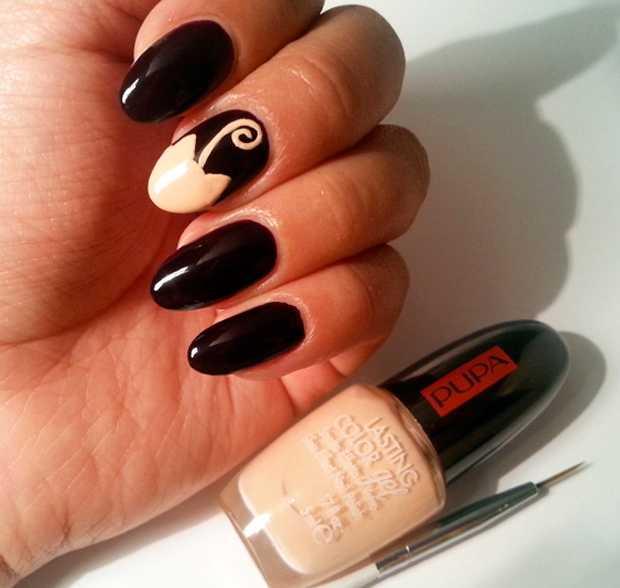
THIRD STEP: With the n. 105 light purple I draw the nose, the center of the ears and begin to draw the footprints on the ring finger starting from a triangle with round corners.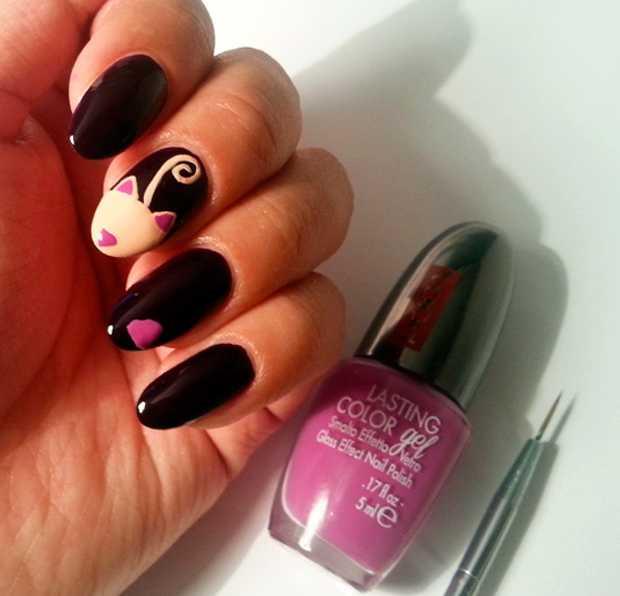
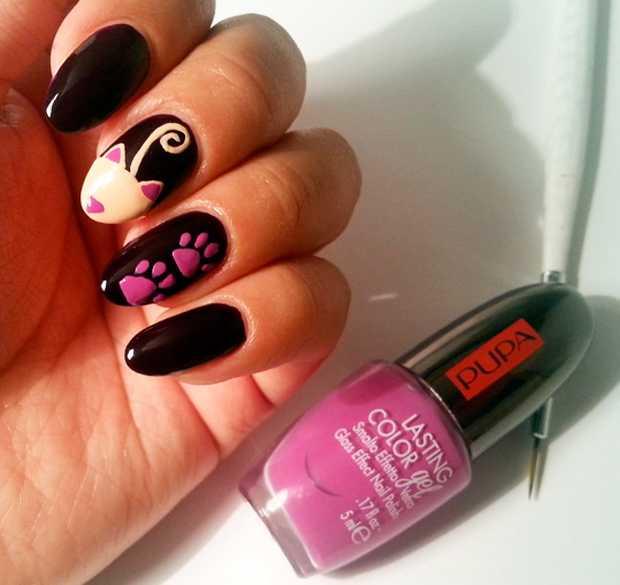
FOURTH STEP: I then draw the cat's eyes with a dotter, and finally a brilliant top coat , which fixes the nail art and makes the work complete and flawless!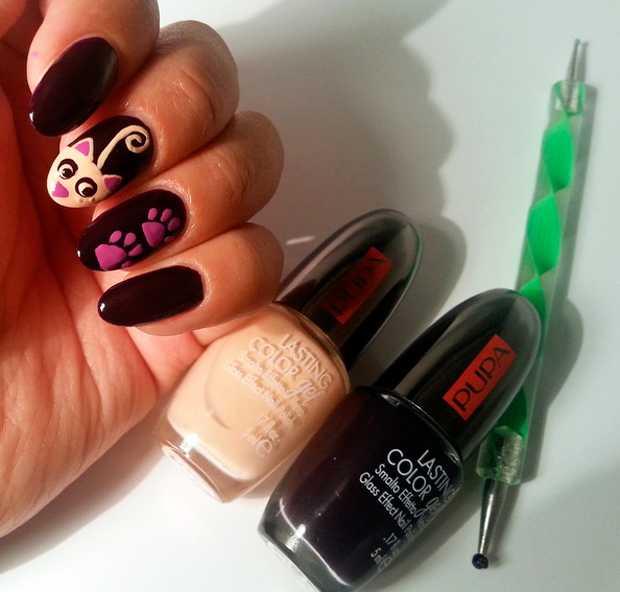

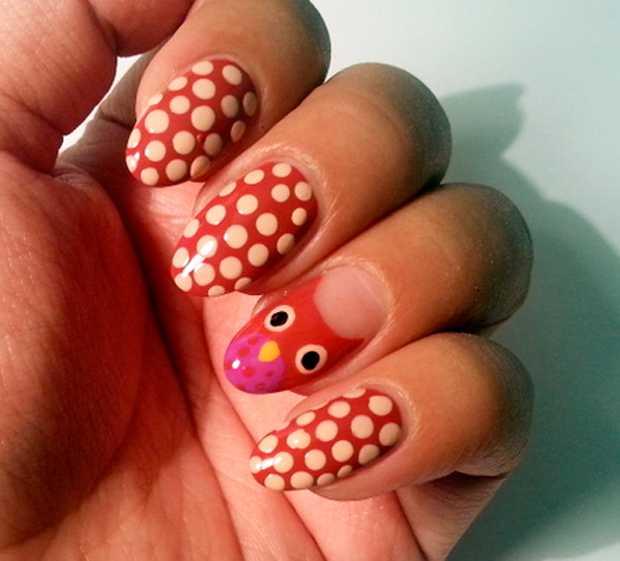
PROCEDURE NAIL ART OWL
FIRST STEP: I apply a strengthening base and spread the Pupa n. 100 brick color on all the nails, while on the ring finger I previously attacked a mouthguard: this procedure will allow us to create a perfect nude bezel in a simple and fast way !
SECOND STEP: our owl then takes shape by starting to draw the eyes with a dotter, and then adding the shape of the animal's belly with light purple pupa enamel .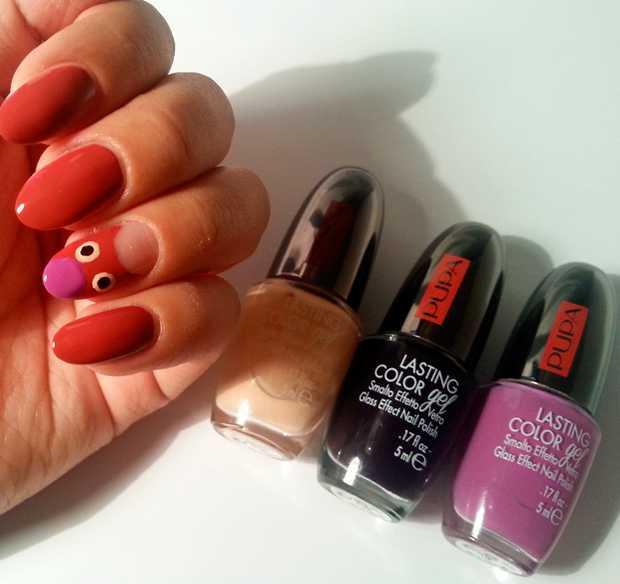
THIRD STEP: I draw the beak and the feathers and with small dots on the belly.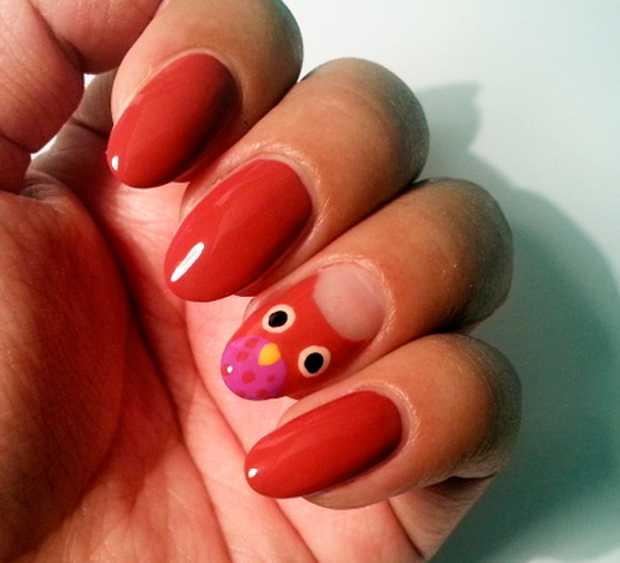
FOURTH STEP: I enrich my Nail Art with polka dots with cream-colored nail polish , and for a professional result, as always, I apply the brilliant Pupa gel effect top coat . 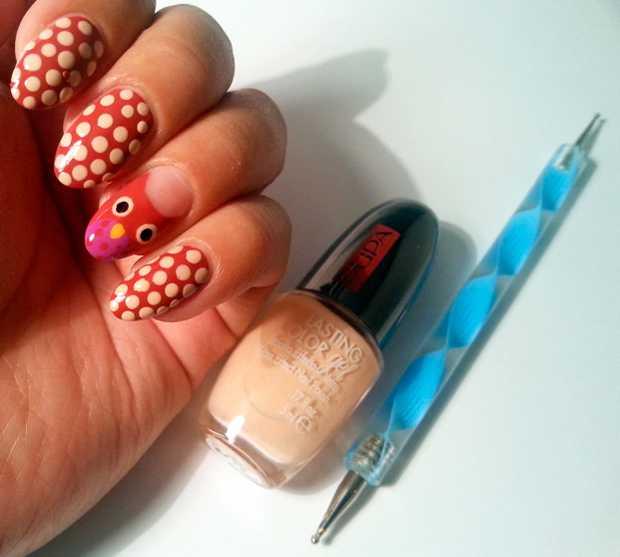
I hope that my simple nail ar t with the new colors of glazes Pupa gel effect you like: what riprodurreste between art cat nail and nail art owl ? Let me know by leaving me a comment!


