The task of the tool to support the development of E-learning lectures is to develop and digitalize online materials as simple and convenient as possible. These tools will help teachers create E-learning lessons with all the necessary features instead of building knowledge for the entire learning process.
Choosing a tool to support building E-learning lessons is also an important step to help teachers use it easily and best suit their needs. Most current E-learning teaching support tools allow teachers to package and export lectures in standard SCORM or AICC format, usually in the form of a compressed .zip file. And almost every LMS today will also be equipped to manage online lectures in this format, so lectures can reach learners more easily and conveniently.
First, let's take a look at some criteria of E-learning lectures.
1. Criteria of an E-learning lecture
1.1. Technological properties
- Built on tools to support packaging products to the web according to HTML5 standards, running on both computers and mobile phones.
- There is a recording of the teacher's lecture (make sure the volume is even, there is no background noise, can dub background music) and show a picture or video of the teacher when necessary.
- The lecture must be synchronized with the text or images in the lesson.
- The system of interactive exercises is rich, diverse, uniform in color with the content of the whole lesson, with appropriate images and sounds inserted.
- Use Font Arial or Unicode encoding.
1.2. content
- Ensure accurate, scientific content and knowledge.
- Creativity, reality, science and innovation.
- Completeness, completeness.
- Clarity in citation of documents and reference materials.
1.3. Pedagogy and method of communication:
- Meet the self-study needs of learners.
- Lectures (voice) and explanations (texts) are easy to understand
- Create a learning situation.
- The questions guide learners to think and learn in an active way.
- Interactive and engaging.
- Contains test and evaluation content.
1.4. General assessment
- Effectiveness can be brought to learners.
- Attractiveness.
- Can be widely applied and popularized in practice.
2. Support tools and software
- Using Adobe Presenter software 7, 9, 10, 11
- Using software Ispring Suiter 7.0, 8.1, 8.7, 9.0…
- Use Camtasia Studio 8 software to edit videos.
- Use Total Video Converter software to change the movie extension.
- Use Violet software to create interactive games.
- Use Mindmap 8 software to draw mind maps
3. Instructions for installing iSpring software
In this article, the teaching manual will guide teachers to install the software to support e-learning e-learning iSpring Suite 9. iSpring is actually an expensive Powerpoint add-in. Like many other educational software, iSpring also supports a free version for education during the peak period of the Covid 19 pandemic, used for 60 days without watermark (different from the trial version ), but now this support package is no longer available. again. Teachers can still use the method below to install and use it for a long time.
Step 1: Download iSpring software
Teachers can download the software at the link iSpring Software
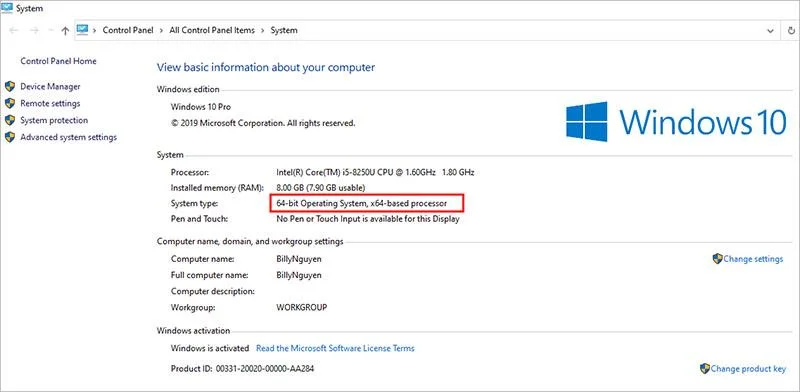
Step 2 : Check whether the operating system is 32 bit or 64 bit
Teachers right-click on the My Computer icon, select Properties to check if the Windows version of the computer is 32 bit or 64 bit
Step 3 . Proceed with the installation
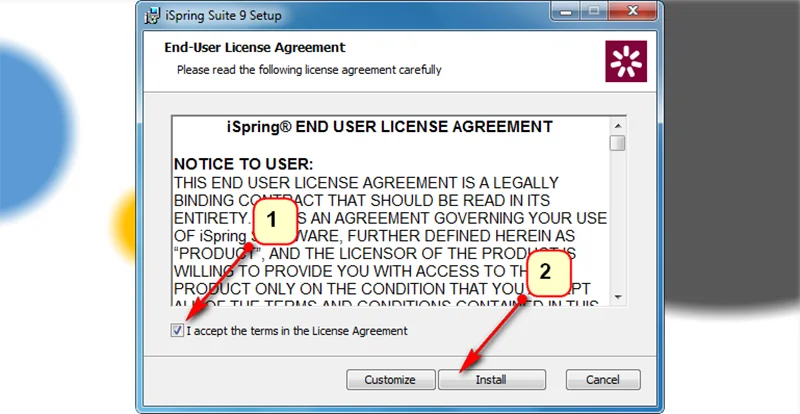
After checking the operating system, teachers proceed to select the corresponding folder to install (Ispring Suite 9.7 only installs and runs stably on Powerpoint from 2007 and up) . Double click to install, if yes/No (or Run), then click Yes (or Run). In the next window, click I accept the items in the License Agreement and then click Install ( If a Yes/No message appears, select Yes ).

Wait a moment the installation is in progress

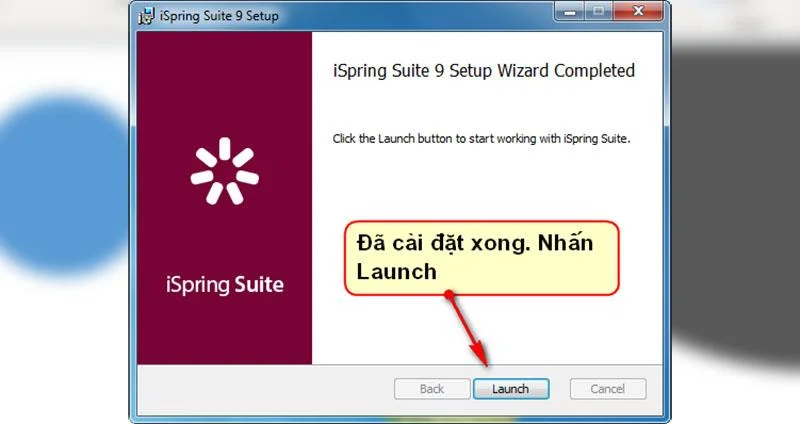
When the Launch button appears, click to finish.

Step 4 . Proceed to crack the software.
This is a fee-based software, so for long-term use (trial is 15 days with watermark), teachers should crack the software.
Before proceeding with Crack, please turn off Antivirus and Disconnect internet applications so that the crack process is 100% successful.
The teacher opens the folder that has not been authorized for 32 bit (or 64 bit ) win in the folder containing the installer that the teacher has downloaded. Find and run the file (If Yes/No appears , select Yes ), then click on the icon and wait for about 5 seconds, then turn it off, relaunch the Powerpoint program.

That's how the teacher has installed and Cracked successfully. Wish teachers have good lectures with iSpring.
See more: Instructions for building E-learning lessons using iSpring