Device Links
Literal descriptions of pictures can provide additional context to images. You can validate an image, authenticate it, share its provenance, and credit the original author. Whatever the reason, captions make a big difference.

In formal or official documents, captioning may even be a formatting requirement. Thus, it’s important to learn how to do it when working in Google Docs on articles, books, presentations, and other electronic documents.
This article will go over various available methods for adding captions, including one that helps automate the process and captions multiple pictures simultaneously based on your instructions.
How to Add Captions to Images in Google Docs on a PC
Google Docs users have unrestricted access to the cloud-based word processor when using a PC, Chromebook, or Mac. Therefore, you can add captions to pictures in four different ways, each method having its own advantages.
Use “In Line” Text to Caption an Image
The “In Line” picture format makes captioning images in Google Docs a straightforward process. Here’s how you can do it.
- Insert a picture into a Google Docs document.

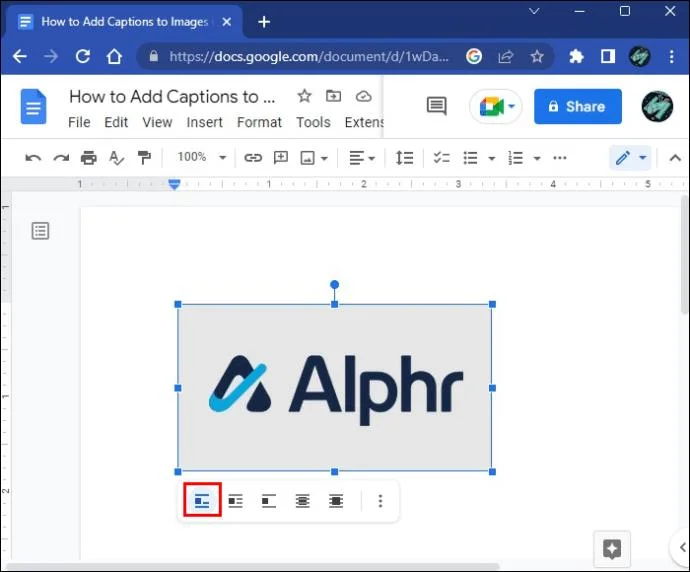
- Select the image and hit the “In Line” option on the toolbar.

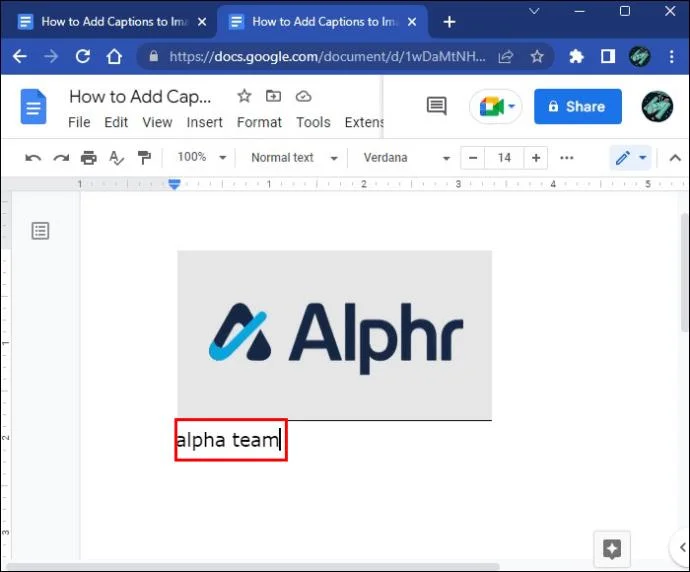
- Click under the image and type your caption.

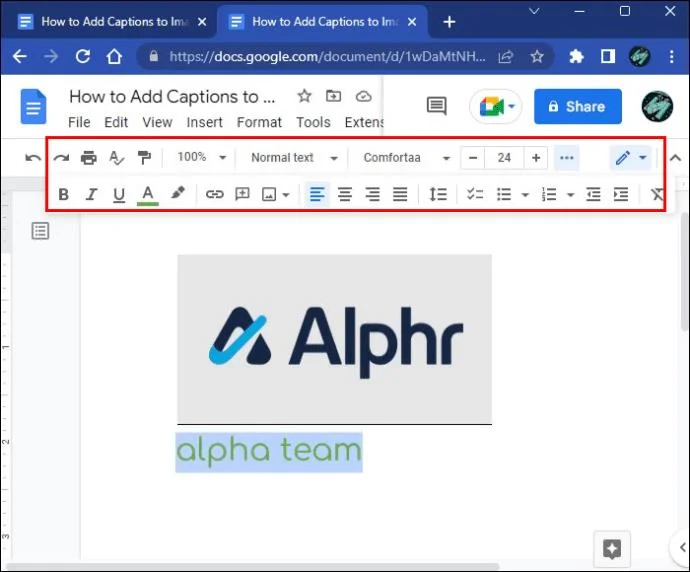
- Select the text and adjust its color, alignment, and size from the options on the top toolbar.

Use a Drawing to Caption an Image
The Google Docs “Drawing” feature is an excellent option to ensure your caption sticks with the image even if you move elements around in the document.
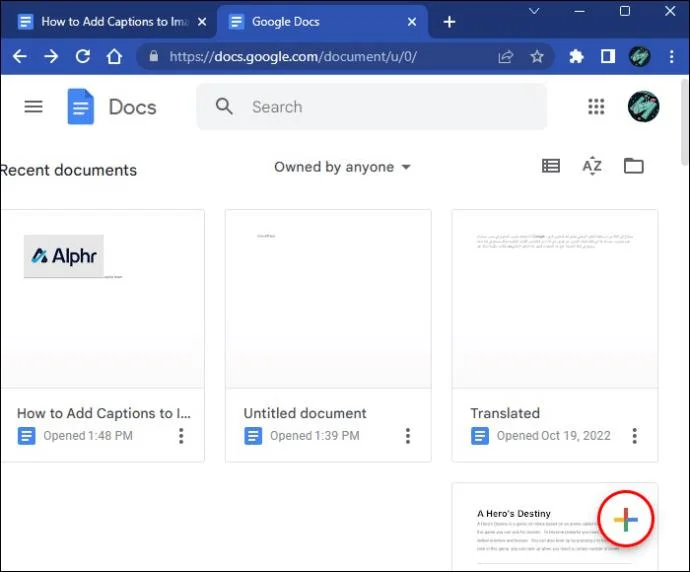
- Open a new document in Google Docs.

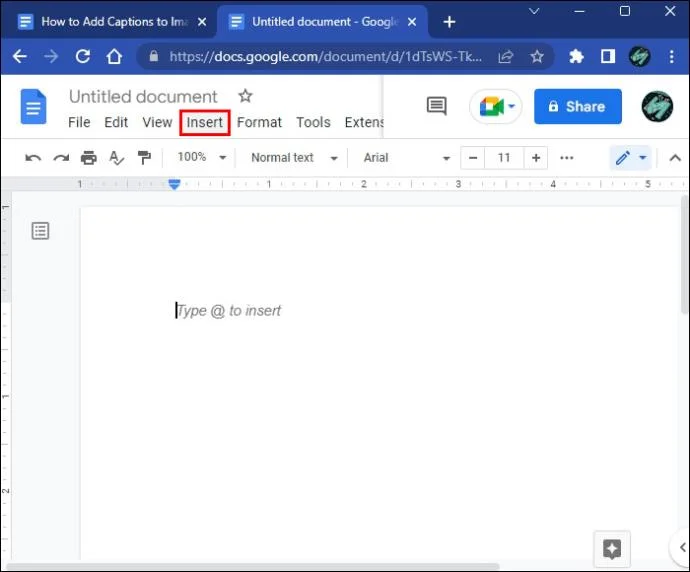
- Click the “Insert” button on the toolbar.

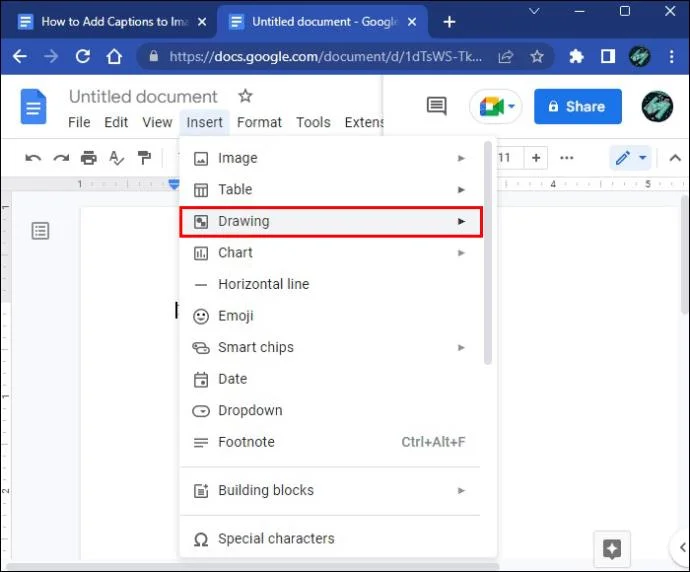
- Select the “Drawing” feature.

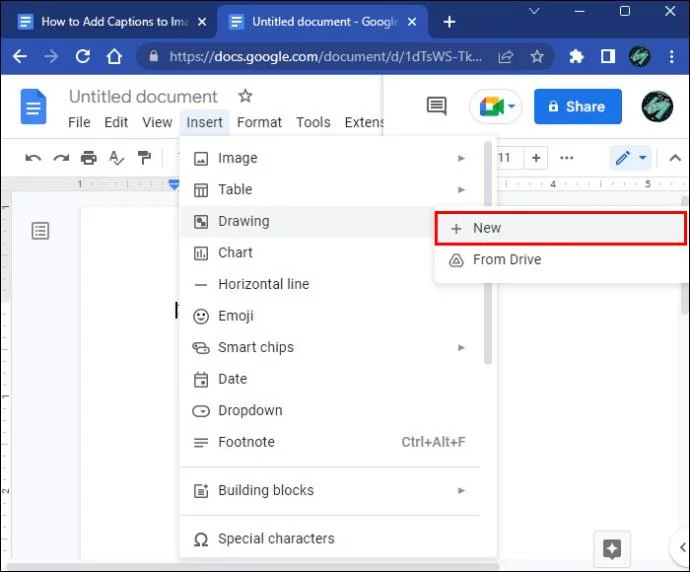
- Click the “+New” button.

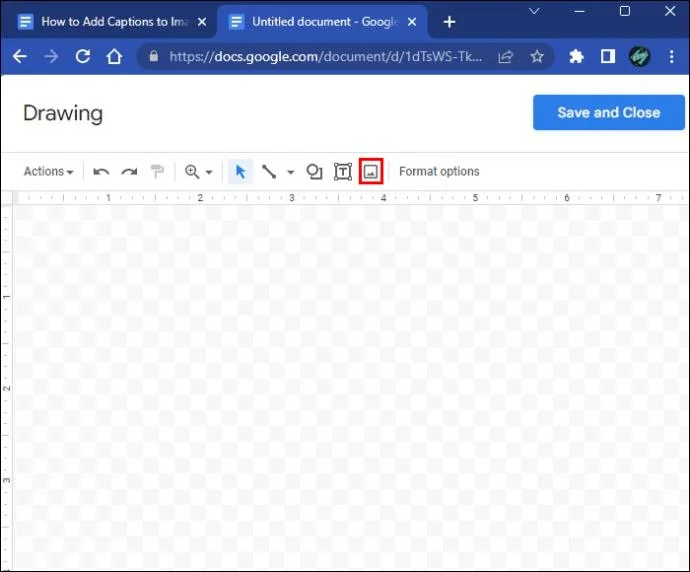
- Click on the “Image” button in the new toolbar.

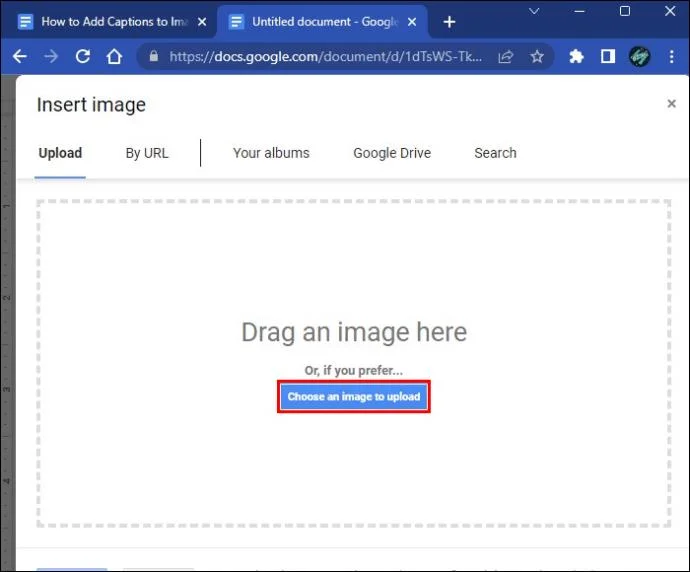
- Upload an image from your device or paste a URL of a picture.

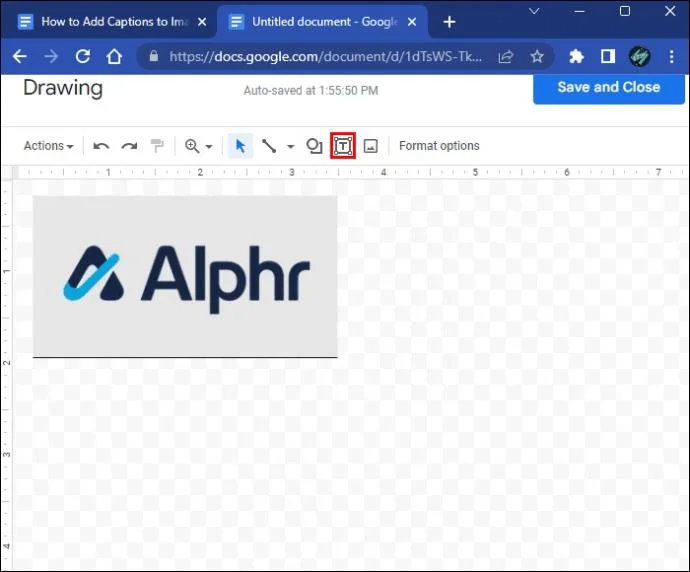
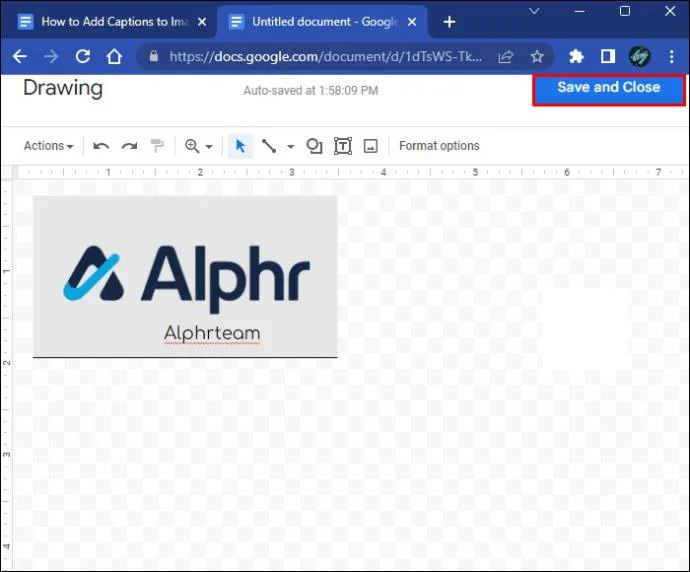
- Click the “Text Box” button next to the “Image” button.

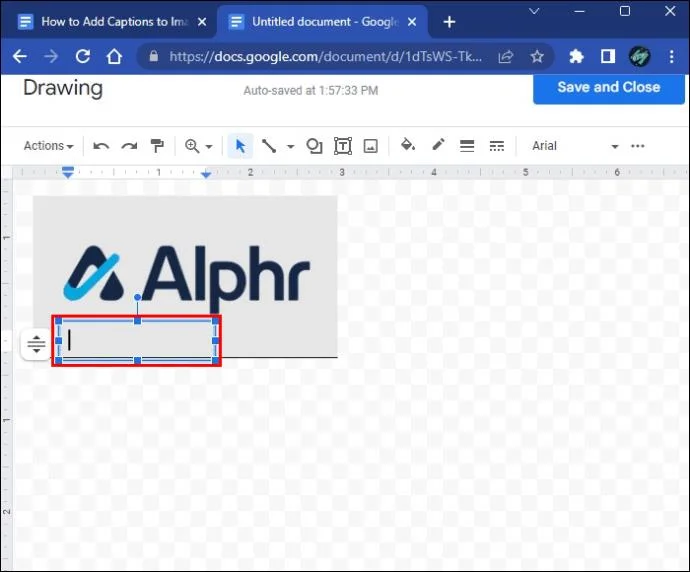
- Draw a text box manually and type a caption.

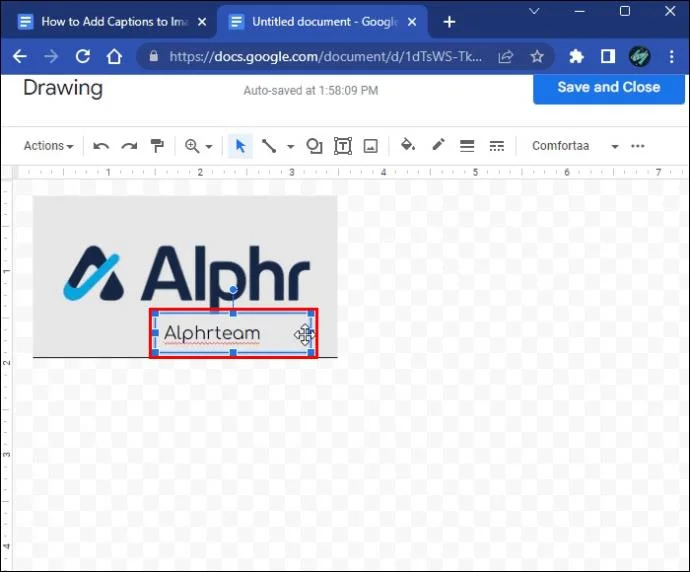
- Format the text as you like and align it manually by dragging the text box until satisfied.

- Click the “Save and Close” button.

This method allows you to select and drag the picture around in your document without leaving the caption behind.
Use a Table to Caption an Image
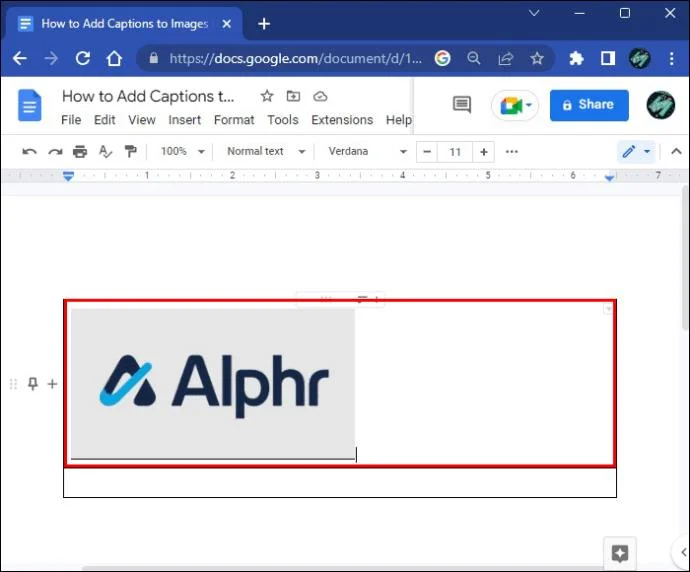
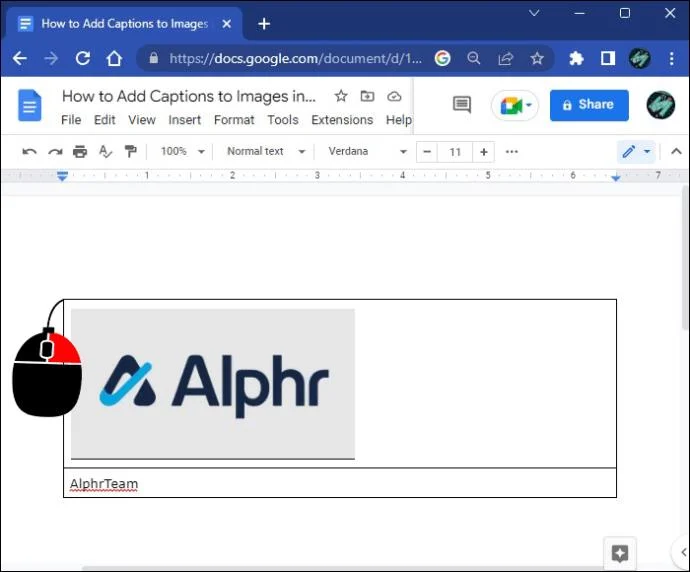
Placing an image in a table allows you to add a caption using the cell underneath. Here’s how to do it while also eliminating the table border.
- Start a new document in Google Docs.

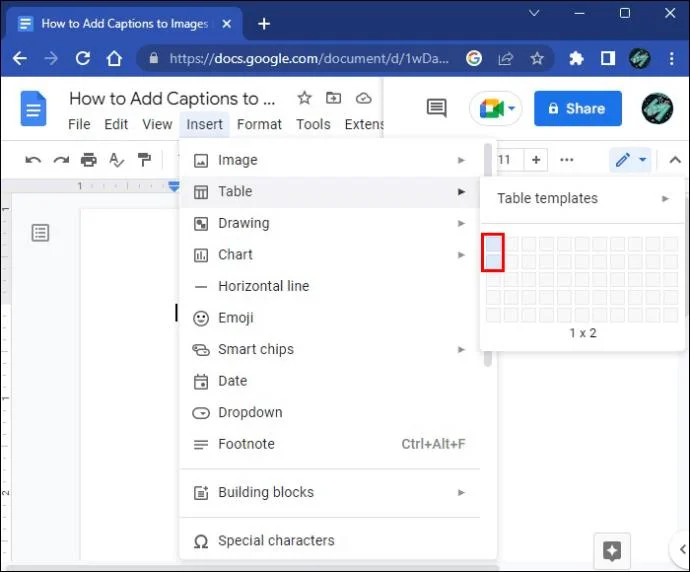
- Click the “Insert” button on the toolbar.

- Select a “1 x 2” table to create two cells.

- Add the desired image in the top cell.

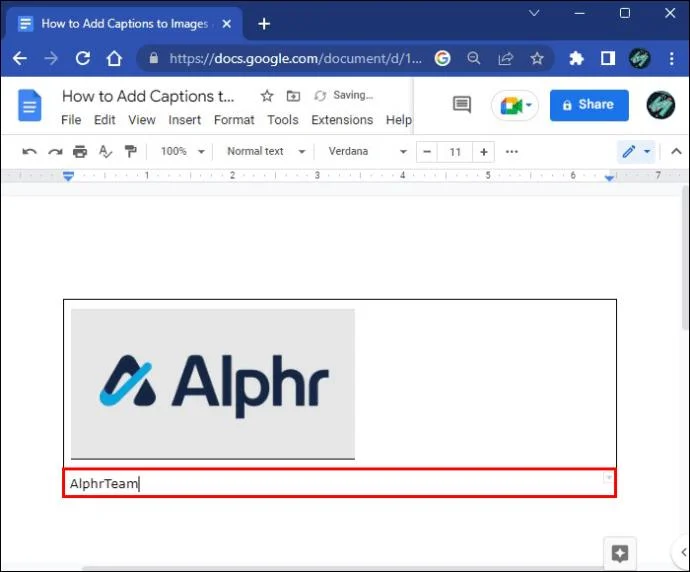
- Type a caption in the lower cell.

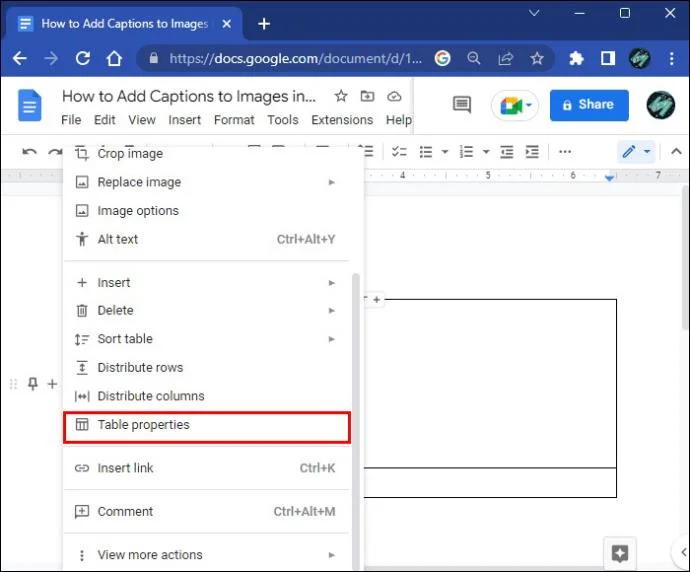
- Right-click the table border.

- Select the “Table Properties” option.

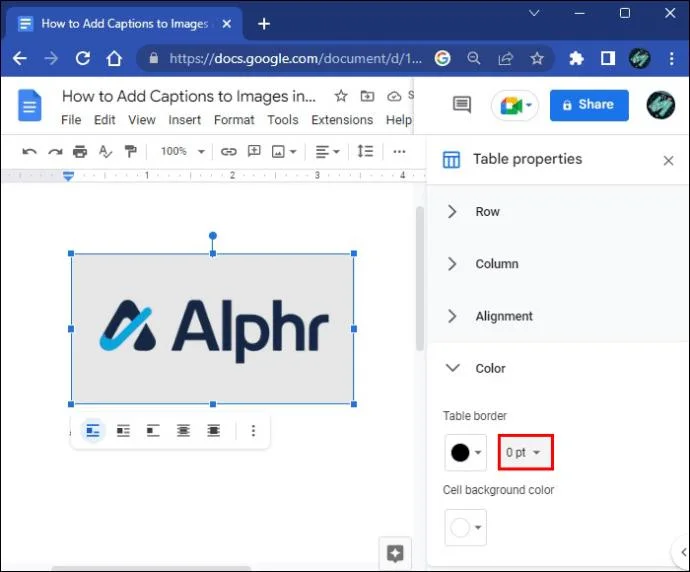
- Locate the “Table Border” option a set it to “0 pt.”

These modifications will make the table border invisible. Like the “Drawing” feature, inserting an image in a table lets you move it along with its caption anywhere in the document.
Use a Free Caption Add-On
As a browser-based service, Google Docs enables users to install and experiment with various add-ons. Caption Maker is one handy add-on for adding multiple captions simultaneously and streamlining the workflow.
Here’s how you can use it in your browser.
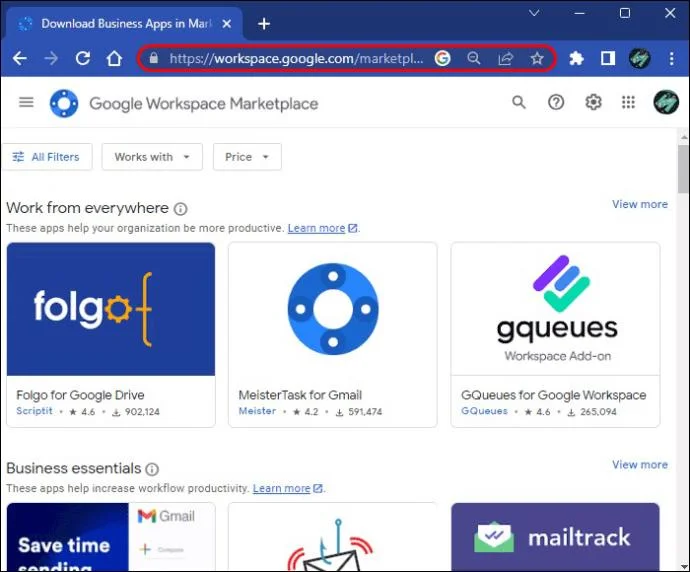
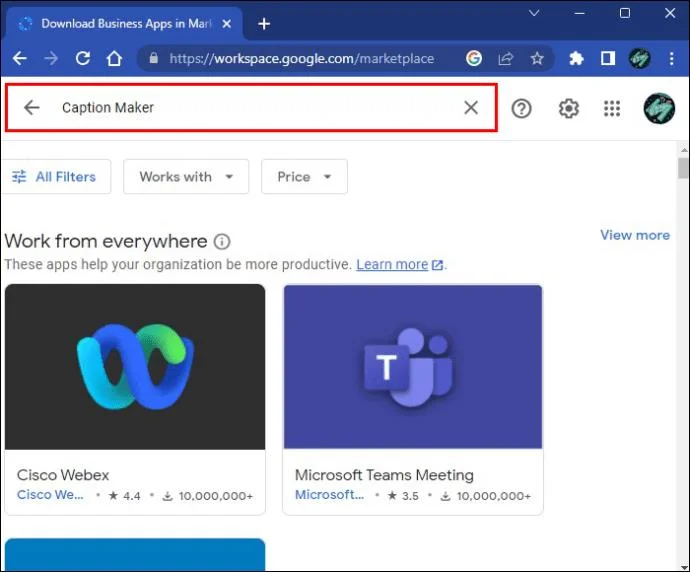
- Go to Google Workspace Marketplace.

- Search for “Caption Maker” in the search bar.

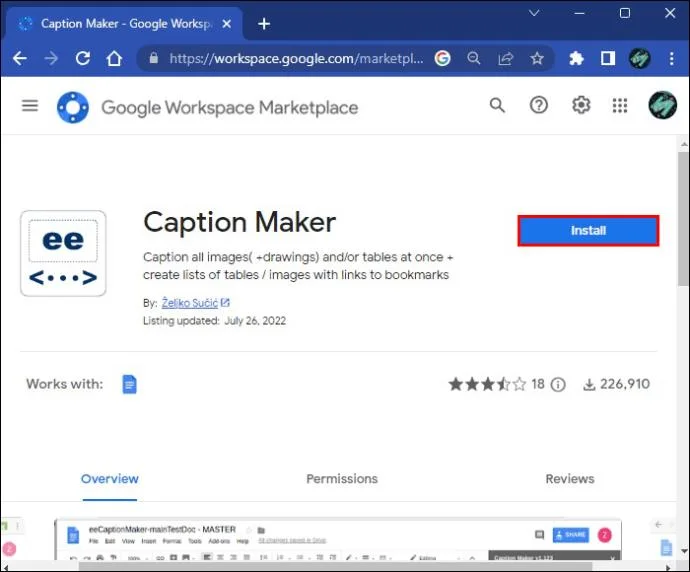
- Install the add-on in your browser.

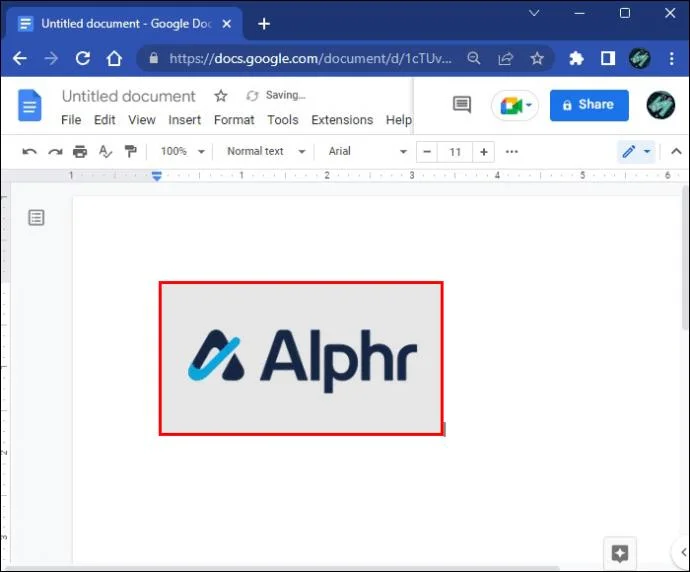
- Go to Google Docs and add pictures to a document.

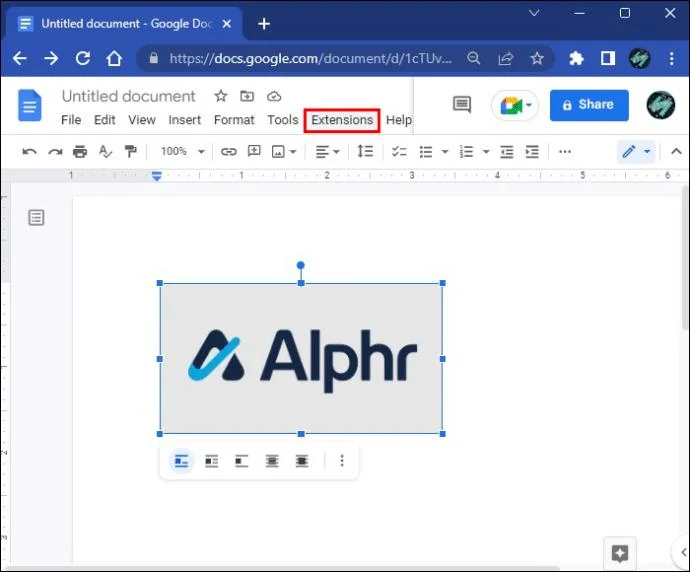
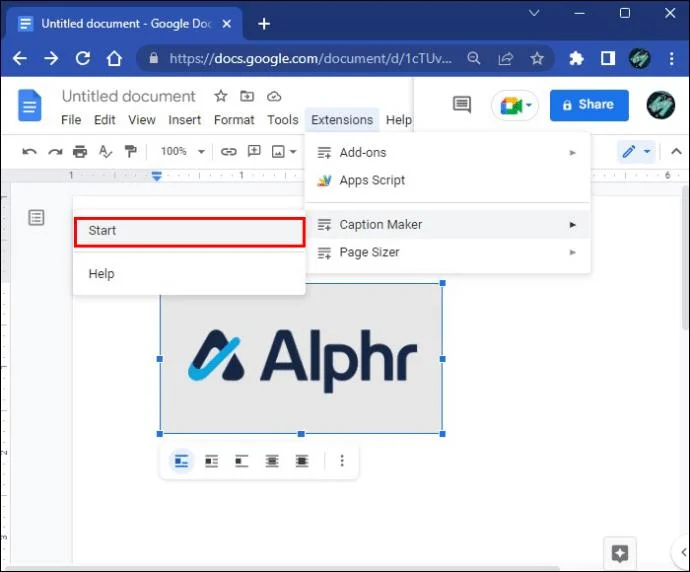
- Click the “Extension” on the toolbar in Google Docs.

- Select “Caption Maker” and hit the “Start” button.

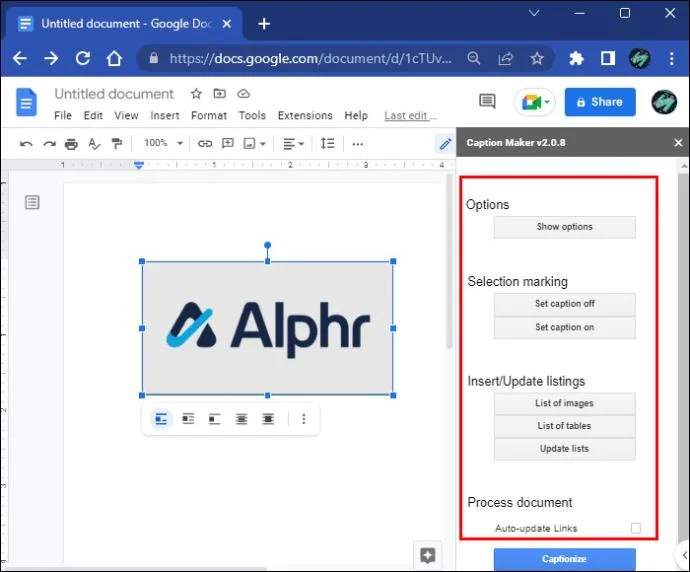
- Customize the add-on’s settings to your liking.

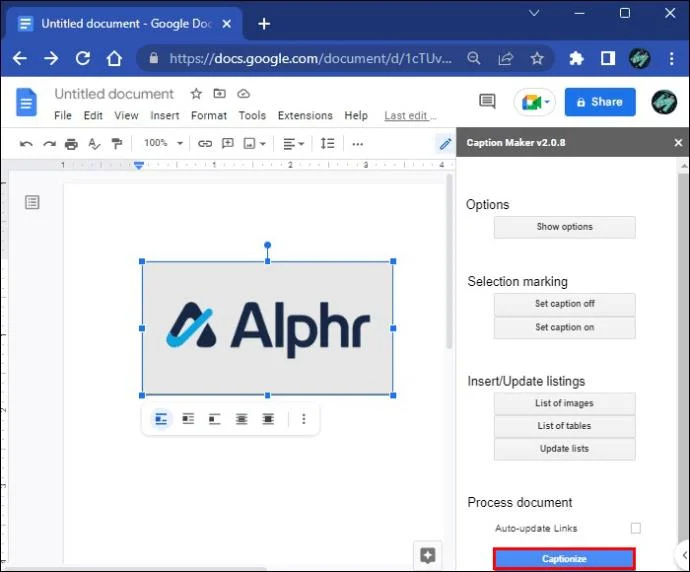
- Click “Captionize” to add captions to all pictures in your document.

How to Add Captions to Images in Google Docs on an iPad
The iPad version of Google Docs works similarly to the iPhone and Android apps. It’s a watered-down variant of the browser version, but it still does a decent job of captioning images using two different methods.
Use Tables to Add Captions
Here’s how to use a table to add a caption to an image and keep the two elements connected when moving them around the document.
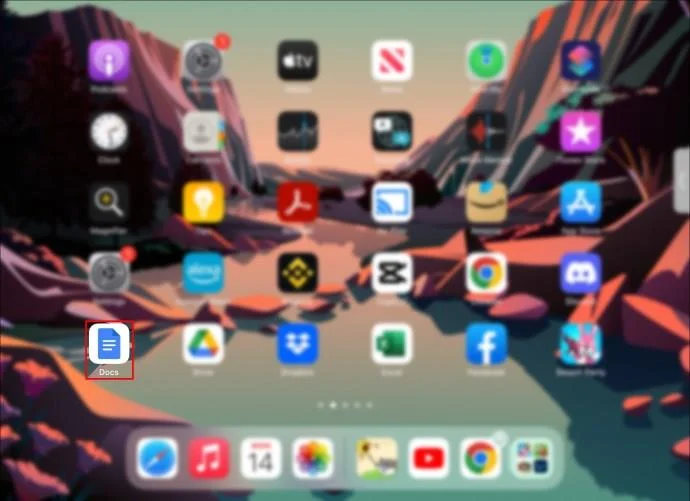
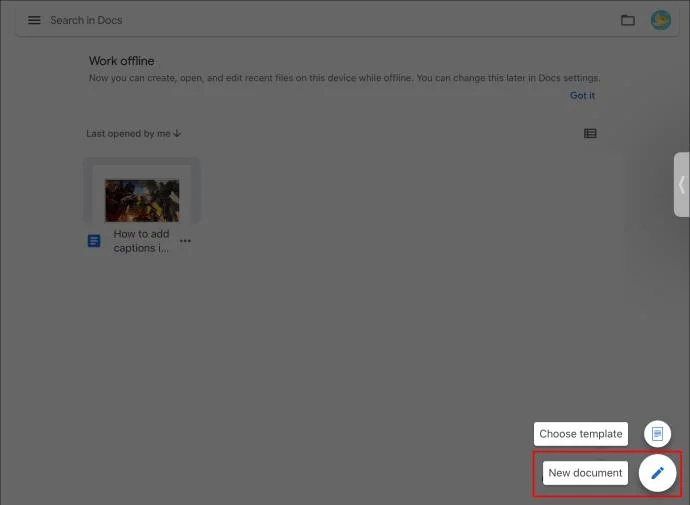
- Launch Google Docs on your iPad.

- Open a document or start a new one.

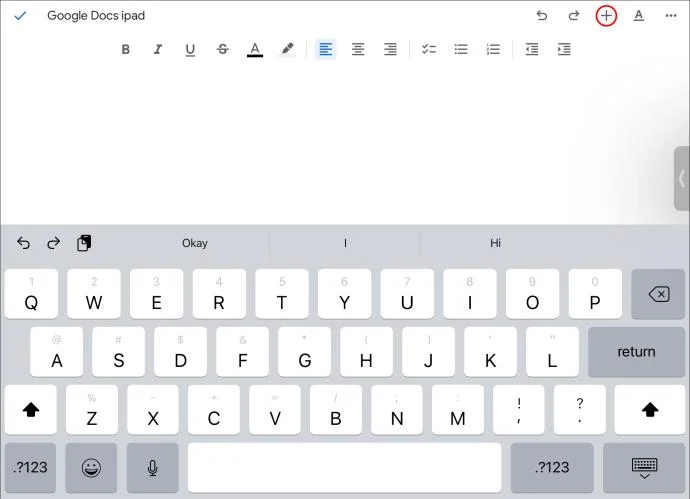
- Tap the “Blue Pencil” icon to enable the editing options if you can’t see them already.

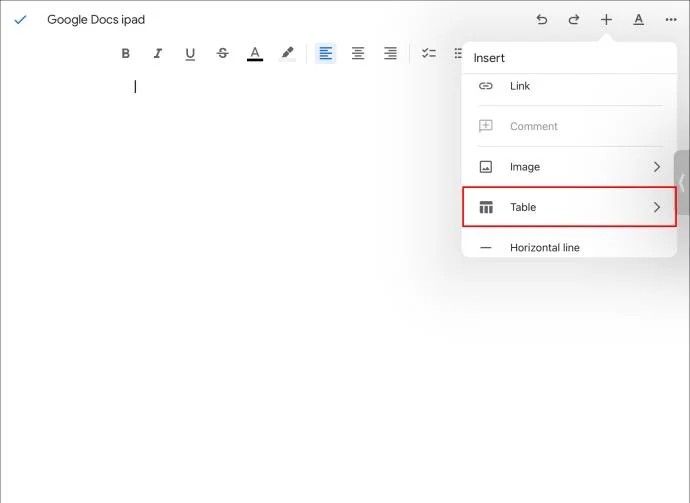
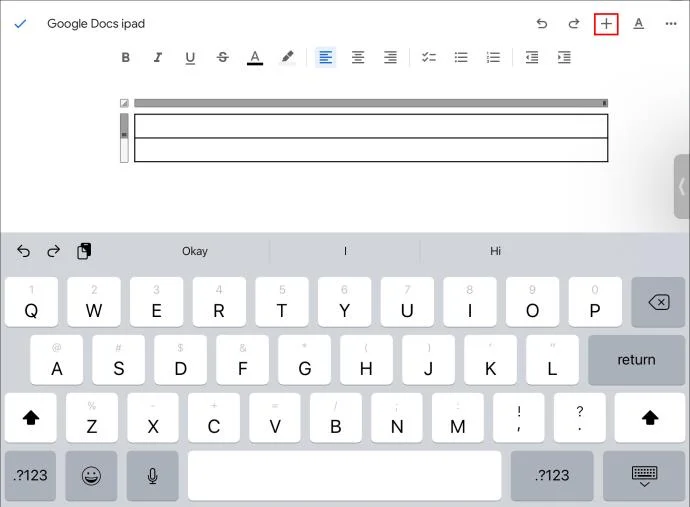
- Tap the “Plus” icon on the toolbar.

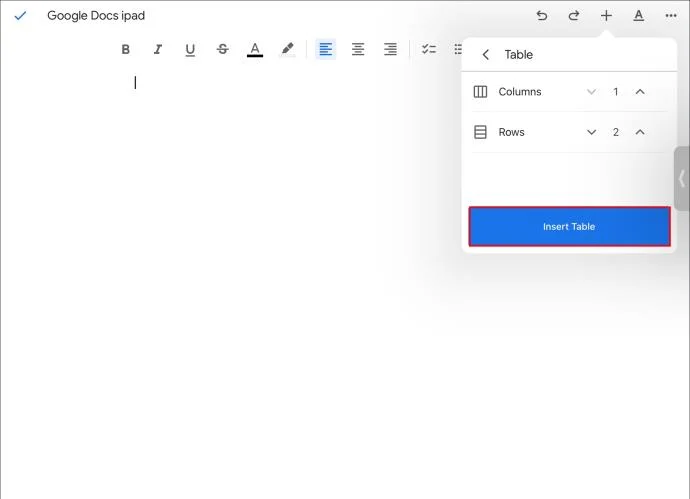
- Select “Table.”

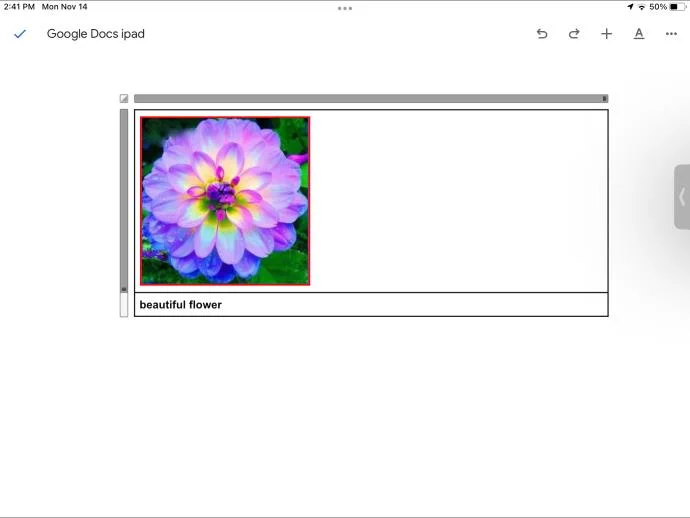
- Insert a “1 x 2” table with different cells for the picture and the text.

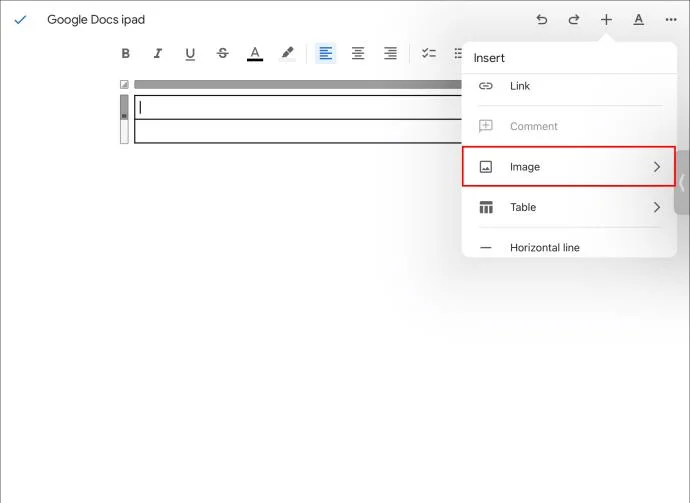
- Go to the top cell and tap the “Plus” icon.

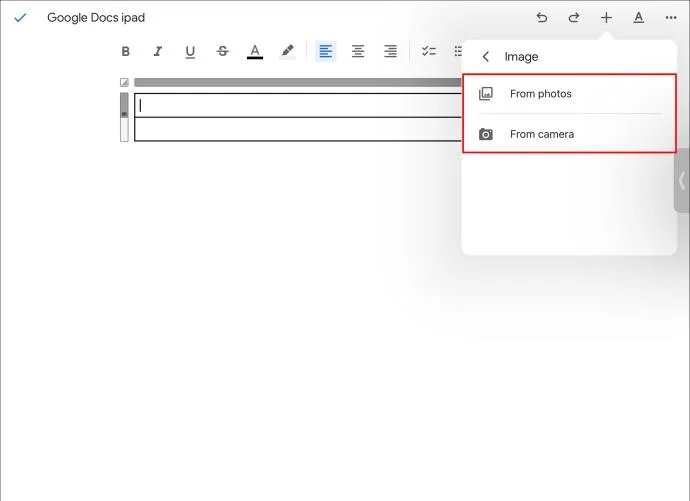
- Tap the “Image” option.

- Upload a picture or take a picture.

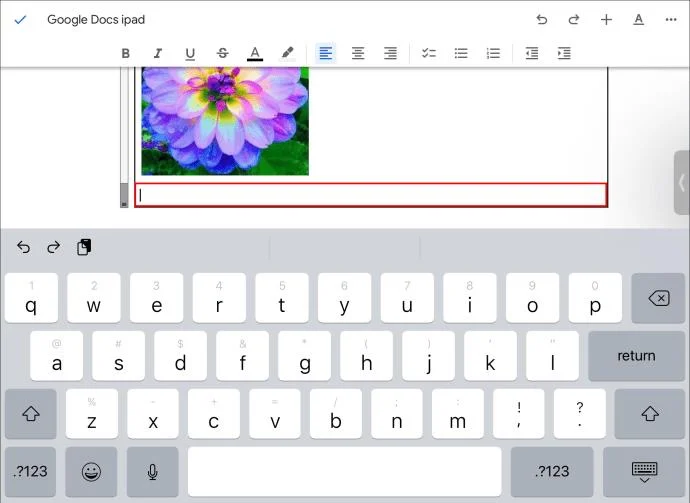
- Alternatively, select an existing picture from the document and move it into the top cell.
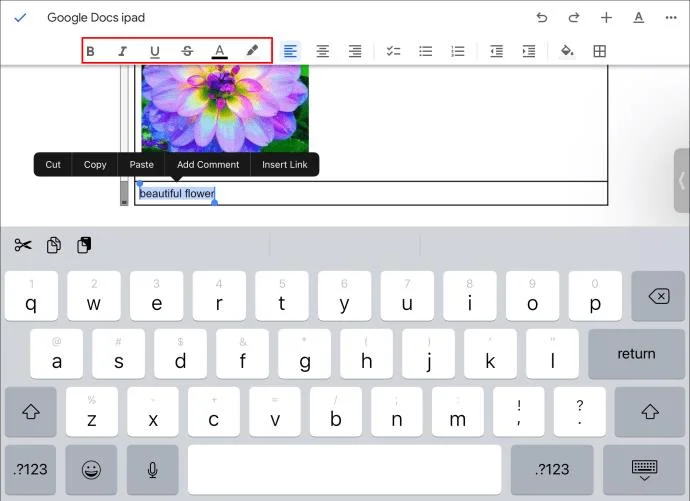
- Go to the cell below and type a caption.

- Format the text to your liking, if necessary.

Add Captions With In Line Formatting
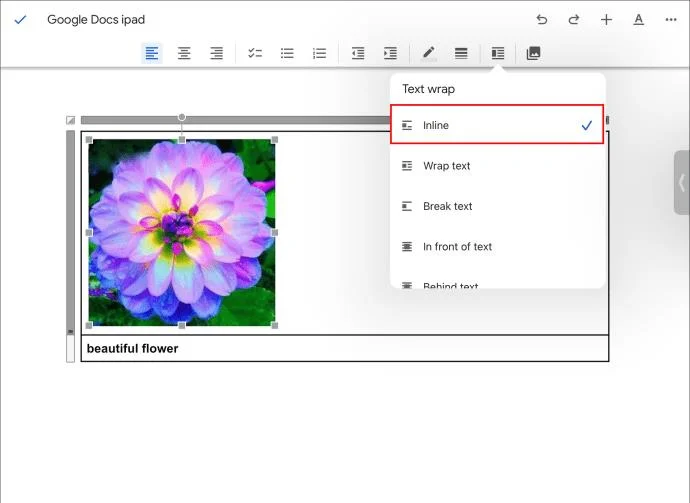
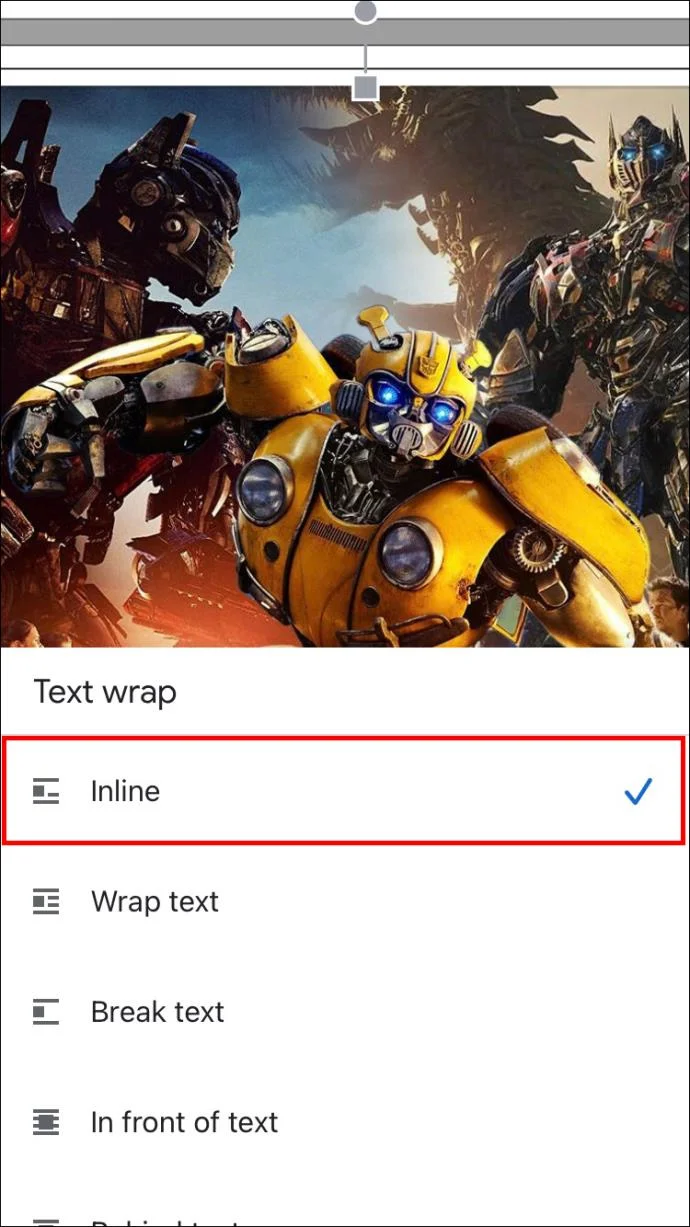
The “In Line” text wrap formatting is an even faster way to add a caption.
- Select an image from your Google Docs document.

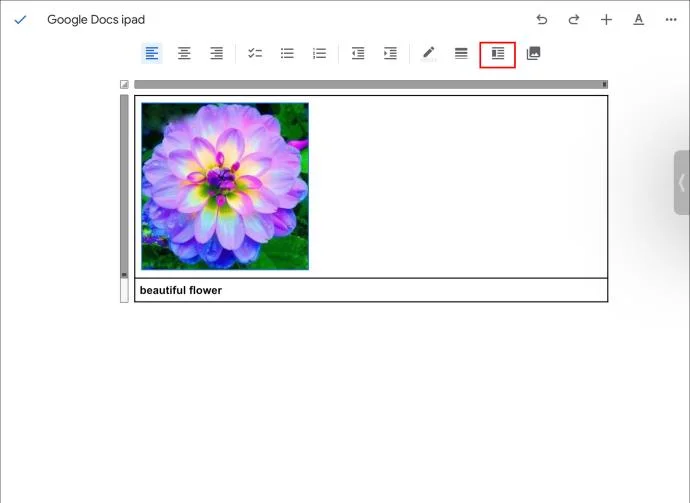
- Go to “Image Options.”

- Look for the “Text wrap” feature and set it to “In Line” formatting.

- Move underneath the picture by pressing the “Return” key and write a caption.
The only issue with this method is that the caption and picture don’t stick together if you try to move them to a new location in the document.
How to Add Captions to Images in Google Docs on an Android Phone
With over a billion downloads, Google Docs is one of the most popular word processors for mobile devices. If you want to caption images in a Google Docs document on an Android device, you can use one of two methods.
Use the Table Feature
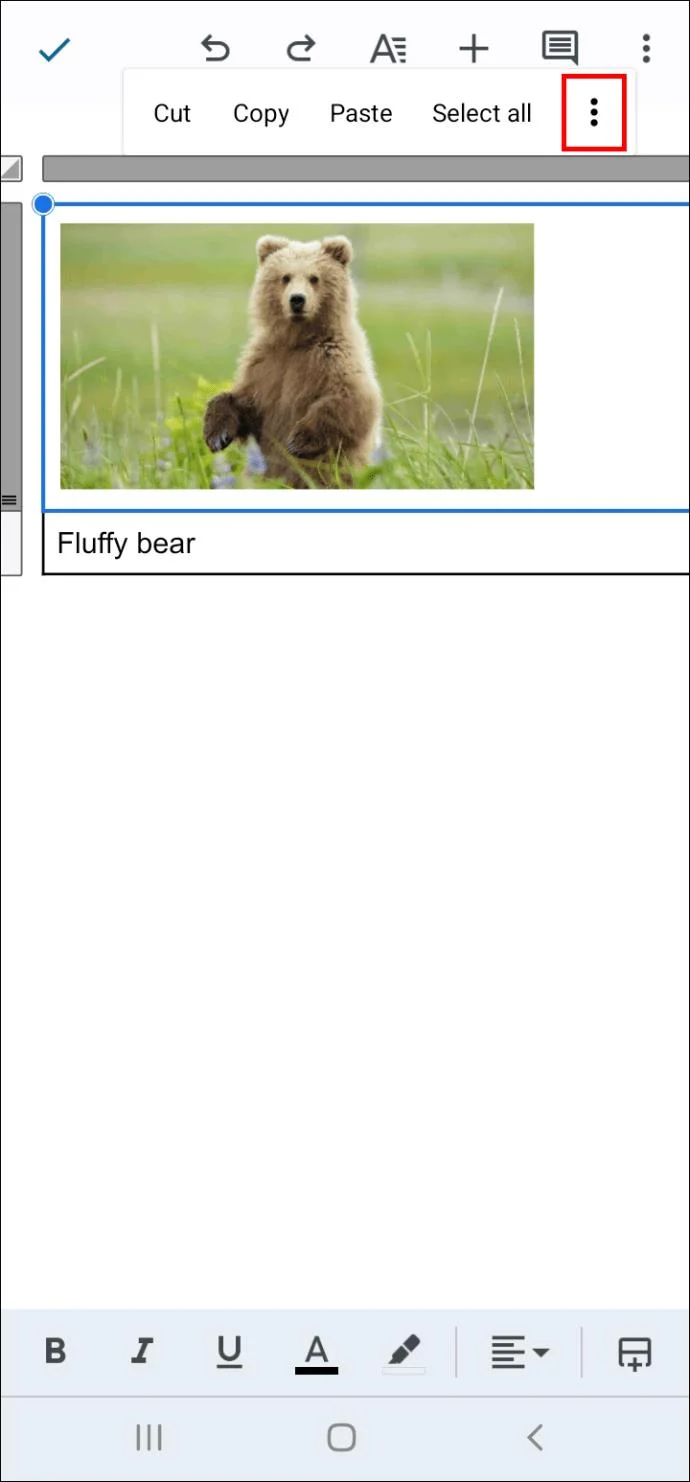
You can’t remove the table border in the mobile version of Google Docs. But captioning using a table still allows you to relocate the table anywhere in a document and keep the caption and image together.
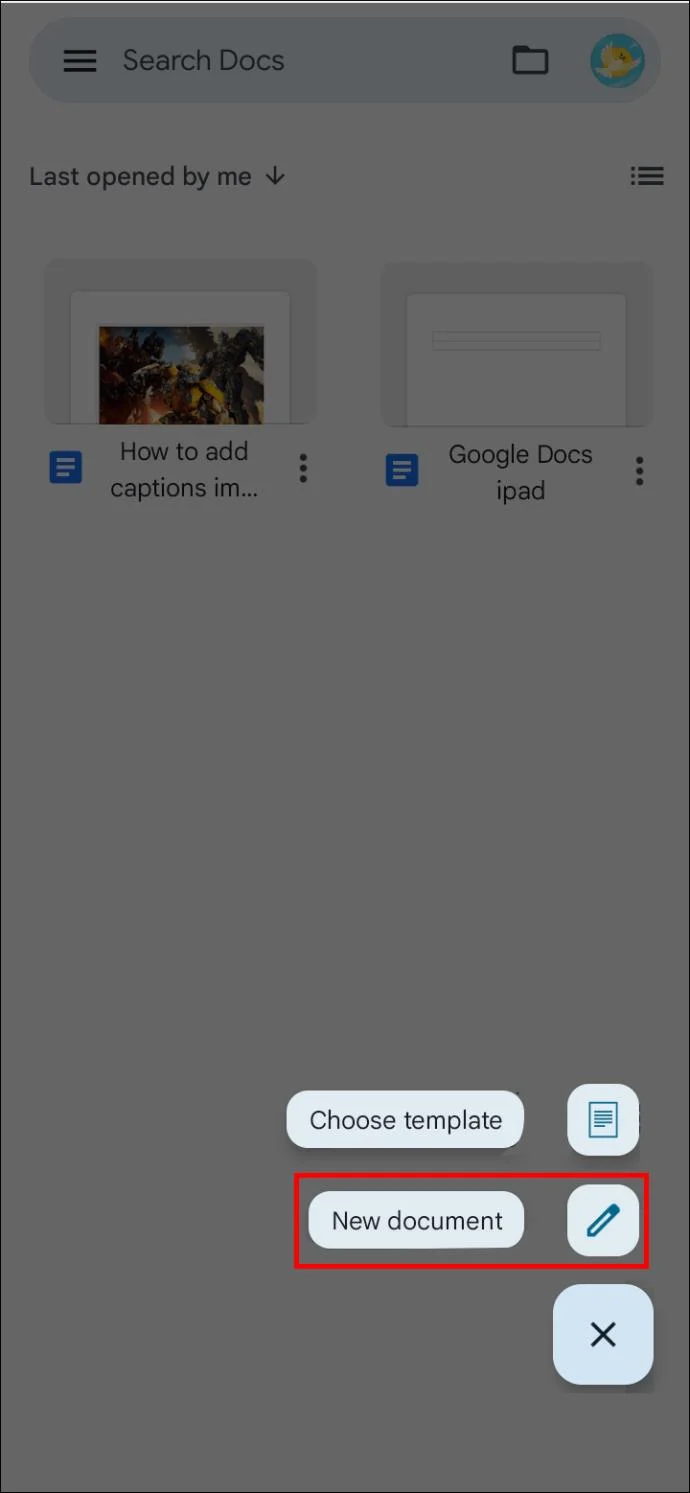
- Open Google Docs on your Android mobile device.

- Load a document or start a new one.

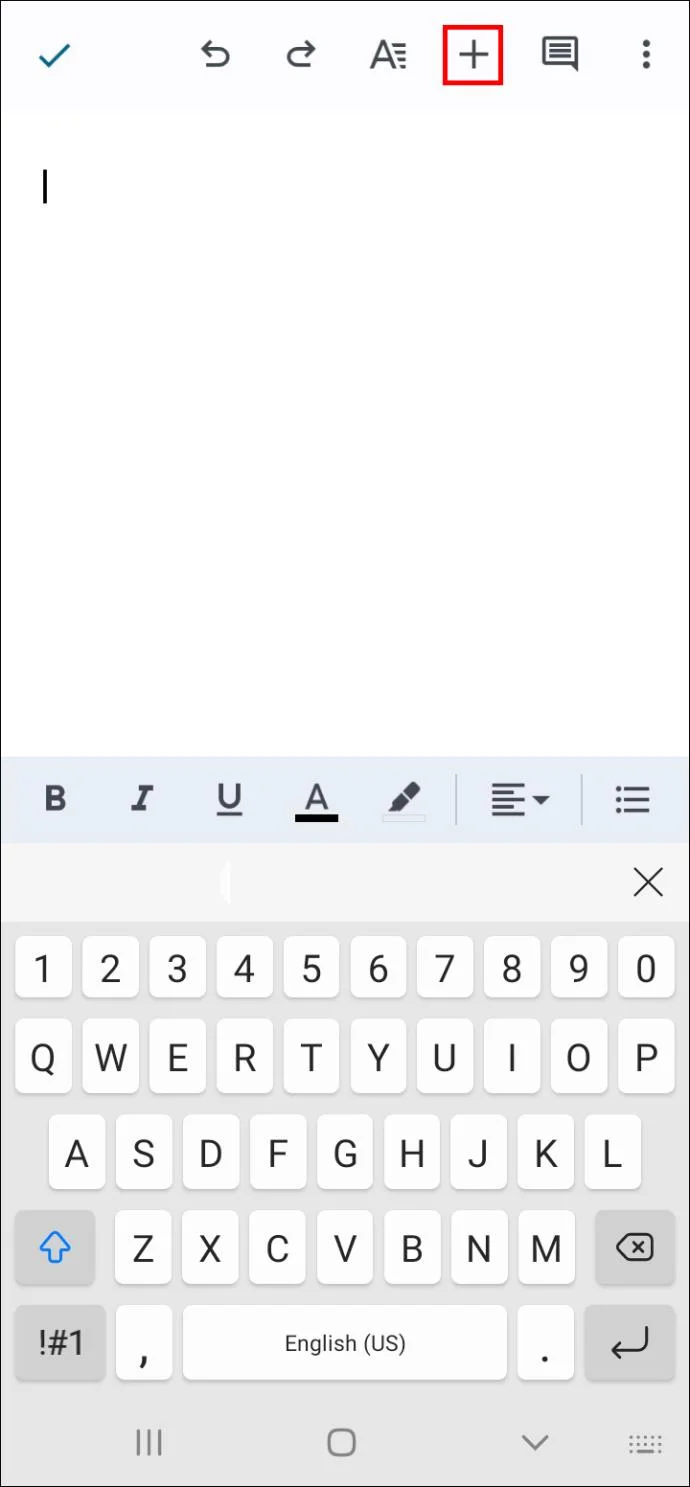
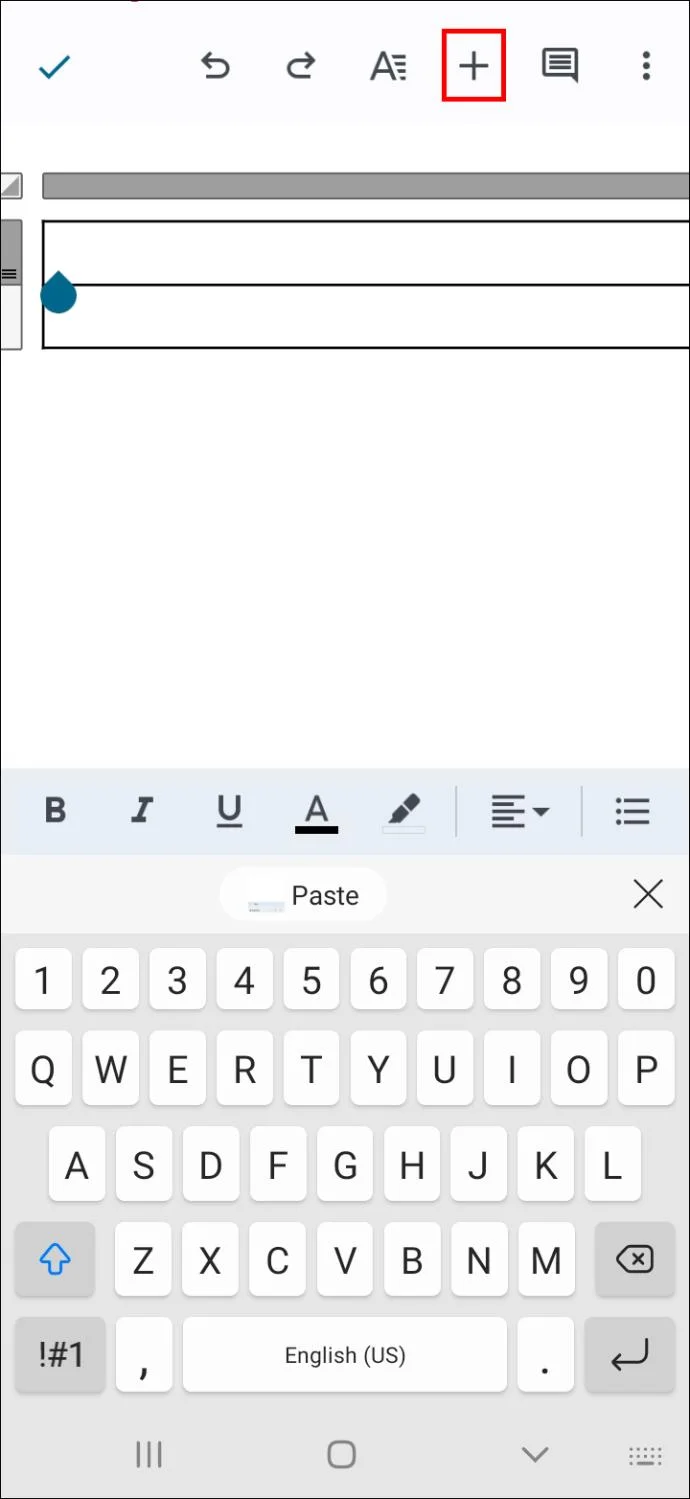
- Tap the “Plus” icon on the top toolbar.

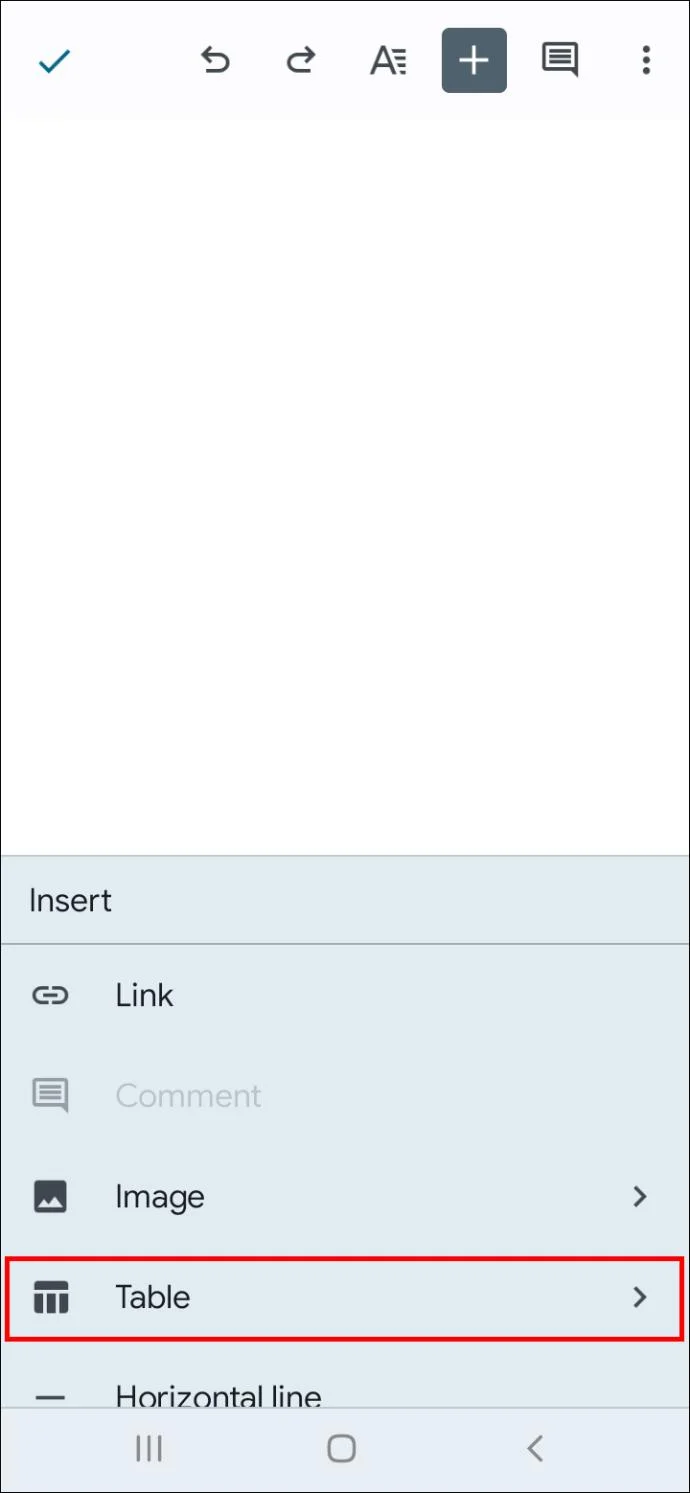
- Select “Table.”

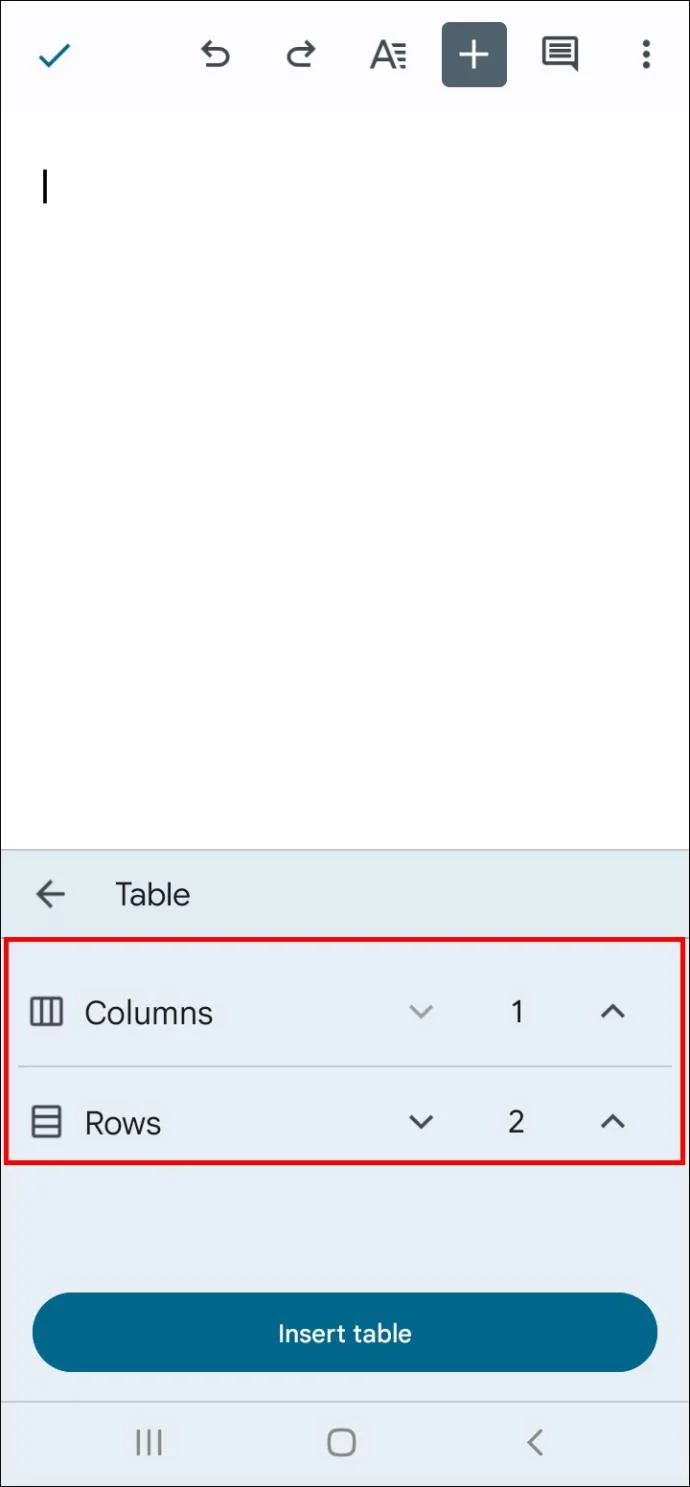
- Create a table with one column and two rows.

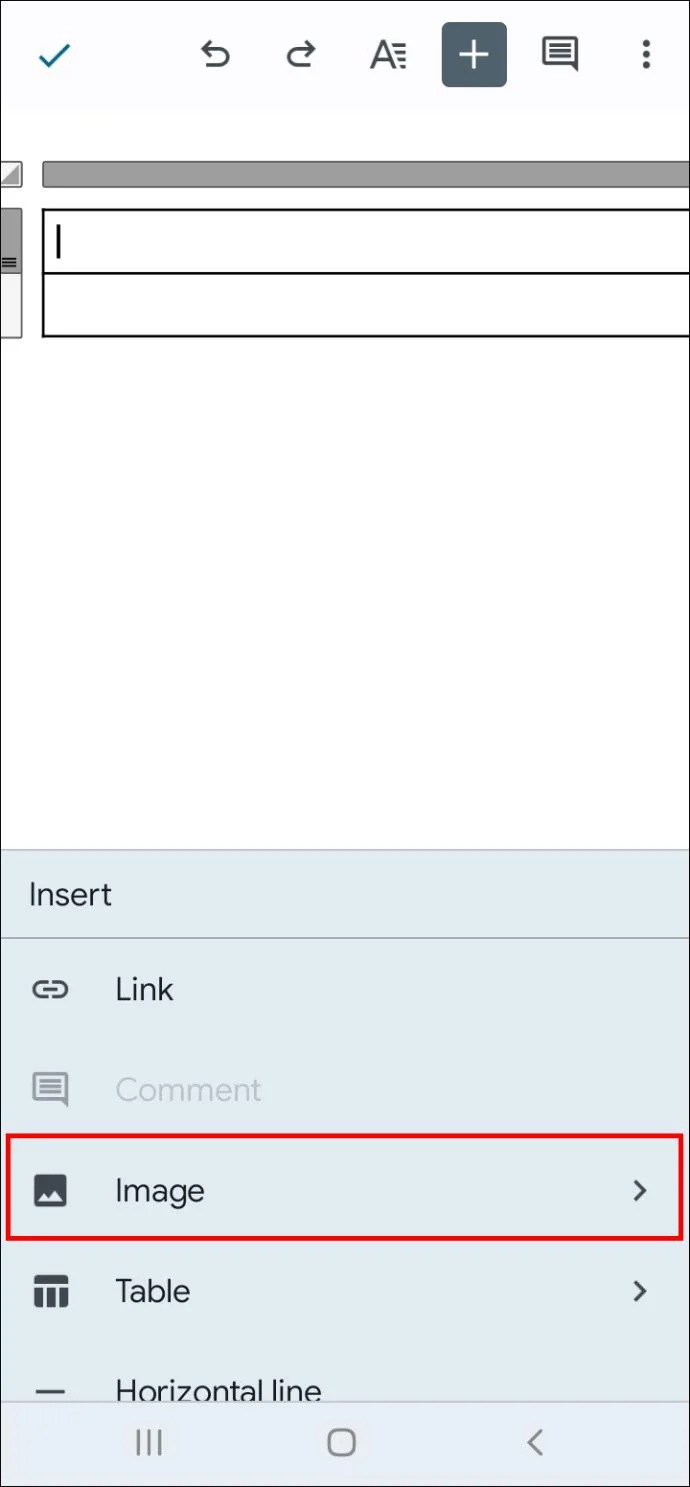
- Tap the “Plus” icon with the first cell selected.

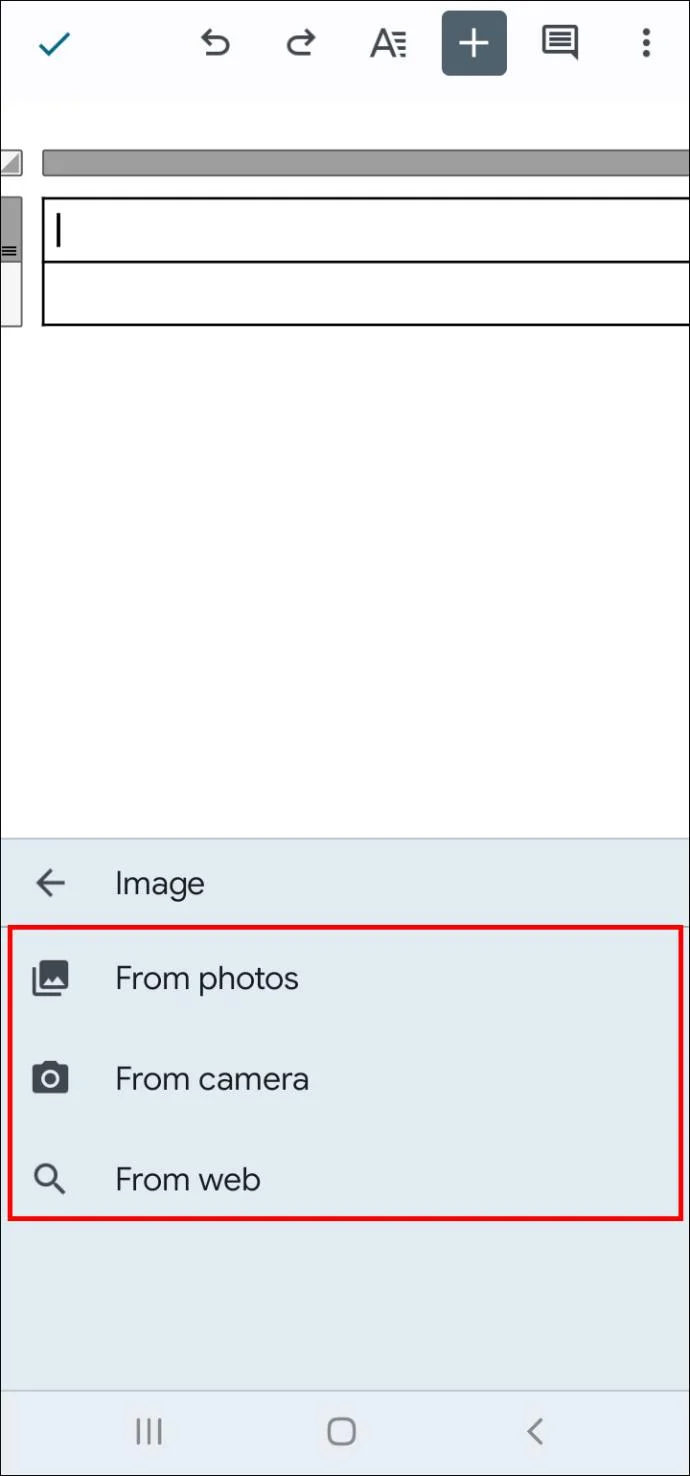
- Select the “Image” option.

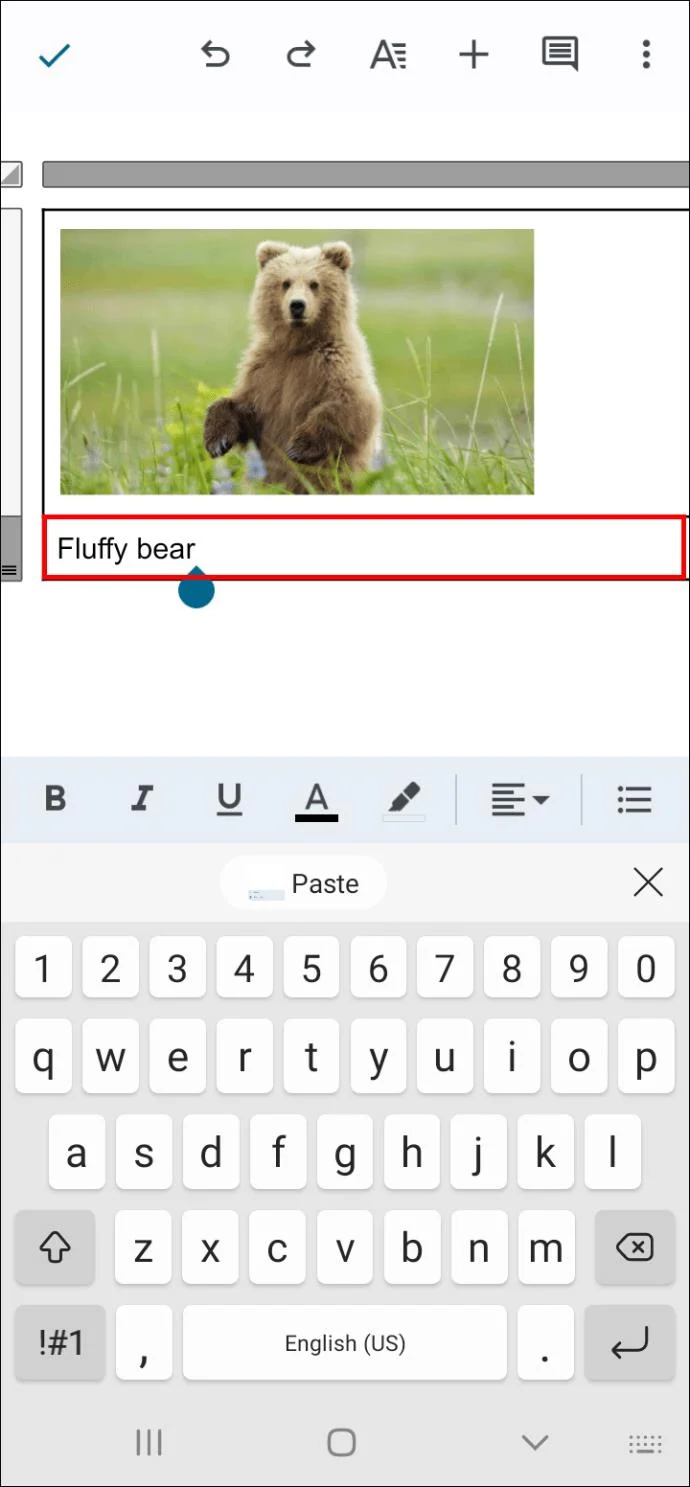
- Load an image or drag an existing image from the document into the cell.

- Type a caption in the cell below.

Add a Caption With the “In Line” Text Feature
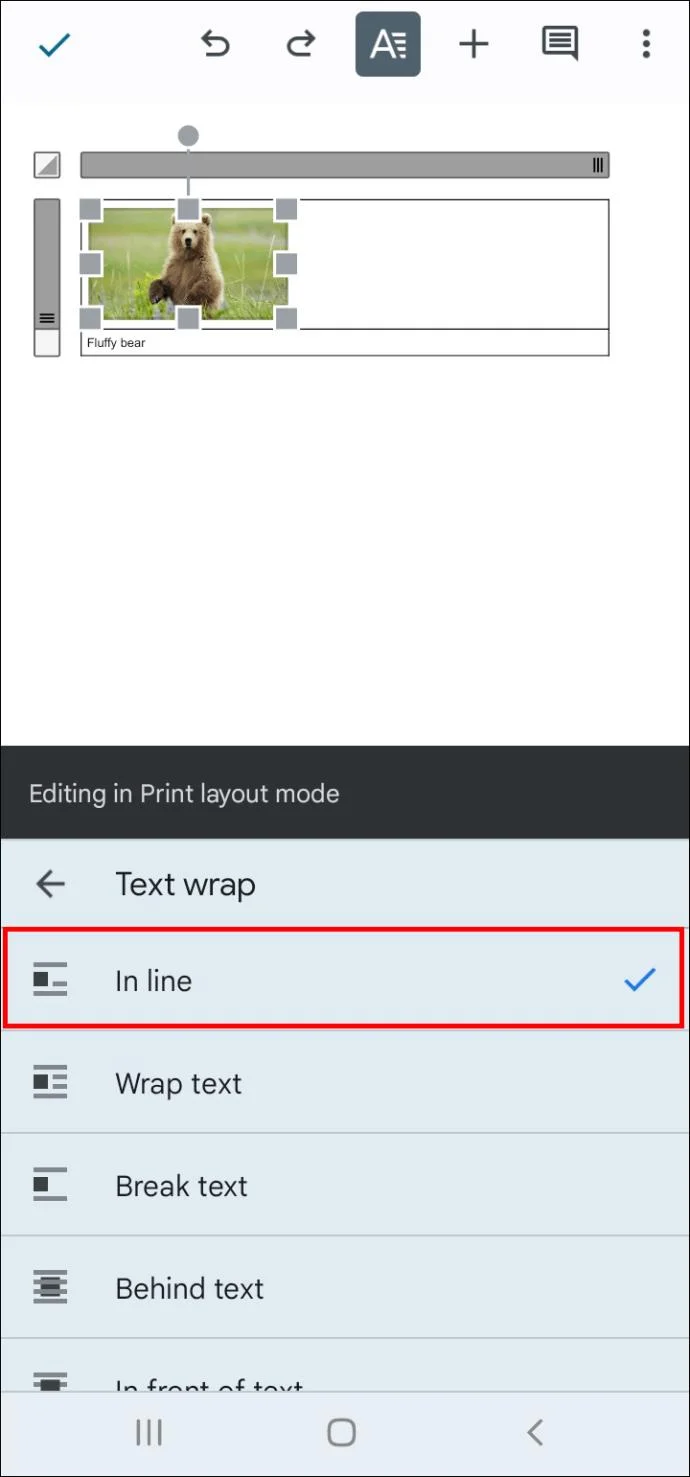
This method makes adding a caption quick but won’t let you move both elements together to a different section of the document.
- Select an image from your Google Docs document.

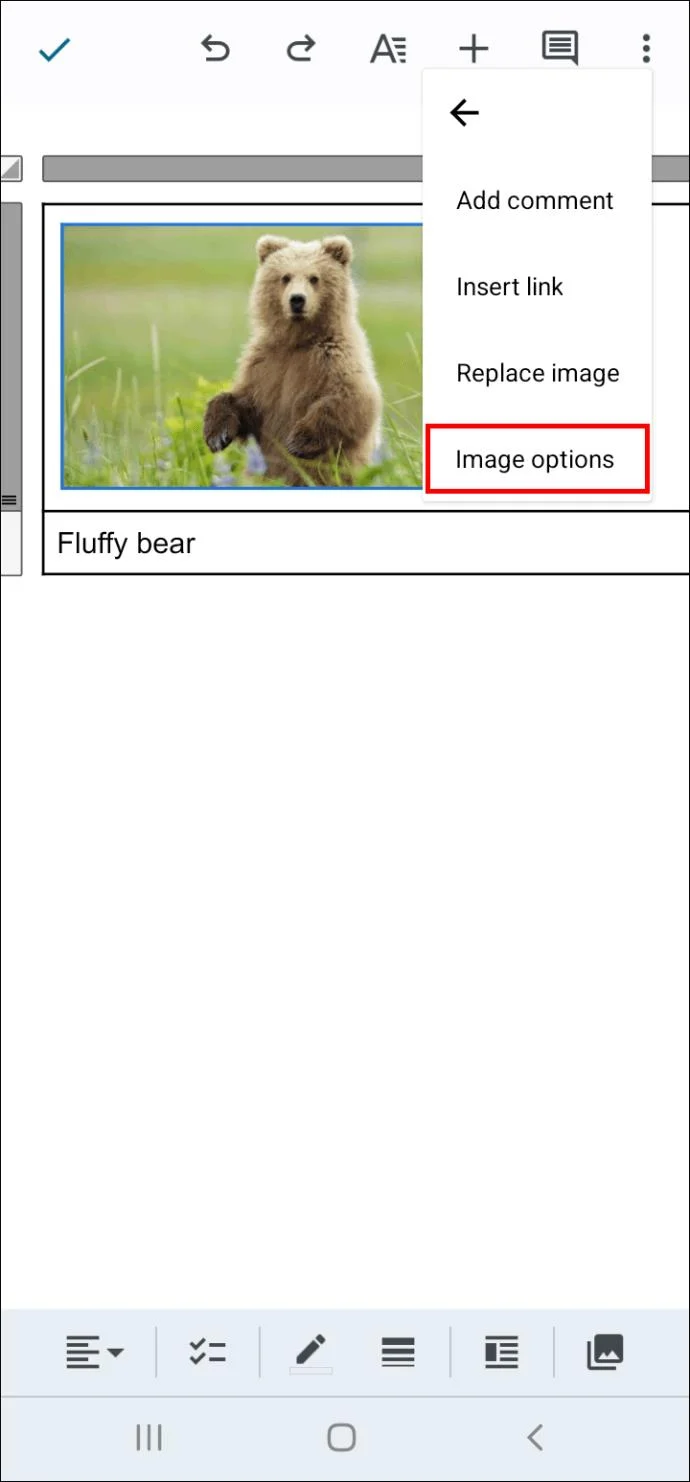
- Tap the “three-dot” button.

- Scroll down and select “Image Options.”

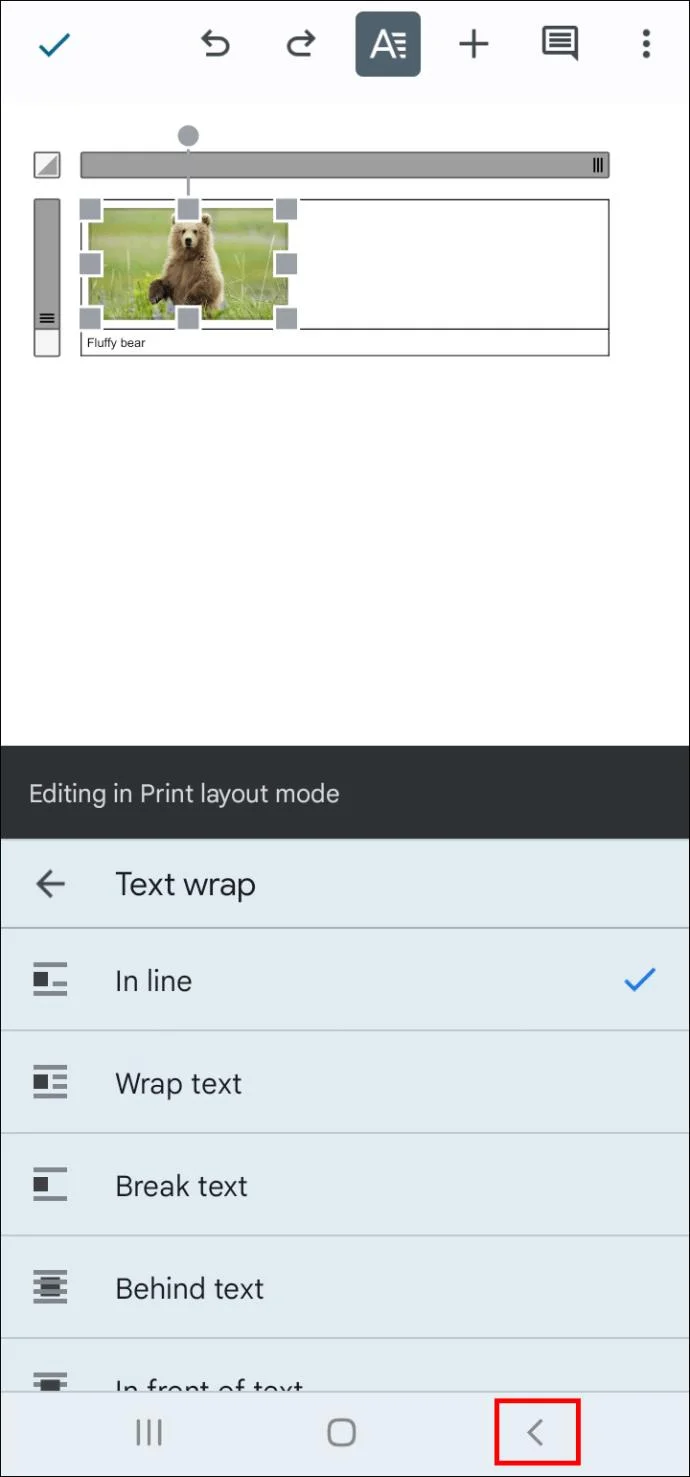
- Set the “Text wrap” feature to “In Line.”

- Hit your virtual keyboard’s “Return” key to move underneath the picture.

- Type your caption.
How to Add Captions to Images in Google Docs on an iPhone
Adding captions in Google Docs from an iPhone is a straightforward process. The simplest method involves adding a table to make the image and its caption part of the same movable element.
Add Captions in a Table
Make sure you install the Google Docs app from the App store.
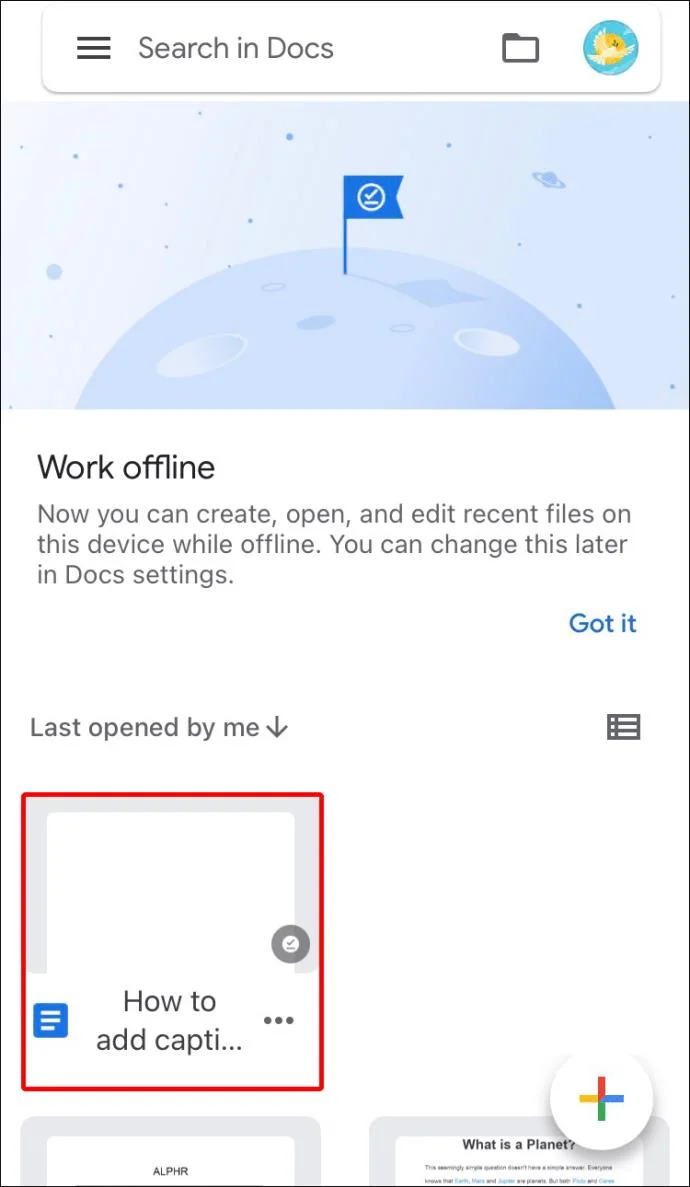
- Launch Google Docs on your iPhone.

- Open a document.

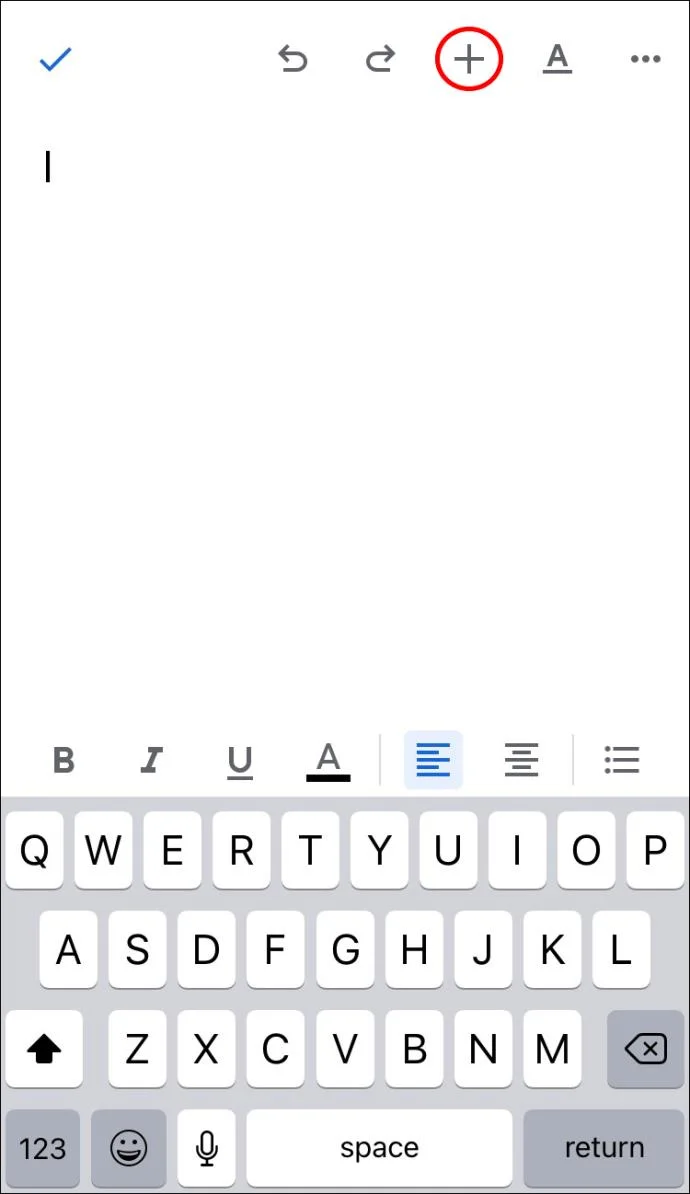
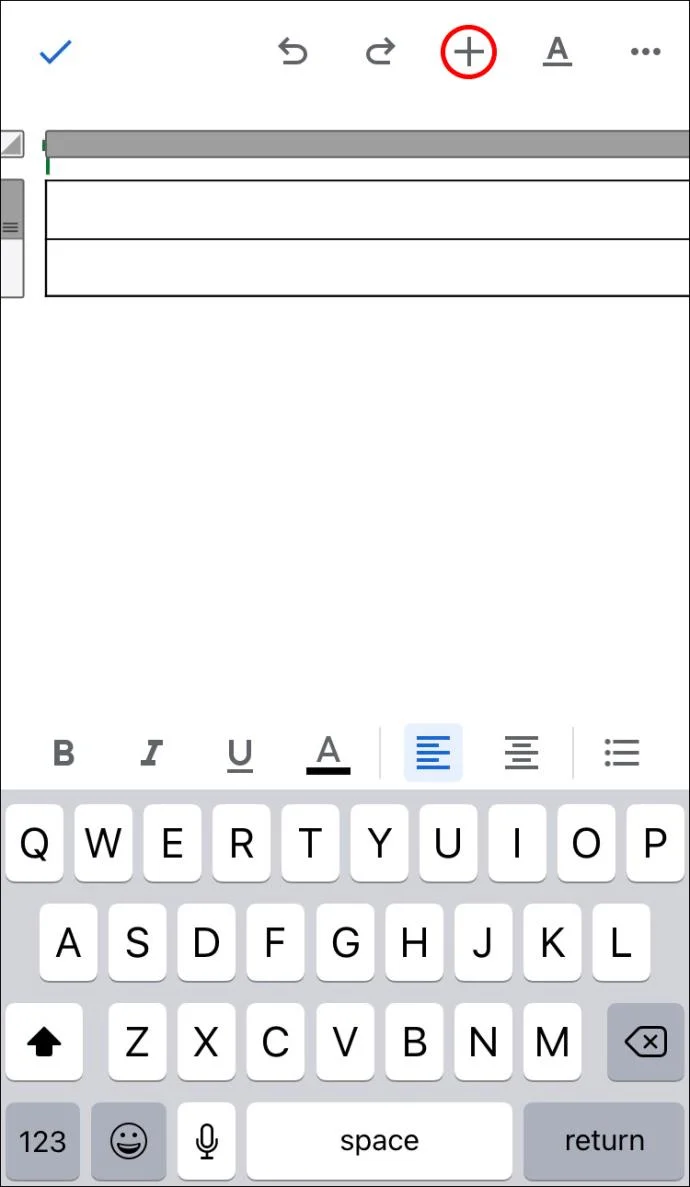
- Select the “Blue Pencil” icon on the bottom right corner of the screen to enable the editing options.

- Tap the “Plus” icon on the top toolbar.

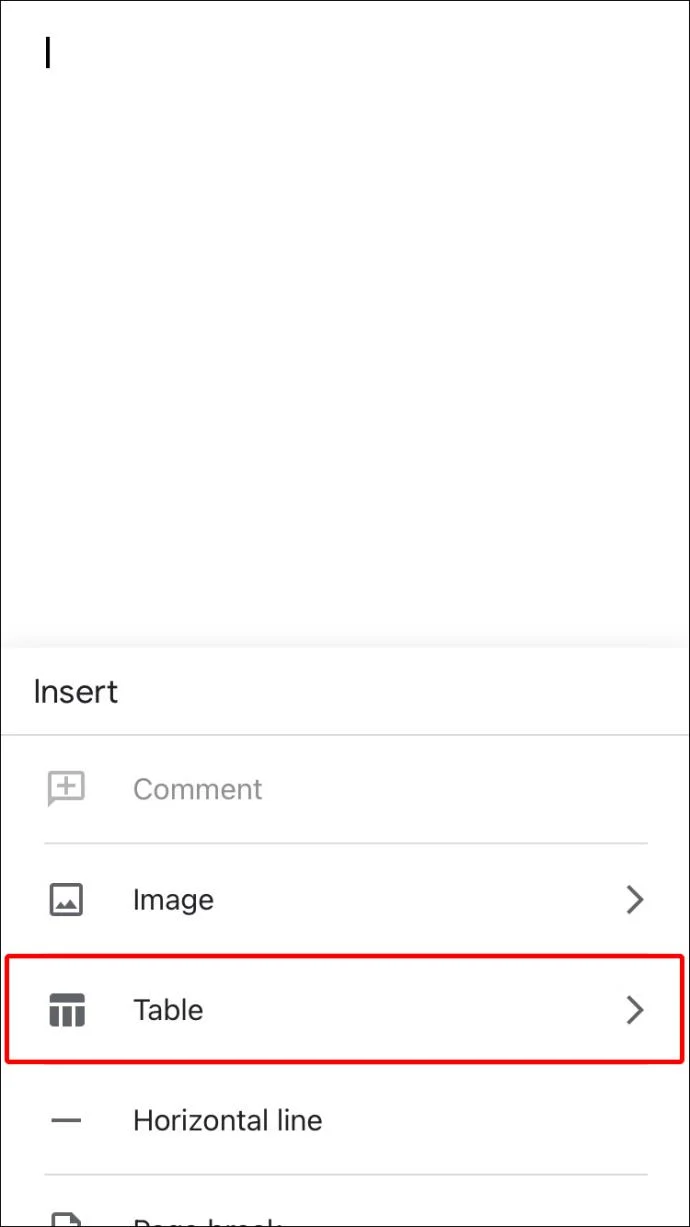
- Select “Table.”

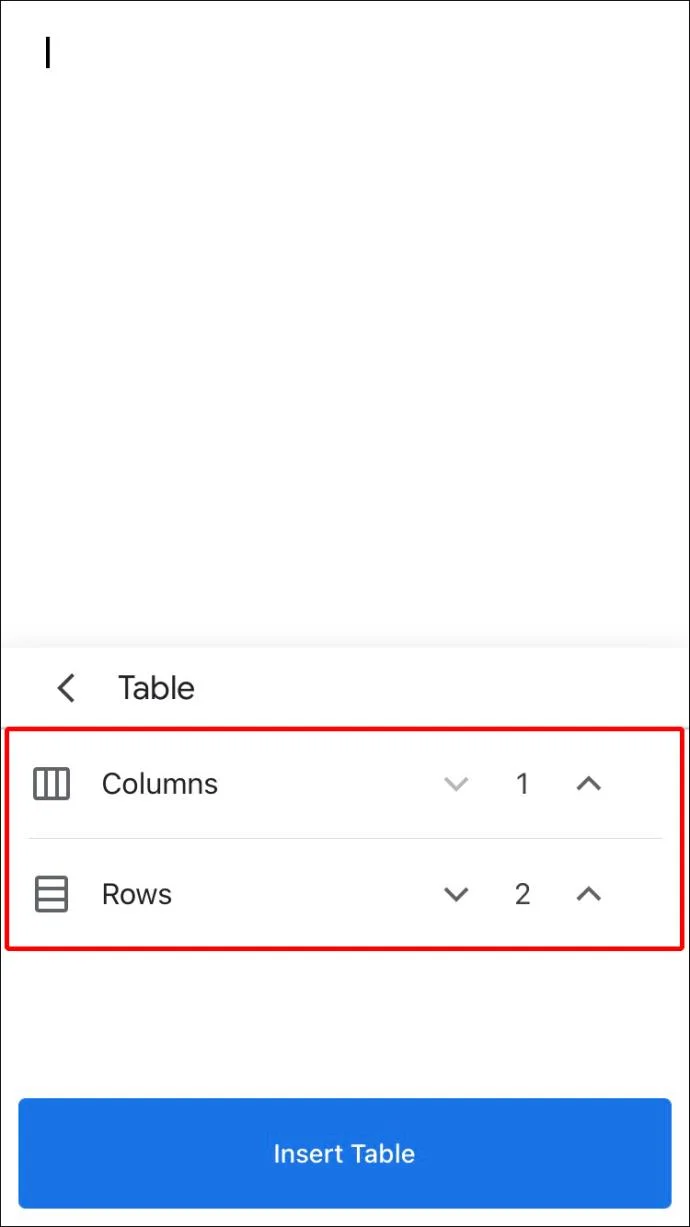
- Create a “1 x 2” table with one column and two rows.

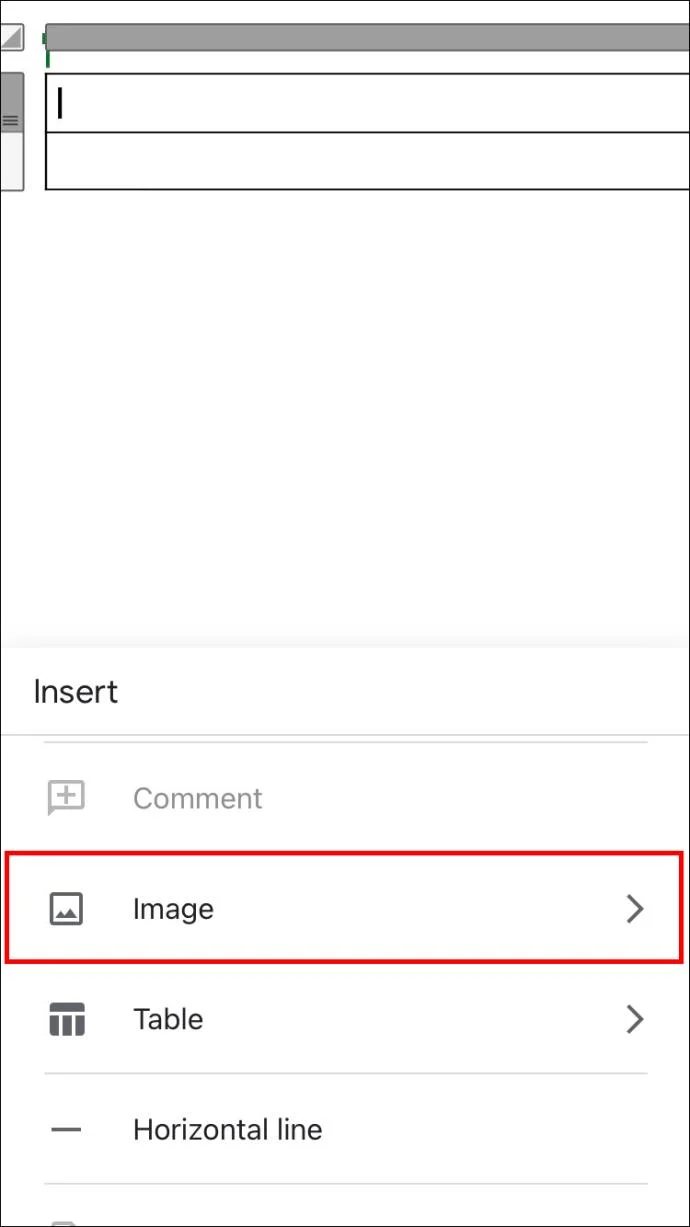
- Select the top cell and tap the “Plus” icon on the toolbar.

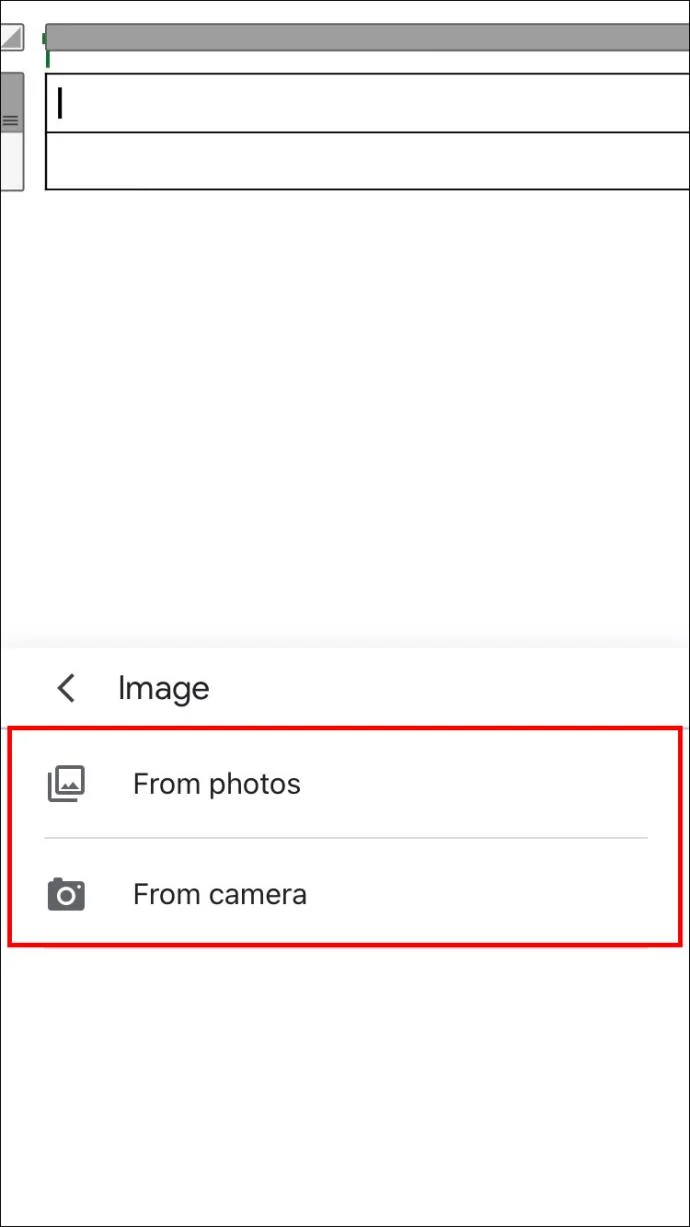
- Tap the “Image” option.

- Take a photo or upload a picture.

- Move to the cell below and type a caption.

Add Captions With “In Line” Formatting
You can add captions even faster and cleaner using the “In Line” text wrap formatting option. It won’t allow you to move the photo to a different location in the document with the caption attached. However, it will help you keep the document clean and without table borders.
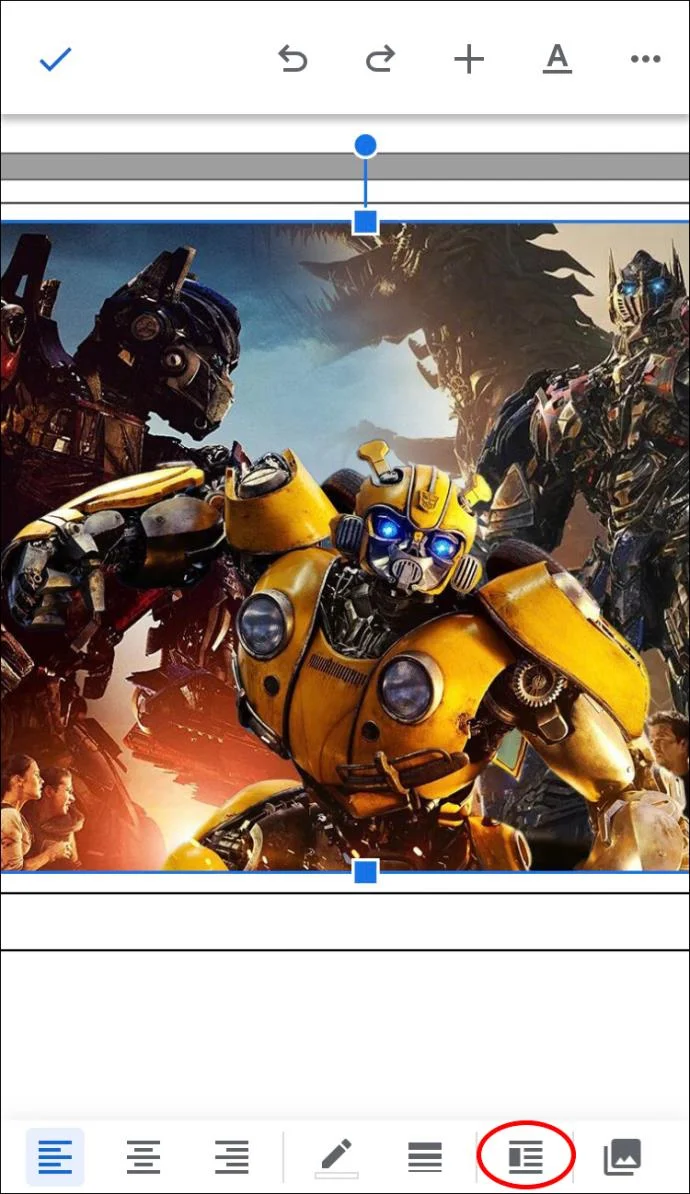
- Select an image from your Google Docs document and tap the “Blue Pencil” icon on the bottom right corner

- Select “Image Options.”

- Give the “Text wrap” feature “In Line” formatting.

- Move underneath the picture to write a caption.
Remember to tap the “Blue Pencil” icon to enable the editing option. You may have to do this whenever you open a document.
Captioning Makes Your Documents Look Professional
Google Docs is a reliable, free online word processor. Although it has clear limitations in its mobile version, the browser-based app features a wide range of text formatting and picture editing options.
Captioning is easy to do when you want to upscale your documents, offer more context, credit authors for third-party photos, and so on.
Let us know what you think of the outcomes of using different captioning methods in Google Docs and which option you prefer. If you have additional suggestions or workarounds, especially for mobile devices, feel free to share them in the comments section below.