Home
» How to
»
Guide to fix “Access Denied” folder is easiest on Windows 10
Guide to fix “Access Denied” folder is easiest on Windows 10
You might be surprised when Windows announces you don't have access to any data on your PC. This error is often caused by permissions in the NTFS file system used by default.
If you get the " Access Denied " error message on Windows 10 when accessing certain files or folders, follow the instructions below.
In most cases, you will need to be an administrator on your computer to change file / directory ownership. You can fine-tune the permissions in the catalog, but there won't be much control elsewhere.
This keeps everyone's file on their computer. Only an administrator can access other users' files. In addition, you will need to provide administrator rights to change the file system, for example in Program Files and Windows folders.
The most basic way to fix "folder access denied" is to use ownership of that folder in File Explorer. Here is how this works.
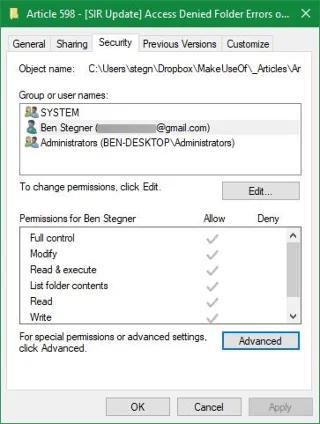
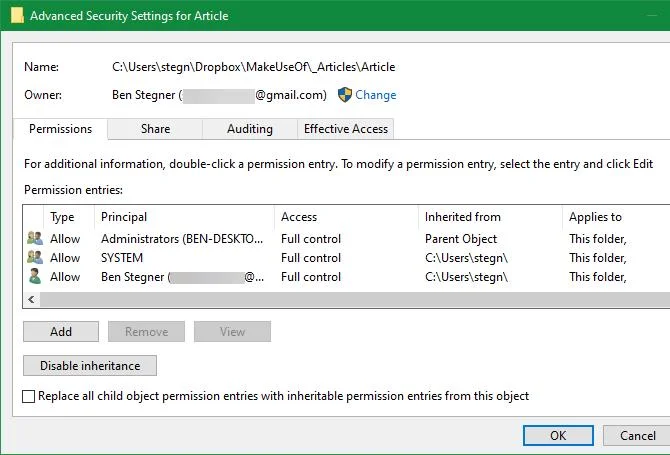
First, right-click on the directory or file in question and select Properties . On the resulting window, switch to the Security tab > click the Advanced button .
At the top of the next window, you'll see the Owner field . It may display Unable to display current owner if an error has occurred. Click the blue Change link next to it to fix the error. - note that you need Admin rights to do this.
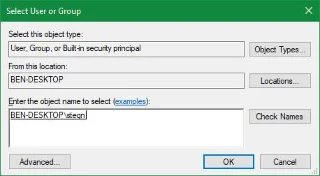
You should now see the Select User or Group dialog box . Please enter the account name of the owner of this new folder inside that dialog. That could be the user account name, a group of users on the PC. Groups include two standard options: Administrators (if you want all computer administrators to have folder ownership), or User (choose who has ownership of it). In a home computer, you should assign ownership to one person.
The article assumes you want to take ownership of the directory using your account name, please type the username here. If you use a Microsoft account to log in to Windows 10, your username is the first 5 letters of your email address. Click Check Names when you're done to ensure accuracy. If that directory is yours, the system will automatically change to PCNAME \ USERNAME . Click OK .
Back in the main Advanced window , you'll see a box below starting with Replace all child object permission entries . If you want to apply changes to an entire folder in the current directory, put a checkmark in this box. Then click Ok twice to complete the process.
Be careful when changing file ownership settings
When dealing with the "access denied" error, you should apply the steps above carefully. Avoid folder ownership in system directories such as Windows, Program Files, Program Data, etc.
This will weaken the system's security as normal accounts are not the owners of those directories. They are important folders that you should not edit.
In fact, you can still access these folders with the above method without Admin rights.
3. Review directory permissions
If you own an inactive directory or if the administrator is attempting to delegate permissions to someone, you should consider the role of the authorized user on the directory in question.
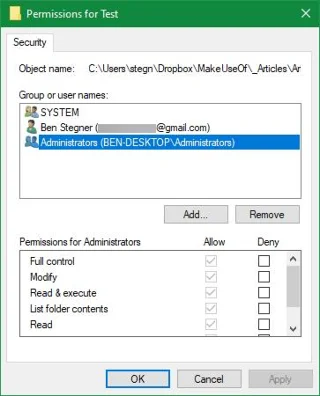
Open the Security tab in the folder properties as described above. At the top, you will see a list of users and groups on the computer. Here, select an item and the table below will show the users' right to use this directory.
As its name suggests, Full Control gives you full control of the folder and everything inside. Read is the most restrictive option because it only allows you to view the contents of the directory. Find out more details at the Microsoft site about file and directory permissions .
4. Double click antivirus settings
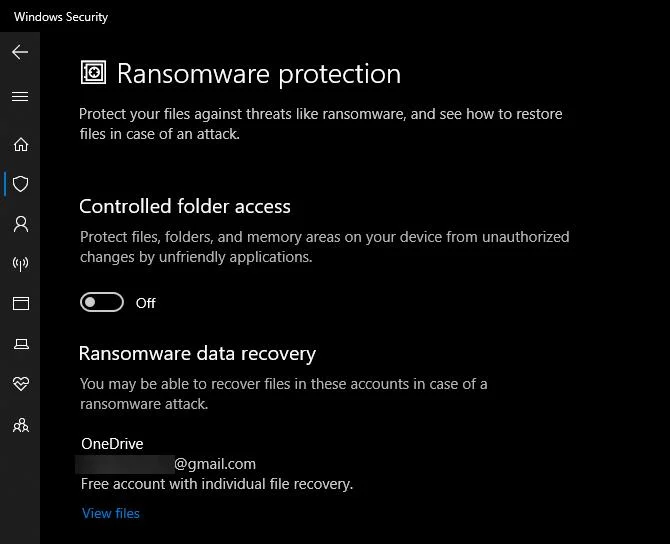
Sometimes anti-virus software works so enthusiastically that your ability to access your files is messed up. If you've verified your file access settings correctly, you should consider testing this step.
Go to install an antivirus program on your computer and see if there is a "shield" for file protection or something like that. Try turning this feature off, then access the file again. If there is no effect, temporarily turn off the antivirus software and see if the error is fixed.
5. Check file encryption
Another cause of an "access denied" error could be due to the fact that the folder contents are encrypted. As you know, encryption protects a file by allowing only someone who has a code key to view it.
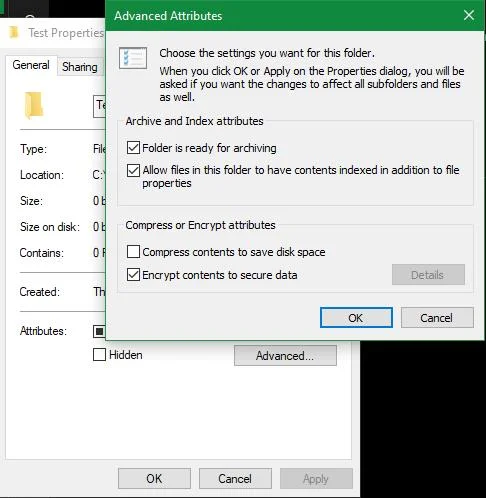
You can encrypt directory contents in Windows, although this feature is only available in the Professional version. To do this, right-click on the folder. On the resulting window, click the Advanced button on the General tab . Here, tick Encrypt contents to secure data . After that, everything in the folder will be locked.
This invisible type of encryption means that the owner never perceives its existence. By logging into the system, they can access these files. But if there is no certificate used to encrypt the folder, Windows will deny your access. Only someone who encrypts the file and has the correct credentials can unlock it.
This is not the only way to encrypt files on Windows 10, but it can cause an "access denied" directory error.
How to fix other potential "File Access Denied" errors
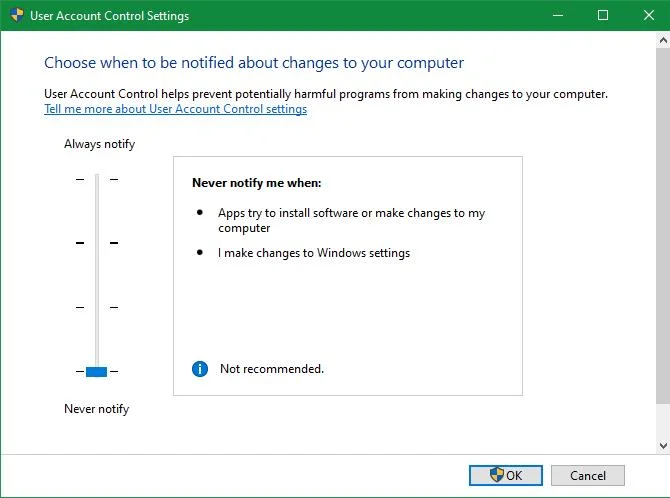
Another common tip to fix this error is to turn off Change User Account Control settings (UAC). To do this, type UAC into the Start Menu and select. Drag the slider to the bottom and click OK .
Next, retry the steps above to get ownership. Afterwards, make sure you have reset the UAC settings to their original locations.
Another troubleshooting step is to try booting the computer in safe mode - Safe Mode and perform the steps to create Admin rights. This action excludes the right to interfere with third party applications.
Finally, make sure no program or person is using the directory or file you want to access. Other operations running may cause the file to be locked. That is why you cannot change it.
Fix the "Destination Folder Access Denied" error
You may see more specific " destination folder access denied " error messages . In most cases, you can use the above remedies. However, do not just consider the destination directory as the message mentioned. Check both permissions on the source directory.
Above are the steps to handle the error of not being able to access the desired folder or file in Windows 10 in the simplest way. Hope the article is helpful to you.