The most commonly deficient nutrients in the diet

Diet is important to our health. Yet most of our meals are lacking in these six important nutrients.
When creating a table in Google Docs , aligning the table as well as the document in the table is very necessary to have a standard document. The operation of centering a table in Google Docs is basically very simple compared to the operation of centering a cell in a Word table , or centering a cell in a PowerPoint table . We can choose between manual operations or using the alignment tool to adjust the table. The following article will guide you to center the table in Google Docs.
Center Google Docs Tables Using the Options Tool
Step 1:
First, you click on any cell in the Google Docs table. Next, the user clicks on Format and then clicks on Table below the list.

Step 2:
Next, the user clicks on Table Properties to readjust the table.

Step 3:
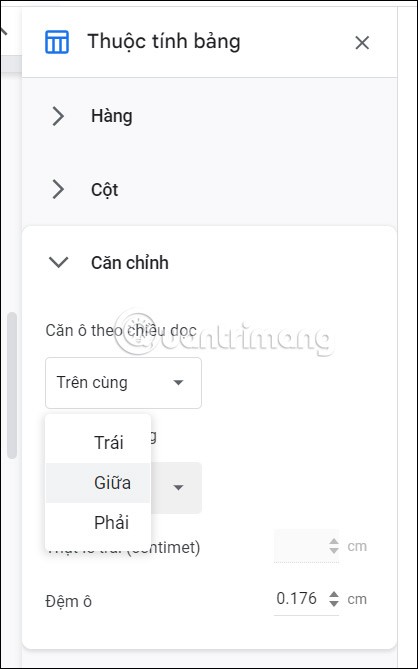
Now on the right side of the screen, options for the table appear. Here, the user clicks on Align and then clicks on Center . The table will then be aligned in the center of the document.
Center Google Docs Tables Manually
With this manual method, we will center the table right from the table creation operation in Docs.
Step 1:
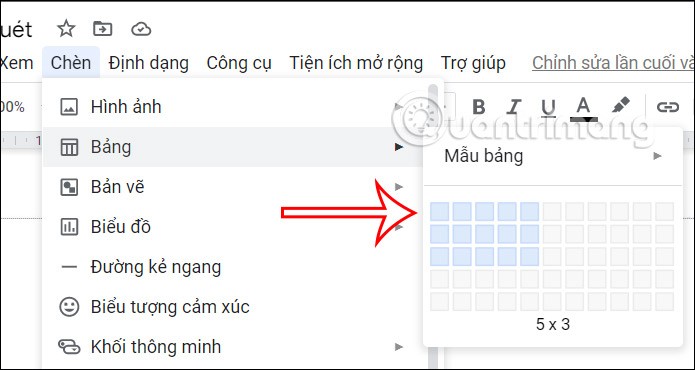
First we will create a table with 1 row and 3 cells . Click Insert then select table and select quantity as 3x1.

Step 2:
Click on the center cell of the table you just created, then click Insert , select Table , then select the number of cells and columns needed to create a complete table .
Step 3:
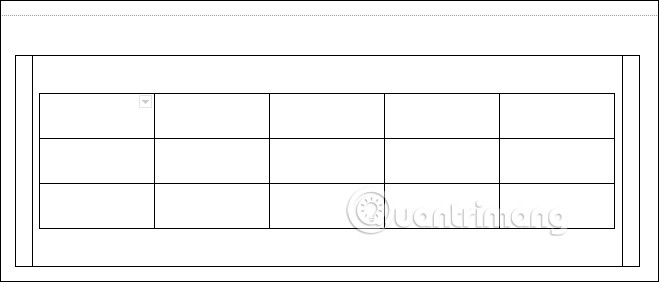
The table will then be inserted in the middle of the cell as shown below. You will drag the left and right columns of the old table to the 2 sides .
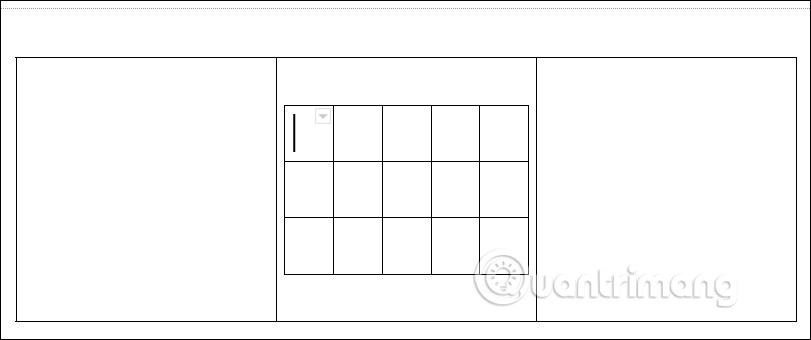
As a result, we get a table with 2 columns on the left and right as shown.
Step 4:
To hide the first table , we will click on the cell of the first table . Then the user clicks on Format, selects Table , and then selects Table Properties .

Step 5:
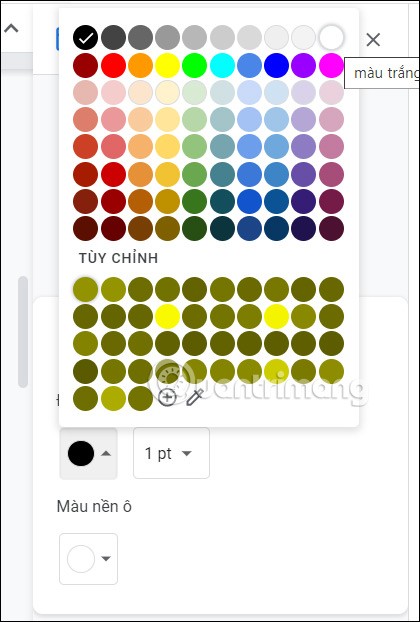
Looking at the content next to it, click on the Color item . Next, in the Table Border section , the user switches from black to white .
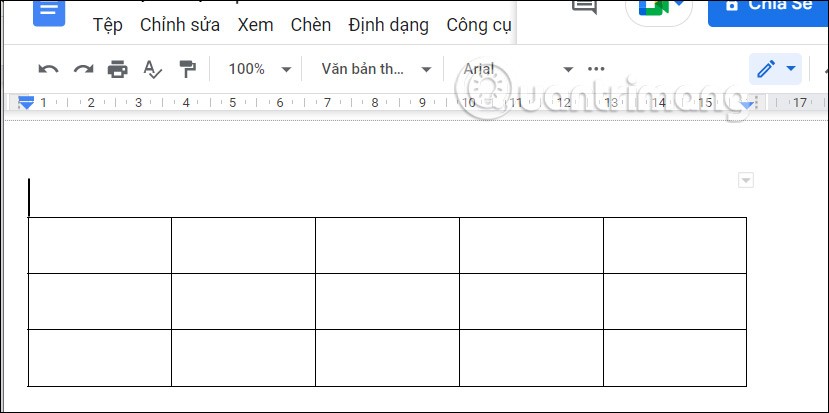
Immediately the first panel will disappear and only the second centered panel will be displayed.
Diet is important to our health. Yet most of our meals are lacking in these six important nutrients.
At first glance, AirPods look just like any other true wireless earbuds. But that all changed when a few little-known features were discovered.
In this article, we will guide you how to regain access to your hard drive when it fails. Let's follow along!
Dental floss is a common tool for cleaning teeth, however, not everyone knows how to use it properly. Below are instructions on how to use dental floss to clean teeth effectively.
Building muscle takes time and the right training, but its something anyone can do. Heres how to build muscle, according to experts.
In addition to regular exercise and not smoking, diet is one of the best ways to protect your heart. Here are the best diets for heart health.
The third trimester is often the most difficult time to sleep during pregnancy. Here are some ways to treat insomnia in the third trimester.
There are many ways to lose weight without changing anything in your diet. Here are some scientifically proven automatic weight loss or calorie-burning methods that anyone can use.
Apple has introduced iOS 26 – a major update with a brand new frosted glass design, smarter experiences, and improvements to familiar apps.
Yoga can provide many health benefits, including better sleep. Because yoga can be relaxing and restorative, its a great way to beat insomnia after a busy day.
The flower of the other shore is a unique flower, carrying many unique meanings. So what is the flower of the other shore, is the flower of the other shore real, what is the meaning and legend of the flower of the other shore?
Craving for snacks but afraid of gaining weight? Dont worry, lets explore together many types of weight loss snacks that are high in fiber, low in calories without making you try to starve yourself.
Prioritizing a consistent sleep schedule and evening routine can help improve the quality of your sleep. Heres what you need to know to stop tossing and turning at night.
Adding a printer to Windows 10 is simple, although the process for wired devices will be different than for wireless devices.
You want to have a beautiful, shiny, healthy nail quickly. The simple tips for beautiful nails below will be useful for you.


