Home
» How to
»
How to create Sticker packages on Viber PC and phone
How to create Sticker packages on Viber PC and phone
In any chat application, Sticker always contributes extremely important to make the conversation more lively and interesting. In particular, Viber also allows users to create Sticker packs in their own style extremely simple and fast.
The feature of creating Sticker pack already supports both computers, and Android phones. Invite you to track how in the article below:
How to create a Sticker package on Viber PC
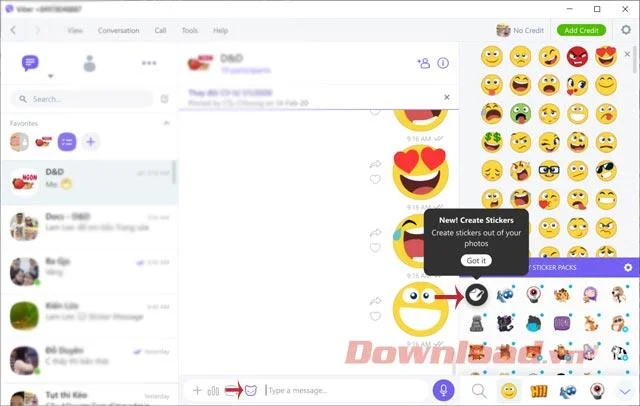
Step 1: At any chat interface, click the Sticker icon, then click the pencil icon to create a new Sticker package.
Create a new Sticker package
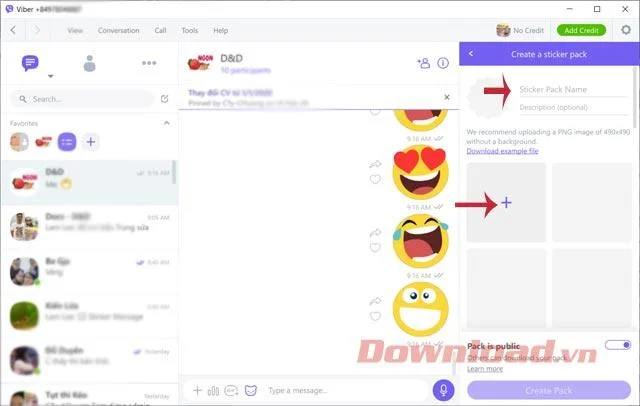
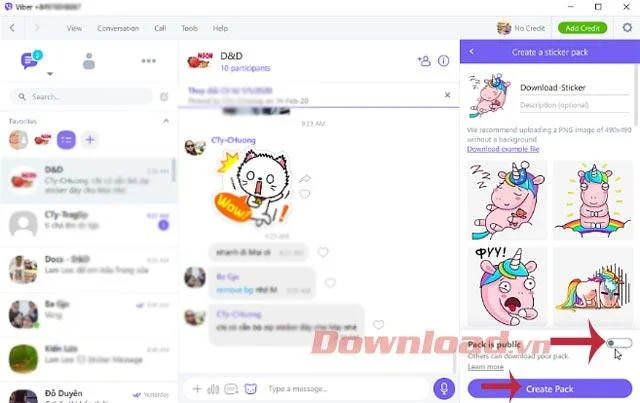
Step 2: Create a Sticker Pack interface appears, you can name the Sticker package, write a description for the package, then click the plus icon to add Sticker. It is best to use a 490x490 size PNG image with a transparent background.
You should pre-edit photos you want to upload with image editing tools like Photoshop or use Remove.bg to remove background images automatically and for free.
Name the Sticker pack
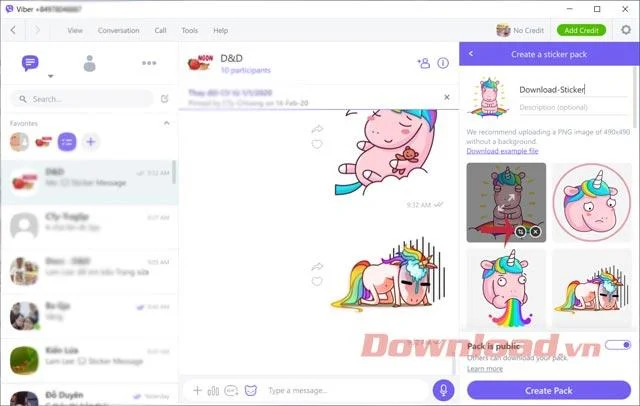
Step 3: After uploading photos, but not satisfied, you can hover on each image, click the Crop icon to crop the image accordingly.
Edit Sticker
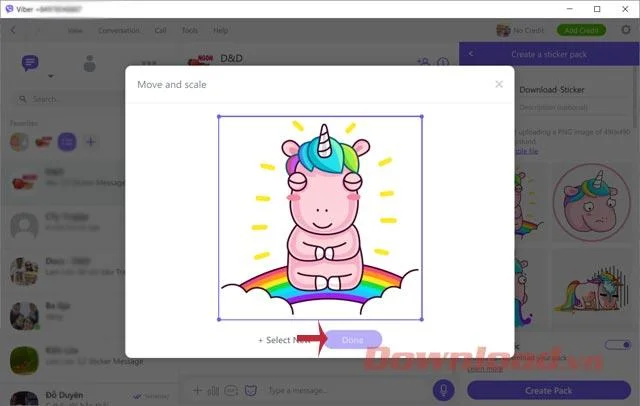
Step 4: Move and Scale interface appears, you can move, crop photos accordingly, then click Done to complete.
Move and resize the Sticker
Step 5: After adding other stickers, you can turn on the public or private mode for the Sticker package you are creating. Then, press the Create Pack button to create a new Sticker package.
Create Sticker
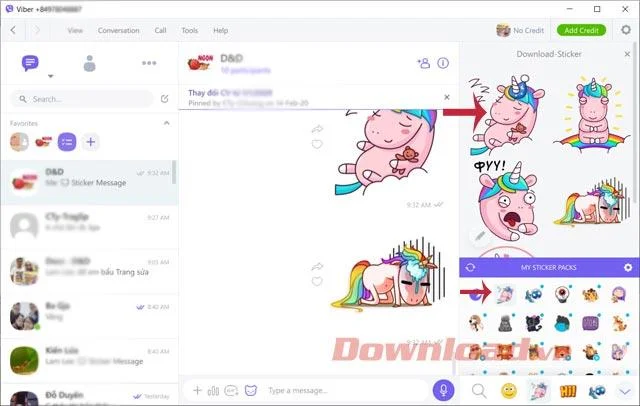
Step 6: Once created, touch the sticker icon will see your Sticker appear in it. Now send to your friends and loved ones as usual.
Use Sticker after creation
Instructions for creating Sticker packages on Viber for Android
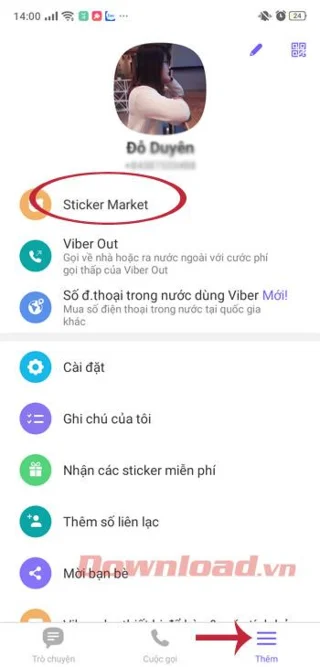
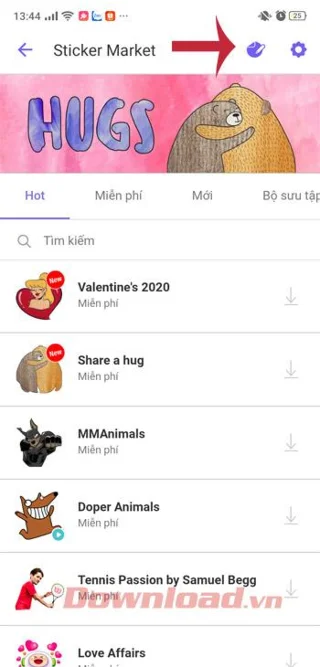
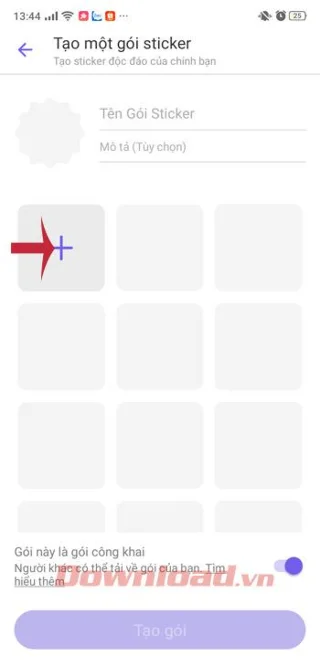
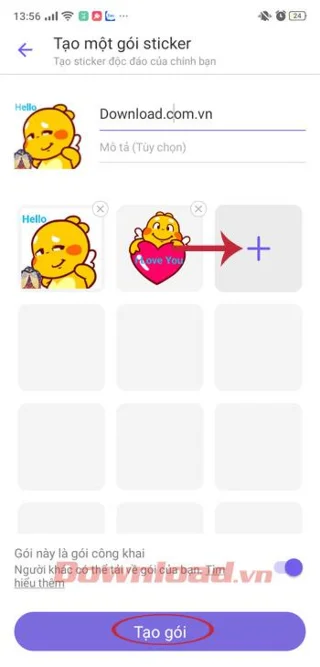
Step 1: Open the Viber app on your Android phone, click on Add in the bottom right corner, then click Sticker Market . Then, click the pencil icon to create a new Sticker pack. The Create Sticker package interface appears, you can name the Sticker package, write a description for the package, and then click the plus icon to add Sticker.
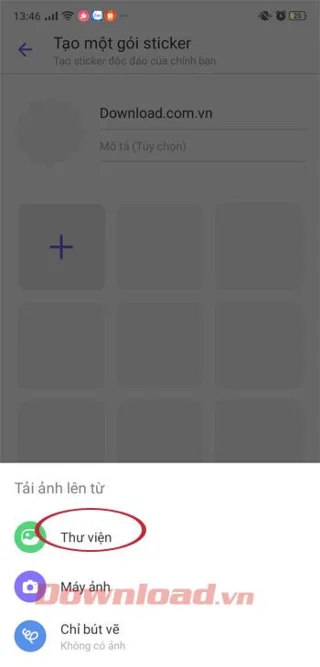
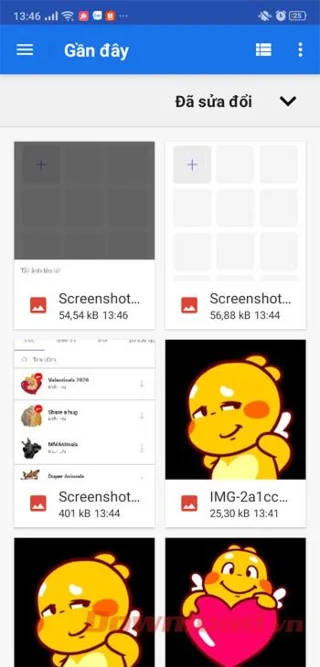
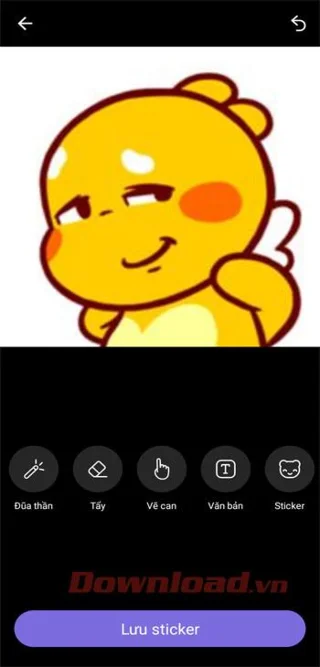
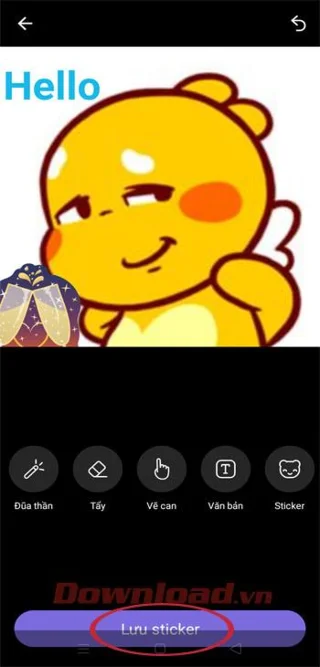
Step 2: You can upload photos from the gallery or take photos directly to create Sticker from your own face. After selecting the image, you can rotate, drag, zoom, zoom ... as you like to choose the angle you like best. Here, there are 5 tools to help you edit Sticker:
Magic wand: Automatically cut out the excess in the image and retain only the face (the main part of the image to use).
Eraser: Remove any excess in the photo.
Draw can: Draw directly into the image.
Text: Write text on the sticker.
Sticker: Insert the graphics into the sticker.
To cancel a previous edit, click the back arrow icon in the top right corner of the image.
Step 3: When you're done editing, click the Save Sticker button below.
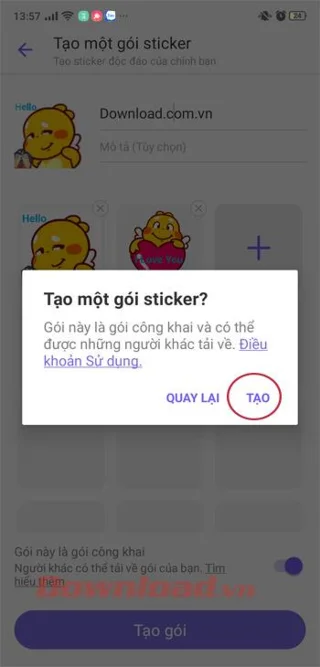
Step 4: Continue to add other stickers to the package you are creating. After adding other stickers, you can turn on public or private mode for the Sticker package you are creating. Then, click Create package> Create to proceed to create a new Sticker package on Viber.
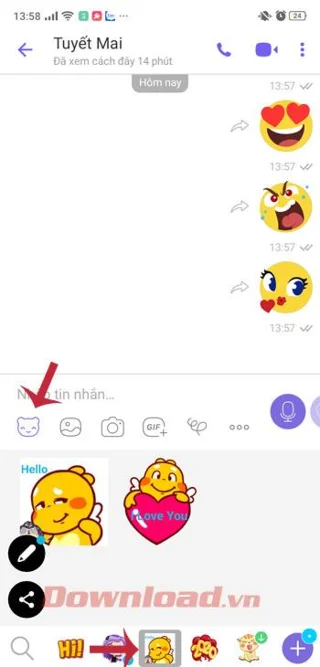
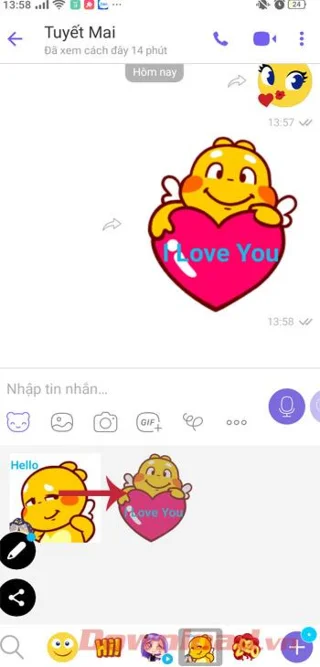
Step 5: Open any chat window up, touch the sticker icon will see your Sticker appear in it. Now send to your friends and loved ones as usual.
What could be better than being able to manually create stickers to send to friends while chatting, making Viber conversations more vivid than ever!