
Full screen app mode on Samsung Galaxy S8 Plus

You can select the application you want to use in the full screen aspect ratio.
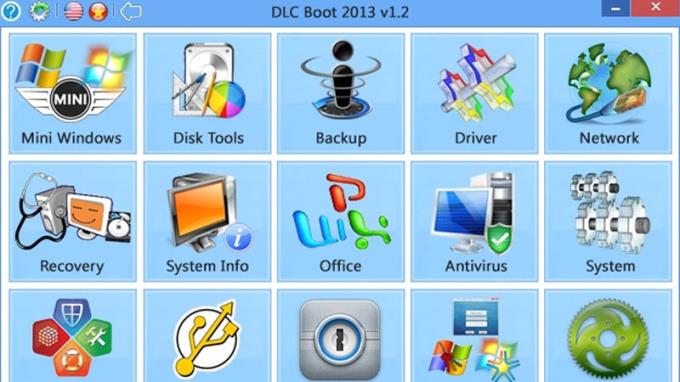
USB Boot is a USB that can load information when the computer starts up the computer . It is usually loaded with an operating system with a compact environment that runs the necessary tools to fix the operating system errors located on the hard drive of the machine such as: recover forgotten Windows password, ghosting the computer, checking the computer, redistribute the hard drive, ...
Rusfus is a software for creating bootable USB on the computer that is easiest to use and rated as the best, can easily create a bootable Windows or Ubuntu installer in a faster USB drive. compared to installing from a regular CD.
Like other software that supports creating USB Boot, Rufus also helps to create UEFI and Legacy standard USB Boot . Makes it easier to install Windows or Linux from a USB booting in UEFI mode.
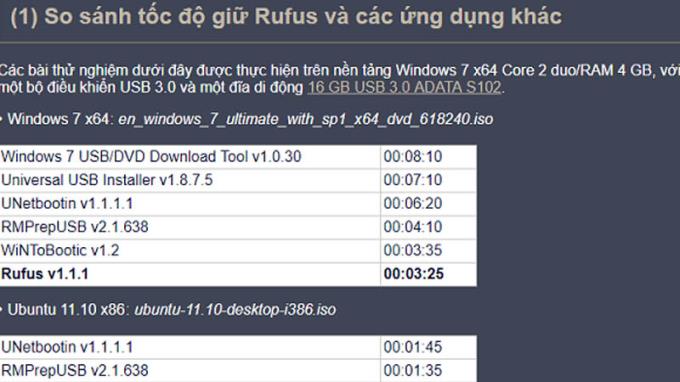
With a capacity of 1MB, but the speed of creating USB Boot with Rufus is quite fast compared to similar software.
- When creating a USB Boot, all data on the USB will be lost, so you need to back up the data before proceeding.
- Prepare 1 USB with a capacity of over 4 GB to create USB Boot.
- Download ISO file for Windows 7 or Windows 10 (ISO file is the file containing the data of the installer).
Download link: HERE .
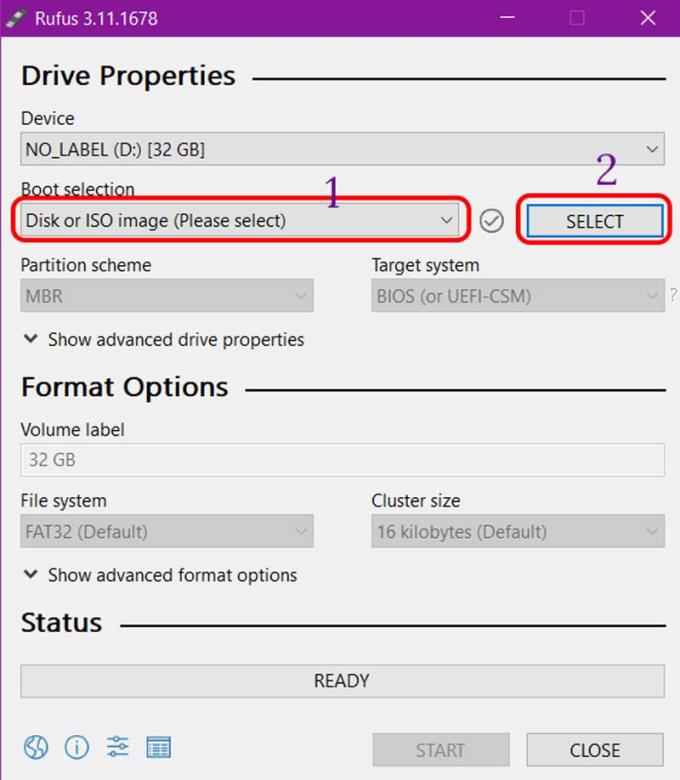
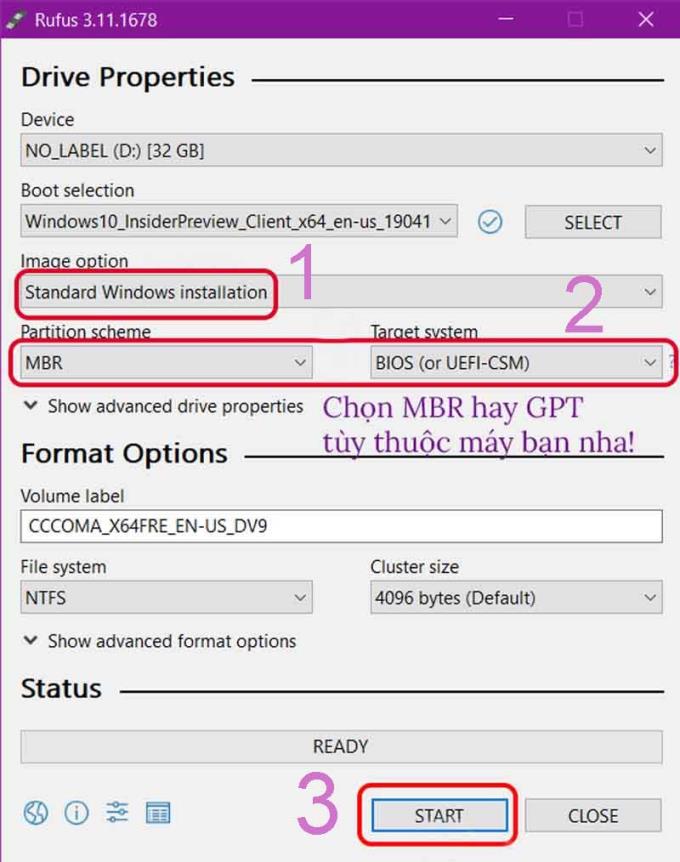
At the interface of Rufus , item Device > Select your USB. Under Boot selection > Select Disk or ISO image > Press SELECT to browse and select the ISO file.
Under Image option , choose Standard Windows installation > Under Partition scheme , choose MBR or GPT depending on your computer supports BIOS or UEFI. Section File System , let it be NTFS> Click Start to start.
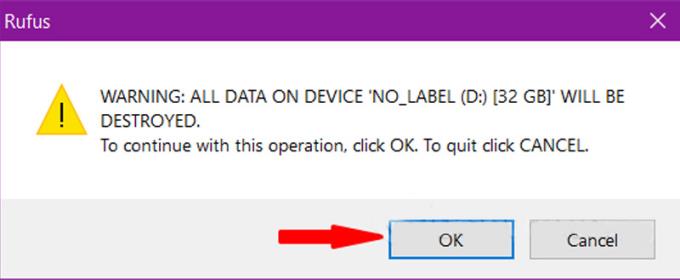
Warning dialog box USB will format, if you have important data, please copy to the computer first. If not, click OK to continue.
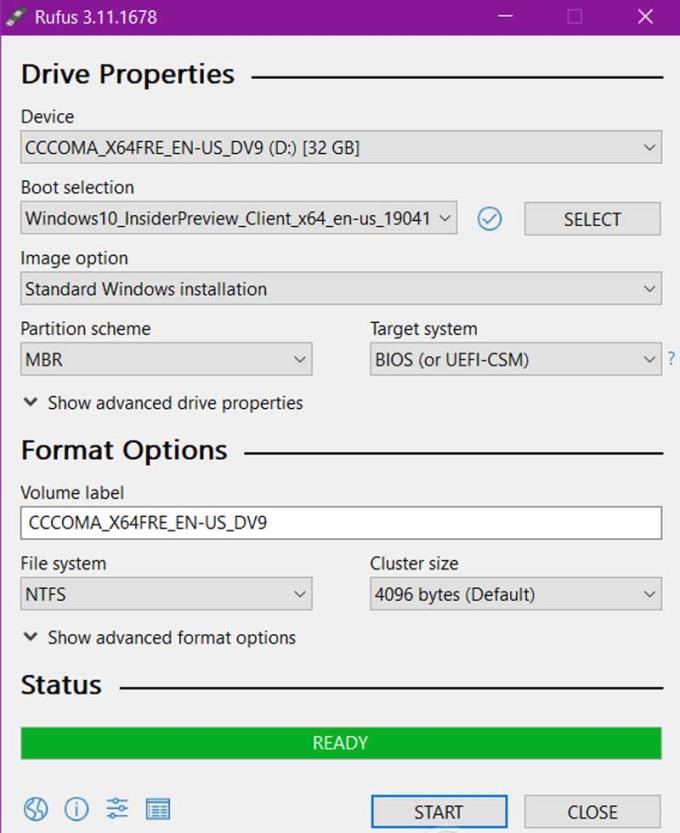
When the program shows the Ready button that is done, click Close to finish the installation process. Now, you can proceed to use your USB already.
Note : To avoid errors when creating bootable USB with Rufus, you need to choose the correct ISO file for your computer when downloading (32bit or 64bit version). The remaining probability of an error is quite low.
See also :
>>> What is Google AdSense? How to sign up, sign in to Google AdSense
>>> Learn about integrated graphics card Intel Iris Xe Graphics
>>> How is Apple Refurbished? Is that good? Note when buying
So, you already know how to create USB install / boot Windows using Rufus software already. It can be seen that creating a bootable USB with Rufus is quite simple, right. Hope this article helps you.
You can select the application you want to use in the full screen aspect ratio.
Choose different performance modes according to the task you are using to get the best out of your phone.
Add a floating camera key you can move to any position on the screen in Auto and Selfie modes.
The edge screen on Samsung phones makes it easy and fast to manipulate your favorite apps, lists, etc.
Answering and ending calls quickly saves you more time and operations.
Screen pinning is a new feature introduced since Android 5.0, which saves users from worrying about other people's curiosity when they lend their Samsung Galaxy S6.
To silence incoming calls and alarms, place your hand on the screen or turn the device upside down.
In part 1, I introduced the Samsung Pass feature on the phone and next in this article I will guide you to edit your web login information and change the security password for Samsung Pass.
The feature allows you to block spam messages or messages that you do not want to receive.
Call blocking helps you avoid being disturbed by unwanted people.
Your device vibrates when picked up to notify you of missed calls and messages.
You can manage permission preferences for the apps you want to easily manage your device.
This feature helps the screen always display information about the time, email, calls, messages or notifications from the application when the screen is locked.
The camera supports many functions and integrates shooting modes that bring many conveniences to users.
Blocking messages helps you avoid being disturbed by unwanted people or promotional messages.
Adjusting the screen mode helps you to optimize the screen to fit your eyes.
One-handed input mode can make pressing the numeric keypad with one hand faster and more comfortable.
Sometimes when accessing the Internet is not possible, we can clear the network settings so that the machine can access the Internet normally again.
Dual Messenger feature allows you to use two separate accounts for the same application such as: Facebook, Zalo...
The feature allows you to combine Wi-Fi and mobile networks together to load when your network is weak.


