Restore ownCloud Sync by Matching the Client to Your Server
Check whether the issue is an OC10 and 7.x compatibility break or a damaged CSync journal, then apply the right fix without deleting synced files.
On Windows 10 you can easily find a page dedicated to managing applications running in the background. However, on Windows 11 this will be a bit more difficult. However, Windows 11 still allows you to turn off background applications. You can set the settings to turn off background applications, set up for a single user to enable all users on the computer.
Note: What WebTech360 instructs you in this article only works with apps you install from the Microsoft Store. All apps you download from other sources will not have settings to set to run in the background. Also, stopping apps from running in the background doesn't mean you can't use them. You can still run these apps normally.
There are several ways for you to turn off background applications on Windows 11. Here are the details on how to do it:
Turn off background apps in Settings
1. Open Settings in Windows 11. You can use the shortcut Win + I to quickly open or use other methods.
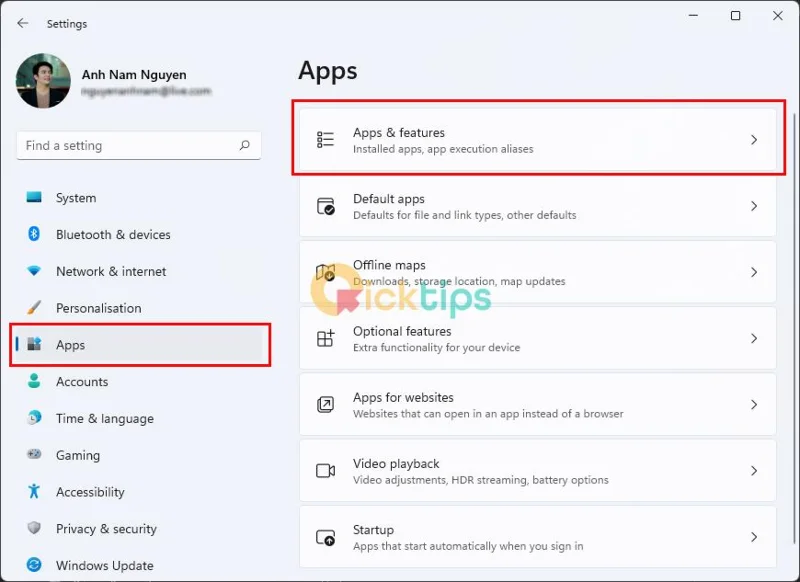
2. Click App then continue to tap Apps & features .
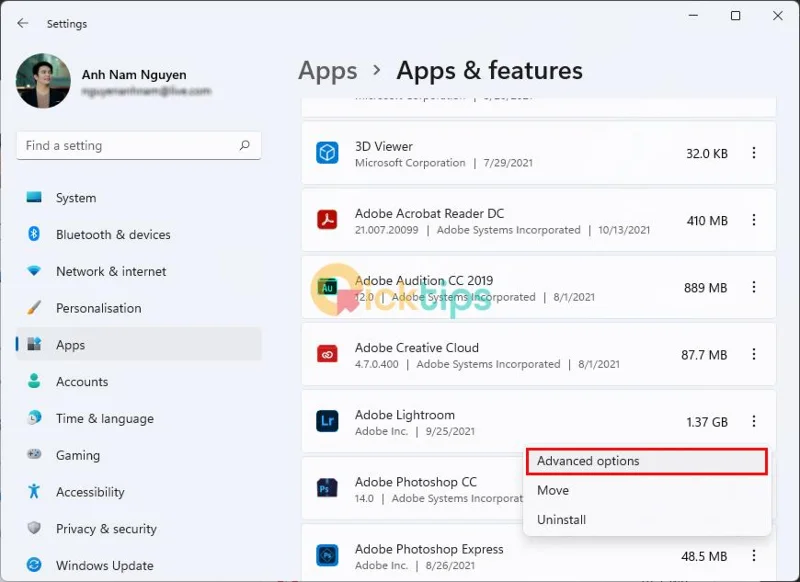
3. Find the app you want to disable from running in the background. Click the 3 dots and then select Advanced options .
4. Find the Background apps permissions section and select the mode you want. By default, Windows 11 will set to Power optimized mode . It allows Windows to self-manage how an application behaves in the background. For example, the system will automatically turn off all background applications if you enable battery saving mode.
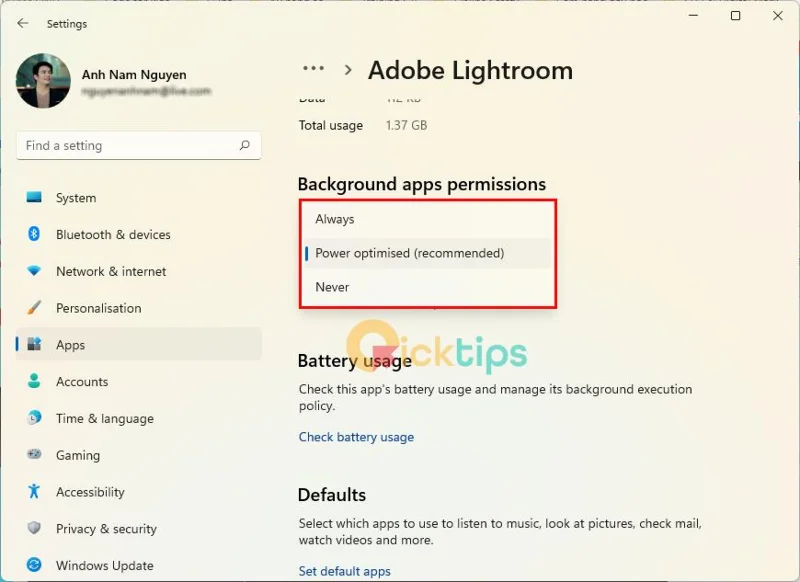
5. Select Never mode to prevent apps from running in the background. However, if after selecting Never , the application crashes, does not send notifications, does not update data, you should switch its settings back to Power optimized or Always.
6. Repeat the above operation with other applications.
In Windows 11's Settings, there is no button for you to turn off all background applications at once. Therefore, we will continue to go to the next section, using the Registry.
Turn off all background applications on Windows 11 using Registry
1. You press Win + R to open Run then type regedit and press Enter.
2. Access the following key:
HKEY_CURRENT_USER\Software\Microsoft\Windows\CurrentVersion\BackgroundAccessApplications3. In the right pane, edit or create a DWORD (32-bit) Value named GlobalUserDisabled.
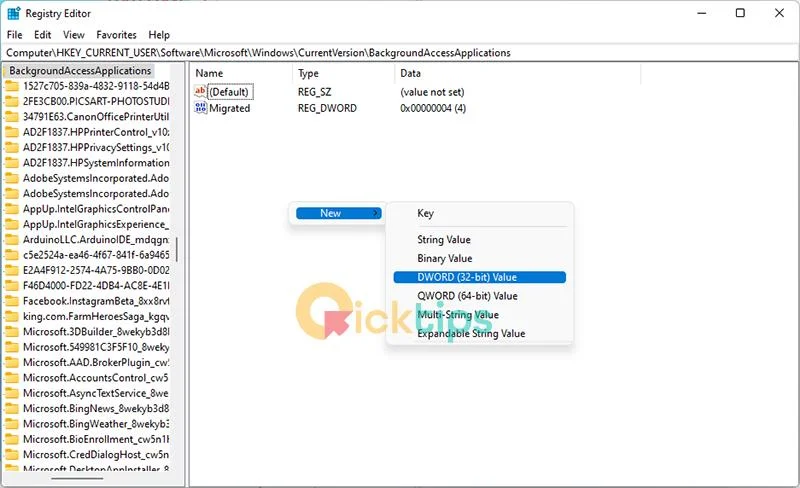
4. Put 1 in the Value data box to prevent all background applications on Windows 11.
5. Reboot the device to apply the change.
To undo the changes, simply adjust the value of GlobalUserDisabled to 0 and you 're done.
Use pre-made REG files
If you don't want to waste time editing the Registry, you can download the REG file that TipsMake.com makes available.
1. Download the ZIP archive of the pre-made REG file .
2. Extract to any folder.
3. Double-click the file Tatappchayngam.reg to close all apps running in the background.
4. Confirm the action and then restart the machine.
You can undo the change by double-clicking on the Batapchayngam.reg file in the ZIP file you just downloaded.
Turn off apps running in the background on Windows 11 for all users with Group Policy
Besides the Registry, you can use Group Policy to turn off apps running in the background on Windows 11 with all users on a computer. With Windows 11 Home unable to open Group Policy, we will also provide a pre-edited REG file.
1. Open the Local Group Policy Editor by pressing Win + R and then typing gpedit.msc then pressing Enter.
2. Navigate to the folder: Computer Configuration\Administrative Templates\Windows Components\App Privacy
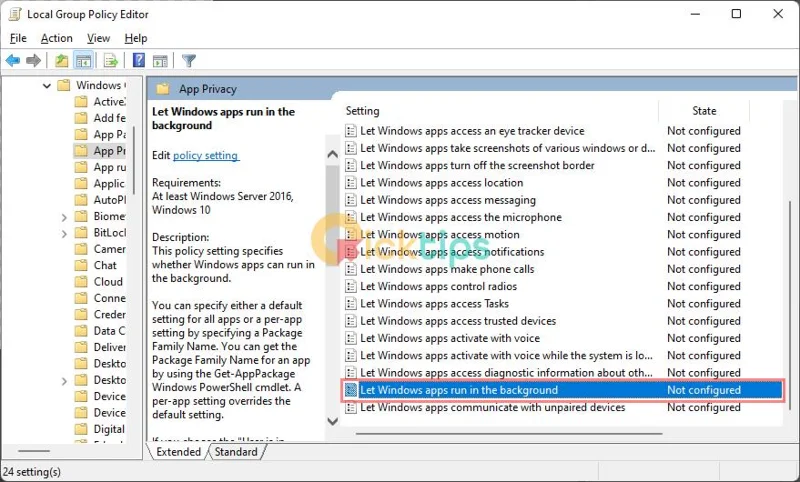
3. On the right pane, find and click Let Windows apps run in the background and select Enabled.
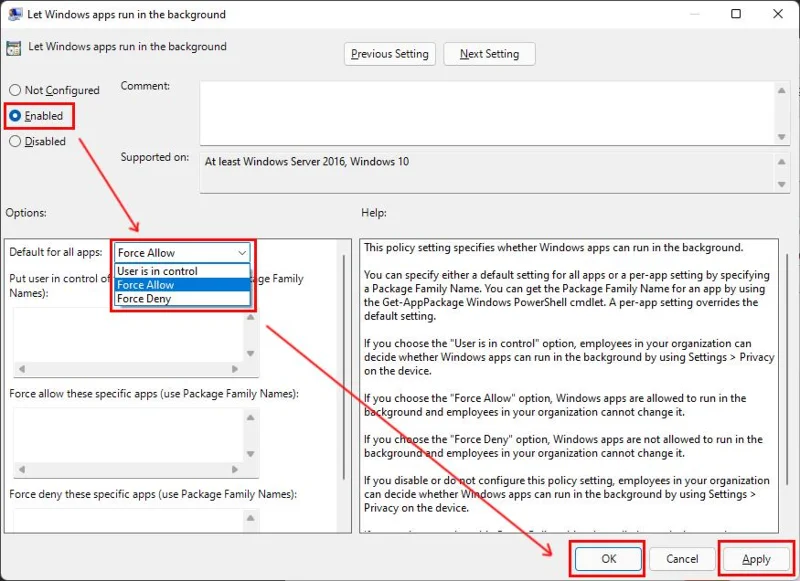
4. In the Default for all app menu , select Force Deny . Click Apply and OK.
So you have turned off the background app for all users on a computer running Windows 11.
With that said, Windows 11 Home doesn't allow you to use the Local Group Policy Editor, so you have to use the Registry to turn off background apps for all users.
Turn off apps running in the background on Windows 11 for all users using Registry
1. You press Win + R to open Run then type regedit and press Enter.
2. Access the following key:
HKEY_LOCAL_MACHINE\SOFTWARE\Policies\Microsoft\Windows\AppPrivacyIf you can't find AppPrivacy , you can create a new one yourself by right-clicking on Windows and then selecting New > Key .
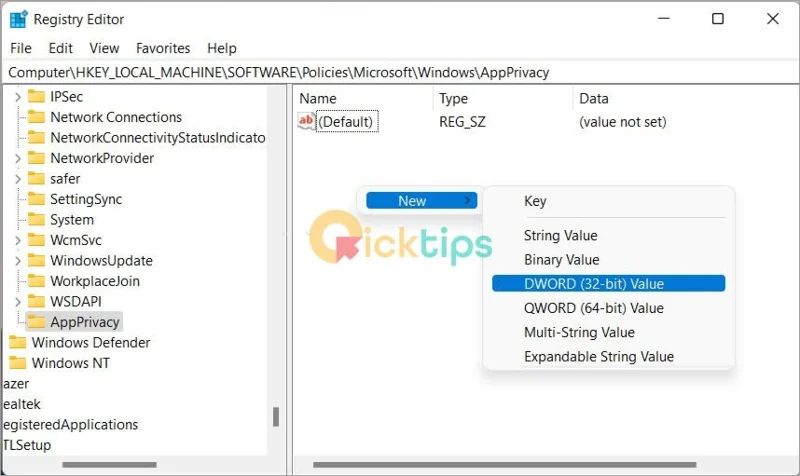
3. Once you have AppPrivacy , click in the right box to create a DWORD (32-bit) Value named LetAppsRunInBackground and set the value to 2 .
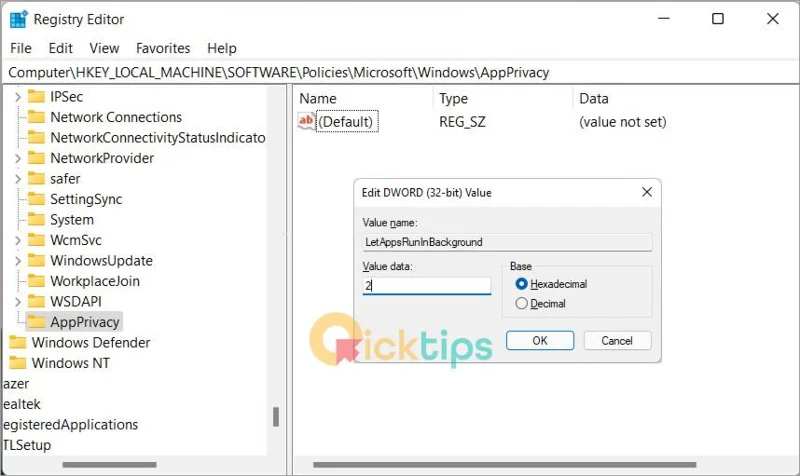
4. Restart the computer.
Use pre-made REG files
As usual, TipsMake.com has created a REG file for you to download to quickly change the Registry. There are two REG files, Tatappchayngamalluser.reg and Batappchayngamalluser.reg , respectively with the function of turning off and on the app running in the background, you download the ZIP file and then extract and use:
The above are brief instructions to help you set up and turn off applications running in the background, making your computer run better. Good luck!
Explore more:
Check whether the issue is an OC10 and 7.x compatibility break or a damaged CSync journal, then apply the right fix without deleting synced files.
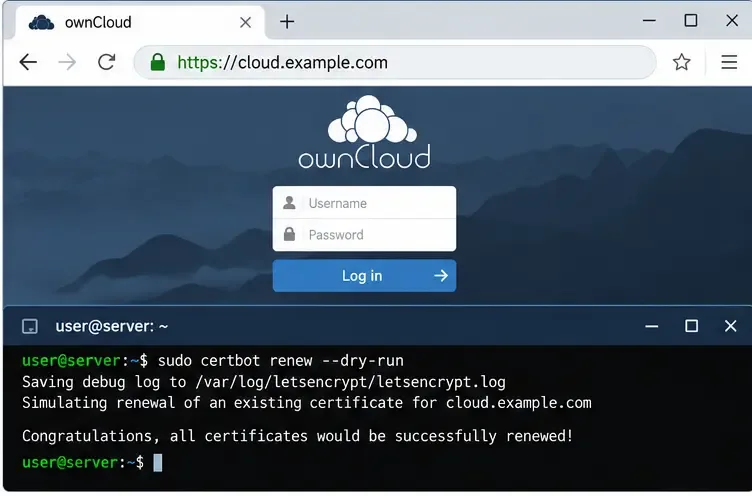
Choose HTTP-01 or DNS-01, configure an ownCloud reverse proxy, and verify Certbot renews HTTPS certificates automatically.
Configure oCIS LDAP sign-in, align user and group lookups, and verify TLS and schema settings before rollout.
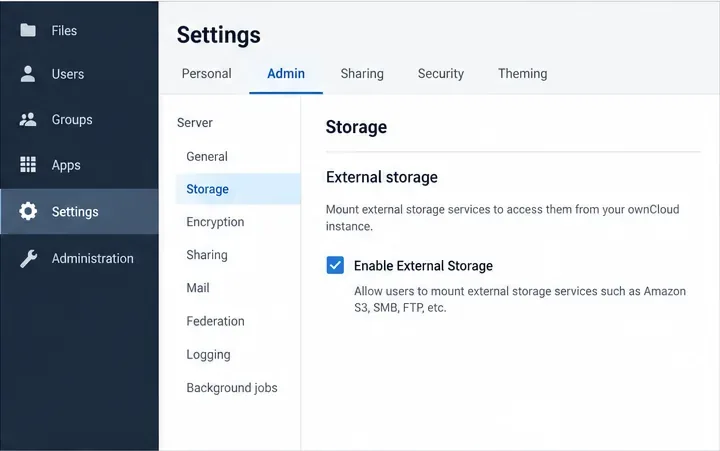
Add an Amazon S3 bucket to ownCloud 10, prepare compatible credentials and endpoints, and check access without confusing a mount with primary storage.
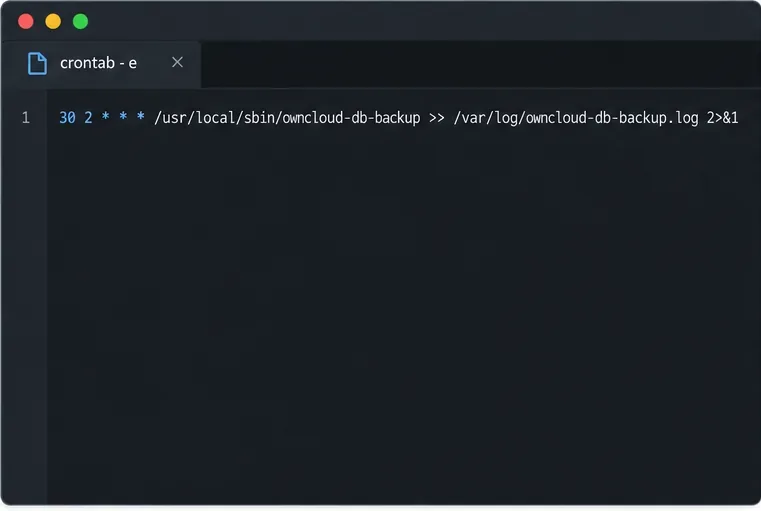
Schedule protected MariaDB dumps for ownCloud Server, handle maintenance mode safely, and verify each backup before relying on it.
Plan an ownCloud 10 to oCIS migration with the supported app, ordered commands, identity checks, and a clear list of data that needs separate handling.
Replace ownCloud Classic 10 logos and tune web UI colors with a theme app, while avoiding upgrade and integrity-check pitfalls.
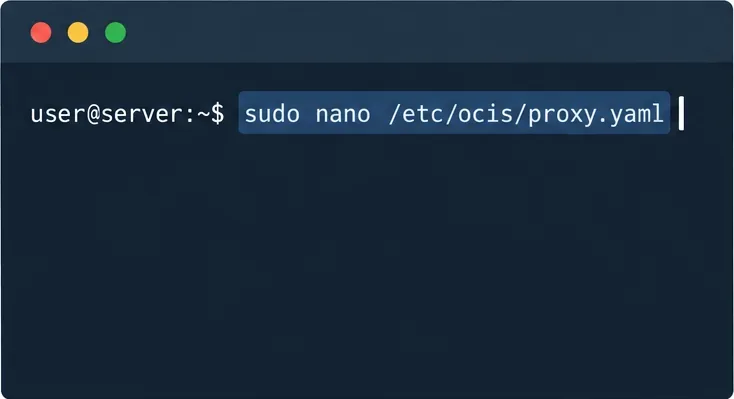
Assign byte-based storage limits to new ownCloud Infinite Scale users by role, with a proxy.yaml example and a safe verification checklist.
Restore ownCloud desktop syncing by checking the server hostname, certificate chain, private CA trust, and captive portal issues without disabling TLS verification.
Use the invalid-file report to identify mismatched core files or app signatures, restore the correct release files, and verify the integrity check safely.