Set Up Nextcloud LDAP and Active Directory Login
Connect Nextcloud to LDAP or Active Directory, limit access with user and group filters, and verify secure authentication before rollout.
Facebook Messenger in the latest version has provided users with an extremely useful feature: changing custom status. With this new feature, we can update our current status to our friends in our friends list. The article below will guide you how to update status on Facebook Messenger with a few simple steps.

How to update status on Facebook Messenger
Step 1: To update your current status on the Facebook Messenger application, first on the main screen of the application, click on the avatar icon in the upper left corner then select the Custom Status button . correction .
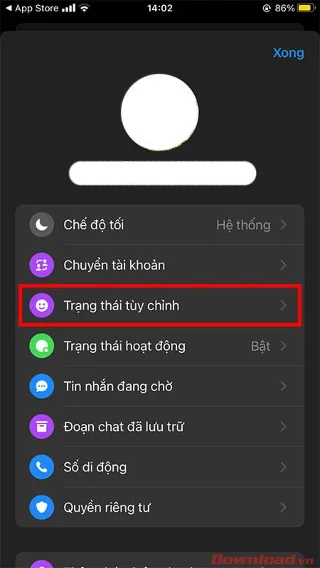
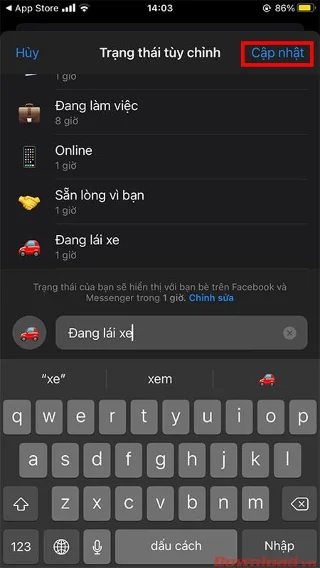
Step 2: On the Custom Status screen that appears, select one of the statuses in the list. You can click directly on the available statuses on the screen or enter a custom status in the Enter status box and then press the emoticon button next to it.
After selecting the desired status, click the Update button in the upper right corner of the screen to update the status.
After successfully updating your status, your custom status will be displayed right below your profile picture. At the same time, friends in the Facebook Messenger chat list will also see your status right next to the conversation.
So with just a few simple steps, you can update your status on Facebook Messenger.
Wishing you success!
Connect Nextcloud to LDAP or Active Directory, limit access with user and group filters, and verify secure authentication before rollout.
Enable a supported 2FA provider, prepare account recovery, then require two-factor authentication for everyone or selected Nextcloud groups.
Secure files edited in Collabora CODE by encrypting the storage layer, protecting temporary data, and verifying encryption and recovery.
Check your host architecture, confirm the CODE tag publishes ARM64, remove forced AMD64 settings, and separate image errors from permissions or memory issues.
Set up the WOPI connection between Collabora Online and ownCloud Infinite Scale, configure the right service URLs, and verify document edits save.
Prevent document exports in Collabora Online CODE by setting the WOPI DisableExport permission, then verify the host and editor enforce it.
Configure Nginx TLS termination, Collabora routes, and WebSocket headers, then test the public endpoints before opening real documents.
Trace a 10-minute CODE disconnect to its proxy, load balancer, or WebSocket path, then correct the timeout and verify the session stays connected.
Install the official Collabora Helm chart, configure WOPI access and ingress affinity, and verify the deployment without common setup mistakes.
Use browser requests, WOPI logs, and targeted proxy checks to find why Collabora opens a blank document—and choose a fix that fits the evidence.