Stop Unwanted Printing and Downloads in ONLYOFFICE
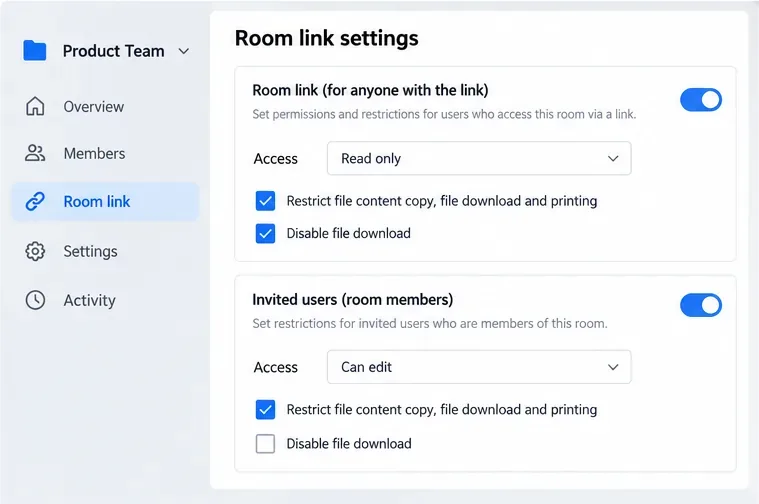
Set print and download limits for ONLYOFFICE links, room members, or Docs API sessions, then verify the restrictions from a recipient account.
The FILTER function in Google Sheets allows you to filter data and return rows that meet specific criteria. Below is how to use the FILTER function in Google Sheets .
Overview of the Filter function formula in Google Sheets
By using this Google Sheets function, you can get multiple matches. Because the data is filtered using the function, the results will be updated automatically.

The Google Sheets Filter function formula includes: Range - Range, Condition 1 - Condition 1, and [Condition 2…]. The first two factors are mandatory, while the second and subsequent conditions are optional. Google Sheets does not limit the number of conditions in the Filter function.
=filter(range, condition 1, [condition 2]…)Example of using the Filter function in Google Sheets
You can find information about sales and profits of each item in different states in the US when using the Filter function in Google Sheets. When a column containing the state name is condition 1, you can create a drop-down list for it.
Create drop-down lists for test conditions
1. Right-click a cell to open the drop-down menu.

2. Scroll down and go to the Data validation section .

3. In the data validation section, set the criteria to List from a range.

4. Click the squares in the criteria section to select a range or formula.

5. In this case, the States column will be the range. You need to select items from cells A2 to A13 here.

6. Save the Data Validation settings by clicking Save .

This action will create a drop-down menu containing items specific to the selected range.

Now that you have created the drop-down menu, start filtering Grocery Items, Sales and Profit by States using the Filter function on Google Sheets.
Implement the Filter function
Here the range is data in 3 columns: Sales, Grocery items and Profit. Now select cells B2 to D13 in the first argument of the Filter function.

Suppose you want to add more data to the column selected as a range. Remember the second value in the open range. You can do this by deleting the number of cells, here it is 13.

As soon as a new value is added, the Filter function will calculate these values without requiring you to filter them again.
The condition value in this example is the States column. Select the States column and set the condition that that column = with the data in cell G5.

In this example, Range Area B2:D has the same height as condition area A2:A.
After pressing Enter to deploy the formula, it will filter the data in the Grocery items, Sales, Profits columns according to the given conditions.

Also, note that the Google Sheets Filter function only includes valid values. If the value checks true, its value in the array is considered, otherwise the function ignores it and moves on to the next step.
In this example, when you select Utah from the drop-down list, you'll see the related data in the filter area.

Filter data by checking multiple conditions
Now we'll update the Google Sheets Filter function to include values greater than 5000 as the second condition. To filter data that meets both conditions, you need to add a new condition to the filter formula.
1. Go to cell F8 where you added the formula earlier.

2. Select the Profit column as the range for the second condition, the new formula is as follows:
=Filter(B2:D,A2:A=G5,D2:D>5000)
3. Press Enter to execute the formula.

The profit from selling flour in Utah is 1240, which does not meet the second condition, so the Filter function of Google Sheets ignored it. Similarly, you can filter this data by trying more conditions.
Above is how to use the Filter function in Google Sheets . Hope the article is useful to you.
Set print and download limits for ONLYOFFICE links, room members, or Docs API sessions, then verify the restrictions from a recipient account.
Set a backup destination, schedule, Mail coverage, and retention limit in ONLYOFFICE Workspace, then verify the archive is ready to restore.
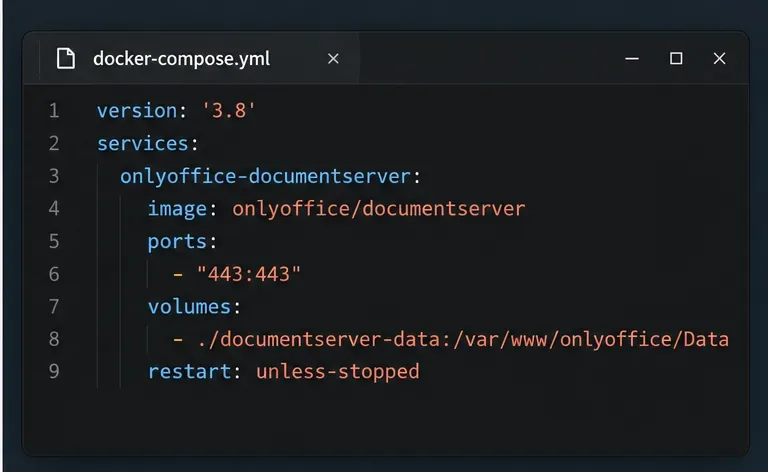
Start the Enterprise Docker Compose stack, persist its license and data, configure JWT safely, and confirm the editors are ready to integrate.
Use an ONLYOFFICE JavaScript macro to remove nonprinting characters and trim extra spaces from a defined spreadsheet range, with a safe review workflow.
Connect ONLYOFFICE DocSpace to Active Directory or OpenLDAP, import users and groups safely, map account fields, and schedule reliable synchronization.
Move portal data from Disk Default to a supported cloud storage provider, or relocate Docker data safely by changing its host volume mapping.
Identify whether Document Server uses a Linux package or Docker, remove only its components, and check remaining data without deleting shared services by mistake.
Trace slow collaborative editing to Docker resource pressure, proxy connections, or document load, then choose the fix that matches your measurements.
Install custom fonts in ONLYOFFICE Document Server, compare persistent Docker mounts with direct copies, rebuild the font list, and verify the result.
Choose where TLS should terminate, mount a trusted certificate and private key safely, and verify HTTPS access to a Dockerized ONLYOFFICE Docs server.