Instructions for adding a name to the iPhone lock screen
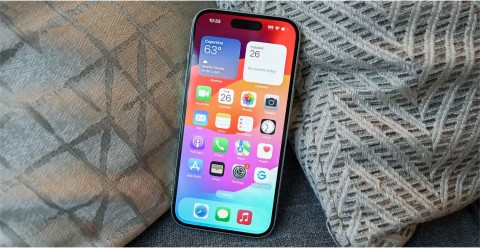
There are a lot of options available to customize your iPhone lock screen, and you can add a name to your iPhone lock screen with a very simple operation.
Widgetsmith will change the widget interface to your liking, with interesting editing options. The new iOS 14 feature when launched has many interesting things for you to explore, including Apple's available widgets. However, Apple's available widgets look quite nice but are a bit monotonous, simple, and for those who like something more novel, they probably don't feel very satisfied. The Widgetsmith application will completely change the widget interface, making the screen more vivid, with all customizations according to your preferences. The following article will guide readers on how to change widgets with Widgetsmith.
How to use Widgetsmith to create your own iOS 14 widget
Step 1:
First, download the Widgetsmith app for iPhone from the link below:
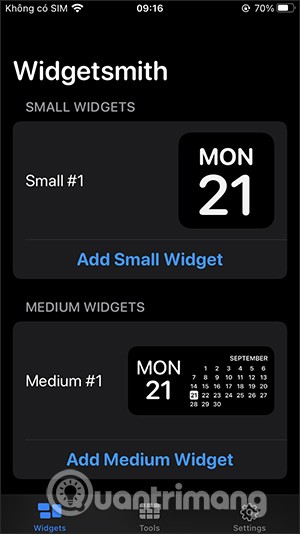
On the application interface, the Widget tab will have 3 sizes to choose from including Small, Medium and Large. If you want to create a new one, click on the Add (Size) Widget line, otherwise use the available widget to edit.
Step 2:
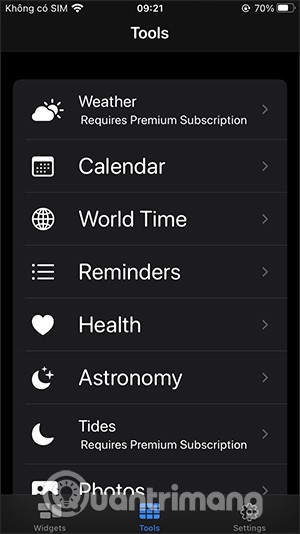
Click on the Tools tab to see a list of items to create widgets such as Weather, Calendar, Health... During the process, you will be asked to grant access permission if any.
Step 3:
Now select the widget size , for example select Medium #1 to proceed with editing. Next, click on Medium #1 to rename it as you like. This will be used later to select the widget by the given name for easy searching.
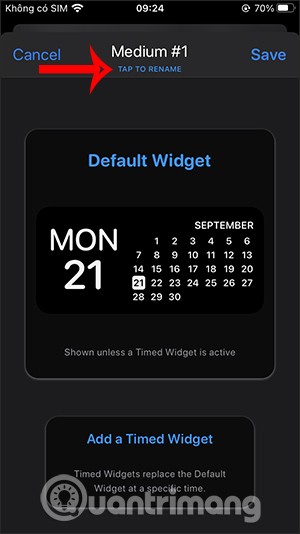
Next, click on the widget in the middle to go to the category selection section. We will choose categories with different available colors. Below are the tabs including Font, Tint Color, Background Color to customize the interface.
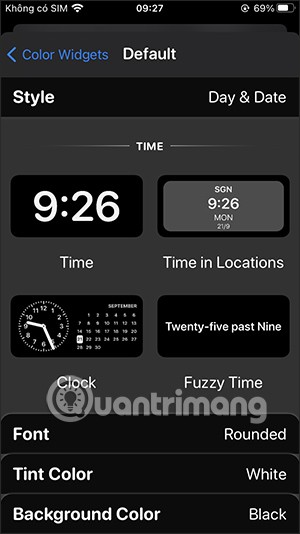
Step 4:
For example, I will change the background color so click on Background Color . Select the color below to apply to the widget. Then you choose the font and font color . Finally, click the back arrow icon , then click Save to save.
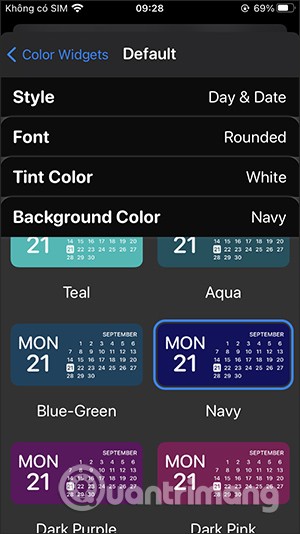
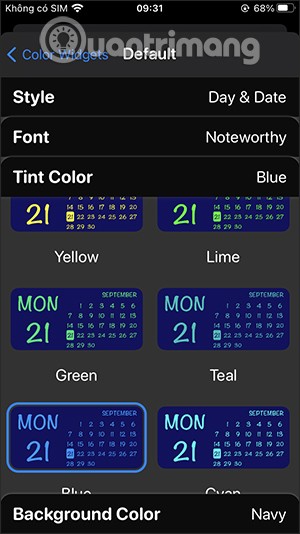
Step 5:
In case you want to change more, continue to click on Medium then scroll down to see the section to download photos in the album to make a widget .
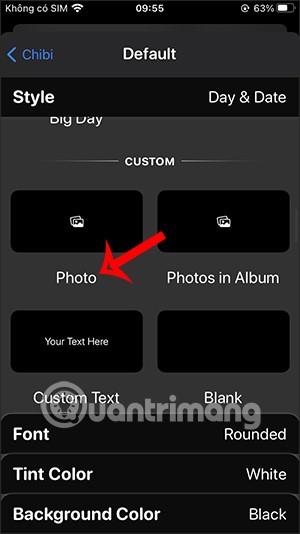
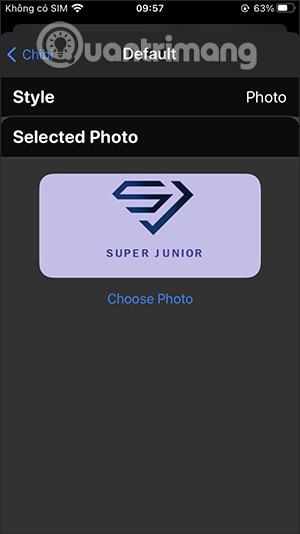
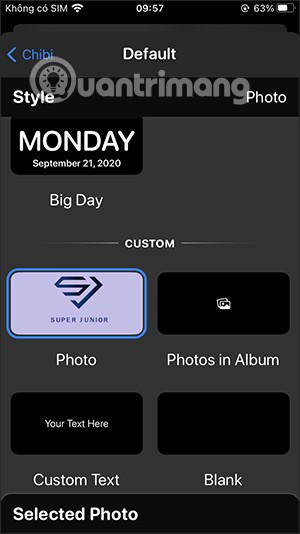
Step 6:
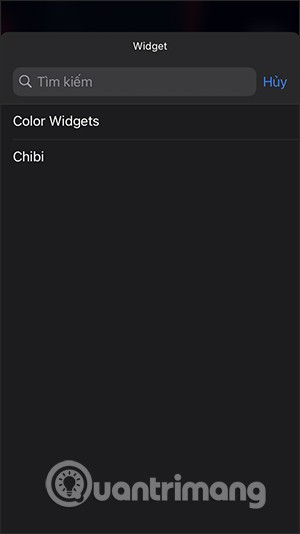
After creating the widget, we just need to add it as usual. Select the Medium widget and then select the widget you named earlier to use.
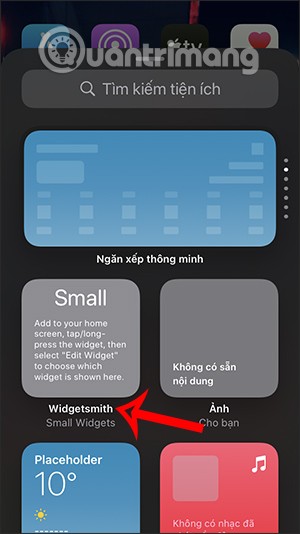
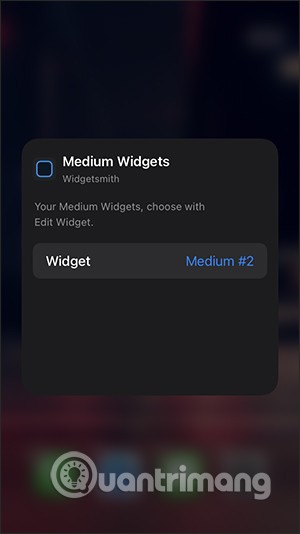
Step 7:
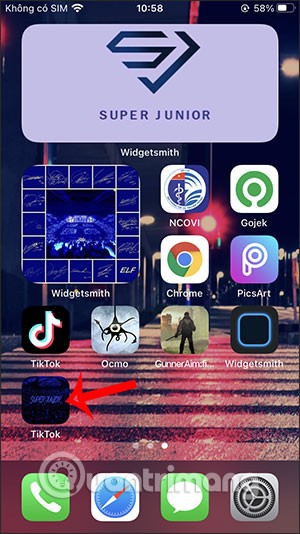
The result will be as shown below. The screen interface looks much more vivid than before.
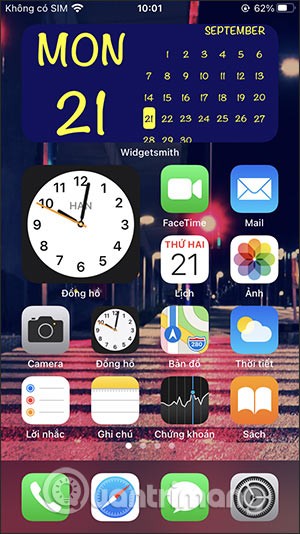
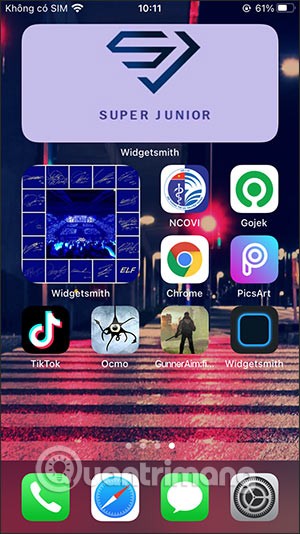
In case you want to change the screen interface further, you can create an application icon with your own image. To do this, follow the article How to create an application icon on iPhone/iPad without Jailbreak .
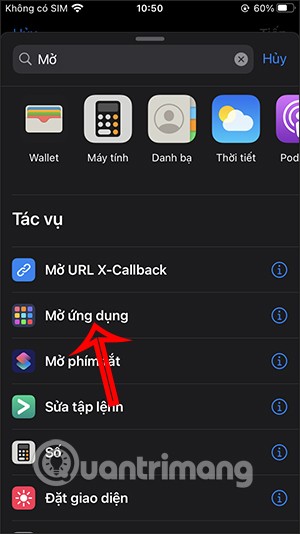
Or we can also do it right away using the Shortcuts application on the iPhone. First, go to the Shortcuts application and then tap the plus icon to add a new Shortcut, select Add action . Then search and select Open application .
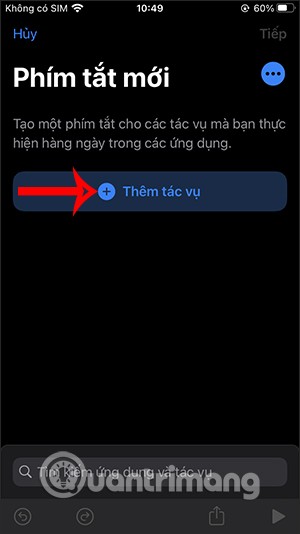
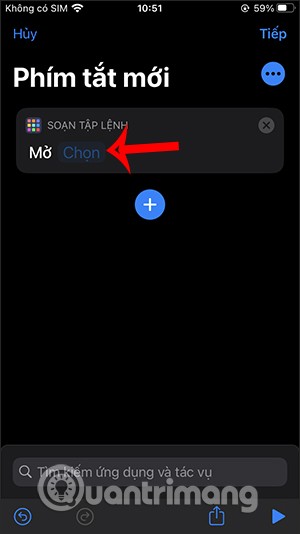
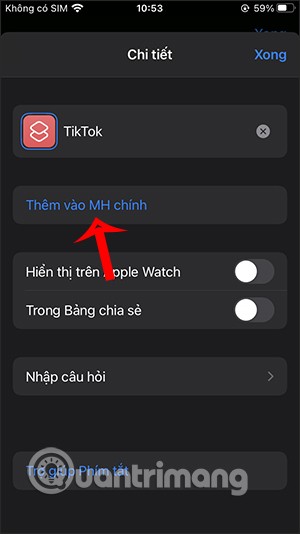
Next, click the Select button to select an application you want to duplicate. Then enter a name for the shortcut that matches the name of the original application, then click Add to Home Screen .
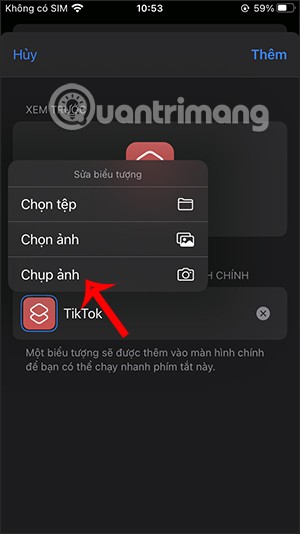
Now you press and hold on the shortcut icon you created and then press Select photo to upload your photo. As a result, we have created a new icon for the application and when you press it, it will open the original application.
Video of creating your own widget using Widgetsmith on iOS 14
See also:
There are a lot of options available to customize your iPhone lock screen, and you can add a name to your iPhone lock screen with a very simple operation.
How to fix Widgetsmith app not working on iOS 14, Widgetsmith is a great iOS 14 customization utility. However, many people get errors when using it. Below
Diet is important to our health. Yet most of our meals are lacking in these six important nutrients.
At first glance, AirPods look just like any other true wireless earbuds. But that all changed when a few little-known features were discovered.
In this article, we will guide you how to regain access to your hard drive when it fails. Let's follow along!
Dental floss is a common tool for cleaning teeth, however, not everyone knows how to use it properly. Below are instructions on how to use dental floss to clean teeth effectively.
Building muscle takes time and the right training, but its something anyone can do. Heres how to build muscle, according to experts.
In addition to regular exercise and not smoking, diet is one of the best ways to protect your heart. Here are the best diets for heart health.
The third trimester is often the most difficult time to sleep during pregnancy. Here are some ways to treat insomnia in the third trimester.
There are many ways to lose weight without changing anything in your diet. Here are some scientifically proven automatic weight loss or calorie-burning methods that anyone can use.
Apple has introduced iOS 26 – a major update with a brand new frosted glass design, smarter experiences, and improvements to familiar apps.
Yoga can provide many health benefits, including better sleep. Because yoga can be relaxing and restorative, its a great way to beat insomnia after a busy day.
The flower of the other shore is a unique flower, carrying many unique meanings. So what is the flower of the other shore, is the flower of the other shore real, what is the meaning and legend of the flower of the other shore?
Craving for snacks but afraid of gaining weight? Dont worry, lets explore together many types of weight loss snacks that are high in fiber, low in calories without making you try to starve yourself.
Prioritizing a consistent sleep schedule and evening routine can help improve the quality of your sleep. Heres what you need to know to stop tossing and turning at night.
Adding a printer to Windows 10 is simple, although the process for wired devices will be different than for wireless devices.
You want to have a beautiful, shiny, healthy nail quickly. The simple tips for beautiful nails below will be useful for you.
