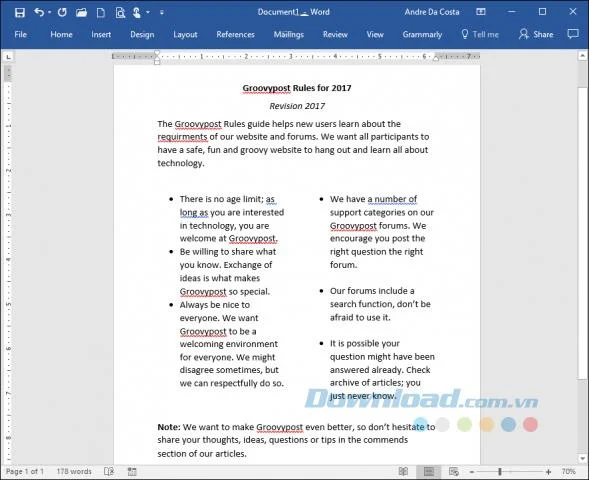
If you want to create your favorite documents by arranging text like a newspaper or a newsletter, you can use the column feature in Word 2016 of the Office 2016 office suite. Great for maximizing the use of text in a document so you can combine additional information like a table or image.
Column breaks are often a problem for some users. Also, it's important to remember where you want to start creating the column. In this article, we will show you how to handle columns in Word 2016.
Format text as a column in Microsoft Word 2016
Before you create your columns, you may need to enter information such as title and introduction. Simply because it's easier to format the column if there is some text available on the page. Once you have some text on the page, start a new line in your document. This is where you will create the column.

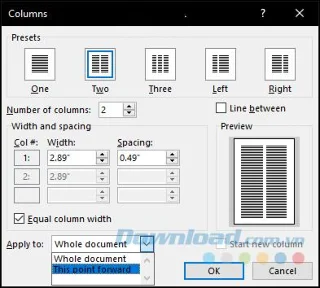
Select the Layout tab and click Columns . You can choose from the list of column numbers you want or if you need more than three columns, click More Columns . Microsoft Word 2016 allows you to create up to 12 columns in a document.
Next, click on the Apply to item and select This point forward , then click on OK . This will notify Word to start creating the column at your cursor position in the document. If you do not do this, your title and introduction will be part of the column. Click OK to confirm the change.

You can start entering additional information for your columns. Different formats can be applied in the same way as normal bullets, fonts, or line spacing.
Instructions for column breaks
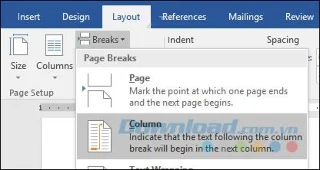
An important part of creating columns is breaking columns. This helps determine the structure of the document. Instead of pressing the Enter key until the cursor is in the next column, correctly breaking the column helps Microsoft Word to place the cursor in the next column. To do so, place your cursor on a new line, close the bullets if you are using them, click on the Layout tab and click Breaks> Columns . You will see the cursor jump to the next column. You can continue to enter the rest of the column.

Back to a single column
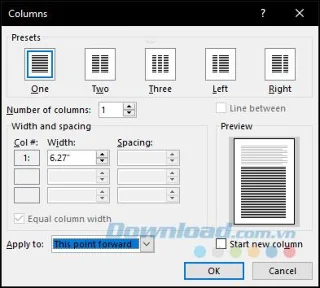
So, once you've completed the columns, your next step is to return to a single column in the document. To do that, place the cursor on a new line, turn off the bullets (Bullets) if you are using them, then click the Layout tab > Columns> More Columns and select One (One column). In the Apply to section , select This point forward and click on OK.

You can then continue to import the rest of the document.

Alternatively, you can resize each column using the ruler. Another feature you can associate with columns is page breaks. This is great for creating complex documents with different page sizes and content. Above is an article that teaches you how to create columns and break columns in Word 2016, hopefully the article has provided useful information for you.