If you are a person who likes photo editing, it is impossible not to know the PicsArt application. With many extremely useful photo editing tools, we can easily turn our simple photos into beautiful, sparkling artistic photos. Especially now, users can easily delete text on photos with this application.
To help people easily and quickly remove text on their images with this application, today Download.vn will introduce an article on how to remove text on photos using PicsArt , please refer to it.
Instructions for removing text from photos using PicsArt
Step 1: To do this, first we will open the PicsArt application on our phone.
Step 2: At the application's home page, click the "+" icon at the bottom of the screen.
Step 3: Select any photo on your phone that you want to remove text from the image.


Step 4: Now, at the photo editing interface of the application, click on Tools.
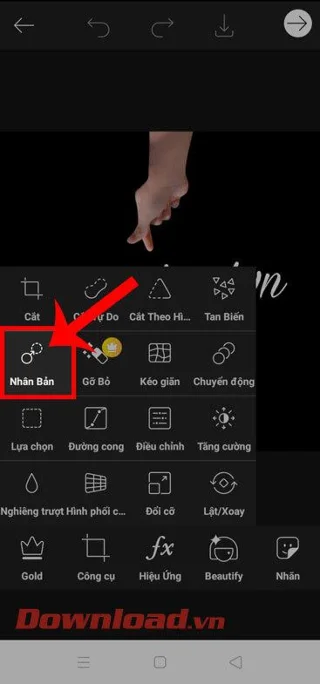
Step 5: In the Tools window , tap Duplicate .


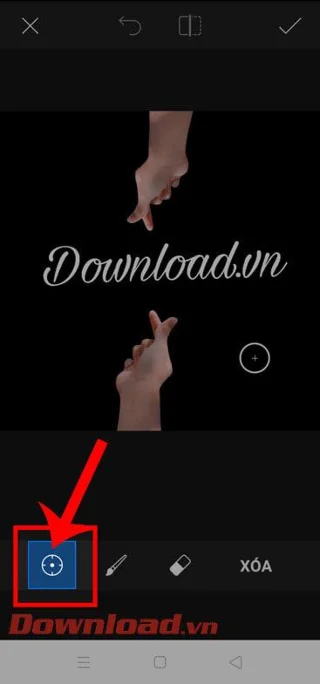
Step 6: Click on the circle icon at the bottom of the screen, then move the white circle in the image to a point on the photo to get a sample color.
Note: We should choose color areas that are the same or nearly the same color as the part of the image containing the text.
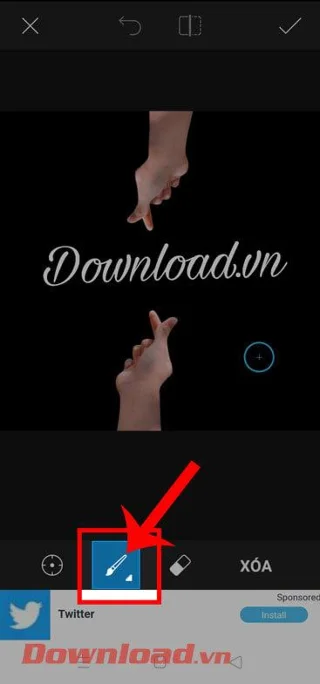
Step 7: Then, click on the pen icon , then touch and move the blue circle to the image area with text to start deleting the text.


Step 8: Once all the text has been deleted, click on the tick icon in the upper right corner of the screen to save the photo editing operation you just made.
Step 9: Finally, click on the arrow icon at the top of the screen to save the deleted image to your phone.


Wishing you success!