Many Mac applications have a Preferences menu that allows you to change their settings. You can also change your Mac's preferences in the System Preferences panel .
But not all settings are available in the Preferences or Settings dialog box . That is why you need to know about the default Terminal command. It allows you to change hidden application settings and Mac systems using the command line.
Today, download.vn will tell you some hidden settings on your Mac and can change it with the Terminal command.
What is property lists?
Application settings and user preferences are stored in files called property lists (PLIST files). But users should not manually edit PLIST files. Commands allow you to safely change the settings and options in a PLIST file without digging into them.
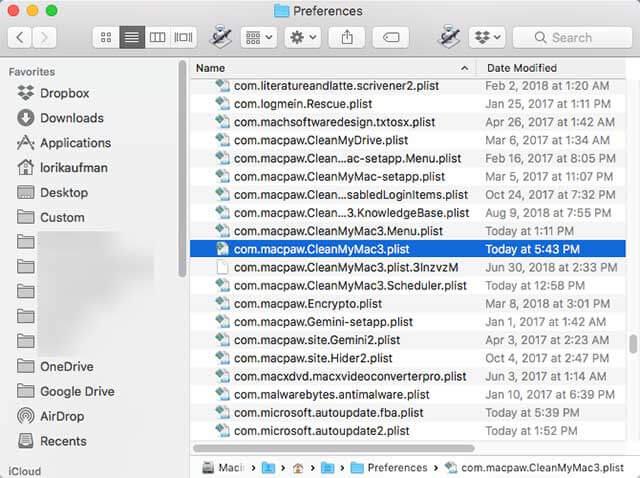
PLIST files are stored in 2 locations on a Mac: User files are stored in ~ / Library / Preferences / . The tilde (~) symbol represents your home directory; System-wide settings are stored in / Library / Preferences / .
The name of the PLIST file is the domain name and usually belongs to individual applications. For example, the domain name for Clean My Mac 3 is com.macpaw.CleanMyMac3 . Therefore, the property list file for Clean My Mac 3 is com.macpaw.CleanMyMac3.plist .
See user options
You can view user options in an application using the default command and do this before changing the settings. Thereby, you know what the original options are and in case you want to return to the old settings will be easier.
To view user options, open Terminal (in the Applications / Utilities / folder ), enter the following command at the Enter prompt .
List of results displayed in the Terminal window. It will be quite long because it includes all the settings for every application. You can also put this data in a text file if you want to save it. Just add > [path and file name] at the end of the command. For example: To save all user options to a file on the desktop, type the following command and press Enter .
defaults read > ~/Desktop/userpreferences.txt
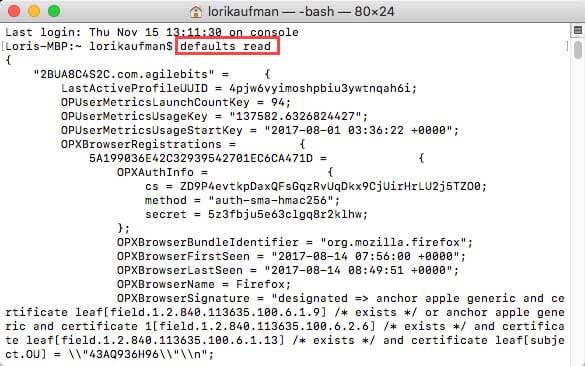
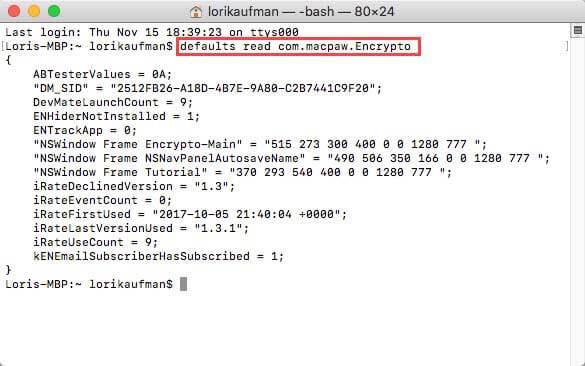
You may not care about user options on all Mac apps. Thankfully, you can view the user preferences of an individual application by its domain name and PLIST file. For example: To see options in the Encrypto application , enter the command:
defaults read com.macpaw.Encrypto
You can add a path and file name as above to save it to a file if you want.
Apply changes by default command (Defaults Command)
Users cannot change the settings for an application currently running by command. It can even override what you have done. Therefore, you should close an application before changing its settings by command.
In the case of Dock and Finder, users must restart them after changing the settings. To restart the Dock, use the following command in the Terminal window:
To restart Finder, use the command:
With the drop-down lists listed below, it has the appropriate killall command ready when needed. That way, in most cases, you just need to copy the command and paste it into the Terminal window (right-click on the prompt and select Paste ).
1. Always show hidden files in Finder
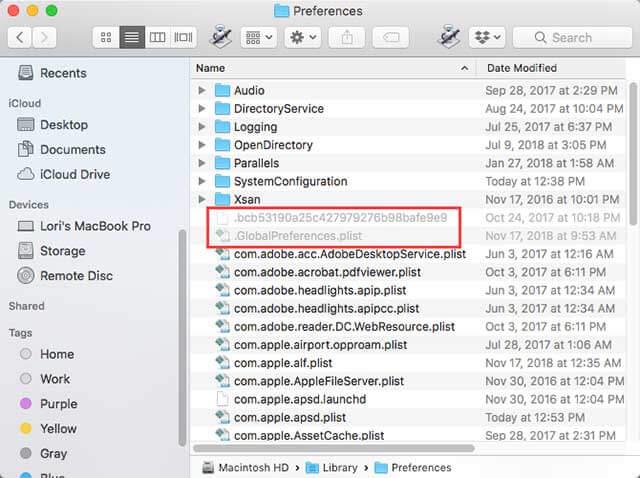
By default, Finder does not display all files. Some files (mostly files that users don't need to process) will be hidden. Hidden files have a dot at the beginning of the file name. You can also hide your own files using this method.
To always display hidden files in the Finder, enter the following command at a prompt in the Terminal window:
defaults write com.apple.finder AppleShowAllFiles TRUE && killall Finder
To hide all files again, run the same command but change TRUE to FALSE :
defaults write com.apple.finder AppleShowAllFiles FALSE && killall Finder
2. Always display the default Extended Print dialog box
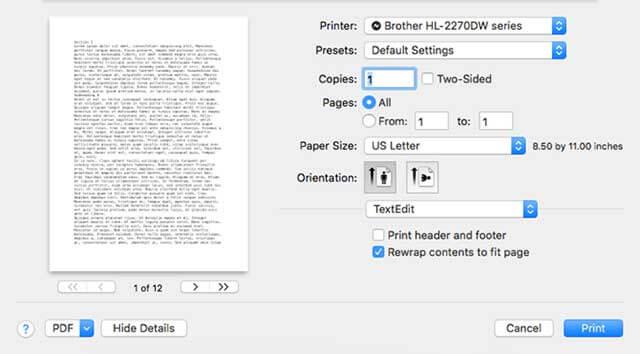
To add printing options on a Mac, you must click Show Details on the Print dialog box . If you frequently use additional printing options, you can change the settings so that the print dialog box is displayed to expand completely.
Type the following command at the prompt in the Terminal window:
defaults write -g PMPrintingExpandedStateForPrint -bool TRUE
To return to the default dialog box without additional options, enter the same command but replace TRUE with FALSE.
defaults write -g PMPrintingExpandedStateForPrint -bool FALSE
3. Change the format and location to save the default screenshot
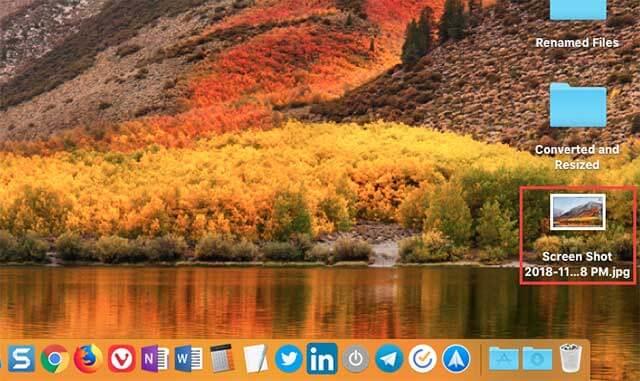
Your Mac has some handy keyboard shortcuts for taking screenshots like Cmd + Shift + 3 to capture the entire screen and Cmd + Shift + 4 to select an area to capture.
You may want to change the default format or change the location where screenshots are saved. At that time, you need to execute a command from the Terminal.
Change the default screenshot format
You can save screenshots to other formats like JPG, BMP and PDF. The user needs to replace [file type] in the command below with another 3-letter image format name:
defaults write com.apple.screencapture type [file type] && killall SystemUIServer
Change the location for saving screenshots
In macOS Mojave, you can change the default image storage folder directly from the Screenshot app. To do this, click the Options button in the screenshot toolbar and select the folder under the Save To section of the resulting menu.
On a Mac that is not running Mojave, you must issue a Terminal command:
defaults write com.apple.screencapture location [path] && killall SystemUIServer
Replace [path] with the new Finder location in the form like this:
/Users/[Username]/Pictures/Screenshots
You can enter the path name into the Terminal or drag and drop the relevant folder into the Terminal to paste its path name. In addition, users can also copy the path name and paste it into the Terminal.
You will see the Copy as Pathname command in the context menu when right-clicking on the destination folder. However, the command appears only when you hold the Options key while right clicking.
4. Drag the widget tables onto the desktop
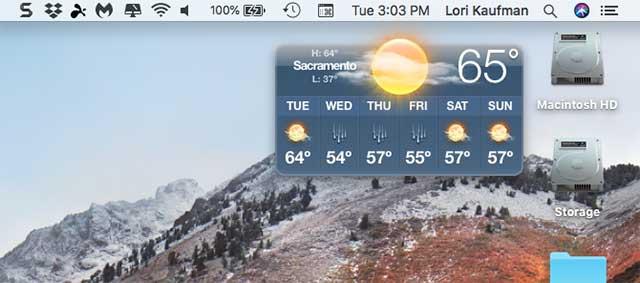
A lot of people forget or don't know about the Mac's Dashboard. It hides behind the shortcut F12 . The widgets on Dashboard are like widgets in Windows, including items such as clock, weather, calculator, etc.
You can move widgets from the control panel to the desktop using a combination of default commands and Dashboard shortcuts.
Activate Developer Mode
The first thing users need to do is to put Dashboard in Developer Mode by launching Terminal ( Applications -> Utilities -> Terminal) and typing the command:
defaults write com.apple.dashboard devmode YES
Hit Enter or Return .
The second step is to restart Dashboard, but instead of logging out and logging in, enter another command in Terminal:
Hit Enter or Return .
Pull the widget out or bring it back to the Dashboard
Now you can press the specified shortcut key (usually F12 , or on some devices F4 ) to show and hide the Dashboard.
After the Dashboard appears, drag the widget you want out. While dragging, pressing the shortcut again, the Dashboard disappears but the widget stays on the screen. You can move it to any location on the desktop and always show up on other applications.
You want to drag as many widgets as you like out or back to the Dashboard by repeating or reversing the above procedure.
To turn off Developer Mode, type the command:
defaults write com.apple.dashboard devmode NO
Press Enter or Return , then continue using the command:
Hit Enter or Return.
5. Remove Dashboard
If you don't use Dashboard, you can remove it. If you're using a Mac with a small amount of memory, turn off the Dashboard so it doesn't use machine resources in the background.
Type the following command at the prompt in the Terminal window:
defaults write com.apple.dashboard mcx-disabled -boolean YES && killall Dock
To get Dashboard back, just run the above command and replace YES with NO :
defaults write com.apple.dashboard mcx-disabled -boolean NO && killall Dock
6. Display system information on the login screen
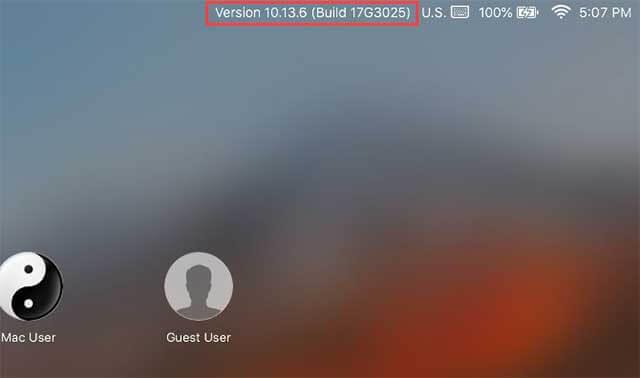
You can view system information (computer name, macOS version and IP address) on the login screen by clicking the clock, but this feature is not enabled by default.
To enable it to appear by default, enter the following command in the Terminal window:
sudo defaults write /Library/Preferences/com.apple.loginwindow AdminHostInfo HostName
To disable the feature, enter the command:
sudo defaults delete /Library/Preferences/com.apple.loginwindow AdminHostInfo
7. Add Quit option to Finder
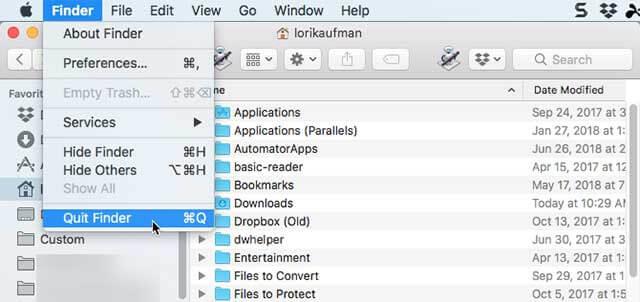
Did you know you can exit Finder? By default, there is no Quit option in the Finder, but you can add it.
Enter the following command in Terminal:
defaults write com.apple.finder QuitMenuItem -bool TRUE && killall Finder
To remove the Quit option , repeat the above command, replacing TRUE with FALSE :
defaults write com.apple.finder QuitMenuItem -bool FALSE; killall Finder
8. Display one application at a time
You can have multiple applications displayed on the desktop at the same time. But if you work on a small screen, it is more helpful to display only one application at a time. When an application is turned on, the minimized opening of the app will hide all other open apps.
Enter the following command in the Terminal window:
defaults write com.apple.dock single-app -bool TRUE && killall Dock
To disable single app mode, replace TRUE with FALSE in the above command:
defaults write com.apple.dock single-app -bool FALSE && killall Dock
9. Change rows and columns in Launchpad
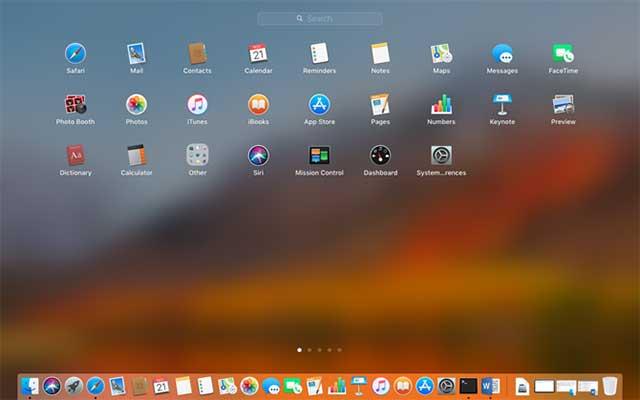
Users can customize Launchpad by rearranging applications. But you can also change the number of rows and columns displayed in Launchpad. By default, it displays 7 columns and 5 rows.
To change the number of columns, enter the following command in the Terminal window. Replace X with the number of columns you want:
defaults write com.apple.dock springboard-rows -int X
To change the number of rows, enter the following command in the Terminal window. Replace X with the number of rows you want:
defaults write com.apple.dock springboard-rows -int X
Then restart Launchpad and restart the Dock with the following command:
defaults write com.apple.dock ResetLaunchPad -bool TRUE && killall Dock
To return to the default number of rows and columns, enter the command:
defaults delete com.apple.dock springboard-rows
defaults delete com.apple.dock springboard-columns
killall Dock
To completely reset Launchpad, including rearranging apps, enter the following command in Terminal:
defaults write com.apple.dock ResetLaunchPad -bool TRUE; killall Dock
Above are some of the commands that you can perform to change the settings on the Mac. However, if you do not like to use commands, you can use 3rd party tools.
